|
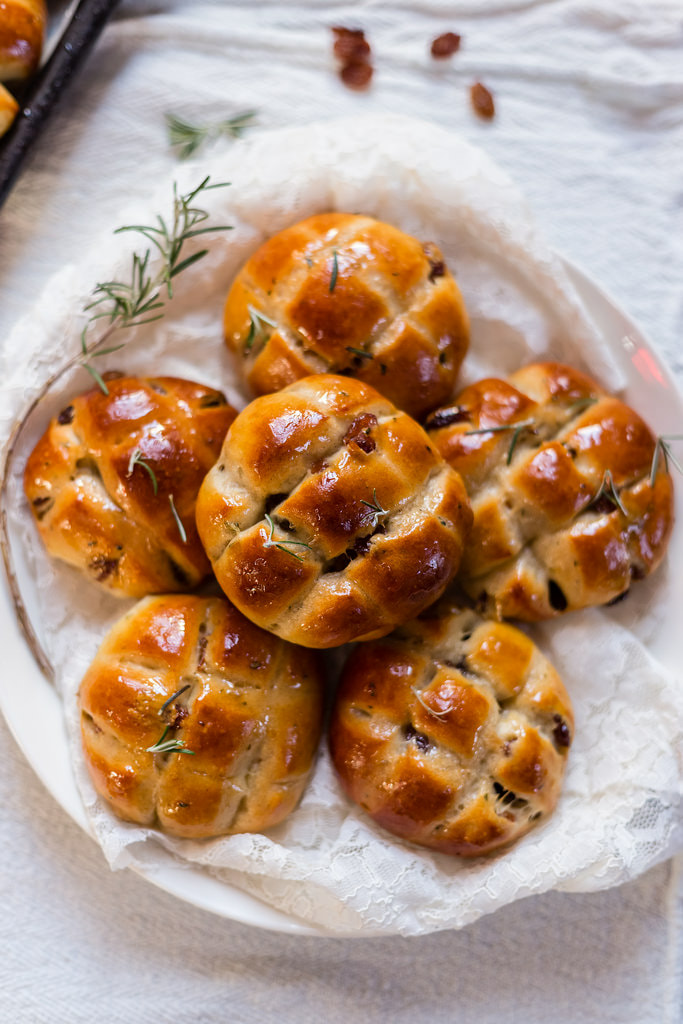
Without a doubt, one of the best ways to discover truly authentic Italian recipes is to subscribe to Pasta Grammar's YouTube channel. Follow them on social media too... @PastaGrammer. You see, aside from the nonnas on the Pasta Grannies YouTube channel, this raven haired Calabrese, Eva is one of the best cooks who uses traditional techniques for traditional Italian dishes. Her recipe for ciabatta is one you'll want to make every week. --Jerry Finzi 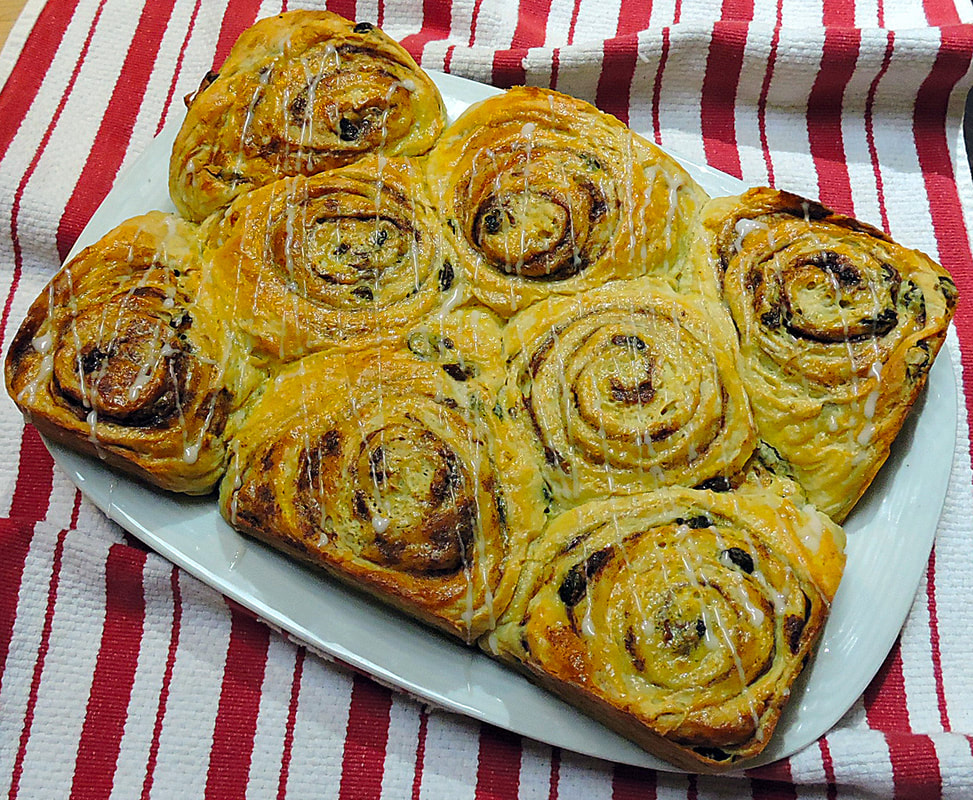  Natale a casa Finzi Natale a casa Finzi Since my son Lucas was small, we have obviously dedicated early Christmas morning to opening gifts. This early morning sharing of love for each other has often stretched past noon, depending on the number of gifts to open. Admittedly, "We Three" (as we call our little famiglia) spoil each other, with multiple gifts and overstuffed stockings hanging on the mantle--some gifts even celebrate Italian cuisine. (This year, my favorite was a 5 pound caciocavallo cheese from Puglia!). This can be a long ordeal (when Lucas was little, it might take all day), so one tradition we've tried to keep is making my recipe for cinnamon-raisin and walnut buns the day before so we can easily heat them up and ice them for our Christmas breakfast. There's nothing better than one of these buns with a hot chocolate on Christmas morning. It's also a quick, simple breakfast to make that won't delay the opening of gifts. Here is the recipe, which can make enough to enjoy throughout the entire Natale season... 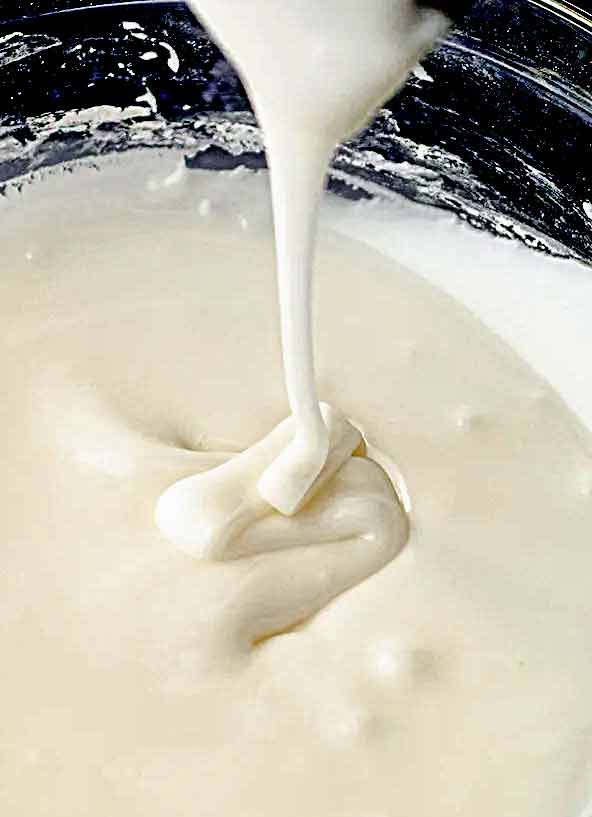 Babbo Finzi's Raisin-Cinnamon-Walnut Buns This recipe makes about 18 buns, about 5" across Ingredients Dough 4 Large Eggs 1 cup warm water (105-110 F) 1/2 cup orange juice 1/4 cup mild honey (Acacia honey is best) 2 tablespoons active dry yeast 7-1/2 - 8 cups all purpose flour 2 teaspoons fine sea salt (I use Baleine brand) 2-3 tablespoons ground cinnamon (to taste) 1-1/2 cups (3 sticks) unsalted butter, at room temperature (cut into pieces) For the Filling 1-1/2 cups light brown sugar 2 cups chopped walnuts (ground in a spice grider) 1/2 teaspoon salt 1/3 cup ground cinnamon 1/2 cup (1 stick) melted, unsalted butter 1-1/4 cups raisins (soaked in an orange liquor for 15 minutes, then drained) For the Frosting 4 cups sifted confectioner's sugar 1 teaspoon vanilla 1 teaspoon Fiori di Sicilia flavoring pinch of salt 2-3 tablespoons orange juice, or orange liquor. 1/4 cup milk (I use skim) grated zest of 1-3 oranges (depending on how many are being served) for sprinkling over the top... I forgot this Christmas) Directions for Dough 1. Place the eggs into a medium bowl and whisk until foamy. 2. Add the warm water and honey to the eggs and mix well to dissolve. Sprinkle the yeast into the egg mixture, stirring well, then let sit to "proof" until foamy (about 10-15 minutes). 3. After the yeast has proofed, add the 1/2 cup of orange juice and stir well. 4. Sift together the 7-1/2 cups of flour, 2-3 teaspoons cinnamon and 1/2 teaspoon salt into the bowl of a stand mixer. 5. Start mixing on a low speed while adding the pieces of room temperature butter until it gets to a rough crumb stage. 6. Make a well in the center and pour in the proofed egg/yeast mixture. Mix on low speed until the dough clears the sides of the bowl. 7. Place the dough onto a lightly floured work surface and knead until it becomes smooth and springs back a bit when a finger is pushed into it. This dough should become smooth and not sticky. 8. Cover with a cotton towel or plastic wrap for 10-15 minutes to relax. Make the Filling 9. In a medium bowl, combine the brown sugar, chopped walnuts, salt and cinnamon. I grind the walnuts into a crumb using a spice grinder, but if you them chunkier, leave them chopped (from a package) or use a chef's knife to chop to a size you like. Filling and Rolling the Dough 10. Prepare two half sheet pans by lining them with parchment paper. 11. Roughly shape the dough ball into a rectangular block to make rolling out into a rectangle easier. On a lightly floured surface, roll out the dough into a rectangle that is no more than 12" and no less than 1/4" thick. The rectangle should be about half as wide as it is long. Try to create 90 degree, angled corners. 12. Using a pastry brush, coat the entire surface of the dough with the melted butter, coming to within 1/4" of all sides. 13. Spread the walnut filling evenly across the dough. 14. Drain the raisins well and spread evenly across the dough. 15. Roll up the dough, starting from the side furthest from you, jellyroll fashion. As you roll toward you, lift occasionally to tighten the roll as you go. When you get to the end, pull and then pinch the last side along its length, pinching the dough so it sticks to itself. 16. Roll the pinched edge so it's underneath your roll. (This helps to hold it in place while cutting.) Using your flat hand or a bench scraper, make sure the ends are pressed in flat. 17. Using a large, serrated bread knife, start cutting 1/2 - 3/4" thick slices, placing each one on your parchment lined sheet pans. You can either allow 1-2" of space between each so they sell into nice round buns (photo below), or more tightly next to each other to create more of a pull-apart bun experience. (See the photo above). 18. Cover the pans loosely with plastic wrap and allow to rise at room temperature, away from drafts, for about 1 hour, or until doubled in bulk. This dough really puffs up! 19. About 30 minutes before baking, preheat oven to 350 F. 20. Place trays on center rack(s) and bake for 15-20 minutes, or until lightly golden brown. You can bake each pan separately, or if your oven can accommodate two pans at once, bake them at the same time, perhaps swapping racks and rotating pans once halfway through baking to ensure even baking. 21. Try not to over-bake these buns--they can dry out easily if over-baked. You want them warm and soft when served. They freeze well (on a tray in the freezer, then placed into zip-lock bags when rock-hard). They will microwave perfectly (30 seconds or so) the next day (after refrigerated), or heated in an oven from frozen for 10-15 minutes at 350 F. They can be iced right before serving. Making the Icing 22. While the buns are baking you can make the icing. Place the sifted confectioner's sugar and salt into a large bowl, and using a small whisk, combine. Whisk in the vanilla, Fiori di Sicilia and the orange juice (or orange liquor). Now, slowly start adding the milk, little by little, until the icing becomes very smooth and can make a ribbon when drizzled from the end of the whisk. You might not need all the milk, or you might need a tablespoon or two more (it depends on the humidity). This recipe can also be made swapping out the milk for water if you are lactose intolerant. You want the icing to be able to drizzle ribbons onto your buns, yet be sticky enough to cling well. Serving/Reheating 23. When finished baking, remove the pans from the oven and let cool for 5-10 minutes right in the pan. If you ice them while hot, the icing might soften and become too thin. 24. Select the buns you want to eat right away and either use your whisk or a small spoon to drizzle lines of icing across the tops. If you like lots of icing, use a small offset spatula and spread a coating of icing across the entire surface. 25. Distribute some orange zest on top. 26. For eating the next day, you can place some buns on a tray (without icing) and cover with plastic wrap. The next day you can reheat the icing for 15 seconds in your microwave, then reheat the buns in the microwave for 30 seconds (using a microwave cover) or in a 325 F oven, lightly covered with foil, for 15 minutes. 27. These buns freeze very well, without icing, by first freezing solid, uncovered, in your freezer until rock hard. Store the frozen buns individually in zip-loc bags. To defrost and reheat, place on a pan covered lightly with foil in a 350 F oven for 15 minutes, then ice afterwards. You can also defrost them using your microwave using the defrost setting, but don't forget to use a cover to prevent drying out. Our buns lasted our family of three from Christmas morning until the Epiphany on January 6th! I hope you enjoy them as much as we do... --Jerry Finzi 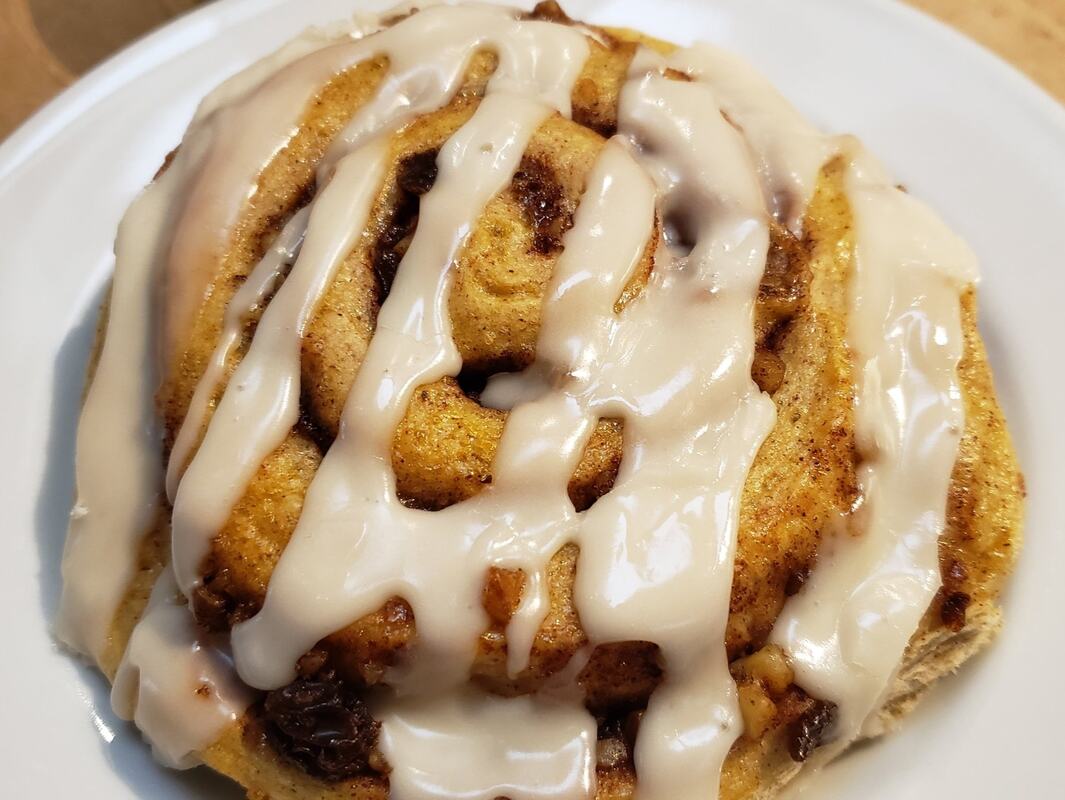 Copyright 2023 by J.Finzi/GrandVoyageItaly.com
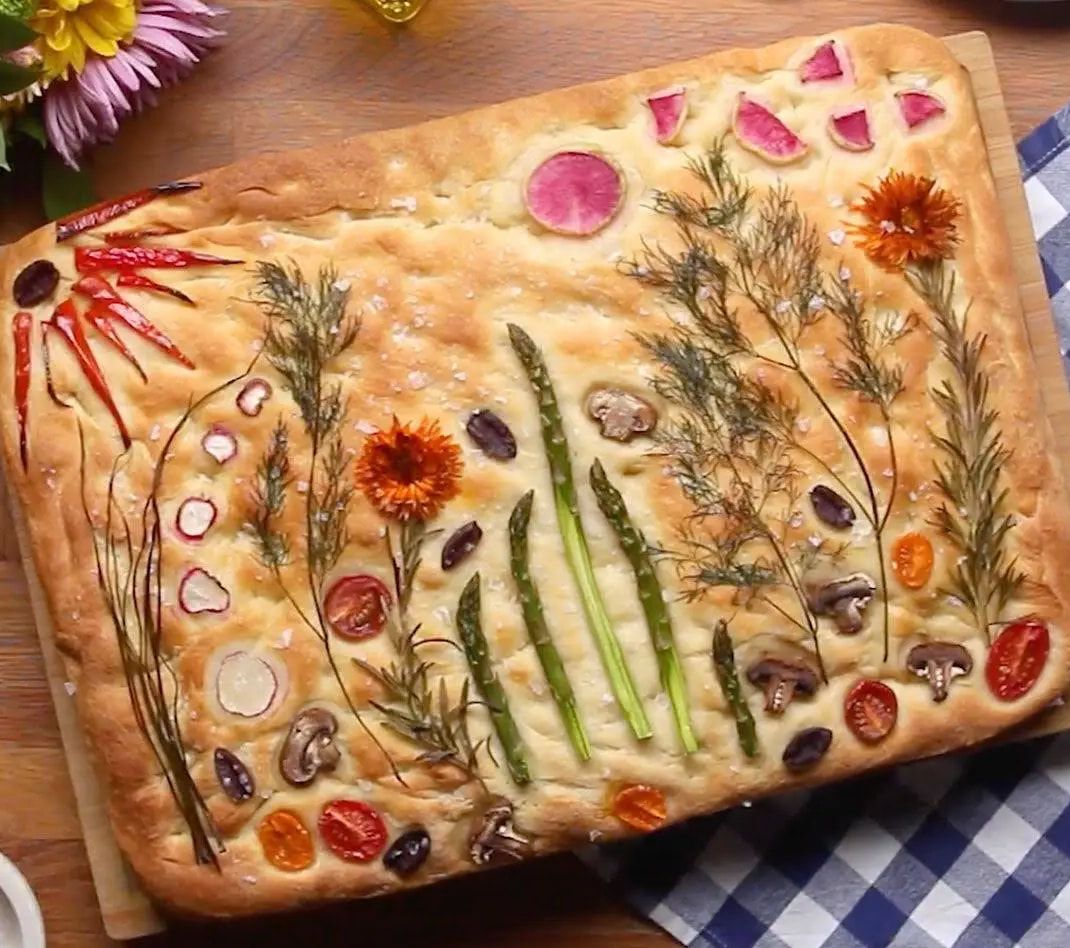
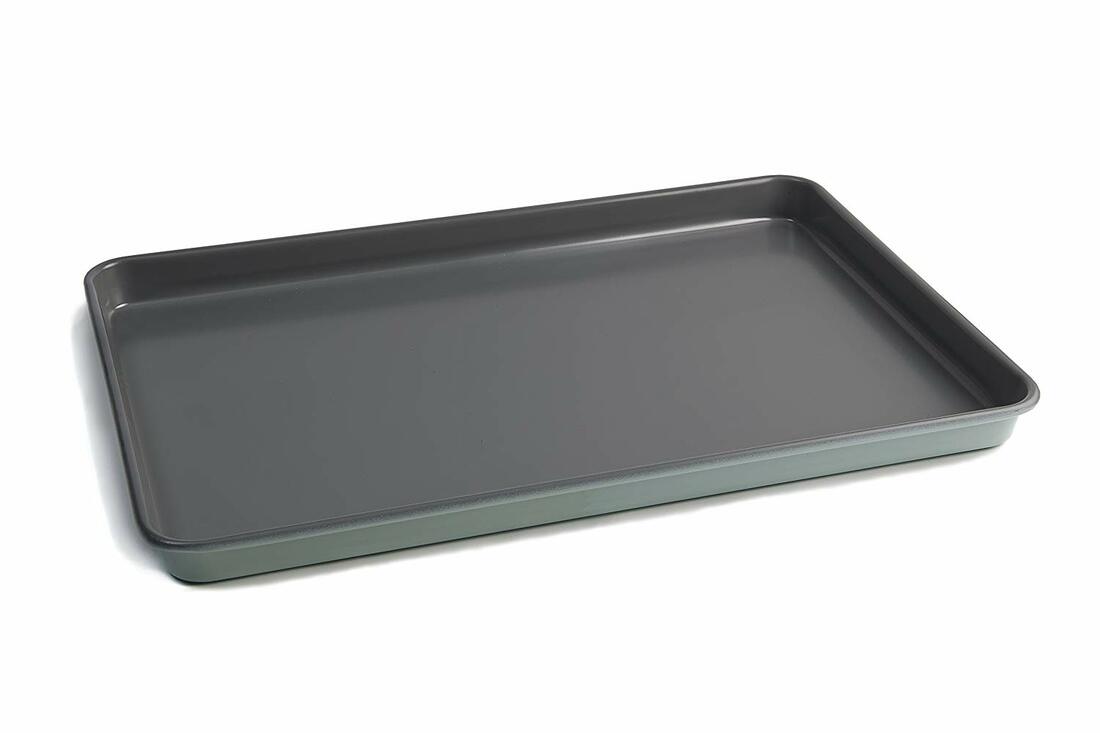
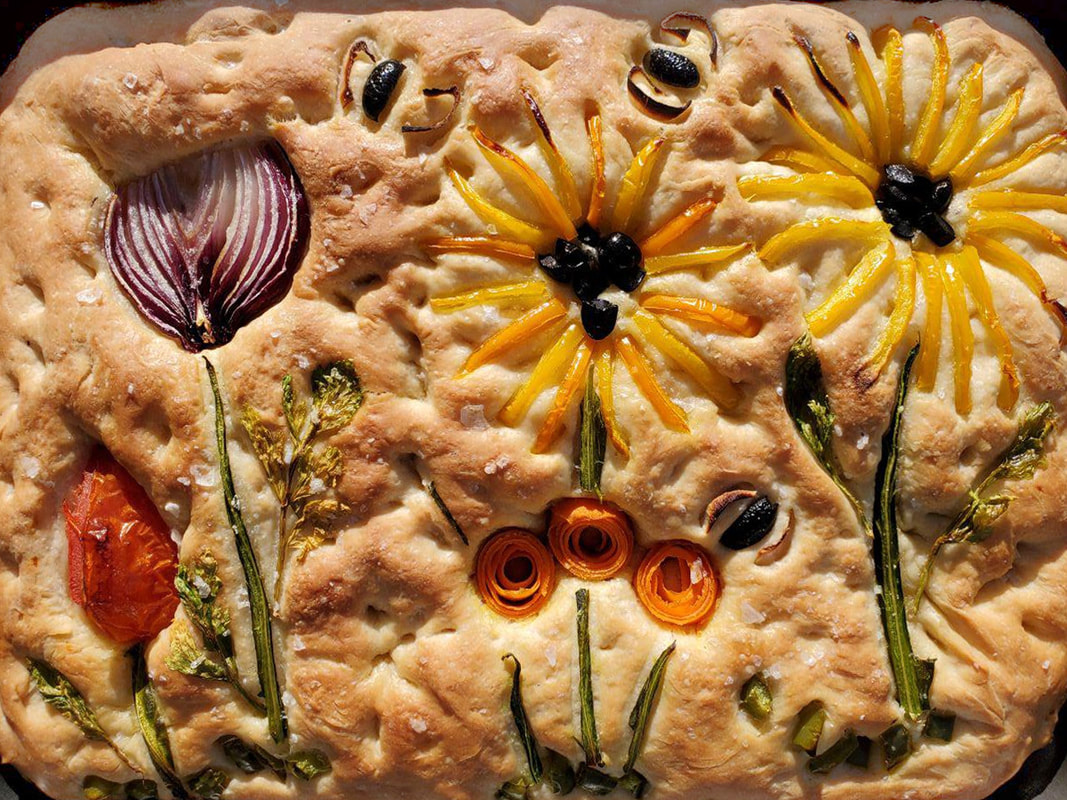 Focaccia is one of the world's oldest flatbreads with roots in ancient Greece and with the Etruscans, even before the Roman Empire reared its head. The Romans called it panis focacius (bread of the hearth) in Latin. In its basic form, it is a leavened bread, very similar to pizza but without all that cheese. There have been versions of focaccia all through the Mediterranean coastline in Europe and northern Africa. In ancient Roman days, it looked like a very simple, flat round of pull-apart bread. It was a meal to be carried by shepherds and fishermen and meant to be eaten later. In regions of neighboring France it's called fougasse. In Argentina and Brazil--both with large Italian immigrant populations--its name is fugazza and they can be either topped with stringy cheese or even double-crusted and stuffed. The common modern form of focaccia is dimpled with fingertips to make little wells that can hold savory items like olives, cherry tomatoes, peppers, red onion, sliced potatoes, garlic or even sweet things like figs, pear slices, blueberries, walnuts, dates, honey, anise seeds, bulbing fennel (finnocchio), orange zest or grapes. The top is usually brushed or drizzled with extra virgin olive oil and sprinkled with rosemary, sea salt, pepper or other spices. Of course, you can sprinkle a bit of cheese (usually grated), but go to far and you've crossed the line between focaccia and pizza. The variations are endless. In Italy, most pasticceria (pastry shops), panetteria (bread bakery) and even bars will have slices of focaccia often sliced and priced by weight. (Note: A "bar" in Italy is a family friendly place to get cappuccino and pastry in the morning and panini for lunch.) 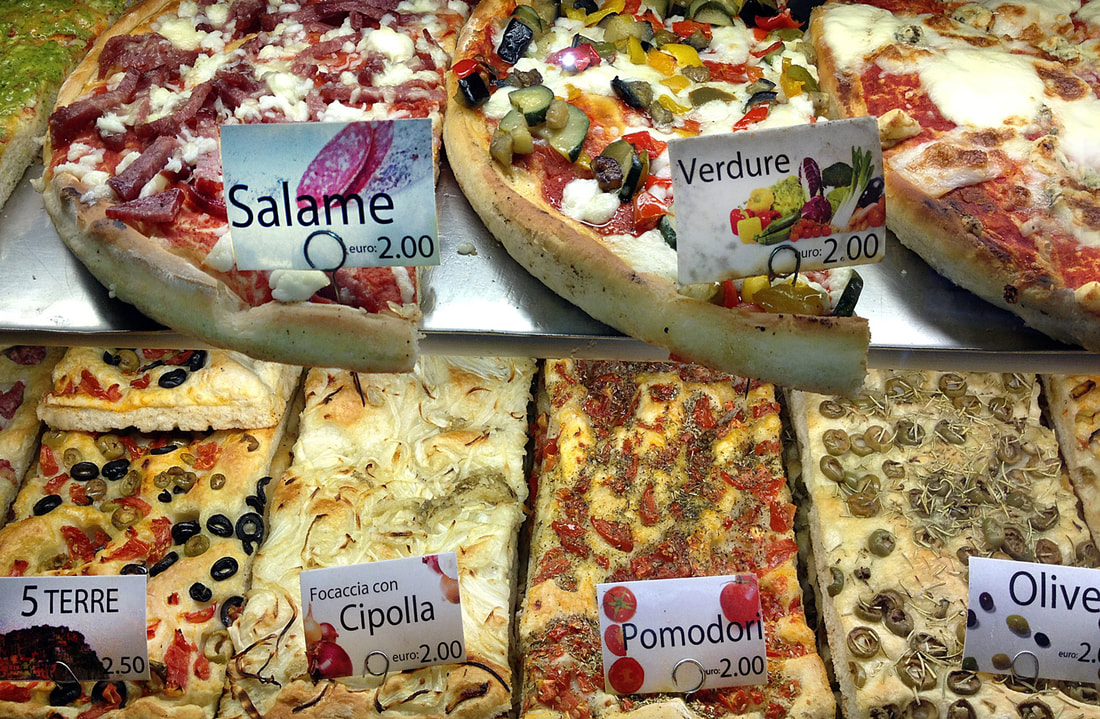 Typical Italian offerings of focaccia Focaccia is usually baked in 1" deep, dark steel pans. The texture is usually bready and for that reason a high protein "strong" flour (bread flour here in the U.S.) is used. The thickness also has the benefit of being used to make panini, slicing through the middle and stuffing with provolone, mozzarella, prosciutto or thing slices of salami. 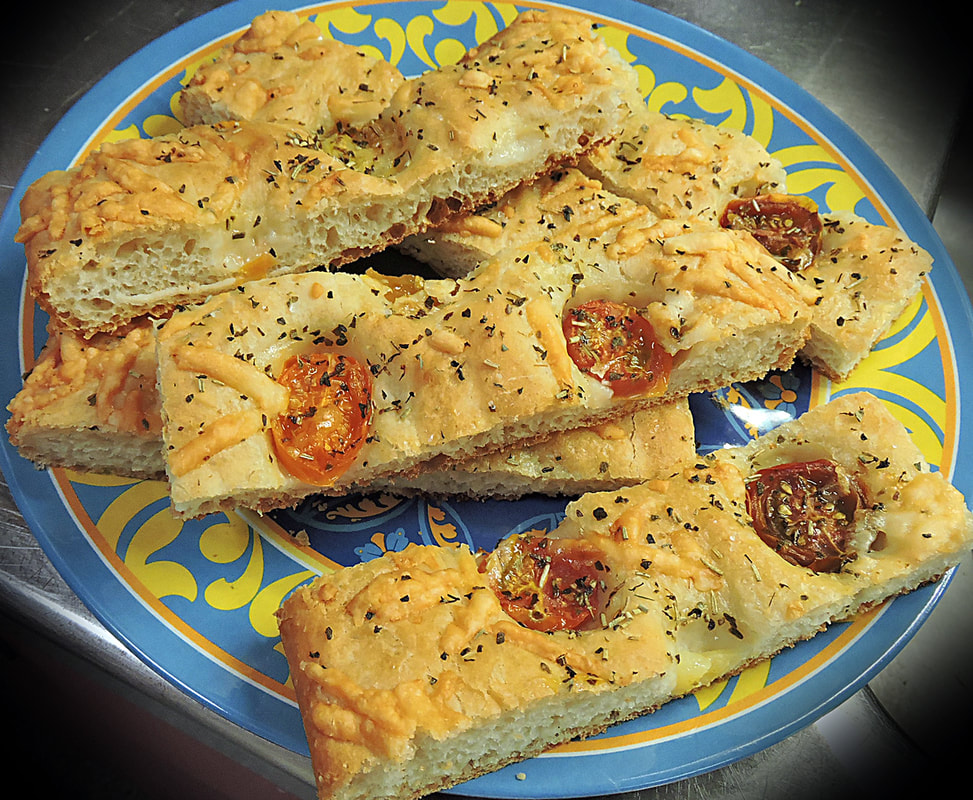 Slices of focaccia ready for snacks, lunch or along with dinner 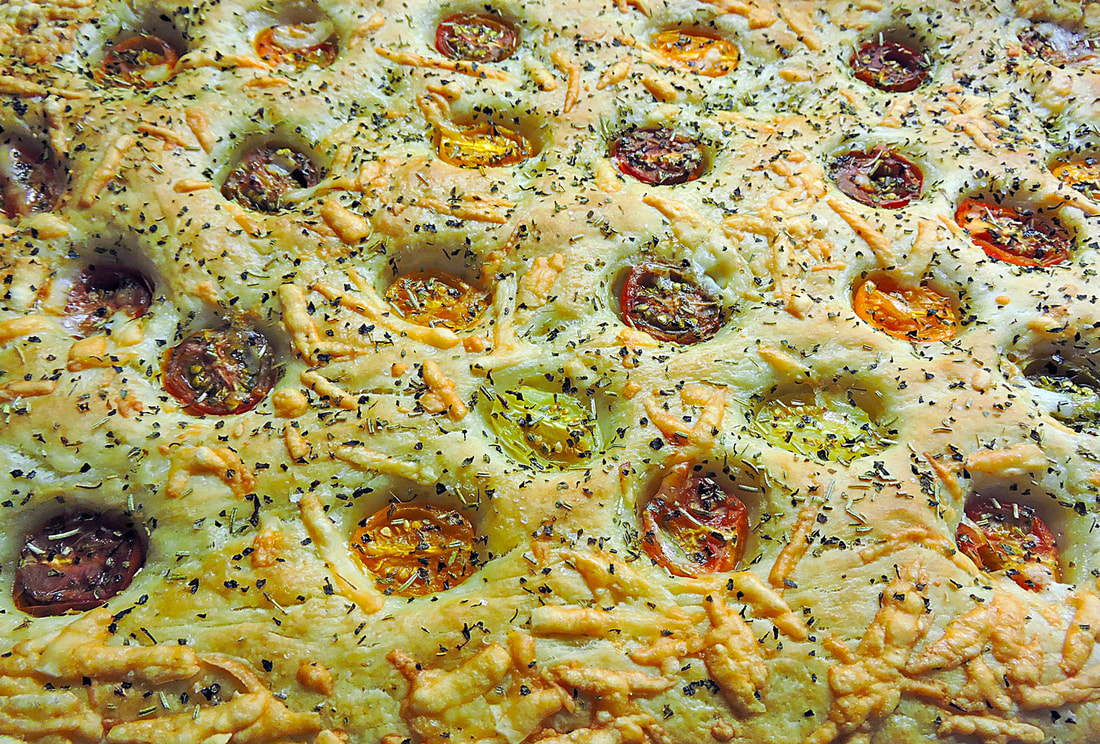 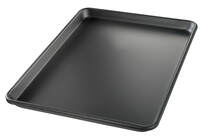 Dark, half sheet pan available on Amazon Dark, half sheet pan available on Amazon Ingredients Yeast mixture: 1-3/4 cups warm water (110-115F) 1-1/5 tablespoons fast acting yeast 1 tablespoon honey  For the dough: 1 cup King Arthur all-purpose flour 2-3 cups King Arthur bread flour (plus extra bench flour) 1 tablespoon sugar 1 tablespoon sea salt 2 tablespoons extra virgin olive oil Extra virgin olive oil for the pan Toppings: Extra virgin olive oil (for brushing) Cherry tomatoes 1/4 cup grated cheese (using 1/4 holes/box grater), provolone, asiago, or caciocavallo (cheese is optional) Dried thyme, rosemary, oregano, fresh ground pepper, sea salt Directions Preheat oven to 435F with a pizza stone or steel on the center shelf.
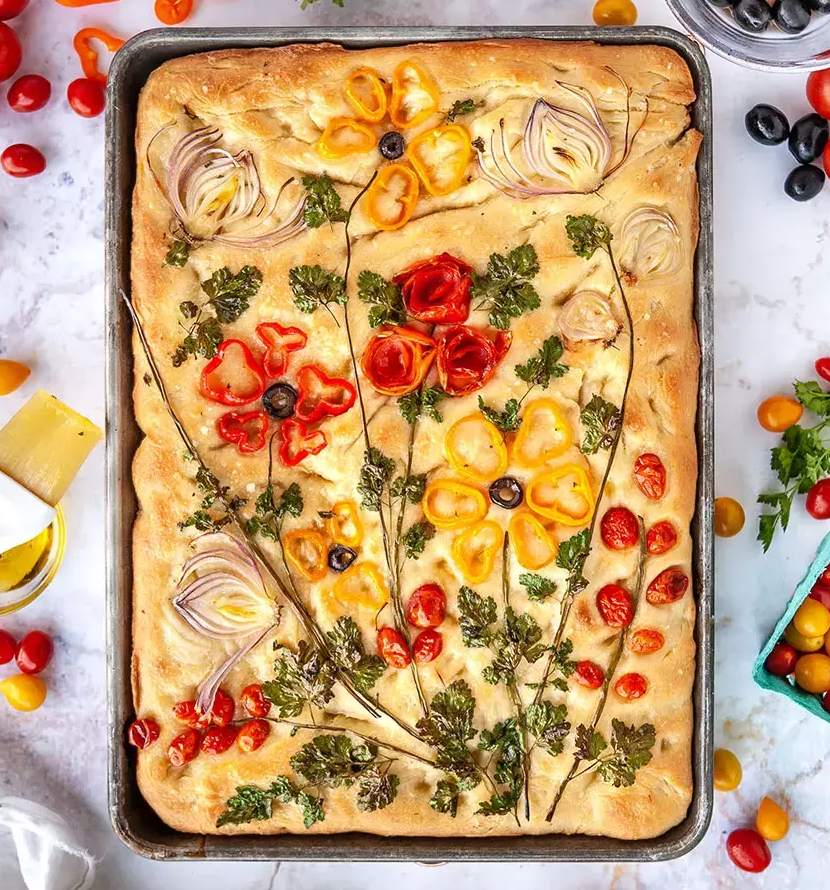
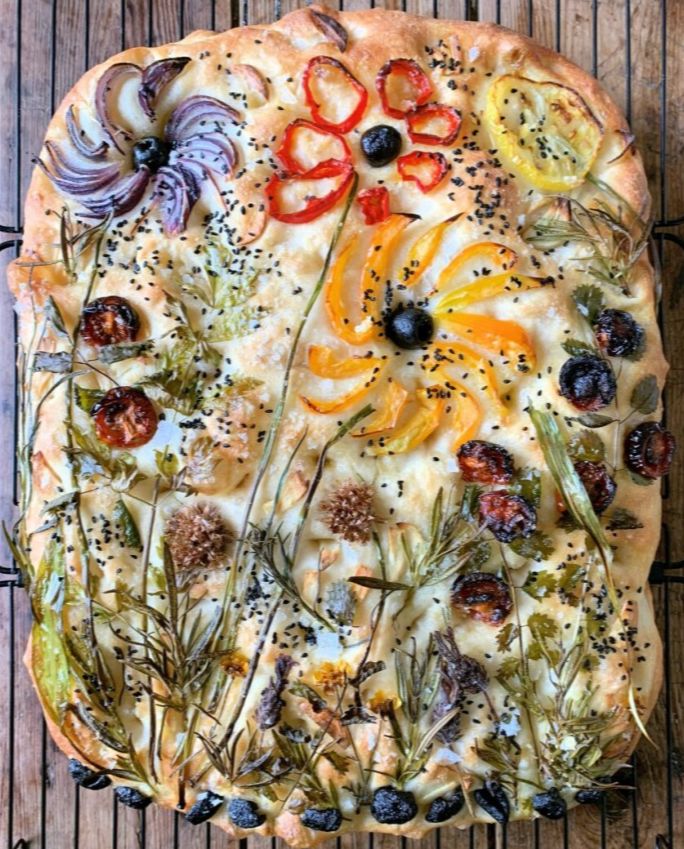
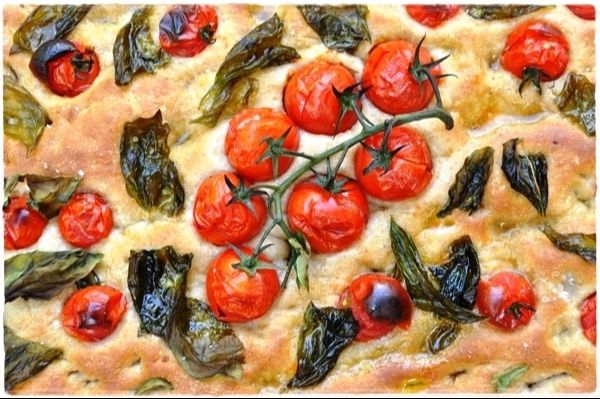
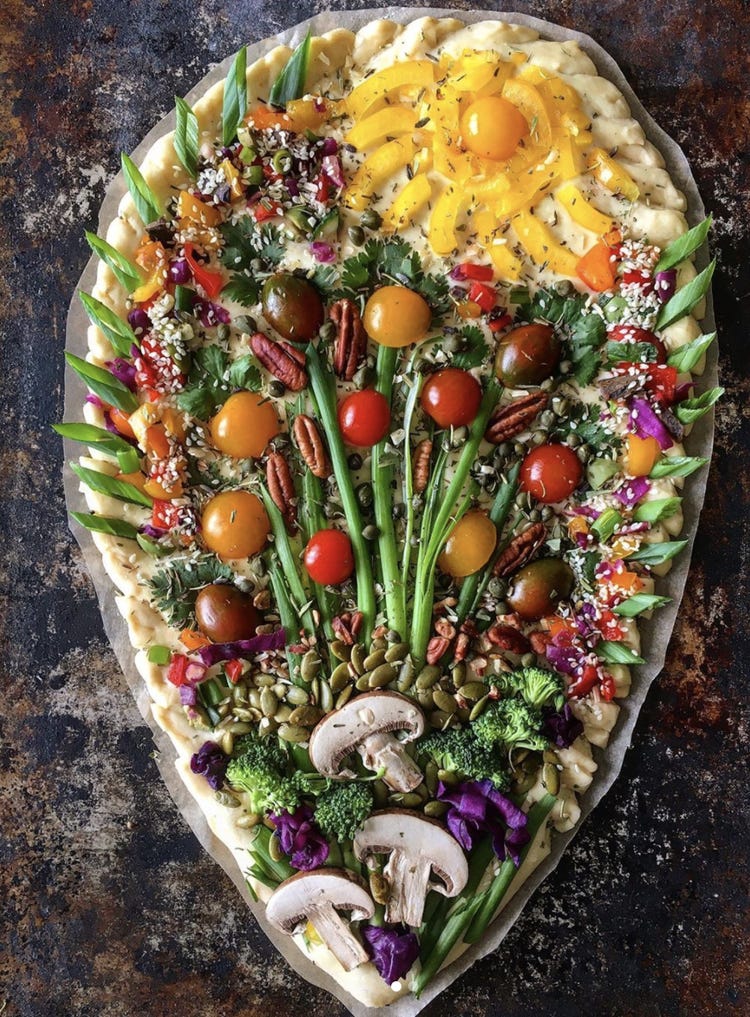
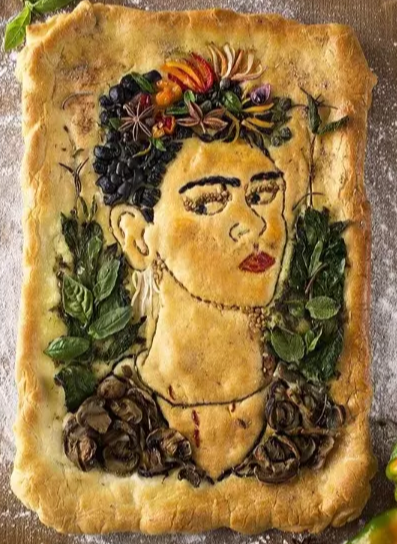
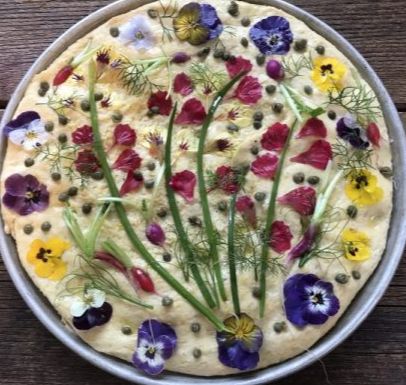
You can reheat in a microwave by wrapping with a damp paper towel, then heating for 30 seconds (time depends on the power of your unit). To kick it up a notch, try a fresh drizzle of extra virgin olive oil (we really recommend unfiltered) or an aged balsamic. For a quick lunch, top with a draping of prosciutto. You can also slice focaccia in half and use to make a panino (sandwich) filled with thin sliced colt cuts and cheese or even cooked ingredients like grilled eggplant, tomatoes and mozzarella or roasted vegetables. Getting Creative 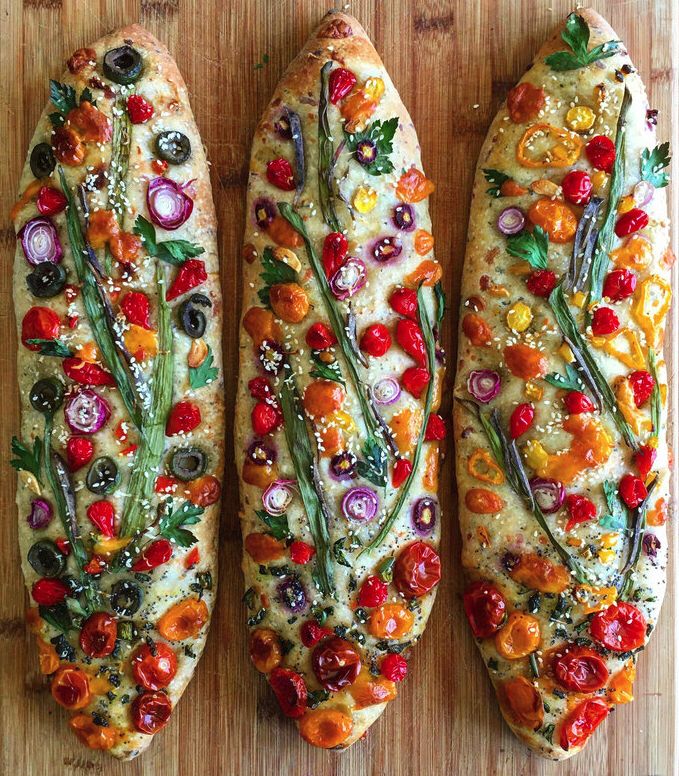 Now that you know the basics of making focaccia, consider getting creative, as these examples illustrate. Look for color contrasts, textures and interesting shapes with your choice of toppings. Consider unusual things like asparagus, cauliflower, beets, basil, cilantro, kale, mushrooms, berries, capers, chives, colored course sea salt, and various seeds. Depending on your ingredients, you might have to partially bake your focaccia first with ingredients that can cook during the entire bake time and need to be pressed into the dough. For other things that might burn, like seeds or tender leaves like basil, position on top during later stages of baking. Be creative and make a masterpiece for a special occasion, or simply make simple focaccia for every day snacks and meals... Buon appetito! --Jerry Finzi
 You might also be interested in...
Forni Italiani: 21 Regional Breads from Italy The Secret Life of Ciabatta Scarpetta: Bread Wipes the Italian Plate Clean Italian Easter Bread: Pane di Pasqua Recipe Pane Coccoi: The Amazing Sardinian Art of Decorated Breads Forno Antico Santa Chiara: More than Just a Bread Bakery  Some people called my Dad acting "silly" as a negative, but not me. Anything silly, I love. Something offbeat, oddball, out of the norm, and I'm automatically drawn to it. The time Dad wore vampire teeth at a fancy wedding's cocktail hour was wonderful. My discovery of this interesting pizza is also wonderful: pizza scima ("silly pizza") from the cucina povera traditions of Abruzzo. It's authentic and offbeat. Why is it called "silly"? To understand the name, we have to get into the evolution of the Abruzzese dialect word "scima". This is an unleavened bread, and the Italian word azzimo (masculine) or azzima (feminine) in Italian means unleavened, referring to any bread that's made without yeast. In dialect the word is ascime. Southern Italians tend to shorten words, in this case the word was simplified to scima (SHEE-ma). Scema in Italian can mean either stupid or silly, perhaps in this case referring to someone silly enough to make bread without leavening...  Il Coppo, covered in coals with the pizza baking underneath The history of this pizza evolved from the 13th century Jews who settled in Abruzzo and made unleavened bread. Traditionally it is baked directly on an open wood fired hearth, common in many country homes even today. After coming up to temperature, the wood coals are cleared to the sides and the dough round is placed directly on the brick base. Next, the dough is covered with a 5" tall dark steel coppo (like a large pot cover) and coal embers are placed on top. This baking method is similar to the Colonial American method of baking bread in a cast iron Dutch oven in an open fireplace. The baking method below tries to mimic the open hearth by baking on a pre-heated pizza stone (to cook the bottom) with a dark pan placed over the top of the pizza (to create a moist, but hot baking environment). You might even try to make this pizza using a baking cloche. Common in the southern towns of Casoli, Roccascalegna, Altino, Lanciano and San Vito Chietino, this pizza is characterized by the addition of extra virgin olive oil and wine. Each year there is even a pizza scima sagra (food festival) in Casoli.  A similar method of baking bread in a Dutch oven Ingredients
Instructions
Useful Tools on Amazon...
 Mary Ann at home in front of the camera  Continued from Part 1... Finzi: Of course, we’ve read your new book, Ciao Italia: My Lifelong Food Adventures in Italy. You've given us all some more great recipes and stories with an enormous degree of detail. Another winner, for sure. Brava, Maestra! Speaking from an Italian-American perspective, what are the main differences between Italian cuisine and the dishes Italian-Americans served here? And regardless of their lack of authenticity, which Italian-American dishes do you really love? Mary Ann: Regional dishes are based on local ingredients, fresh ingredients and simple preparation. Italian-American food is often based on many canned foods like beans and prepared tomato sauces and inferior, imitation cheese. Of course I love spaghetti and meatballs and chicken “parm” like anyone else. Finzi: I grow our own string beans and especially love those yard-long heirloom beans that can plate like a green spaghetti, but I'll have to take your advice and start growing my own beans. We do make our own sauces from scratch, but most of the year used high quality canned tomatoes. In summer we do make fresh tomato sauce, which is wonderful. Chicken “parm” is a favorite in our house, too. We love the way my wife makes it (casserole style with rigatoni) but I also make a lighter version more like a standalone corso secondo.
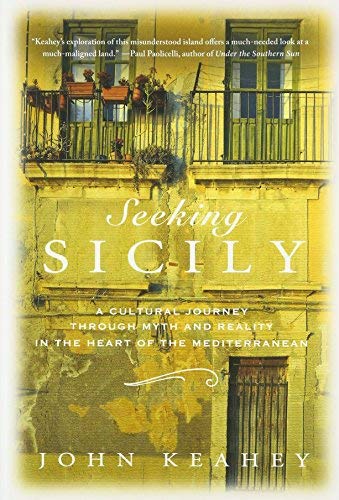
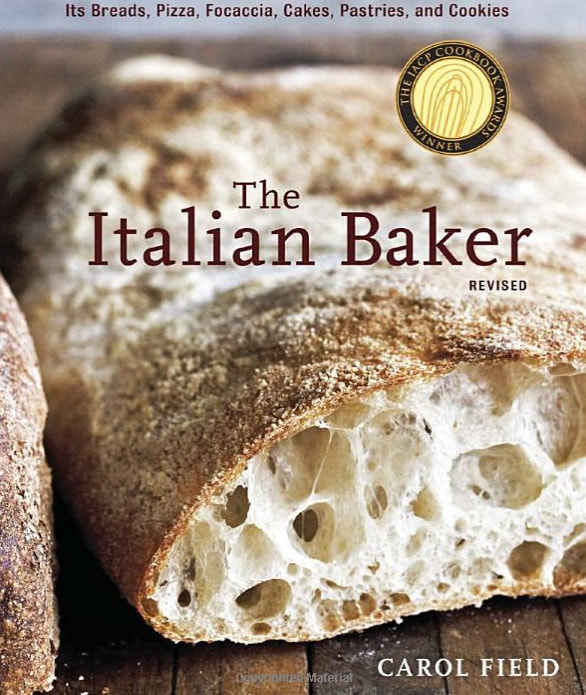
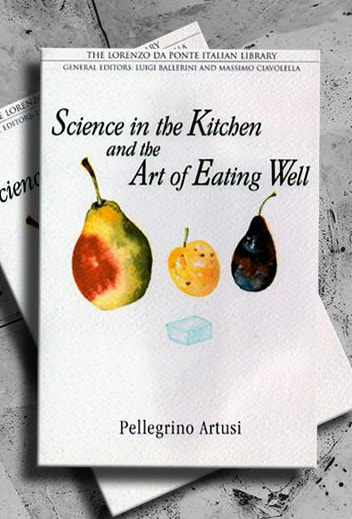
All of us have our favorite cookbooks. We have a collection of yours (of course), but also from Julia Child, Nick Malgieri, Marcella Hazan and Pierre Franey. Which cookbooks couldn’t you live without? Also, what are some historic cookbooks you would recommend for people wanting to explore the history of Italian cuisine? Mary Ann: Ada Boni’s, Italian Cooking; Waverly Root, The Food of Italy; John Keahy, Seeking Sicily; Carol Field, The Italian Baker; Pellegrino Artusi, The Science in the Kitchen and The Art of Eating Well
Finzi: We actually have one on your list--Carol Field’s Italian Baker is amazing and includes a fantastic recipe for focaccia. What regions—or towns—have you never visited or cooked in when traveling through Italy? Which are on your bucket list, and why? Mary Ann: I have never cooked in Friuli or Calabria and I would love to cook in Abruzzo because the food is very high quality, and I love the way they use almonds in cooking. Although I love the confetti (candy coated almonds), there is so much more to do with them. Fried Fish Fillets with Parmesan and Almond Coating 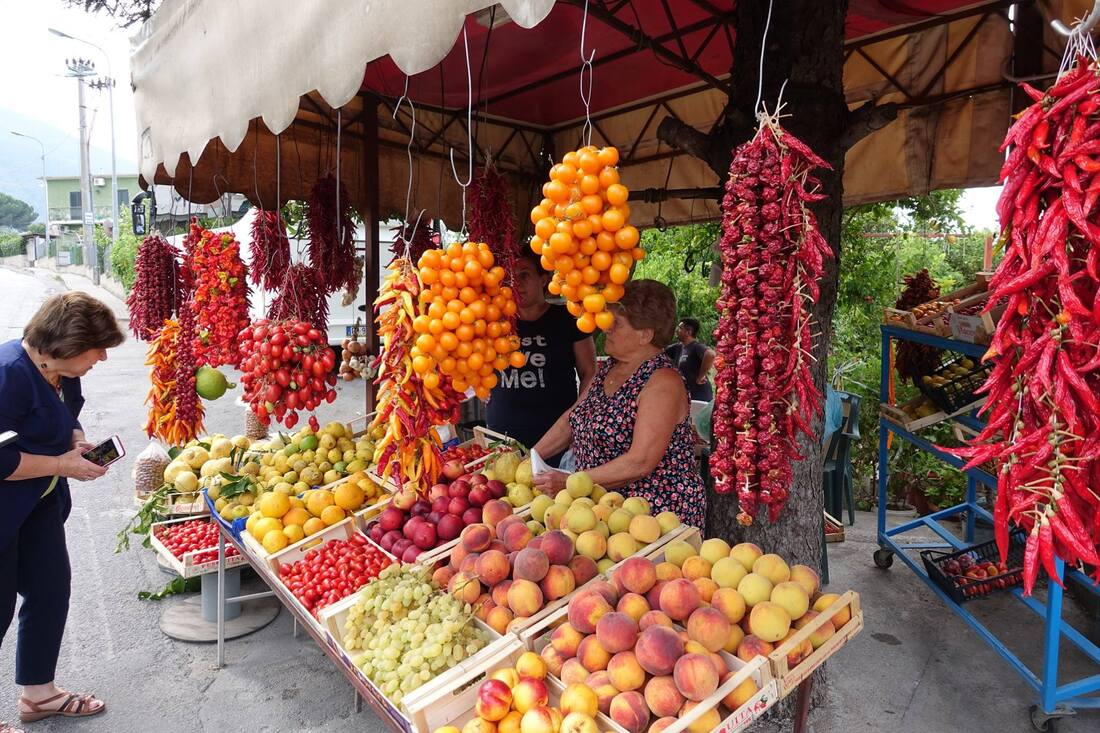 Shopping in an Italian market Shopping in an Italian market Finzi: We agree totally. We love the flavor of almonds in all manner of pastries. But to be honest, I personally never went for confetti almonds—I was always worried about breaking a tooth! The waves of Italian Diaspora during the 19th and 20th centuries brought Italian migration to several countries around the world, merging Italian cuisine with that of their host countries. Have you ever thought of exploring the evolution of this mash-up of culinary cultures? (Examples: Brazil, Argentina, Australia, Tunisia). Mary Ann: It is a great idea and I have thought of it. It's on our bucket list! Finzi: I’ll be looking forward to see what you come up with. By the way, in researching my own surname’s roots, I have discovered that there are nearly as many Finzi in Brazil as in Italy! I’m in touch with many of them via Facebook—perhaps I’ll ask them for some fusion Italian-Brazilian family recipes! Are there any other countries you like to visit and cuisines you enjoy cooking? A fusion, perhaps? Mary Ann: I just love Ireland and their food is fantastic. I also enjoy cooking Chinese food. 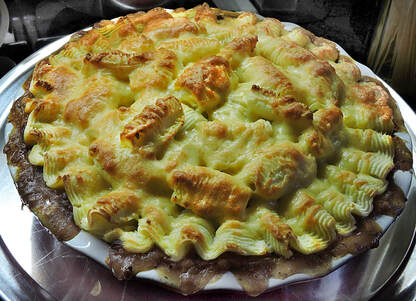 Click the photo above to see our own Shepherd's Pie Recipe 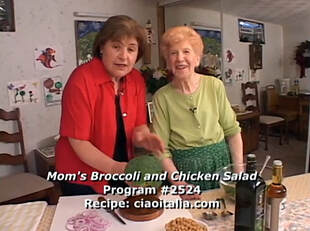 Mary Ann and her Mom cook together in this classic episode. Click to see the video. Mary Ann and her Mom cook together in this classic episode. Click to see the video. Finzi: This past Saint Patrick’s Day, I made my annual shepherd’s pie and my wife Lisa made her Irish Soda bread. Although my wife Lisa makes fantastic Chinese food, she hasn’t picked up her wok in a while. (Hint, hint.) There is such a wealth of ethic food in the world and so many influences in the regional foods of Italy! You’ve cooked with many famous chefs over the years, but we also appreciate when you cook along with home cooks here and in Italy (I still remember the episode with your Mom). Have you thought of doing a series of shows where you feature these home cooks’ recipes? Mary Ann: We have featured many home cooks and you will see them on our new season coming this spring. I learn a lot from them. Finzi: My mother was a pretty good Italian cook and my Dad worked as a grocer and deli man his whole life. Because of this, my favorite heirlooms from them is Mom’s scolapasta, her large pasta pot, her ravioli pin, Dad’s meat slicer and even his retractable crayon marker he used to mark prices on cold cuts. Which kitchen heirlooms do you treasure? Mary Ann: My nonna Saporito’s 2 ft long, thin rolling pin, her cleaver, chitarra, my mother’s scribbled notebooks on Italian foods, her apron and old cannoli forms made out of bamboo. Finzi: Bamboo cannoli forms? I love the idea. Easy to make if you have a neighbor with overgrown patch of bamboo. 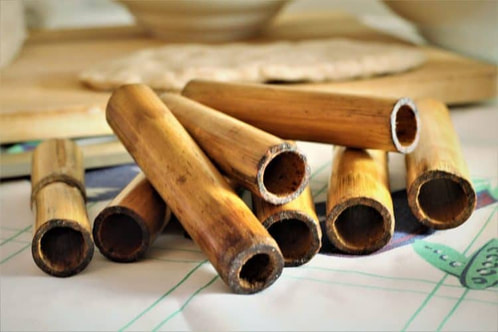 Click the photo to see Bamboo Cannoli forms on Amazon Beside heirloom kitchen tools, my Mom left me her techniques of making “Sunday gravy”, gnocchi (click for RECIPE) with a fork and her Italian style Pot Roast (click for RECIPE). Dad taught me how to make giant deli meatballs (click for RECIPE) Thanksgiving turkey, Christmas ham and all about home grown heirloom tomatoes. What are the most important technique your family's cooks passed along to you? Mary Ann: Use your hands! They are your best tools. Finzi: According to my son, my pizzas and other dishes are so good that he’d like to see me open a pizzeria or restaurant, but I simply enjoy cooking for my family and friends. With both of your grandmothers cooking for professional reasons, did you ever consider “going pro” and perhaps opening your own restaurant? If “no”, why not? Personally, I would really enjoy dining in your Trattoria Ciao Italia! Mary Ann: No, because I think of my show, Ciao Italia! as my restaurant. Opening a restaurant means a commitment to be there and I cannot do both at the same time. Finzi: Last summer, we vacationed in Cape Ann, Massachusetts and seemed to discover Italian influences just about everywhere. When we visited the North End of Boston we considered it to be a better Little Italy than Manhattan’s Little Italy, the Bronx’s Arthur Avenue or Philly’s Italian Market district. Which “Little Italys” have you visited and what are the best features of each? Mary Ann: I've been to most: Boston, Philadelphia, San Diego, New Orleans. Philadelphia has retained more authenticity; the rest are fading examples. Copyright, 2020 - Jerry Finzi/GrandVoyageItaly.com - All Rights Reserved
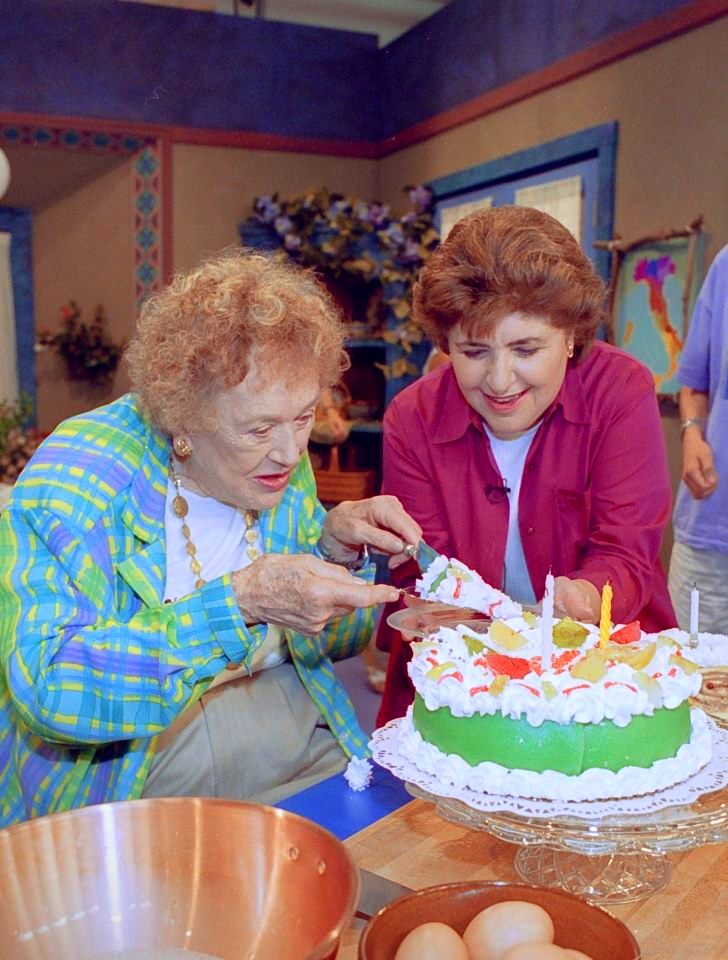
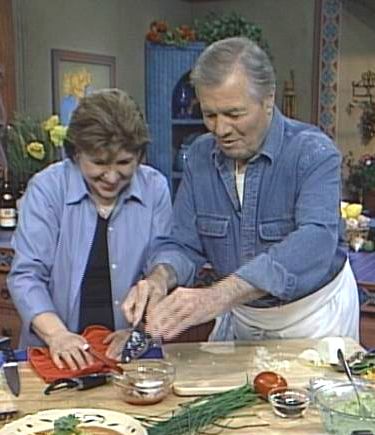
Not to be reproduced in any form without expressed, written permission. 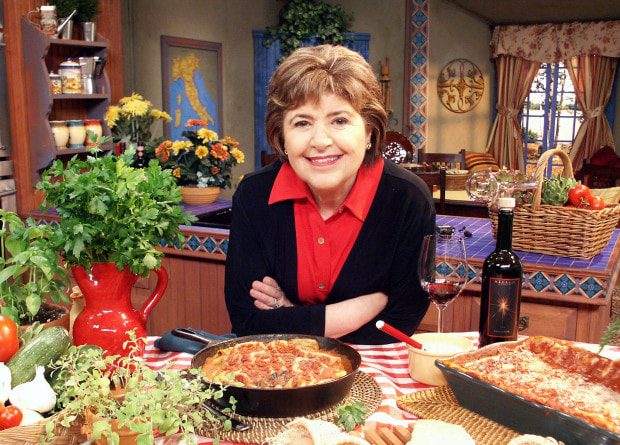  Mom with her Big Pots Mom with her Big Pots Long before my mother passed, I would visit her and Dad in their suburban New Jersey home and we would watch Mary Ann Esposito's show, Ciao Italia on their local PBS station. While I learned Mary Ann's recipe and techniques on TV, my mother passed on her own recipes and hands-on lessons in her humble New Jersey kitchen, in the same way her mother had taught her. Mom taught me to make soups first, then stews, then how to make more complex things like light, fluffy gnocchi (I still remember how quickly her arthritic fingers tossed those gnocchi from the ends of a fork). While Mom taught me our own ricette di famiglia Finzi, Mary Ann helped me perfect techniques to help me become a pretty decent, all-around Italian home cook. She also helped me understand that Italian cuisine isn't just one thing... there are many cuisines to be explored in Italy.  Mary Ann's first book holds a place of honor in nostra cucina Mary Ann's first book holds a place of honor in nostra cucina I wanted to have a conversation with Mary Ann in honor of my Mother, since both of these wonderful Italian women have been a strong influence in my own life in my own Cucina. My Mother would be proud to know that I shared a few words with one of our Italian heroines. Mary Ann is the author of 13 books on the art of regional Italian cooking. She has taught millions of fans how to cook authentic, regional, healthy and delicious dishes on her PBS show Ciao Italia, currently in production for its 29th season of episodes! Mary Ann has over 30,000 followers on Facebook and over 1,400 recipes on her Ciao Italia website. She has also made over 40 tours of Italy, 18 of which were organized as cooking classes attended by loyal home cooks. 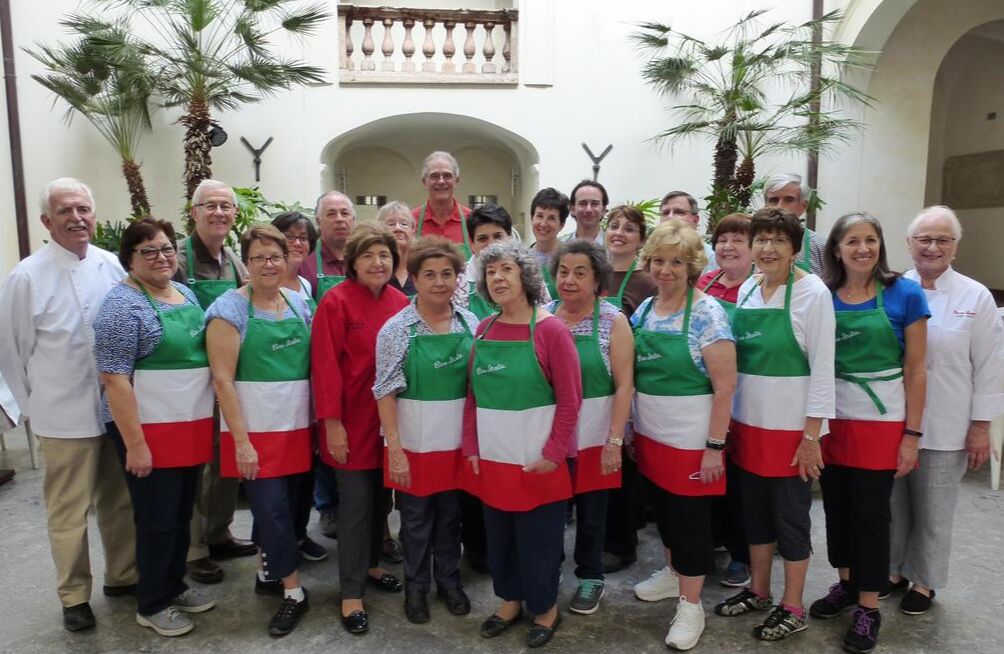 In Italy with one of her classes  Mary Ann was gracious in affording me some of her precious time, her schedule made even busier with the recent launch of her new book Ciao Italia: My Lifelong Food Adventures in Italy, as well as her preparing for the 2020 broadcast of her new season of shows on PBS (check your local PBS listings). 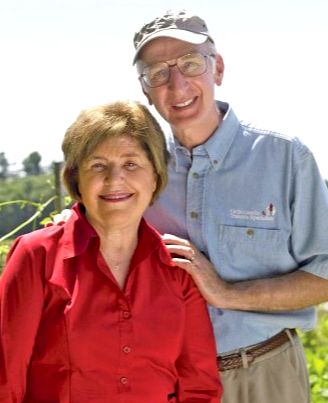 So, pour yourself an espresso, sit back and enjoy our conversation. As a bonus, I also discussed gardening with her husband, Dr. Guy Esposito, the official Ciao Italia gardener. --Jerry Finzi Mary Ann learning about Piadina, a flat bread from Emilia-Romagna Our Conversation... 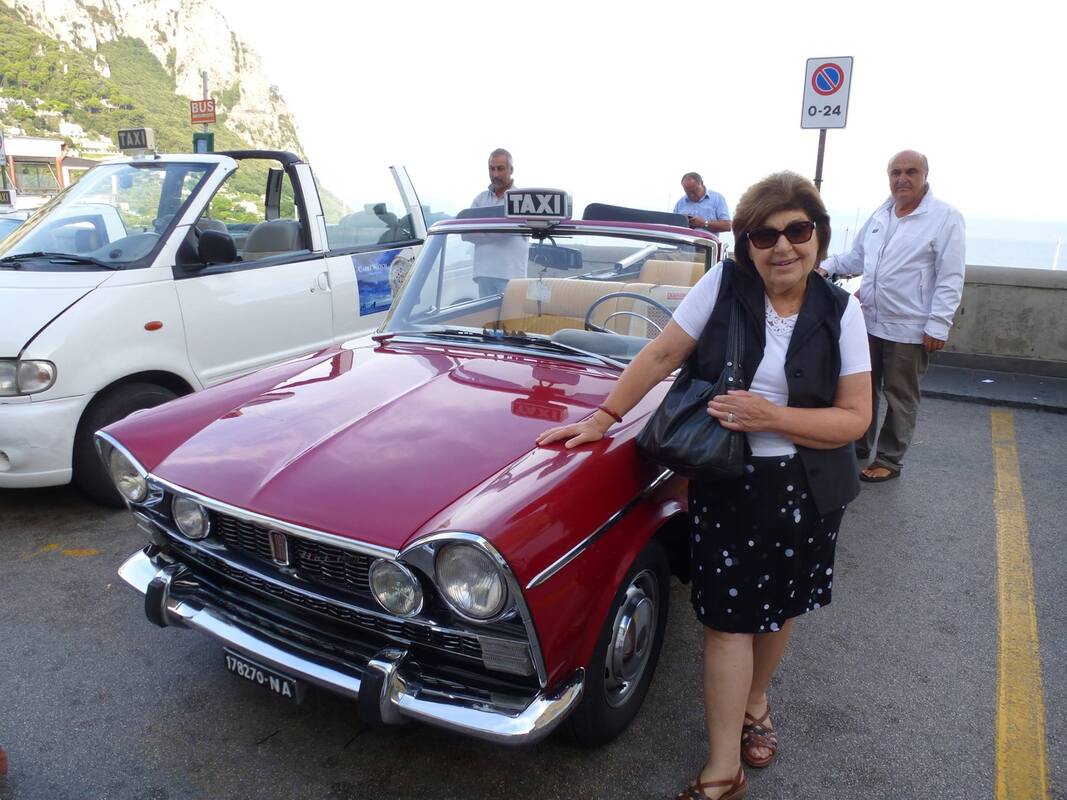 Mary Ann in love with a vintage Capri taxi Mary Ann in love with a vintage Capri taxi Finzi: You’ve been on PBS continuously for 29 years… certainly an achievement for any TV cooking show. Can you explain your commitment to PBS and if you’ve ever been approached to do a show on a commercial cooking network? If you were offered a show, why didn’t you take the offer? Mary Ann: I wanted to have a personal connection with my audience without interruption or distraction and I wanted it to be my show in my words without someone else telling me how to do it. It would have been so much easier to go to go the commercial route but I had higher goals. Finzi: I see your point, Mary Ann. They might have re-packaged what you were bringing to the table (excuse the pun) and your menus might have been someone else’s choices, perhaps by committee. We’re happy you followed your own path. Certainly for my family, some of our favorite episodes have included location segments filmed in Italy. Does your new season include any Italian segments? And throughout the history of your voyages, where were your favorite places to explore—and cook? Mary Ann: Location shoots require a huge effort and lots of money but when our budget allows, we are in Italy. This year for our new season, we will be filming in Tuscany in the fall. All the regions are my favorite, but I am partial to Sicily and Campania. 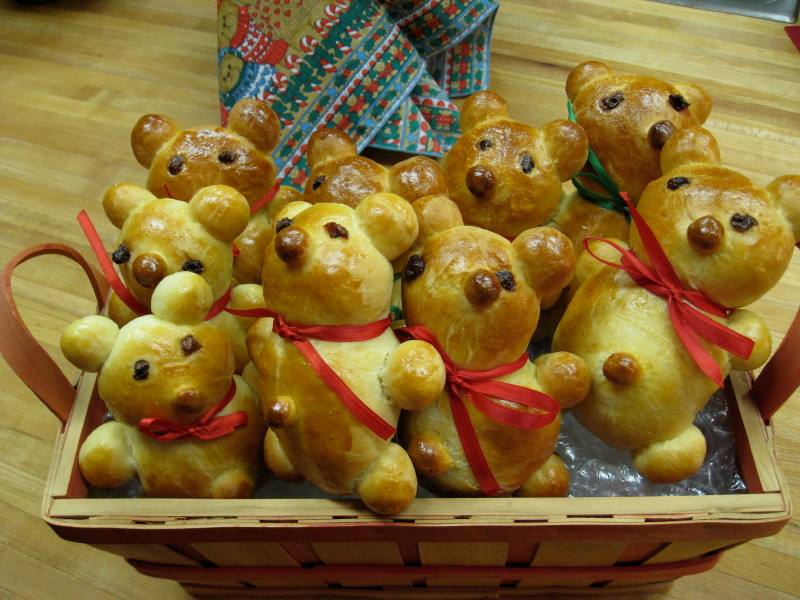 Mary Ann's famous holiday bear breads 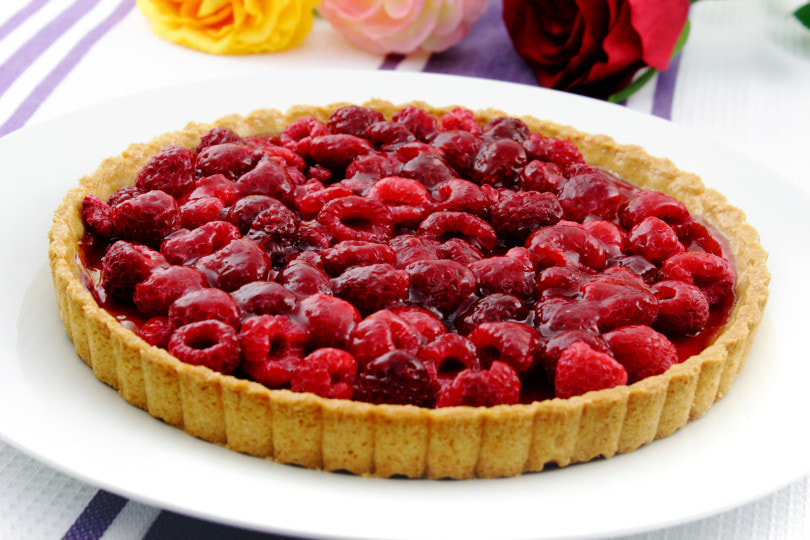 Mary Ann's Raspberry Tart Mary Ann's Raspberry Tart Finzi: I agree with you on this. There's something so warm and welcoming in the South--a much slower pace. For me, I felt most at home when visiting Puglia where my father was born. The people's welcoming smiles reminded me of him. Some of my other favorite Ciao Italia episodes had you baking with the amazing pastry chef, Nick Malgieri. We love Nick because he was kind enough years ago to help me find the recipe for “pas-ah-chut”, as my Molfettese father called them (pasticiotti). What are your favorite pastries to make? Mary Ann: Of course I love to make cannoli, fruit tarts, lots of different biscotti. Finzi: My thing is making the Crostata di Frutta in our cucina, but my wife is the go-to gal for all sorts of cookies, cakes and pies. Happily, this year she is exploring the world of the twice-baked dolci—biscotti.
I've always loved pizza and even worked at our local pizzeria for a while when I was a teen, and for nearly 20 years and I've become a fairly decent pizzaiolo at home. I’ve made Neapolitan, Chicago and Detroit deep dish, “grandma’s”, sfincione, focaccia, thin crust, etc. I think I’ve saved every one of your pizza episodes on my DVR. Which is your favorite pizza and what do you think makes it so special? Mary Ann: I would have to say Margherita is my favorite but I love making all kinds. The important thing is to use as close to original ingredients as possible like Caputo flour for the dough, real mozzarella di Bufala and fresh basil. Finzi: Happily, home gardens, farmers markets and the Farm to Table movement are growing in popularity. Living in the country, we often have to travel to Philadelphia or New York to get precious ingredients like mozzarella di Bufala, but we do grow our own veggies and lots of basil! For me, baking pastry is very specific and precise, which is perhaps why my wife does that in our house. What are your thoughts on “cooking to the recipe” versus cooking the way nonne do, by taste, look and feel? Mary Ann: I’m with you; I never cook with recipes even though I write books with precise recipes for readers based on my testing them. I think the best cooks are those who improvise. Finzi: In my case, improvisation can make it a little difficult when I want to share one of my recipes with our GVI readers. I have to convert a pinch, a dollop, a handful, a splash or to describe how a dough should look and feel. What I’ve always loved about your cooking is the historic and anthropological perspective you bring into the Italian kitchen. You teach that “Italian food” doesn’t really exist, but it’s really about the 20 different regional cuisines of Italy. What would you like to see as an effort to change the American view of “Italian food” as only being pizza, chicken “parm” or spaghetti and meatballs? Mary Ann: Watch my show! Read things about regional cooking; in my just released new book CIAO ITALIA (My LIFELONG FOOD ADVENTURES IN ITALY) you will find a treasure trove of regional recipes with stories that support their origin. Copyright, 2020 - Jerry Finzi/GrandVoyageItaly.com - All Rights Reserved
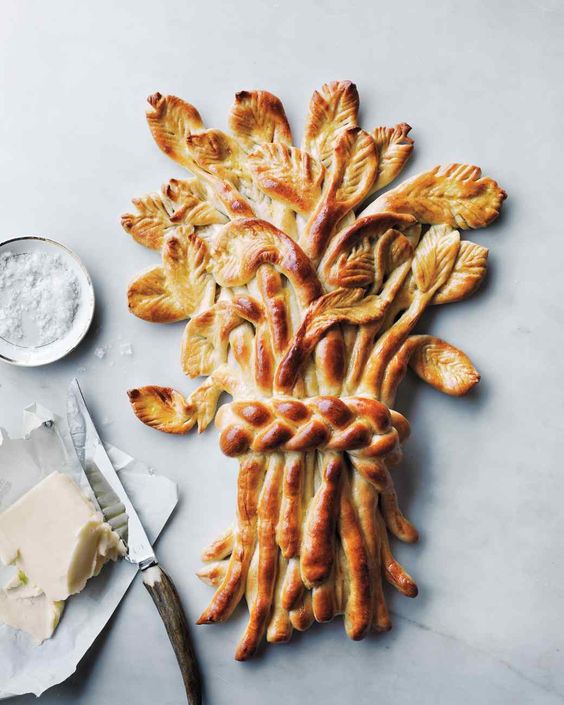
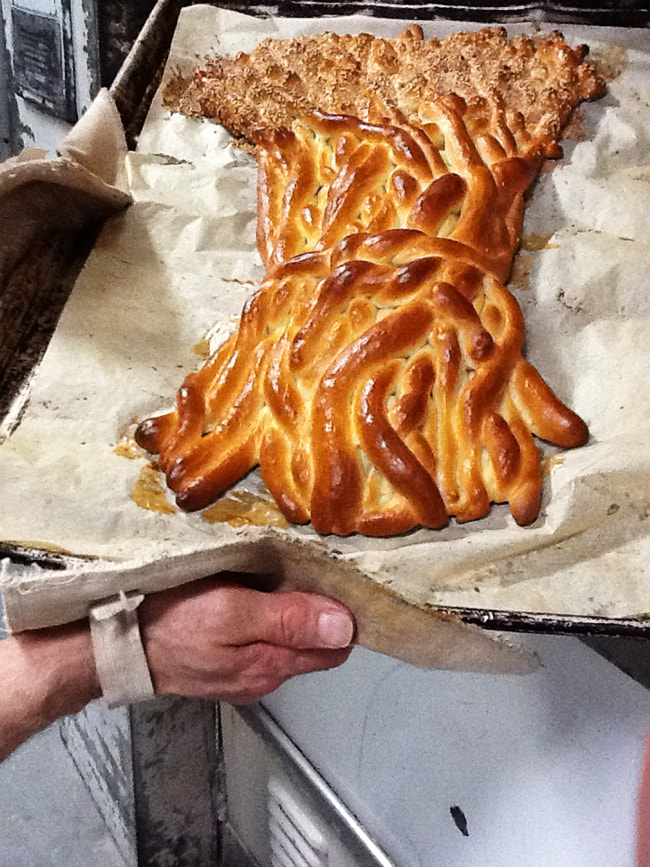
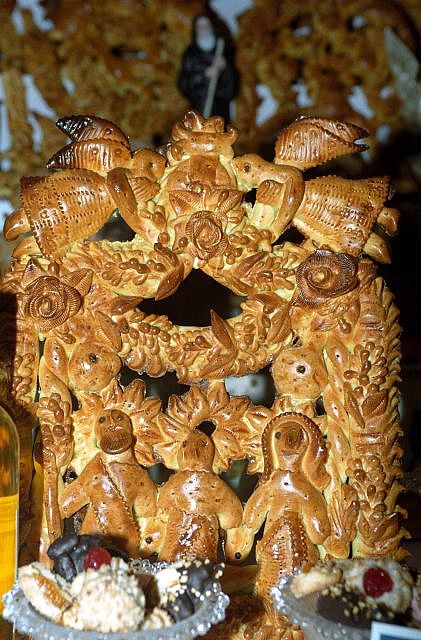
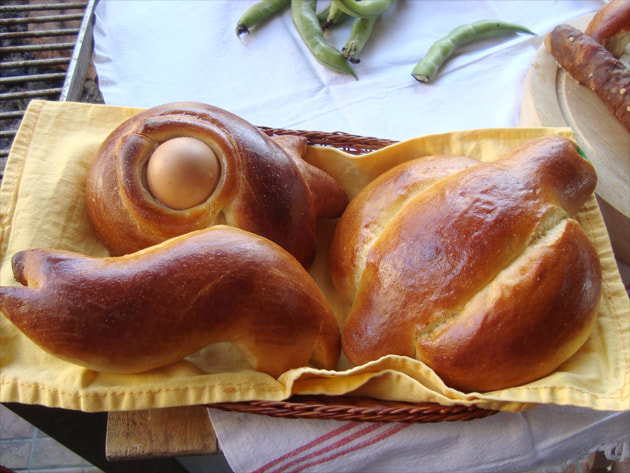
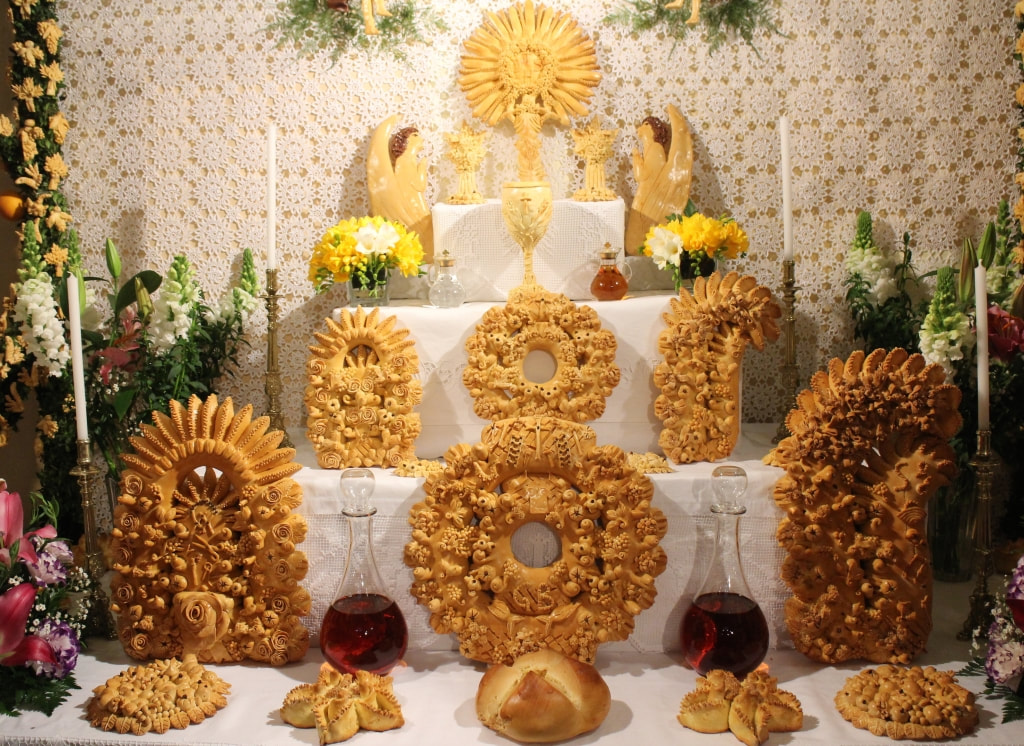
Not to be reproduced in any form without expressed, written permission.  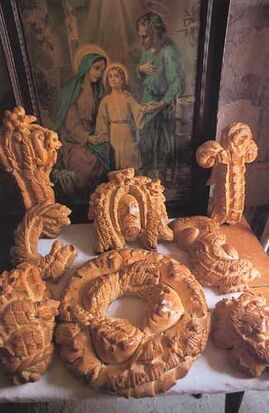 March 19 is a very special saint day in Italy... La Festa di San Giuseppe. This is the day that Catholics celebrate not only Saint Joseph, but all fathers. Consider this day as the Italian Father's Day... A special tradition is making and serving Pane di San Giuseppe, a shaped bread formed into a variety of designs for loaves that will adorn La Tavola di San Giuseppe. You'd be surprised at the amazing and luscious spreads on Italian's tables for their Cena di San Giuseppe, both in private homes and for community and church groups. Traditional forms for breads are crowns, crosses, crabs, donkeys, staffs, wheat, images of St. Joseph, and braids representing the Blessed Mother. This bread has a rich texture and a slightly sweet taste. To pay homage to St. Joseph being a carpenter, breadcrumbs and sesame seeds signify sawdust fallen from his saw. 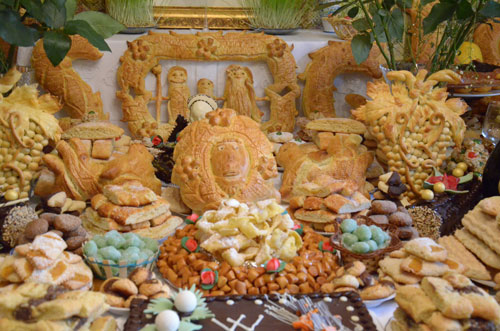 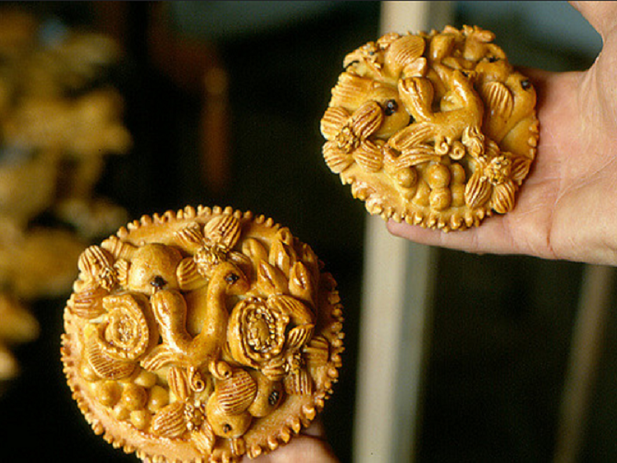 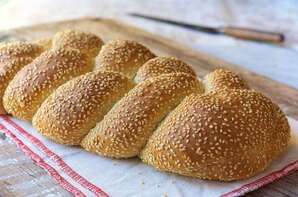 Here is a basic recipe for making Pane di San Giuseppe in a braid form... Ingredients
Directions
--GVI
   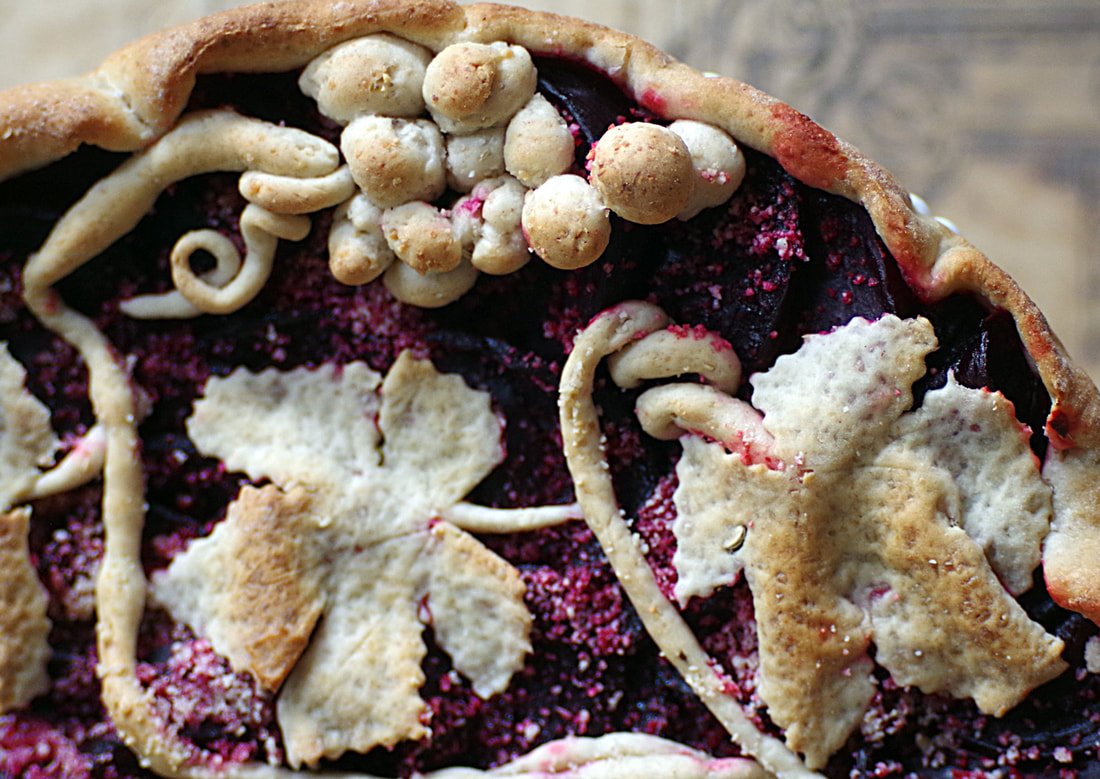 Just in time for the holidays... Autumn Beet Tart!
(Easier to say than Torta d'Autunno con Barbabietola, wouldn't you agree?) For the Crust: 1 cup of all purpose flour 3/4 cup almond flour 3 teaspoons yeast 1/4 cup water 4 tablespoons of cane sugar 2 tablespoons of extra virgin olive oil 1 teaspoon of ground fennel seeds 1 pinch of salt 1 beaten egg For the Filling: 2 large beet roots, steamed 1/2 brown sugar Directions
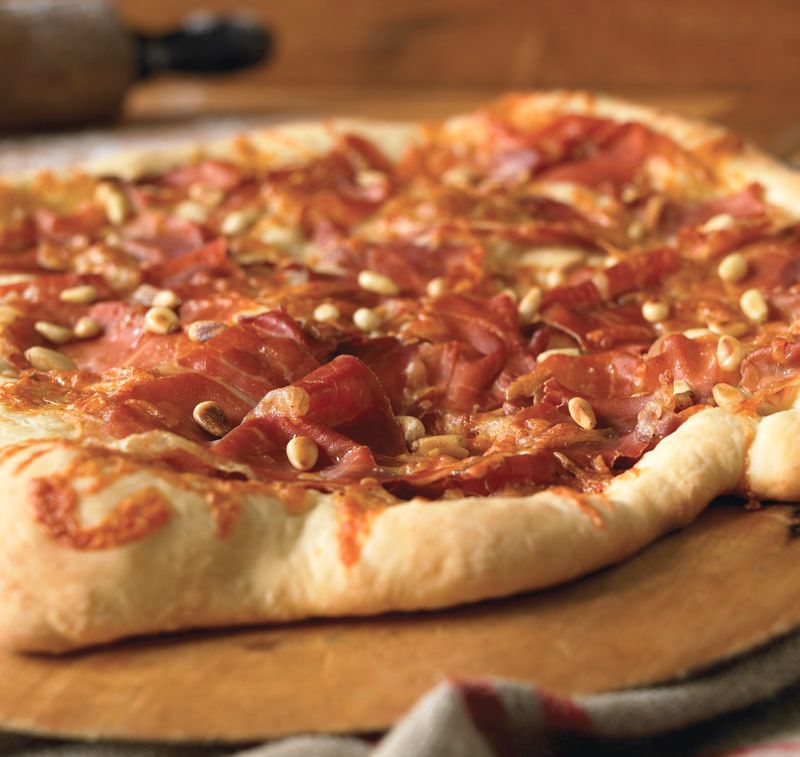
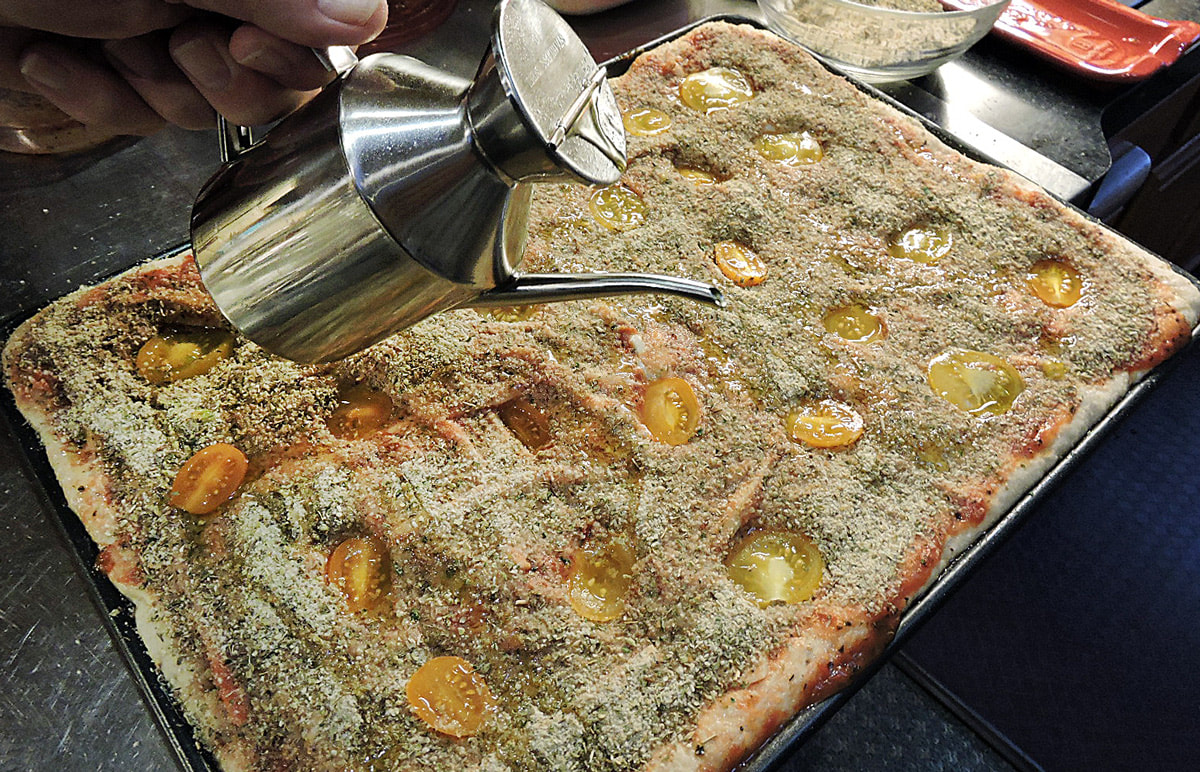 In Palermo there is a type of pizza that is similar to the thick, bready crust of focaccia, but unlike focaccia, it has tomato sauce on the top. Ingredients are usually put on in a reverse fashion--the mozzarella or caciocavallo cheese placed on the dough first with the sauce goes on top. What makes this pizza stand apart from others is the final topping: a healthy dusting of breadcrumbs, which turns this into a classic, Sicilian sfincione. There are derivatives of sfincione, like the tomato pies made around the Philadelphia and Trenton, New Jersey region. This cousin of sfincione is thick and bready, but has a solitary topping of thick tomato sauce with perhaps a sprinkling of grated parmesan cheese (if any) and is always served room temperature. Personally, the tomato pies I've had have been a bit too intense on tomato flavor. For my version of sfincione, I topped it with julienned slices of caciocavallo cheese and Italian style breadcrumbs. Of course, you can also put some stale ciabatta in a food processor and make a rough textured breadcrumb for the topping. I didn't overload my sfincione with breadcrumbs, but keep in mine, in Palermo they might put a fairly thick (1/4") topping of lightly toasted breadcrumbs on top. I made this during the late summer when I had an abundance of my Olivette Jaune heirloom tomatoes, so onto the top they went... Equipment Needed: 1-13x17" half sheet pan (dark colored to create a well baked crust) thin, cotton kitchen towel baking stone (better yet, a baking steel) Proofing the yeast 1 tablespoon active yeast 1 teaspoon sugar 1 - 1/2 cups water at 115F For the dough: 2-3 cups bread flour 1 teaspoon salt 1 tablespoon sugar 2 tablespoons extra virgin olive oil For the sauce: 28 ounce can crushed tomatoes (I recommend Tuttorosso brand) 4 small anchovies in oil 1 tablespoon sugar 2 tablespoons dry basil (or 8 large, fresh basil leaves, julienned) 2 tablespoons extra virgin olive oil Toppings: Thin slices of caciocavallo cheese (alternate, sharp provolone) 1-2 cups Italian style breadcrumbs (or 3 cups, rough chopped fresh breadcrumbs) 2 tablespoons Oregano (for mixing with bread crumbs) Yellow olive shaped tomatoes, halved Extra virgin olive oil Grated Parmigiano Reggiano or similar cheese Optional Toppings: caramelized onions, prosciutto, olives, pimentos, anchovies, fresh basil or oregano leaves. 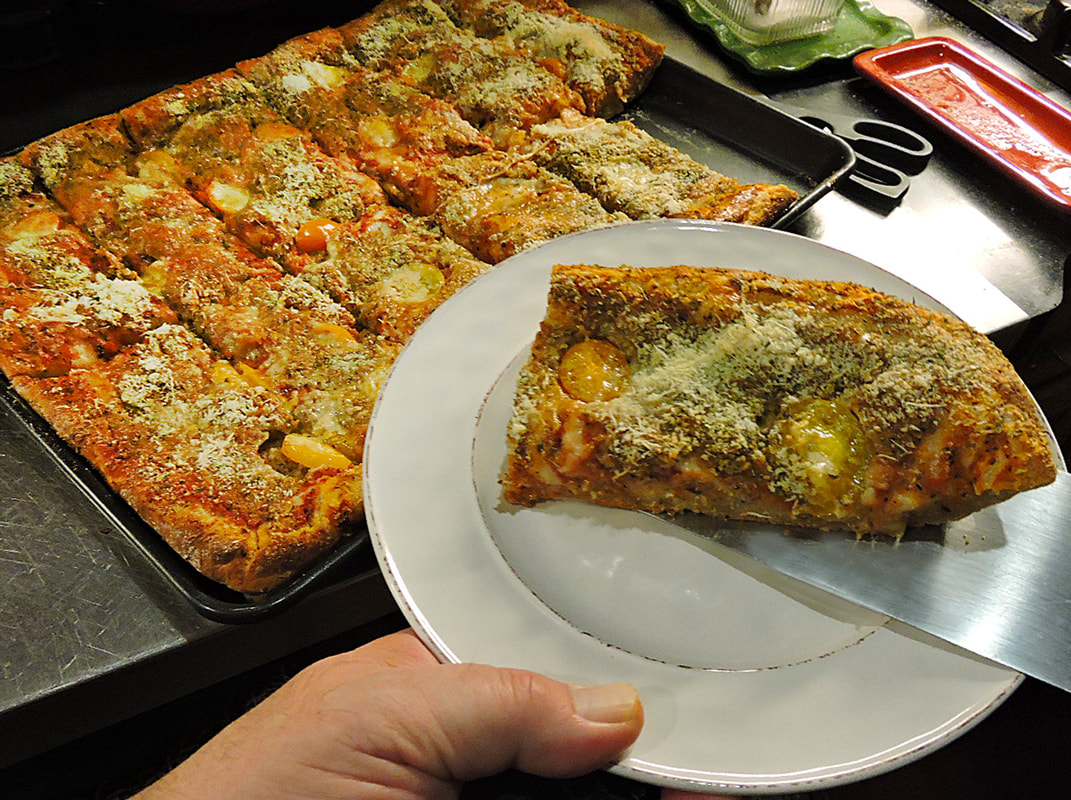 Making the Dough
To make the sauce:
 Putting together the Sfincione:
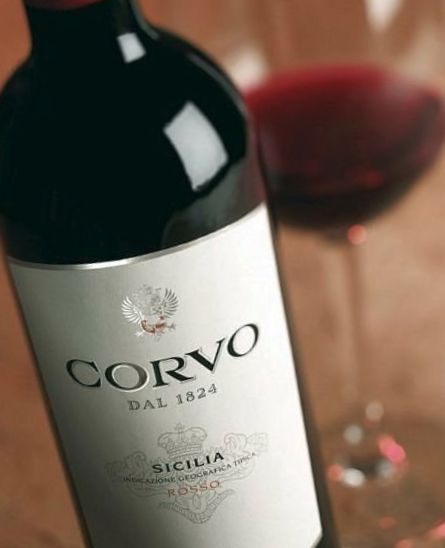
Slice your sfincione into squares or rectangles for serving with a simple salad and a glass of red Sicilian wine, such as Corvo Rosso. And don't forget, sfincione is traditionally served at Natale (Christmas) and the Italian father's day, la Festa di San Giuseppe on March 19th. Buon appetito! --Jerry Finzi You might also be interested in... How to Make a Great Pizza Crust Making the Best Pizza Sauce Our Double-Crust Pizza Rustica! My New Pizza Steel Our Deep Dish Pizza!
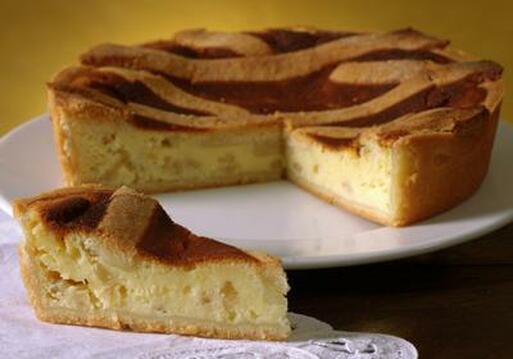
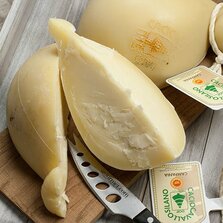 Caciocavallo Cheese 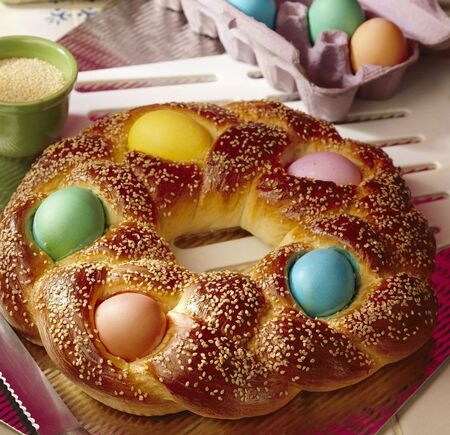 Easter is called Pasqua in Italy, and is a time for celebration and breaking the Lenten fast. In Italy, spring comes early, the weather is wonderful and the scent of flowers blossoming are everywhere. Pasqua is a time for feasting with la famiglia. The Monday after Easter Sunday is a national holiday called Pasquetta (Little Easter), when most businesses close and workers spend the day at home with their family. There are many types of celebration sweet pane (breads) and savory torte (cakes or tarts) in Italy, many of which made from family recipes handed down from generation to generation--often hundreds of years old. Some are known all over Italy while others are regional or local traditional recipes. One has to keep in mind, however, that even within each region there are variations in these recipes--often changing from town to town or family to family. Just keep in mind, it's all about the feast. Here are some of the more popular treats with links to their traditional Italian recipes. If you need translations you can always cut and paste the text of each recipe into Google Translate (or better yet, install a translation plug-in into your browser to do it automatically). Enjoy... and Buona Pasqua! 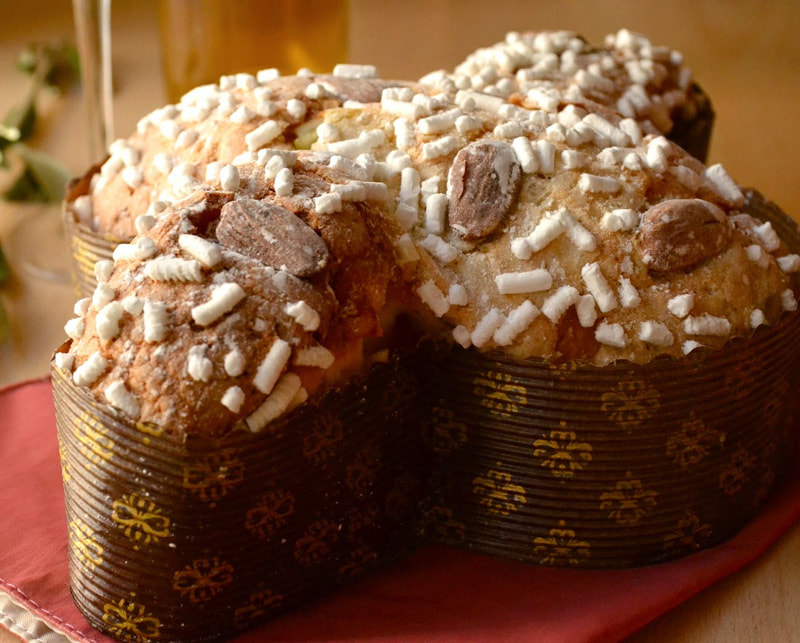 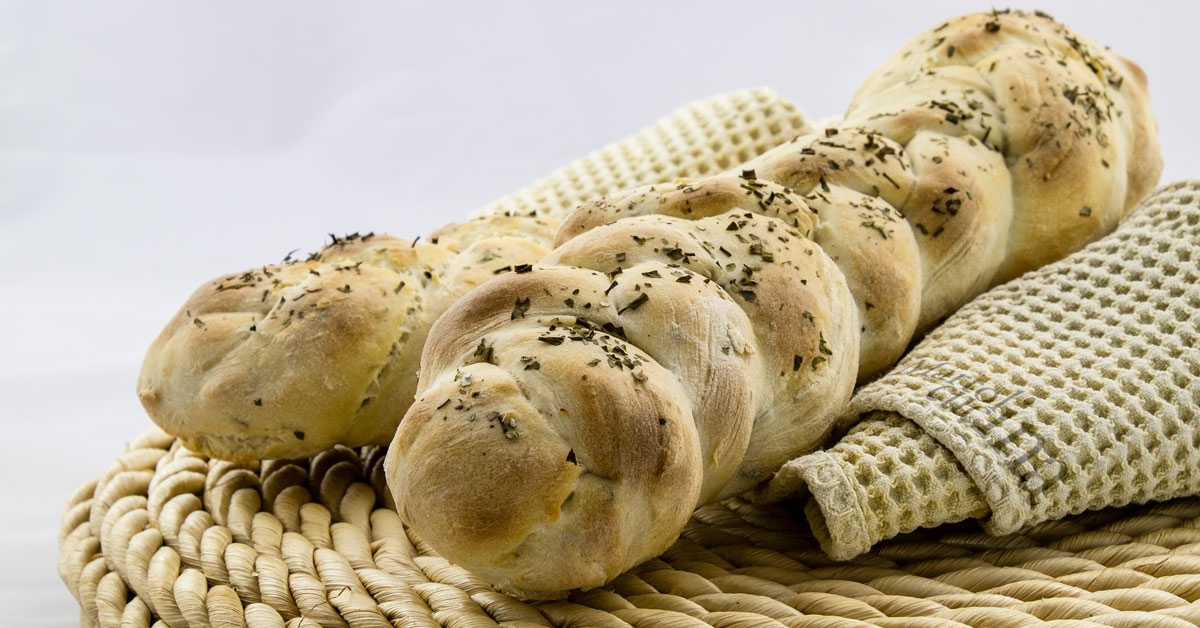 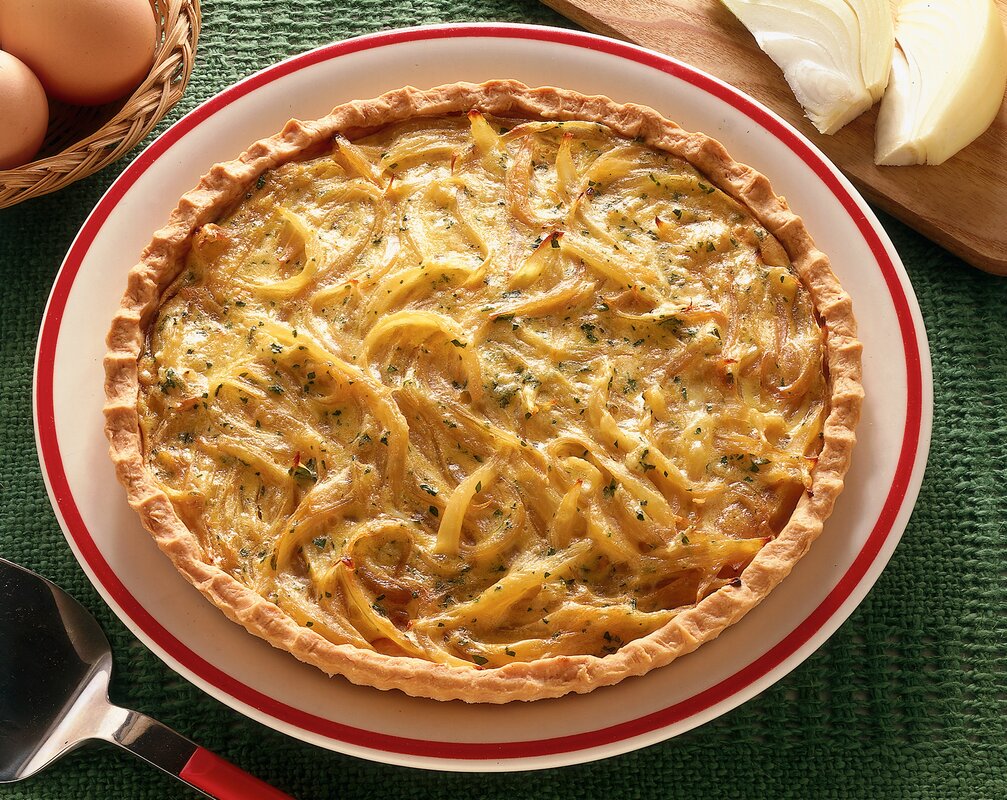 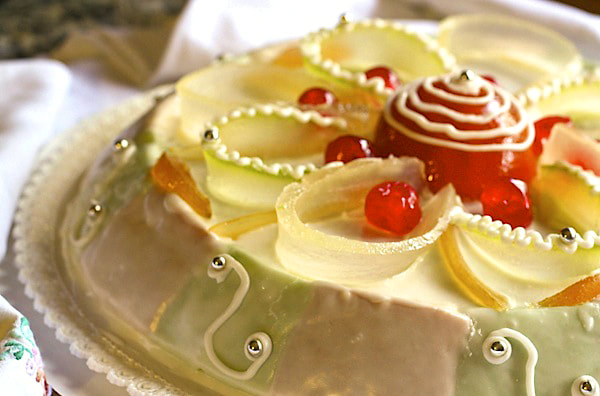 |

Archives
May 2024
Categories
All
|