 by Jerry Finzi For Valentine's Day, my wife treated us to a Beef Wellington dinner, prepared and delivered by a local chef. Even though she got rave reviews, we weren't really Wow'd. Having had Wellington in the past, I knew that there were a few things lacking... The cut of beef wasn't tender enough, the mushroom duxelle was a bit funky tasting, and it was missing a wrap of Parma ham inside the (greasy) pastry. Thinking I could do better, I started thinking... and thinking... Why not transform the Wellington into an Italian version? The idea was to design a recipe similar to Beef Wellington... but instead of using a tender loin steak inside, it would be a large, flattened Italian style polpette (meatball), wrapped in prosciutto and provolone cheese with an black olive/pesto Tapinade just inside the puff pastry. There are similar recipes in Italy called Polpettone in Crosta, but these are loaf-size meatloafs, often stuffed with hard boiled eggs or other ingredients. I wanted mine to remain a Polpette--a true meatball... I set out to make my Polpette alla Wellington! 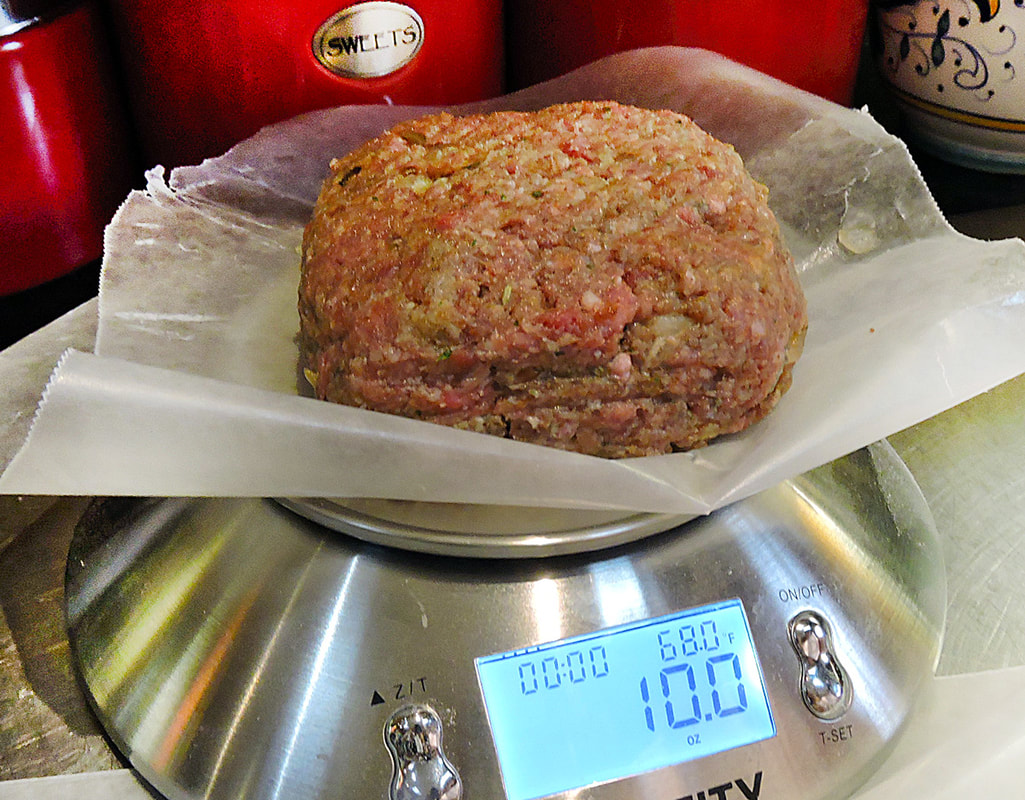 Each polpette weighed about 10 ounces Each polpette weighed about 10 ounces Ingredients for the Polpette 2 pounds ground chuck 1 medium Vidalia, small dice 1 egg 2 tablespoons red wine 1/3 cup finely grated Parmigiano Reggiano 1-1/4 cup breadcrumbs 1 teaspoon dried sage 1 tablespoon sea salt 1 teaspoon dry thyme 1 tablespoon dried basil 15 cracks black pepper (from a pepper-mill) 1 cup canola oil + 2 tablespoons olive oil for frying for the Tapinade 1 - 16 ounce can of black olives, well drained 2 tablespoons tomato paste 2 tablespoons pesto (from jar or Make it Fresh) 3 cloves fresh garlic, chopped 1/4 teaspoon red pepper flakes for the Pastry Wrap 4-6 slices delicatessen sharp provolone 1/4 pound prosciutto, speck or Boar Head Brand Piccolo Prosciutto 2 packages frozen puff pastry (butter or shortening type, your choice) 1 beaten egg (for egg wash) 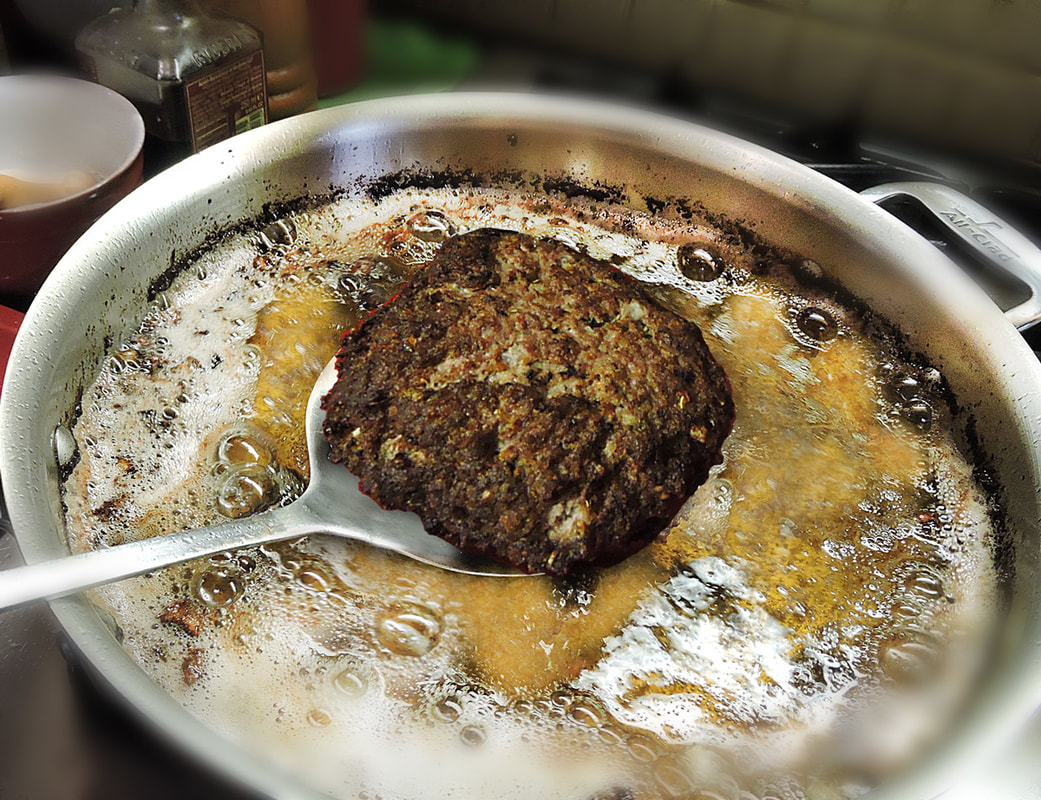 Removing the fried Polpette from the pan 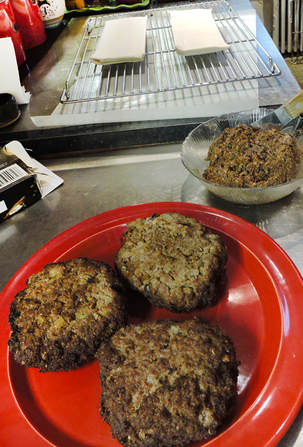 Directions
Frying the Polpette
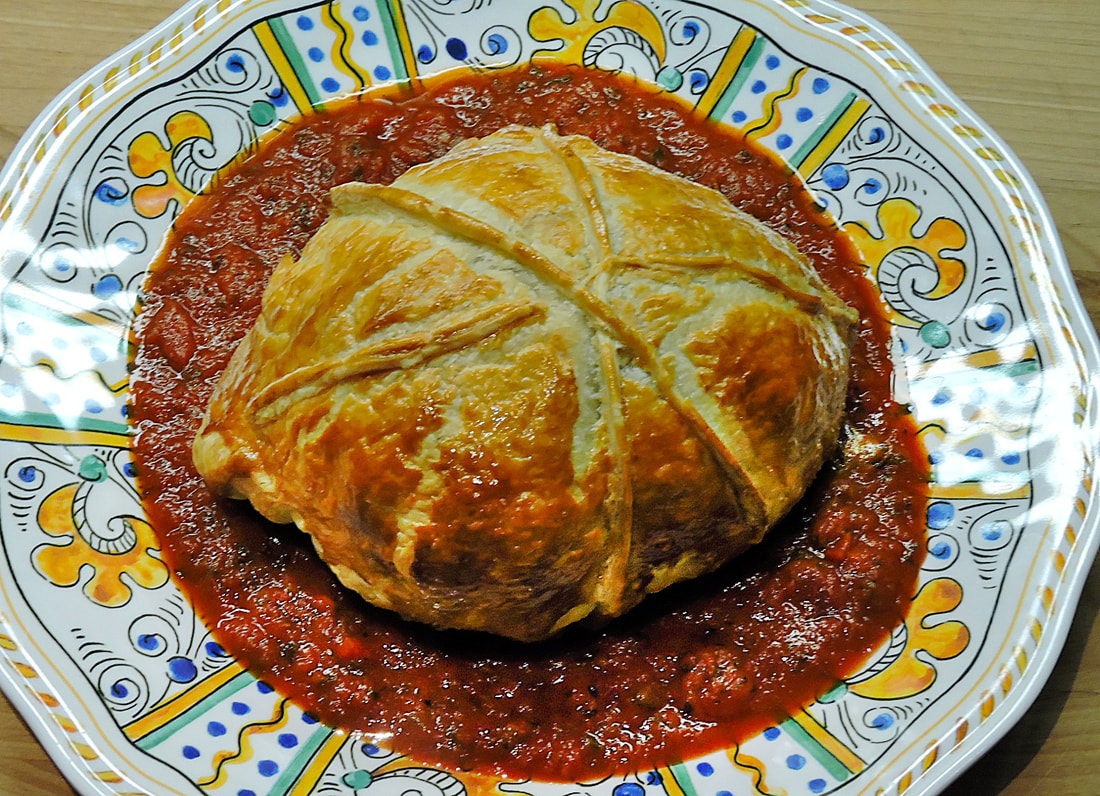
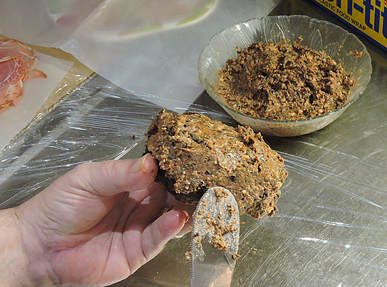 Coating the polpette with Tapinade Coating the polpette with Tapinade Making the Tapinade Next, to make the Tapinade, drain the olives and place into a food processor along with the pesto, tomato paste, garlic, red pepper flakes and Reggiano. Pulse several times to get a spreadable texture... but not too smooth. You might have to scrape down the sides of the mixer between pulses. 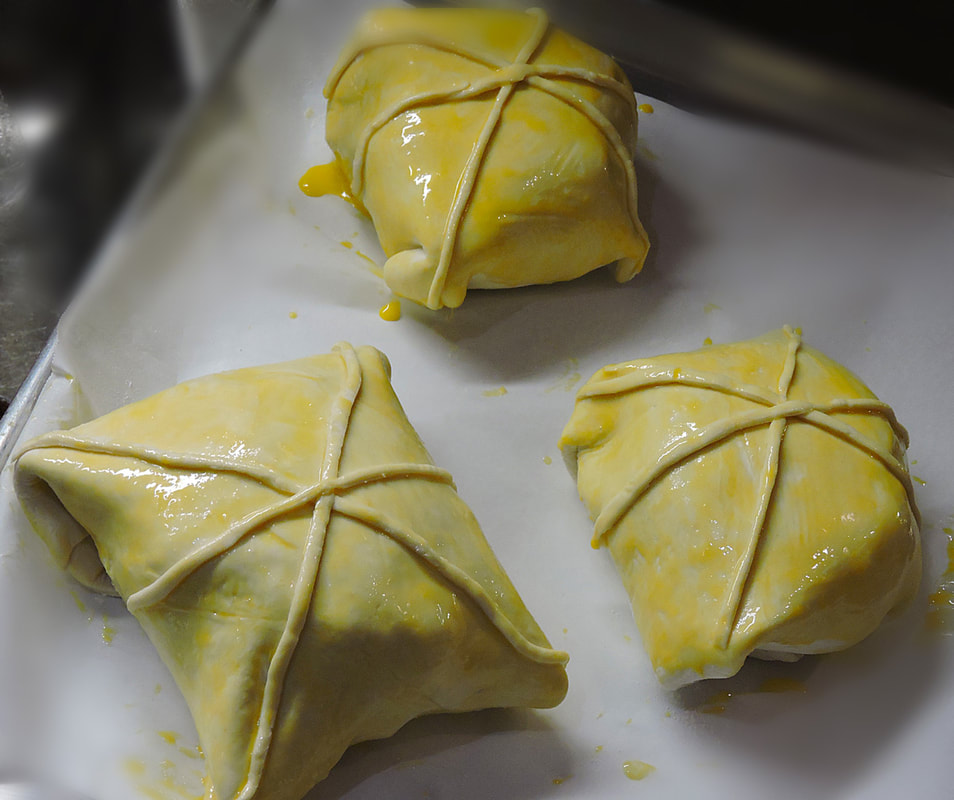 Wrapped and egg-washed, ready for the oven Assembling the Wellingtons
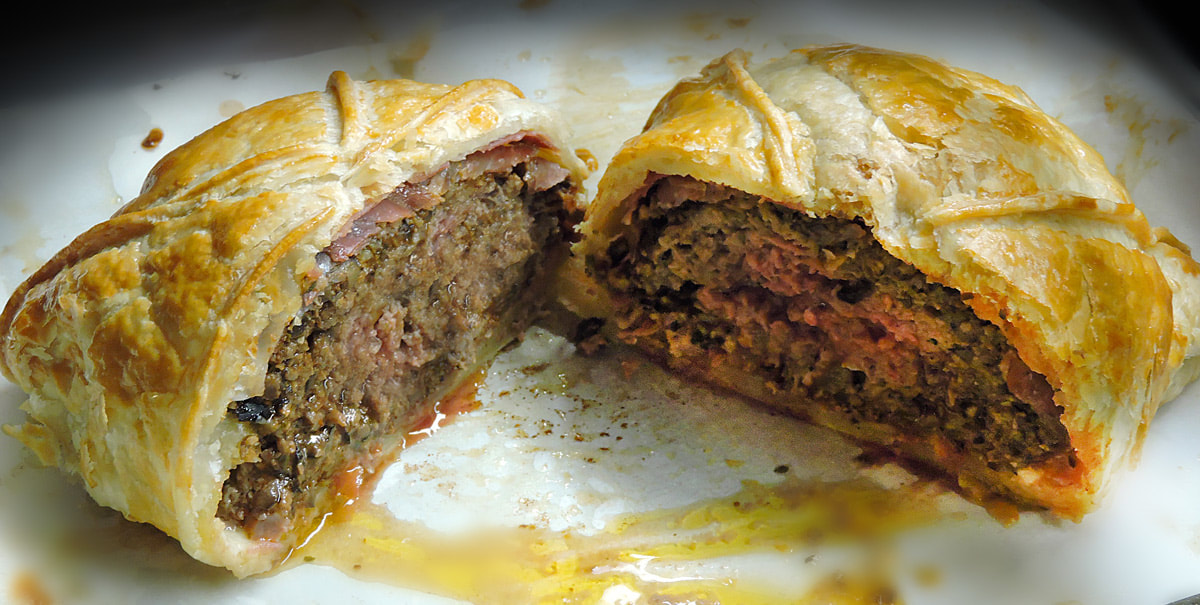 Half of this size Wellington was perfect for each person You can serve your Polpette alla Wellington over a bed of marinara, as we did for one meal, but to be honest, we thought the tomato sauce masked some of the flavors. Also, even though I made the size of our polpette match the size of most beef tenders used to make a traditional Wellington, we felt the serving was too large. If we make this again, we would serve as we did for our second "leftover" meal--each serving was one-half a Wellington. In fact, the second meal we served with a side of Italian flat beans and no tomato sauce. We actually enjoyed this meal much better... the Tapinade's flavors came to the forefront and the spices in the polpette were obvious. The half-sized servings were a perfect portion. I actually thought that 2 days later, after setting up in the fridge, wrapped in foil, the flavors melded and intensified a bit. We re-heated the leftover halves in loosely wrapped foil for one hour. If we make this recipe again, we will make smaller Polpette so each person can have a completely pastry-wrapped Wellington. Enjoy this recipe and let us know how yours turned out! © GVI 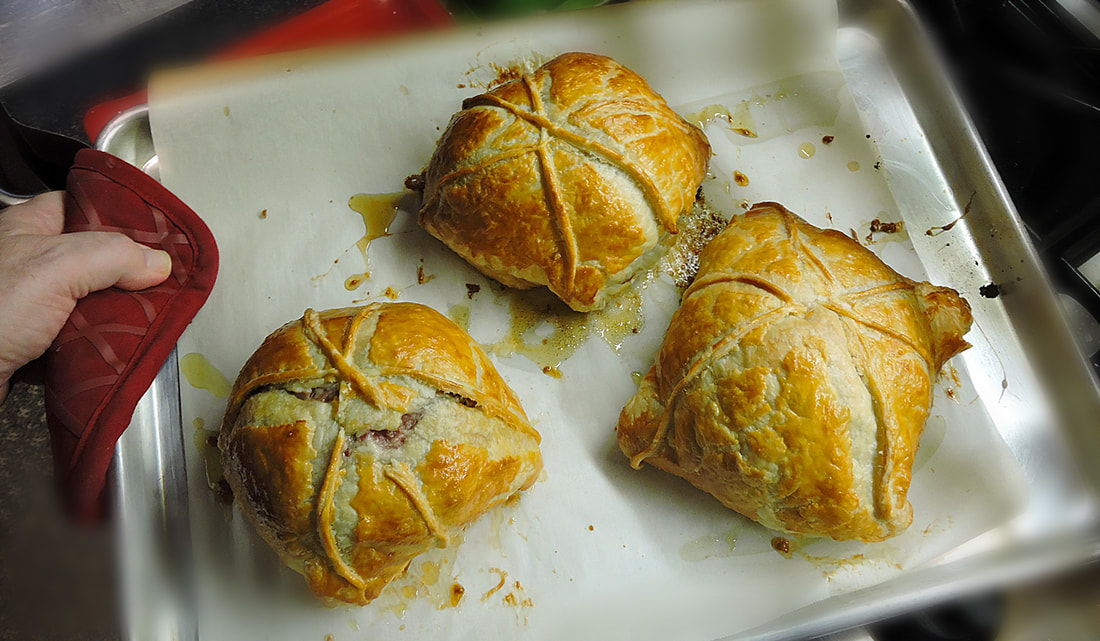 Fresh out of the oven: The two on the left were half-sheets of pastry that were rolled out a bit to fit. They puffed less than the one on the right which wasn't rolled out.   by Jerry Finzi While exploring the villages of the Amalfi Coast, Voyagers are certain to notice that the lemons there are larger than they are used to. They are sure to come across the Sfusato lemon (about two to three times the size of a supermarket lemon) and will be further shocked when they are confronted with the giant-sized, Cedro Citron variety of lemons. They are beastly looking things, with a pebbly surface, strange shapes with a large nipple at one end, and are often as big as your head! 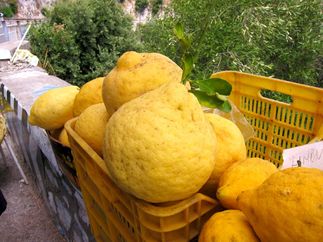 Cedri are primarily found in Italy, from the Italian Riviera down to the Amalfi Coast, though they are occasionally spotted in France, Isreal and even exported to Britain. There are three different citron types: acidic, non-acidic and pulpless. Of the different cultivars, the acidic Diamante is more common in Italy. Cedro citrons are usually up to three to four times the length of common lemons and can measure between 10 and 15 inches in diameter. They can weight up to 3-4 pounds each. The pebbly surface ripens from green to a bright yellow--both colors can be harvested, the peak season being fall and winter. Most--about 70%--of the lemon is white pith from 2-5 inches thick with a soft texture and almost sweet lemony fragrance. In its center is a small amount of segmented pulp with a few pale seeds. This lemon is fairly dry and not used for its juice and the taste is milder than a common lemon.  The pith can be eaten raw or cooked: in salads, atop bruschetta, in jams and preserves, in risotto or pickled. The rind of this citron is very aromatic and a bit sweet, and is used to produce "citron", or candied lemon (used in Italian celebration breads and cakes, like panettone). Some claim it can be a remedy for hangovers, coughs and indigestion. Since the Renaissance, the oils from the skin have also been used in perfumery and cosmetics due to their delicate and fragrant scent. If cooking while in Italy (or if you can get some cedri at home), try these recipes: Risotto alla Sorrento with Fennel and Sage  1 Cedro lemon 1-1/2 cups rice for risotto (Carnaroli, Vialone Nano or Arborio) 1-1/4 cups freshly grated parmesan 1 tablespoon unsalted butter, plus another tablespoon to finish 4 tablespoons Extra virgin olive oil 1 head of finoccio (bulbing fennel) - finely diced 3 stalks celery - finely diced 1 cup white white Vermouth 1 quart chicken stock 4 large julienned sage leaves (or 1/2 teaspoon dried-crushed) Sea salt and freshly ground black pepper to taste Directions
Candied Chocolate Cedro Strips Recipe  (A great holiday snack) 1 - 2 pound cedro 1 cup sugar 1 pint water 3-5 ounces bitter sweet chocolate
You can store these in an airtight container and serve at the end of a meal with fruit, nuts, biscotti and espresso. © GVI 2018 You might also be interest in:
When Life Gives Them Lemons, Italians Make Limoncello Amalfi Lemon and Chicken Pasta Lemon and Turkey Pasta with Prosecco 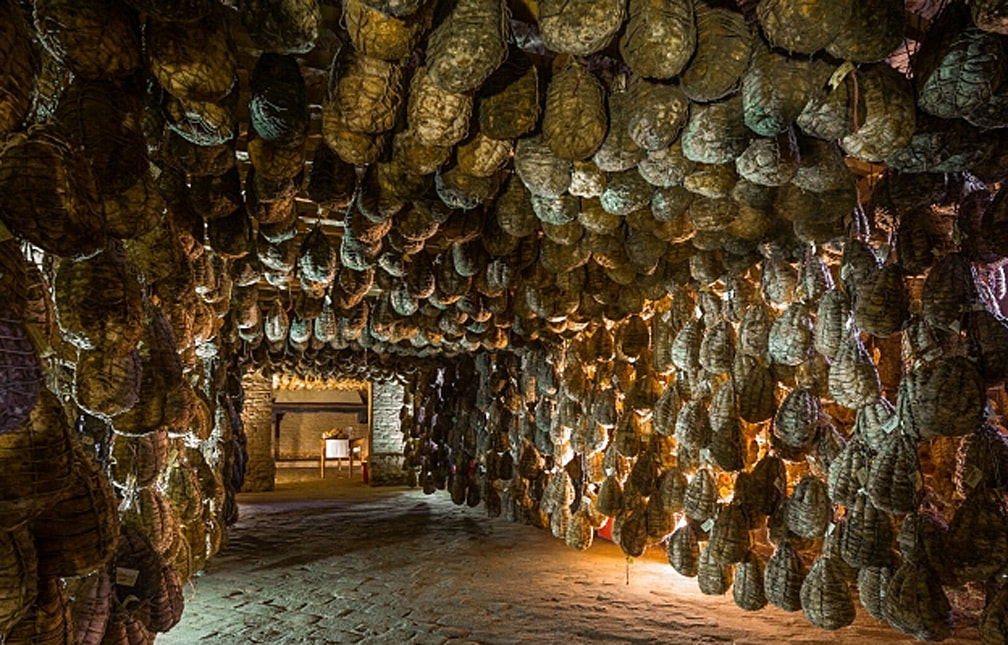 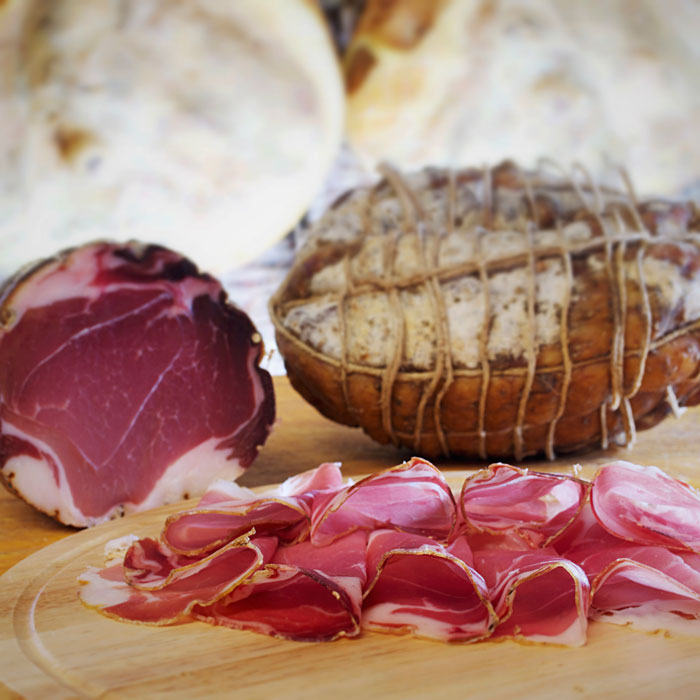 Culatello is one of the most prized salumi in Italy, dating back to the 15th century. Culatello is produced in the flatlands located north of Parma, near the Po River. The city of Zibello is epicenter of production (Culatello di Zibello), due to its particular climate that is ideal for aging the meat. The thick fog that rolls off the Po and the biting cold of the winter give culatello its characteristic sweetness and fragrance. Culatello is made with the muscular part of the hind leg of pigs that were born, raised and slaughtered exclusively in Emilia Romagna and Lombardy. The meat is then processed in the communes of Polesine, Busseto, Zibello, Soragna, Roccabianca, San Secondo, Sissa and Colorno, in the province of Parma. The thigh is skinned and de-boned, and the best part, or heart, is removed and salted immediately. Twine is then wrapped around the meat in a spiral fashion, giving the culatello its signature pear shape. The meat is left to rest and after a couple of days it is massaged, causing the salt to further penetrate the meat. The culatello is left to rest again, in a cold environment, and is then encased in a clean, dry pork bladder and tied up well. At this point, the culatello is placed in humid, room-temperature cellar for at least 12 months. Once it has been aged, the culatello should weigh between 6 ½ and 11 lbs and have kept its characteristic pear shape. Parma versus Colatello Parma ham is sweet and tender. Culatello is a bit saltier than Parma ham, with lots of flavor that comes out when chewing it--rich and sometimes peppery and aromatic. D.O.P. culatello on AMAZON. 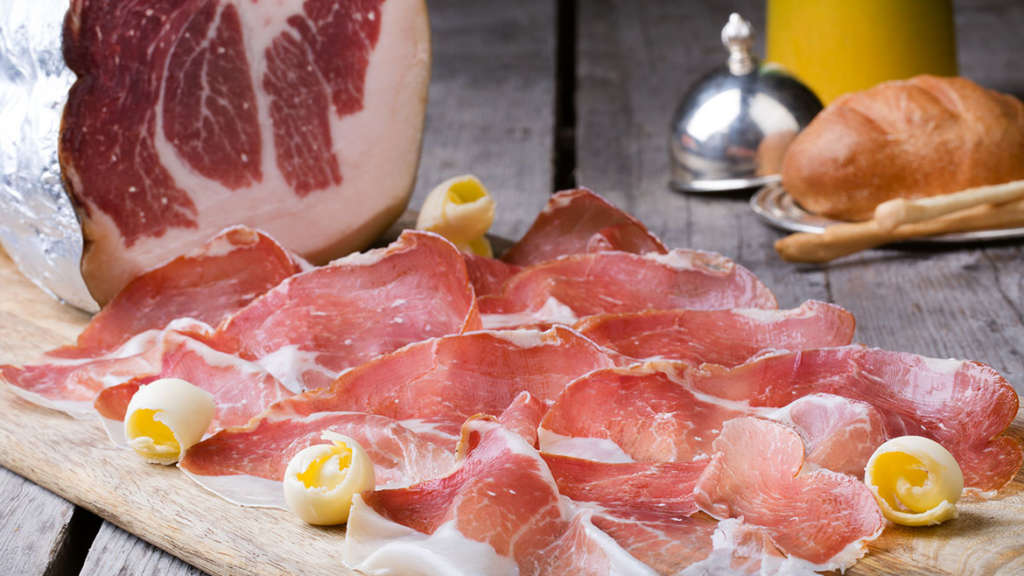 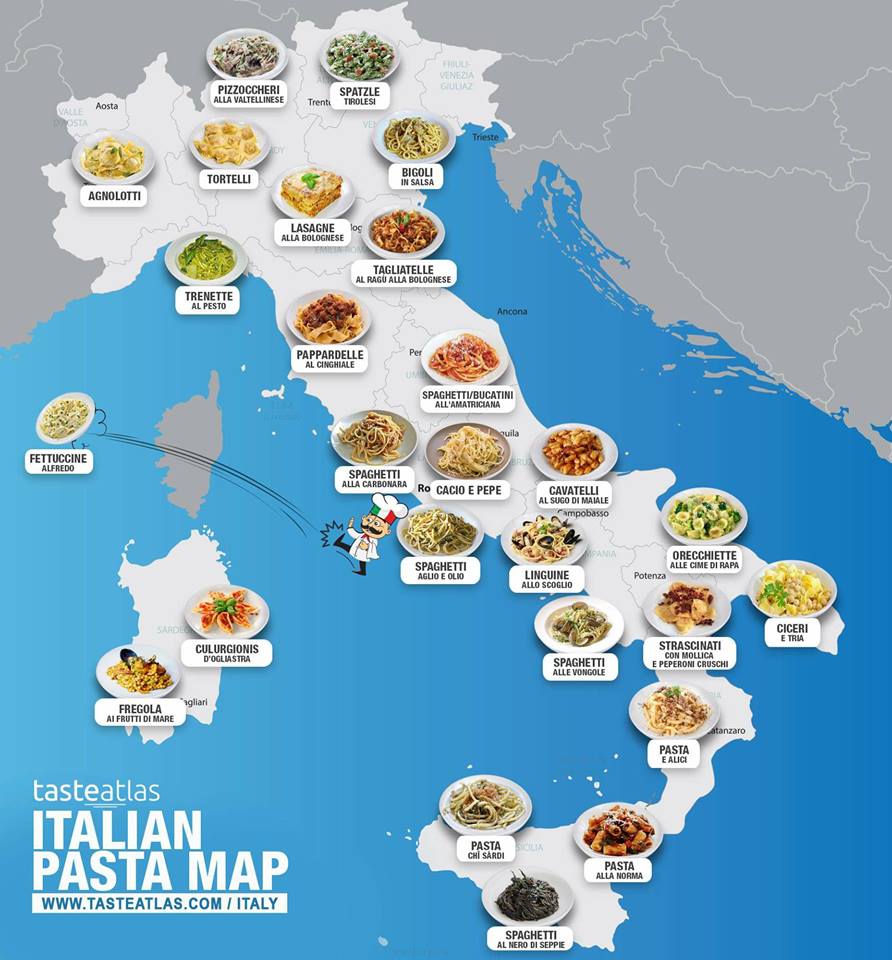 Map courtesy of TasteAtlas.com, a great website that is map-driven. Zoom in on a part of Italy that interests you, and click on links to various food specialties and recipes from that region.
  on AMAZON on AMAZON Beef Ragu over Cheesy Polenta
A rustic, belly-filling recipe from simple ingredients. The cook time from pan to table is under an hour, so it's great for a quick family meal during the workweek... Ingredients Polenta
Directions
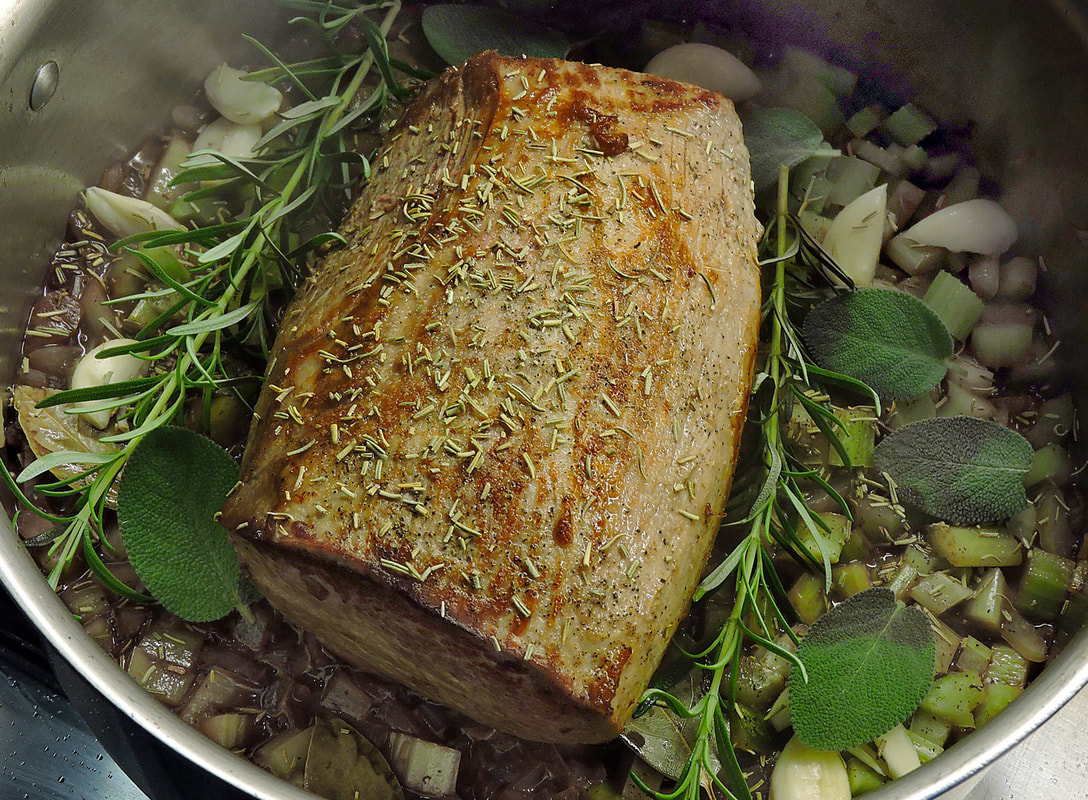
--Jerry Finzi  Of course, I was first introduced to pot roast by my Mom, but being a working mother, she always looked for shortcuts--a big thing for Moms back in the 50s and sixties. Although it was delicious, her shortcut was to use cans of Campbell's Onion Soup and to cook it in her very scary, rattling pressure cooker (Mom managed to blow up a few of those beasts). Even as I moved on to my own life, he loved making this for me as a special treat, believing it was my "favorite" meal. (I really liked her lasagna much better). Well into my thirties, as I developed my own culinary skills, I wanted something more authentic, so I opted for using sweet onions like Vidalia or Walla Walla to add a sweet, deep flavor to my version. In recent years, I've developed my Italian Style Pot Roast, reminiscent of Sugo (Sunday Gravy), but with a much lighter stew type sauce. In Italy, this type of recipe is called Stracotto (literally, overcooked), because of its slow cook time. Another name for this recipe, or rather, style of preparation is simply Brasato di Manzo (braised beef).  Simple ingredients, make a robust meal To ensure that the meat is tender, you should plan this as a weekend meal, allowing most of the afternoon to slow cook the roast on a gas range (OK, electric would be fine also). Yes, as my mother did, this pot roast isn't done in the oven but rather in a heavy pot on a cooktop. This method takes a minimum of 4 hours of slow-cooking. Technically, it's a braise and not a true roast. (One day soon I should show you how I do my Dad's Oven Roasted Beef). I cook mine in our tri-bond, stainless steel, flat-bottomed All-Clad Stockpot, rather than our Dutch oven. I find the wider base spreads the heat out rather than concentrating it in the center, as the narrow-bottomed Dutch oven does. (Which would tighten the proteins in the beef rather than relax them). I also use a heavy cast iron Heat Diffuser over our medium diameter gas burner to diffuse the heat even further. I suppose I could also use one of our other options, like our Staub Coq au Vin Cocotte or our Emile Henry Brasier (for a smaller roast) but I like working with steel. 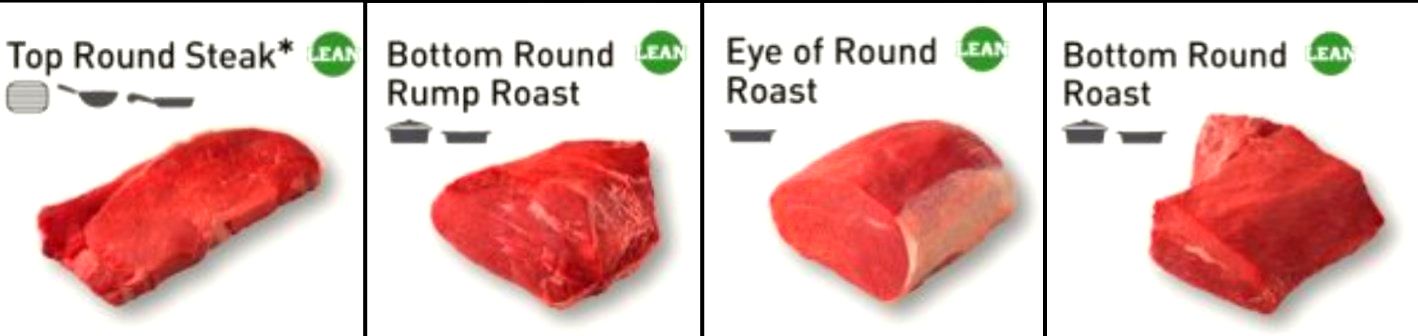 What Cut of Beef? You will see cuts of beef labeled "chuck roast" in the supermarket, but you can use pretty much any type of beef--as long as it's a tough cut--not tender. A slow cooking time and very low temperature really define the process--not the cut of beef. Pot roast is a braise (slow cooked in liquid) that cooks at a low temperature for a long period of time. The tougher cuts work best because the slow cooking gently breaks down the proteins and collagen, giving you a luscious, nearly-fall apart, fork-cutting texture. These cuts are from the parts of the animal that are very muscular with lots of connective tissue and very little fat. If you quickly grilled these cuts, the result would be very tough. The following three cuts will all make a fine pot roast:
 Ingredients
  Heat Diffuser Heat Diffuser Directions
Allora... Buon appitito! Don't forget to write and tell me how yours turned out... --Jerry Finzi GVI CUCINA HACK In this recipe, I shared the trick of thickening with breadcrumbs, which gives a rustic charm to the dish. Of course, if you'd like a richer, even more tomato-y version, you can thicken the sauce during cooking by adding a little tomato paste--perhaps a couple of tablespoons. You can also thicken by using cornstarch... dissolve a tablespoon of cornstarch in a 1/4 cup of cold water and then stir it into the hot, bubbling sauce while stirring to distribute it. (High heat is needed for it to thicken). 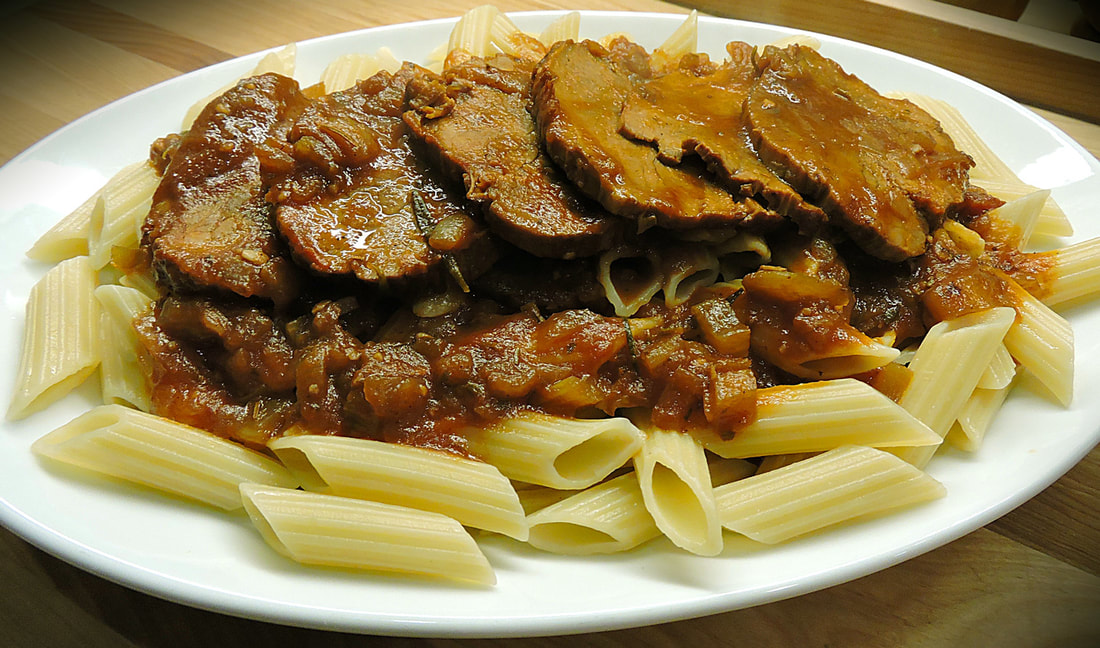 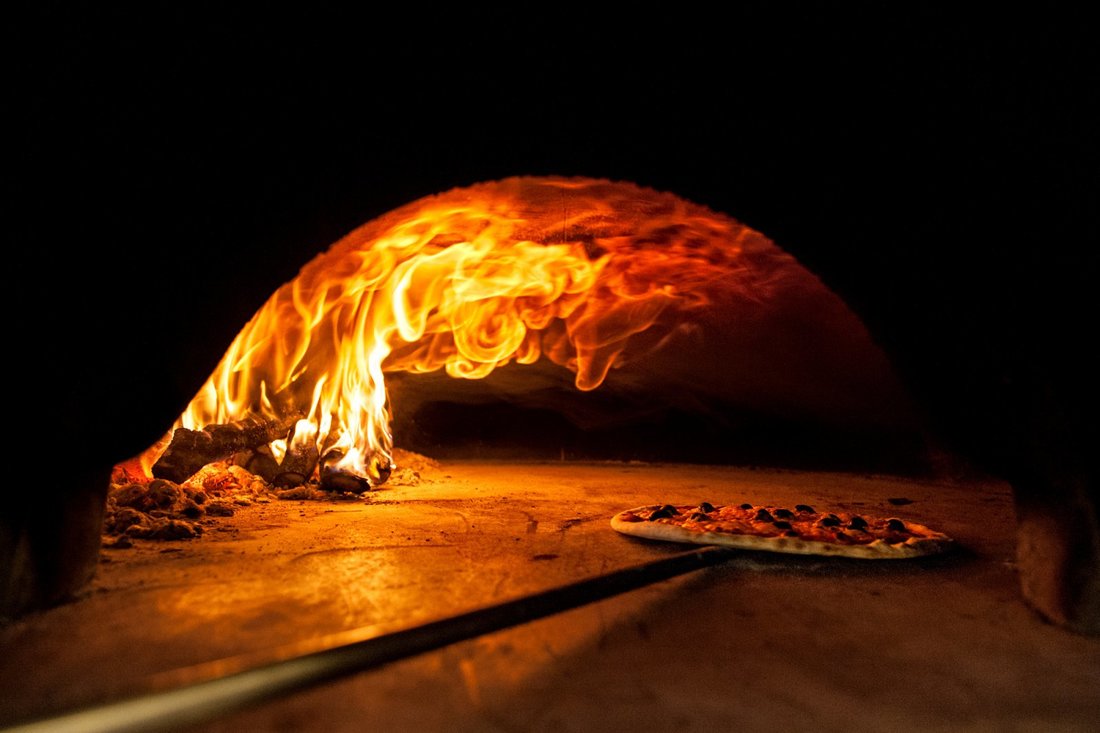  One of many ovens at Pompeii One of many ovens at Pompeii Excerpt from an article by Kristan Melia on Culinary Backstreets/Naples There is evidence that wood-fired ovens similar to the ones used in Naples today were employed by the Ancient Greeks, and some assume that Greek mariners brought this technology with them to the city. Thanks to Vesuvius’ explosive eruption in 79 AD, we can turn to Pompeii for gustatory evidence. Archeologists have unearthed 33 domed clay ovens, complete with chimneys, on the grounds of Pompeii. We know that bread was an important part of the Pompeian diet. The very volcano that would eventually lead to Pompeii’s demise actually contributed to her rise as an early producer of baked goods. The Greek geographer, philosopher and historian Strabo observed that the area around Pompeii and Naples as a result of the soil’s volcanic fecundity, was “the most blessed of all plains, and round about it lie fruitful hills.” It turns out the slopes of Vesuvius were ideal for the growth of cereal grains, and that bread was to become a symbol of Pompeii. An engraving on the entrance to the walled town reads matter-of-factly, “Traveler, you enjoy bread at Pompeii.” The process of grinding the grain to make the bread was arduous. However, the volcanic black lava rock of the region was ideal for shaping tools to grind the local cereals. The practice of crushing, grinding and pounding wheat through a mill was known as pistor and by 160 BC, as Cato documents, the tradesmen responsible for this grinding were known as pistore. When coupled with the ingenious design of the beehive clay oven with chimney, this gave rise to the baking of deceivingly simple, pliable, leavened breads called pinse, so named for the grinding and pounding required to produce them. The pinse would travel through the Roman Empire; years later, we would know its cousins as pissaladiere in Provence, pita in the Middle East and pizza in Naples. 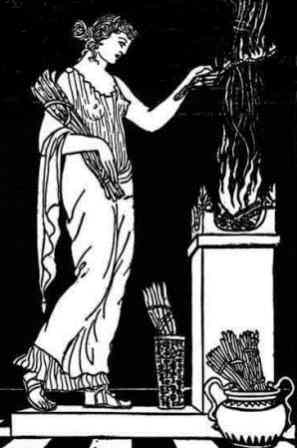 Vesta Vesta In the early days of bread baking in Pompeii, pistore worshiped the god Fornax, the ancient personification of the oven. It is from Fornax that we also derive the word forno (oven), as in forno a legna (wood oven). Every year on February 17, Pompeii’s guild of oven tenders celebrated Fornacalia, lighting and feeding fires in much the same way modern Neapolitans light fires in commemoration of Saint Anthony the Abbot’s day. Years later, Pompeii’s bakers would switch their pious devotions to the goddess Vesta, protector of the hearth – perhaps a testament to the reverence they harbored for the fire that fueled their precious ovens. For all the early success Vesuvius afforded Pompeii’s vibrant grain economy, the volcano would eventually become the town’s undoing. But the traditions of the pistore live on today in the ancient vicolos and back alleys that thread through Naples’ historic center. CLICK HERE TO READ MORE... 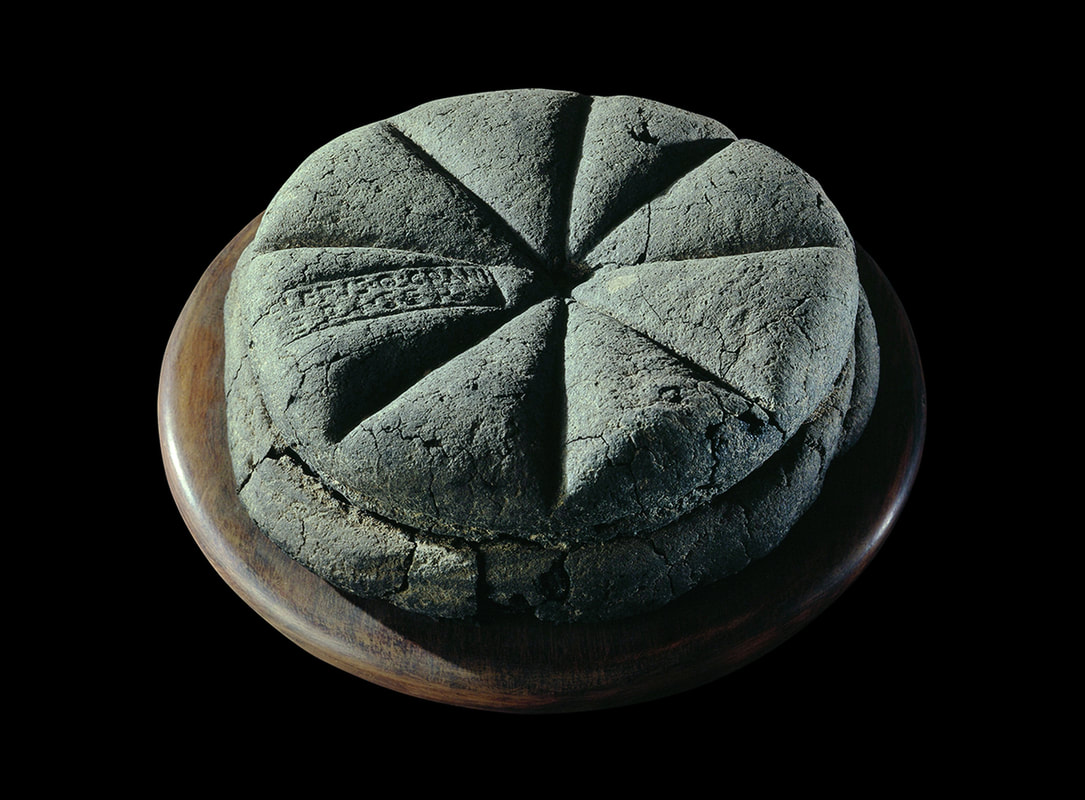 A carbonized loaf of bread with the stamp 'Property of Celer, Slave of Q. Granius Verus', Herculaneum (near Pompeii), 79 AD |

Archives
May 2024
Categories
All
|