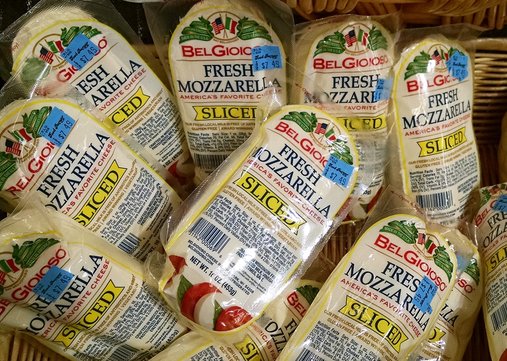
  I just wanted to post a quick review of Sliced Bel Gioioso "Fresh" Mozzarella. I don't know what I was thinking when I threw this into my shopping cart. I usually don't buy fresh mozzarella from a supermarket, but instead buy it from a local Italian specialties shop. I actually prefer the dryer packaged skim mozzarella, smoked mozzarella fontina or provolone on my pizzas. To be honest, I didn't even notice that it was pre-sliced--in other words, they charged even more money for them slicing it for you at the factory. Heck, I haven't even bought "Sugar & Cinnamon" in over 30 years, or "thin sliced pork chops" either... I hate paying extra for something that is simple to do at home.
Anyway, back to the cheese itself. I think it was two Saturdays ago, I took it out and thought I'd use it to make a classic Pizza Neapolitana. What a mistake. First of all, the slices are way too thick (5/8") to just thrown on a pizza... I trimmed them down using safe knife skills and one of my scalloped chef knives. (Still, this was difficult). Next, the texture was like tofu. Very fake and plastic. The melt happened only toward the end of my 5 minute bake time, and even then I had to put the oven on broil to help them melt down more. As for the taste... well, I wish there was a taste. I've never tasted such a bland mozzarella in my life. It definitely needed salt. Most mozzarella will have up to 200 mg of salt. This one contains less than half that at 85 mg. Fresh mozzarella (the really good stuff) might have salt added at both the curd stage and the hot brine-pulling stage. In the end, the melt on the pizza was not pleasant. It actually cooled down unusually fast and solidified again... the gooey-ness was never really there. So, because of it's plastic texture, the lack of a good melt and the bland flavor, I give it only one out of five Boccas. One final comment: The beautiful sounding "Bel Gioioso" name doesn't quite cut it for a mozzarella made in Wisconsin. It's just a made up marketing name that means "joyful beautiful" in Italian. Sorry. It's neither. --Jerry Finzi 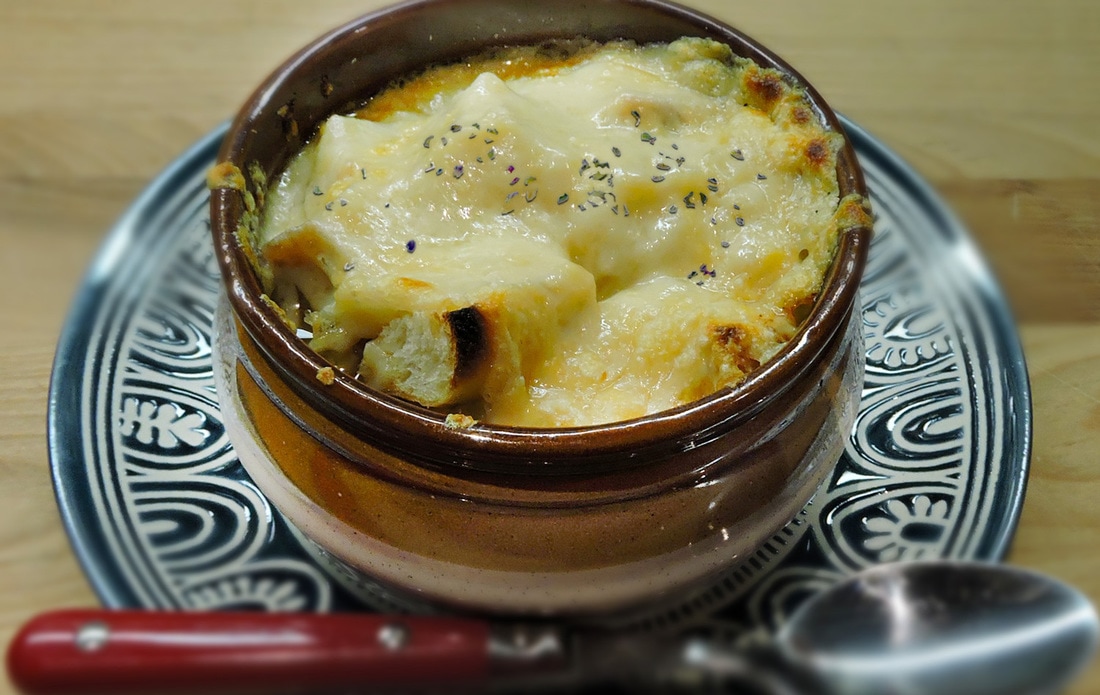 We've been making authentic French Onion Soup for many years, mostly using Julia Child's techniques and ingredients. The last few years, I discovered that I preferred using a sharp Provolone cheese in place of the usual Gruyere, putting a slight Italian touch on the dish. But this year, I though I'd see just how Italian I could go, making our Zuppa di Cipolle Italiano. So first, instead of any type of onion, I thought I'd use my favorite sweet onion... Vidalia. It sounds Italian, doesn't it? I know, I know, the name isn't Italian--they are named after a town in Georgia, but they are very sweet. I thought I'd also swap out the Vermouth for Italian sweet Marsala wine. The two have very similar flavor profiles. I usually use a Cognac like in the original Child recipe, but this time I'd use Grappa. Pepperoncino (red pepper flakes) would add a bit of heat in the soup itself, and for the cheese, I would use creamy Italian Fontina... a sprinkle of Oregano to top it off. I always hated the way most restaurants put one large, crusty-edged, crock-filling slab of bread on top of the soup, and then melt the cheese on top of that. First, it's nearly impossible--using a spoon--to cut a small piece of bread from the crusty, toasted slab. Secondly, the cheese often melted into a solid mat on top of the bread, often coming up in a thick sheet when you're trying to get just a small amount on your spoon. I've eaten French Onion Soup (they just call it "Onion Soup") in France where the cheese was grated and melted down into the soup, forming creamy strands of cheese that mixed with every spoonful. For the bread, I wouldn't use French baguettes slabs, but cubes of ciabatta. In this way, each and every spoonful gets some soup and a piece of bread, with the added bonus of the cheese melting down into the soup and becoming part of it. If you gently push the bread cubes down into the soup before putting the shredded Fontina on top, you'll get a texture similar to some of the bread soups alla povera (peasant style) I've had in Italy. The other thing I changed was the texture and cut of the onions themselves. I've had some versions where the onions were cut so thick and in such long strands that they attempt to choke you as you swallow--especially if they weren't property caramelized. So, my method is taking half of the onions and cutting them into a dice, with the second half cut in quarter-circles, so the strands are much shorter. In this way, you still have a decent texture, but with the diced onions permeating every part of the soup.
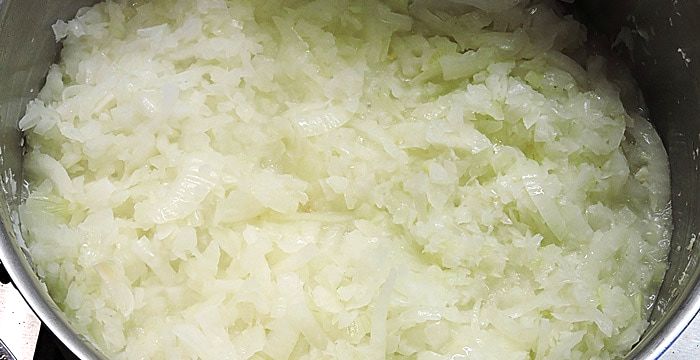
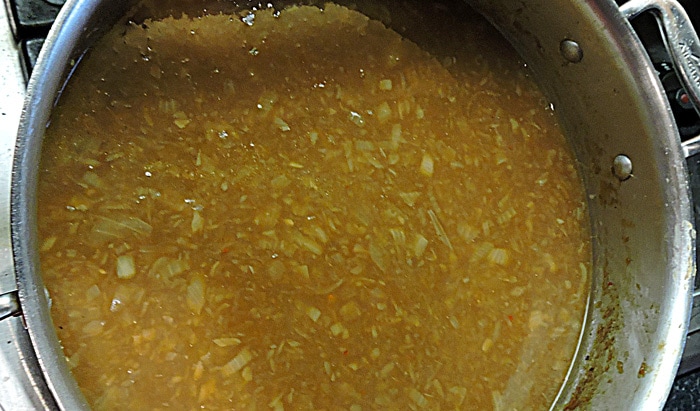
 Ingredients 8 cups onions (about 3 pounds), half diced/half quarter-julienne 2 tablespoons butter 2 tablespoons Extra Virgin Olive Oil 1/2 teaspoon salt 2 tablespoons sugar (to help with caramelizing the onions) 1 teaspoon pepperoncino (red pepper flakes) 2 tablespoons flour 64 ounces (8 cups) beef stock (2 cups should be hot) 4 tablespoons Cognac, Brandy or Grappa 1-1/2 cups sweet Marsala wine (the real wine, NOT a "cooking Marsala") 1 leftover rind of Parmigiano Reggiano (or cut the rind from a new wedge) Salt and fresh ground black pepper at the end to adjust the finished flavor 1 loaf of Ciabatta bread, cubed as need Fontina (we used Bel Gioioso brand, or Fontina Val d'Aosta if you can find some) Oregano for dusting the finished soup 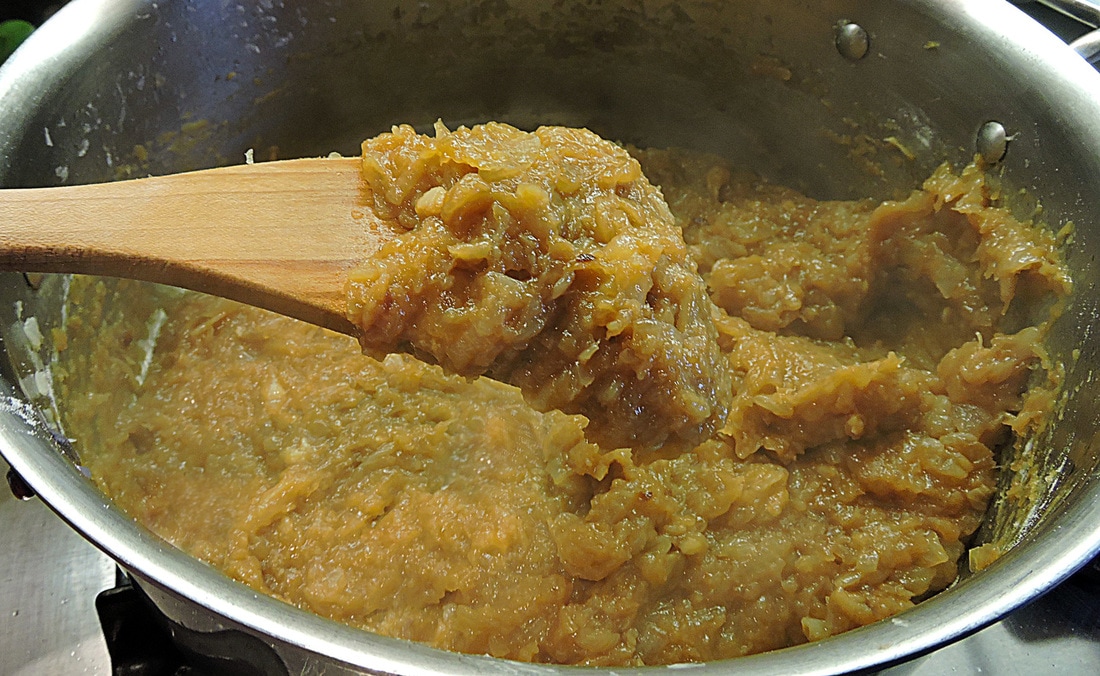 The finished caramelized onions after the flour was added.
When the soup is finished, taste it and adjust for salt and ground black pepper. I added only about 1 teaspoon of sea salt to mine, but it depends on if the stock was salty or not. Trust your palette. In the end, I think I added about 20 cracks of black pepper. 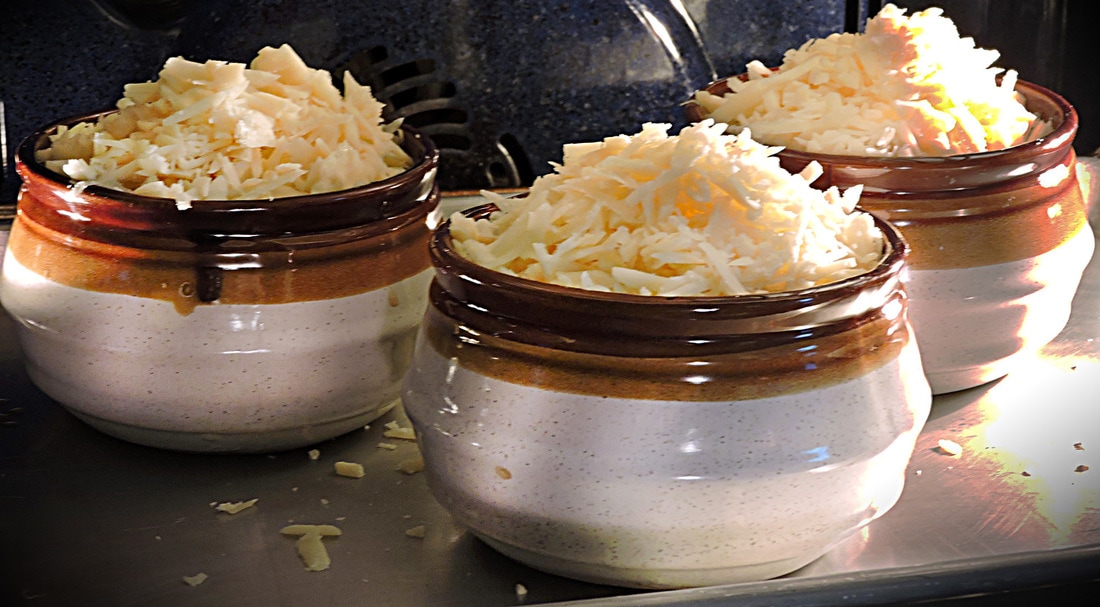 Ready for the broiler 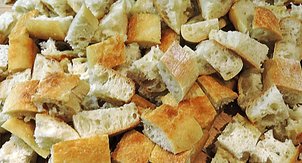 Ready to Serve
There you have it. The taste is luscious, rustic, hearty, sweet and definitely more Italiano than French. I hope you enjoy my Zuppa di Cipolle Italiano... Let me know how yours turned out... Boun Appetito! --Jerry Finzi Copyright 2017, Jerry Finzi/Grand Voyage Italy - All Rights Reserved
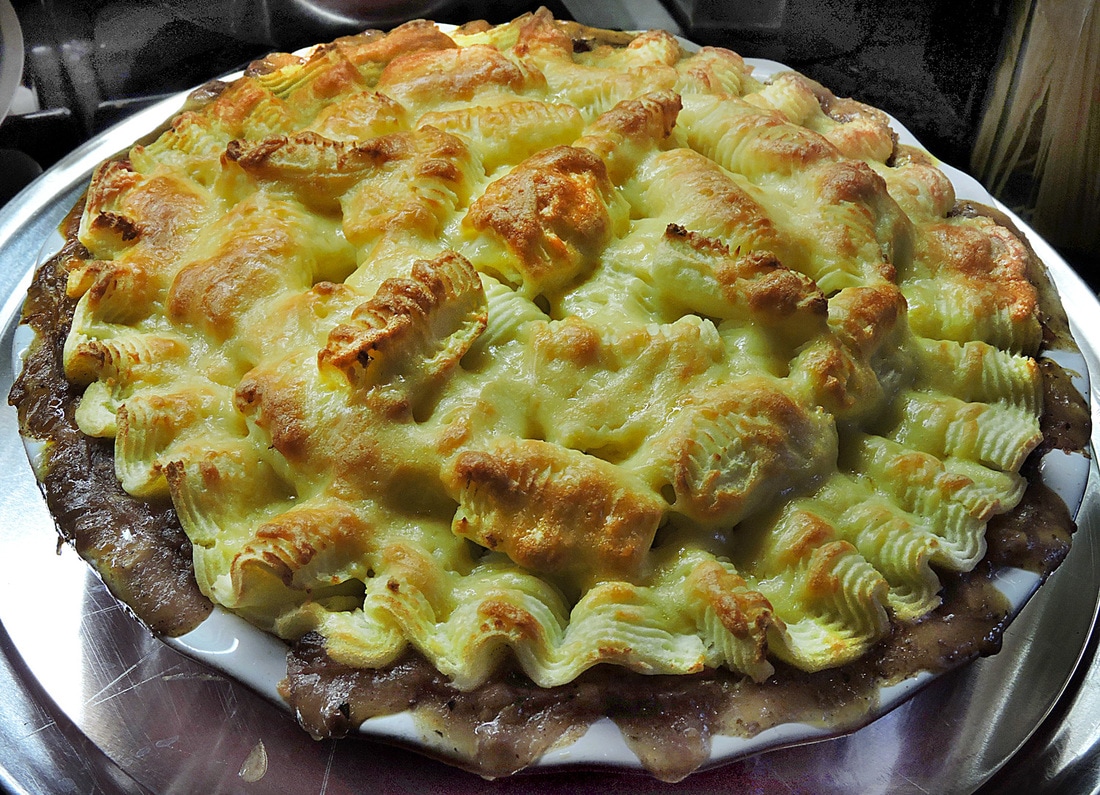  An many might know, each year for St. Patrick's Day we make a Shepherd's Pie and Irish Soda Bread to celebrate. I usually forget to "wear the green" and my son Lucas usually reminds me, but we still enjoy our Irish food, Celtic music and some stout.
Above is a photo of this year's efforts, still steaming from the oven. I gave it an Italian look of gnocchi on the top by using a pastry bag with the larges flat tip I own, with teeth running along it's 2" length. The texture of the potatoes gave a nice crispy surface. This was made in a 12" ceramic deep dish pie plate and weighed about 5 pounds when done. We had two meals out of it, and Lucas had a thermos-full for his school lunch on another day. I was considering topping a pizza with some of the leftovers, but thought that would be going too far... For the original Shepherd's Pie recipe HERE. For the recipe for Lisa's Soda Bread, click HERE. --Jerry Finzi 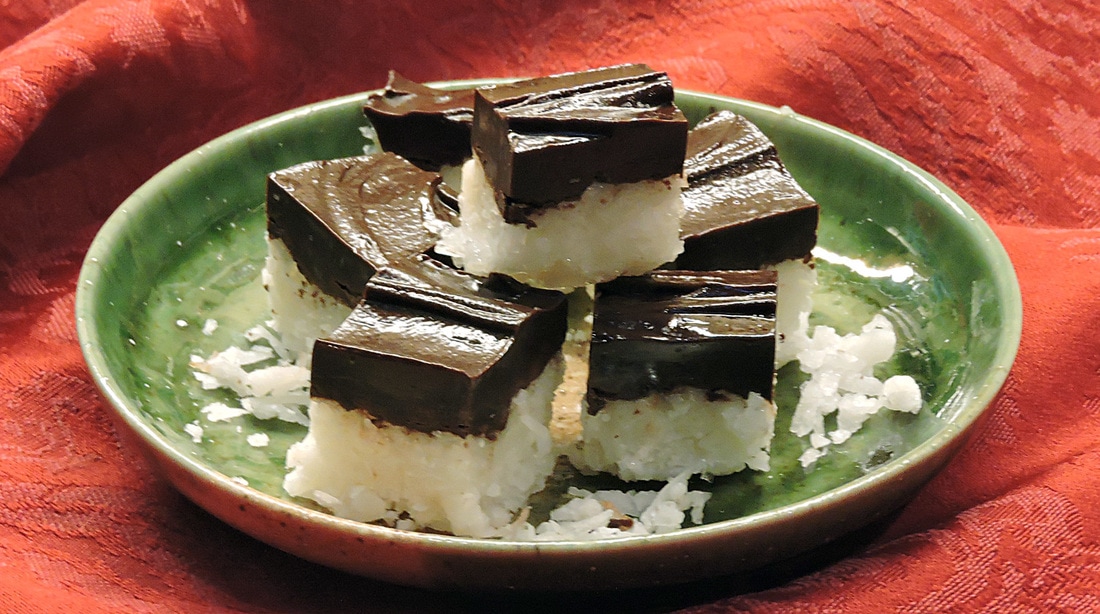 I've always loved coconut and chocolate. Mounds candy bars were a favorite when sitting in the dark, echoing movie palace during Saturday matinees in my youth. In Italy, one of my favorite, two-scoop gelato treats was coco and cioccolato. So when my wife, Lisa made these Coconut Chocolate Squares for me last week, I was in heaven!
Ingredients
Directions
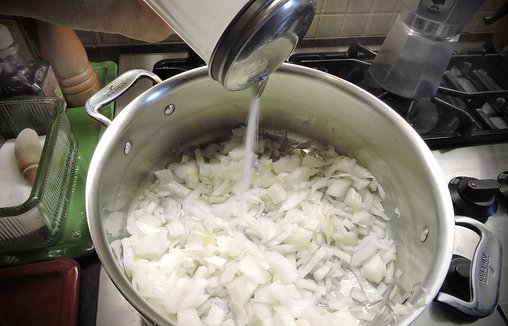 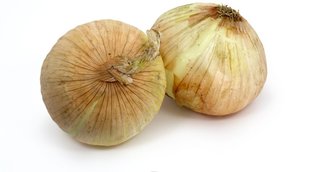 A naturally sweet onion, like Vidalia or Walla Walla is best for caramelizing A naturally sweet onion, like Vidalia or Walla Walla is best for caramelizing Occasionally, to top off my pizza or when I make a dense French onion soup, I need to caramelize onions. We love addition of their intense flavor on pizza and our French onion soup is a favorite of our son, Lucas. When I first tried to do this years ago, I would always burn the onions way before they were caramelized. But I learned a couple of hacks that work well... It's the natural sugar content in onions that becomes caramelized, not the onions themselves. It can take a hour or more over a very low flame to get them dark and nutty brown--Julia Child's goal when making her French Onion Soup the traditional way. To speed things along, I always sprinkle a bit of sugar over the onions after they go into the pan. Not much... a 3-4 tablespoons is enough for 6 cups of onions when making soup, a light sprinkle (a tablespoon or so) when doing only a medium onion for a pizza topping. You'll be surprised at the difference a little sugar makes. It speeds up the caramelization process and helps to give you a nice nutty brown color. The water comes in to prevent burning the onions during the long cooking time. At the beginning, watch over your onions and stir occasionally to prevent burning. But when you've reach the point where the onions are drying out and will do nothing but burn if you simmer them any longer, splash a half cup of water (or more if you have a large amount of onions) into the pan, and using a flat wooden spoon, deglaze the pan to get the brown bits off the bottom. Cover the pan and continue to saute the onions on a low flame. If you use the lid, you can pretty much let them saute while checking on them only periodically until they are caramelized. IF you prefer to watch your onions sauteing without a lid, you might have to splash a bit more water into the pan from time to time. If you use these two hacks, instead of over an hour, you'll have sweet caramelized onions within a half hour. --Jerry Finzi 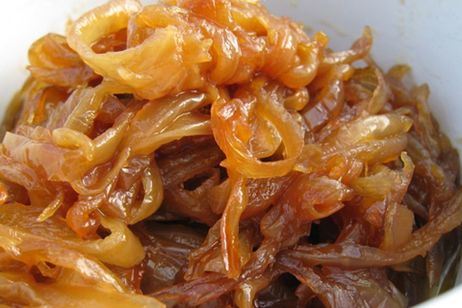 This is what perfectly caramelized onions should look like--glazed and dark  
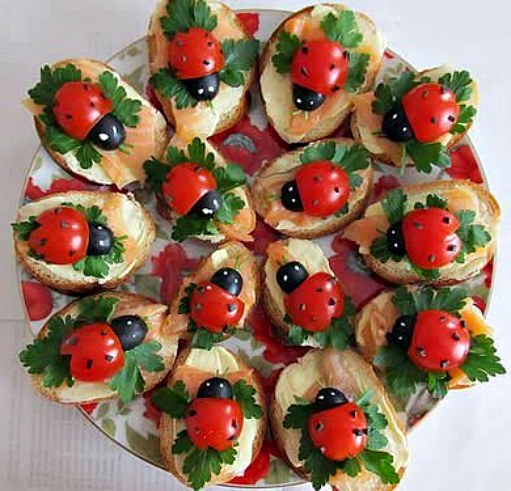
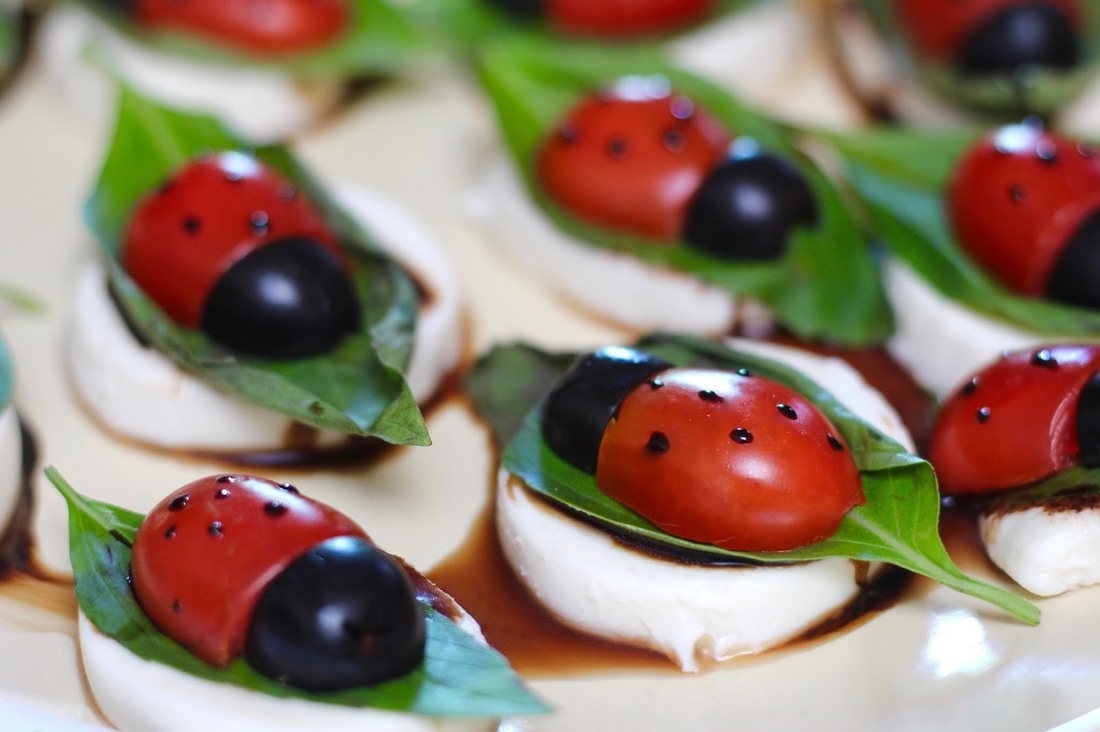
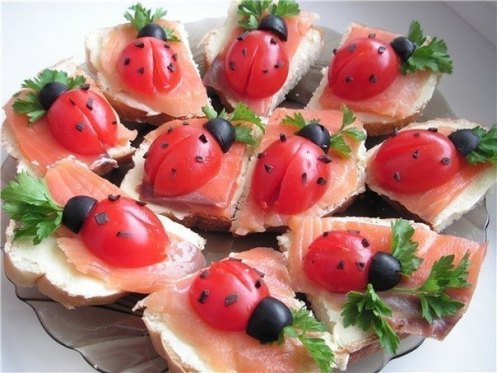
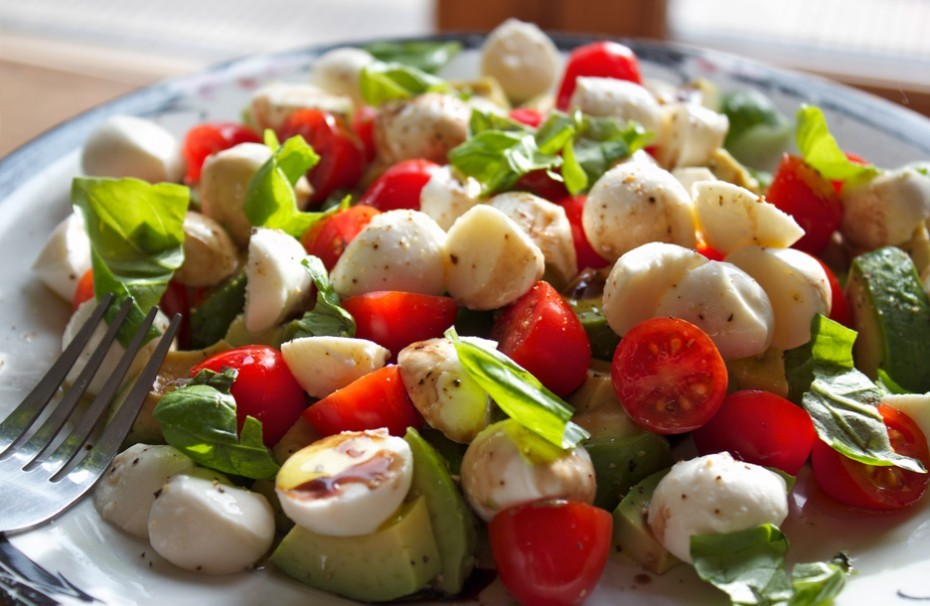
--Jerry Finzi  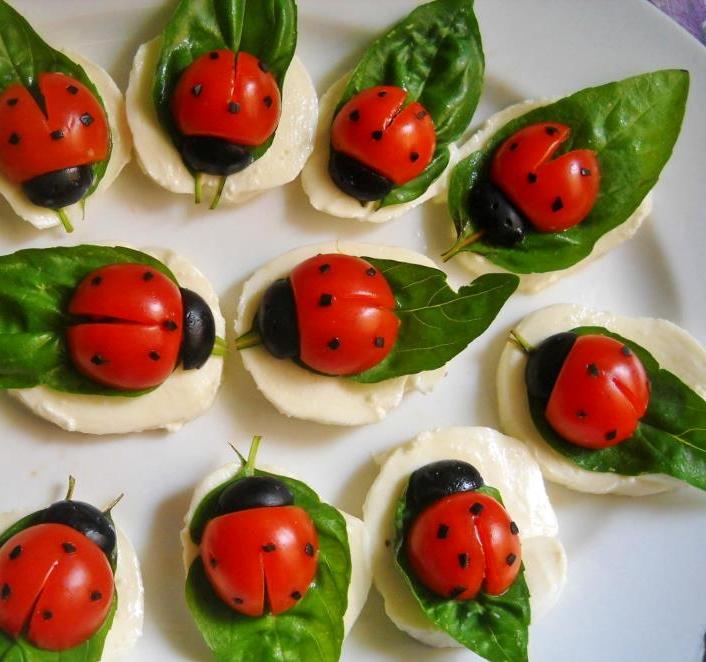 There is nothing like the flavors of fresh mozzarella, basil, olive oil and tomatoes. The myriad of ways these simple ingredients can be put together boggles the mind, ranging from pizza to lasagna to panini. The culmination of this combination is an excellent example of the simplicity of Italian cuisines: Caprese... nothing more than a simple insalata (salad) of these basic components. While you can simply lay some slices of tomato on a plate, top them with mozzarella and basil, and then drizzle with extra virgin olive oil, at times you want some to do something to impress or simply for fun, and the kids will love making... Ladybug Caprese Insalata. It couldn't be easier. Place slices of mozzarella on your plate (placing mozzarella in the freezer for 15 minutes will help make slicing easier) then top each one with a fresh basil leaf. Next, take cherry tomatoes and with a very sharp paring knife, cut the separation between the two "wings" a little more than halfway up and tease them open--just a little so they look like beetle wings. Next, slice a bit of the "neck" of the tomato off so you can tuck a pitted, black olive into it as the "head". The two antennas are easy to make using the soft stems on the end of the leaves. Make holes with a toothpick, then insert the stems. Now, how to make the spots has become a subject of debate all over social media. There are several ways to make them. The first (and easiest) is to use aged balsamic vinegar... dotting the spots on using a toothpick. (The thin stuff they pass off as balsamic in supermarkets will not work). Aged balsamic is viscus enough to stick and shouldn't drip or more. Just be careful not to drizzle olive oil on the backs of your ladybugs if you use this method. If you don't want to spend the extra cash on aged balsamic, just reduce the supermarket variety in a saucepan under high heat to create a reduction--a thick glaze--and use that. The second way, is to cut very tiny dots from the skin of a black olive. Use a sharp paring knife to skin the olive, then do very small julienne strips. Then, slice into little dot shapes. It's a bit finicky, but not really hard to do. The dampness of the inside of each olive skin dot will help stick them to the cherry tomatoes. Pick each "dot" up with the tip of your paring knife to put into place. A third way is to use individual grains of course, black sea salt. You can pierce the skins of the tomatoes at each location of a dot, then gently sit a grain of salt in each one. A fourth method is to take some cream cheese and color it with black paste food coloring (the type used in cake decorating). Then use a very small circular piping tip and pipe little dots onto the ladybug backs. Some think that an edible marker can create the dots, but my experience in using these markers is that they are a water based dye and will bead up on the smooth skin of a tomato. You won't be able to draw a spot that will hold its shape and they might even run, especially if you drizzle extra virgin olive oil over the creation. To finish off the plate, carefully sprinkle some fresh black pepper around the mozzarella but be careful not to get any on your ladybugs. Alternately, you can leave out the black pepper. Then drizzle extra virgin olive oil over the creation, but remember, if using balsamic as the dots, steer clear of them. Finish with a sprinkle of sea salt. You can make your Ladybugs on a serving platter or on individual plates, perhaps two per person. --Jerry Finzi Some photos just for inspiration...  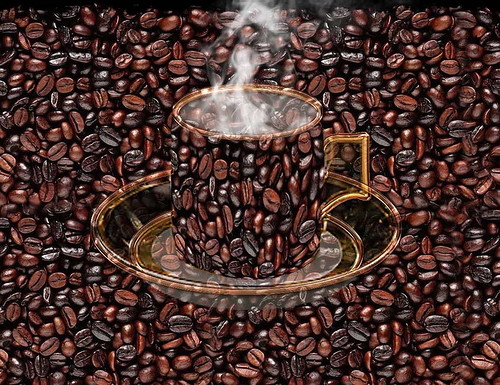 In the centuries before the iconic Bialetti Moka pot, people drank the new beverage in coffeehouses, an idea that started in Constantinople around 1550, but also spread to Mecca, Damascus and Cairo. Although David ibn Abi Zimra (a Cairo rabbi) ruled in 1553 that Jews could drink coffee prepared by a non-Jew, he also warned against patronizing public coffeehouses and suggested that instead, they have their coffee deliver to their homes--especially due to its medicinal use.
Initially, in the 15th century, the drink quickly spread throughout the Ottoman Empire, enjoyed with large amounts of sugar. Jews and Muslims alike found that it helped them stay awake and alert for nightly prayer services. For Muslims, it took the place of forbidden alcoholic beverages. For the Jews, its adoption was tentative with rabbis debating whether it was Kosher, what blessing it required or whether it was actually a medicinal drug. Coffee in Italy had a slow start, partly due to it being declared a Drink of the Devil and outlawed by the Catholic church, and later, because it was a very expensive drink for the elite. The Church considered it as being "the bitter invention of Satan", and also bemoaned of its links to Islam. It wouldn't be until 1603 when Pope Clement VIII tasted--and liked--coffee and gave the drink full absolution from its sins. This helped open the floodgates for coffee in Italy and the rest of Europe. In 1632, the Jews of Livorno--a port city that was given over to the Italian Jewish population which became a center of Mediterranean trade--imported the first coffee into Italy and then opened the first coffeehouses (Bottega del Caffè). By 1624 and 1650, large shipments were shipped to Venice and by 1683, the first coffeehouse in Venice opened. In researching this article, I actually discovered that in 1766, an ancestor with my family name, Beniamino Finzi (an Italian Jew) was given management of a coffeehouse in Livorno. He managed to get the Jewish leaders to rescind a law forbidding games of chance in coffeehouses frequented by Jews. He was the first Jew to be granted a permit to allow gambling with card and board games in a coffeehouse. From this time on, a Jew could only run an "entertainment room" for gambling only if they also served coffee! Coffee was becoming mainstream.... within 200 years of the first sip being tasted in Italy, the craving for coffee had spread throughout Europe and even into the New World. --Jerry Finzi |

Archives
May 2024
Categories
All
|