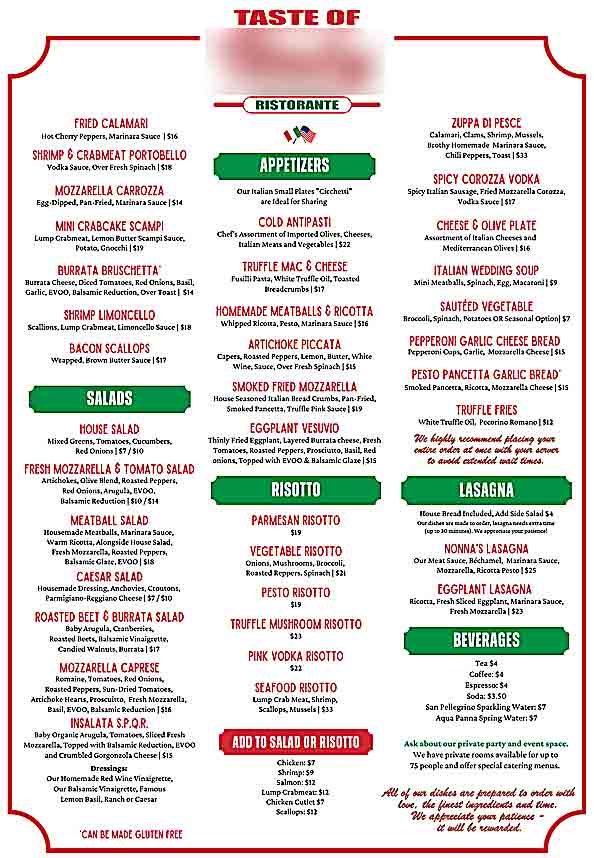
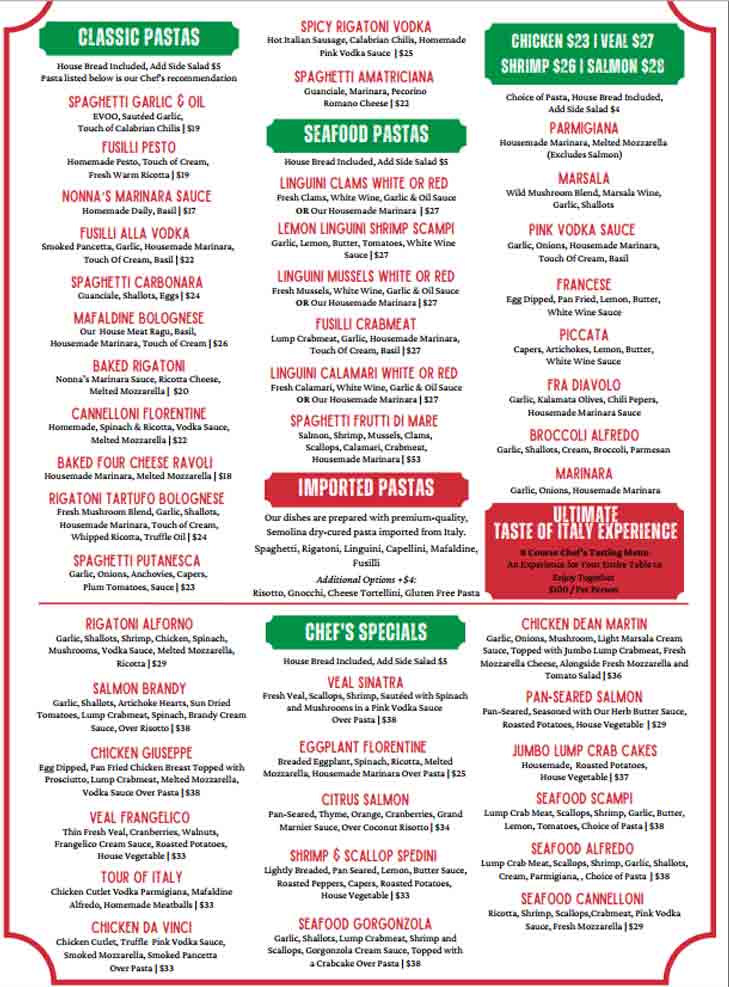
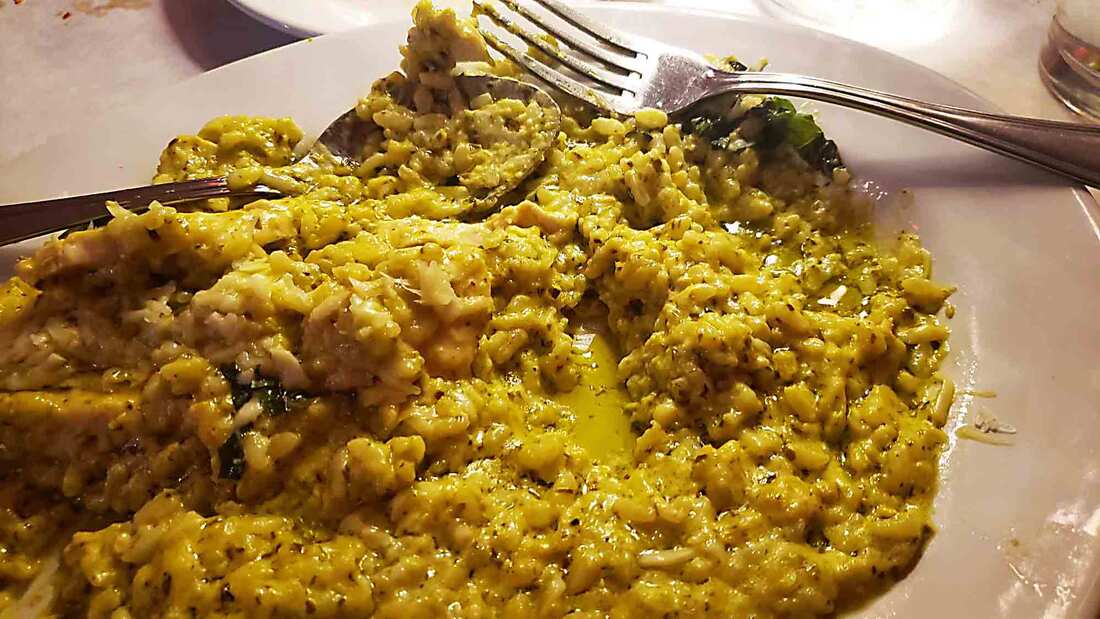
 This was supposed to be Pesto Risotto, and why put a spoon on my plate? This is it. I'm at my wits end. Is eating out at so called "Italian" restaurants worth the high prices, poorly prepared, unauthentic and inconsistent menu choices? This past Good Friday evening, my wife, son, his wonderful girlfriend and I went to a "Italian" restaurant called Taste of _____ in a nearby town. (Fill in the blank. It's one of the most overused names for Italian restaurants and pizzerias in the U.S.) The place has been getting mostly great reviews on social media from locals (Italian-Americans are a minority around here), so my wife made reservations and then... At first, we were confronted with a strong fishy smell as we entered the place (i.e, not fresh). The menu: a very typical Italian-American, overpriced (for what we received) menu with pizza place graphics. There were dishes named after Sinatra and Dean Martin and oddly one named Da Vinci. There was a volcano pile of stuff called Vesuvio and a "meatball salad"--meatballs "alongside" a salad.(Most reviews claimed the meatballs were terrible, so we didn't dare). The antipasti mix had tightly rolled, cheap capicola and a tasteless prosciutto with green and black olives straight out of a plastic 5 gallon restaurant jug. We also ordered a "fried mozzarella" that turned out to be a grilled cheese with mozzarella. The menu was missing any Neapolitan pizza, fresh pasta dishes, bistecca, boar stew or even fried/stuffed olives, chickpea fritters or arancini. Some pasta dishes were not finished in the pan, with sauces placed on top. Many were heavily finished with olive oil. The bread in the basket was not great and there was a large slice of butter swimming in a bitter, low grade olive oil mix for dipping (I suppose). There were no Primi or Secondi dishes. Proteins were mixed in with pasta on the same plate--Italian-American style. As for presentation, the portions were HUGE with so many things thrown on top, creating visual chaos. (Looking like a regurgitated meal). The finisher in the kitchen surely had a heavy hand with many dishes swimming in olive oil. (Many photos on their Google page was evidence of this). There were dry pasta dishes with Bolognese sauce (what, no fresh egg pasta?) and other misidentified pasta shapes. There was an extreme overuse of garlic in some dishes, as my son's girlfriend had in her mushroom risotto. Native Italians use garlic only to flavor the oil at the beginning, then remove the cloves. My wife said she had to "saw" through her overcooked chicken cutlet and her gnocchi were definitely made from frozen and were gluey.
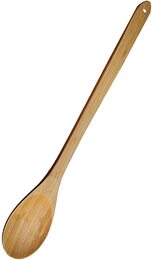
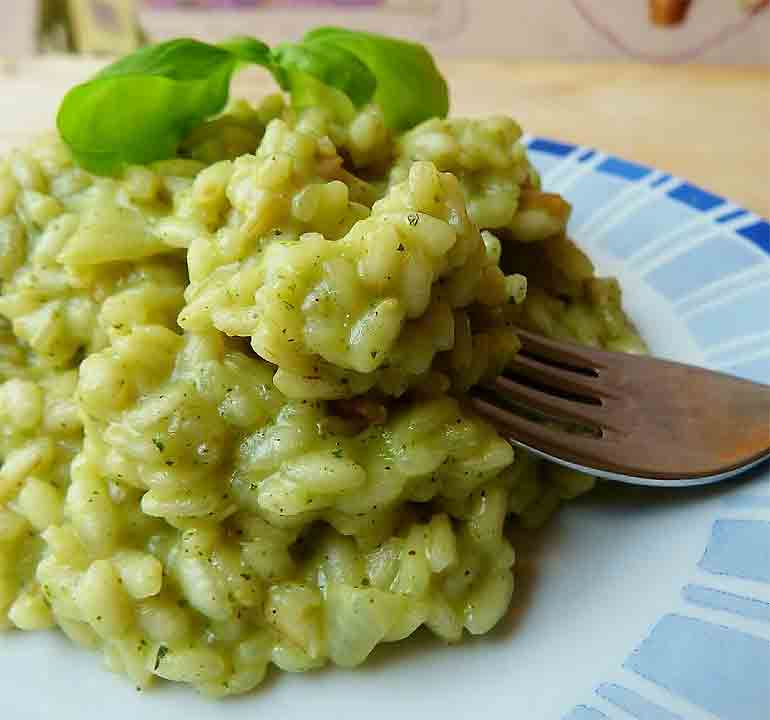 This is how I expect a pesto risotto to be This is how I expect a pesto risotto to be At the top of this post is a photo that I took of my "pesto risotto" at the end of our meal... about 45-55 minutes after arriving at the table. You can clearly see the pools of oily fat (olive oil and broken sauce). Responding to my local review, the "owner/chef" claimed I finished 60% of the dish--I actually left 80% or more of this HUGE portion (enough to feed 3-4 people).
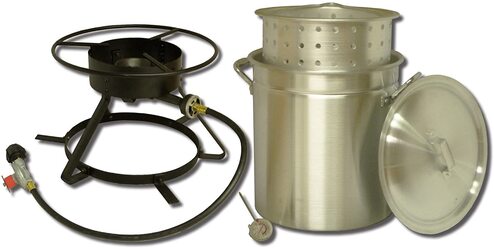
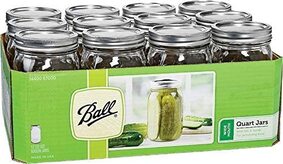
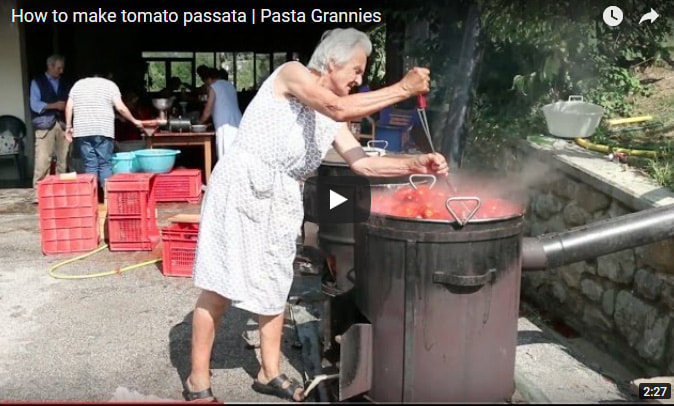
Also, I want you to note the huge spoon they placed on the plate, the same many American restaurants use, expecting diners to twirl spaghetti with. Five minutes into the meal my stomach was feeling queasy. There was a broken, heavy sauce (cream added?) and it looked like they poured olive oil over the risotto, pooling below. Perhaps they added too much butter and cream to finish over heat and the sauce broke. The risotto was not made with carnaroli or arborio rice. When making risotto, this type of rice itself produces its own starchy "cream" and causes l'onda (a wave). This was a gloppy mess. I still felt nauseous 2 hours after. None of us were satisfied with our meals. My son's pesto pasta had very little actual pesto with olive oil pooling underneath. Instead of a classic dollop of pesto on top, there was ricotta (not mentioned on the menu). He felt thee pesto was made using dried basil with only a blackened chiffonade of "fresh" basil sprinkled on top. I concurred. My dish sat in from of me for about 45 minutes while I picked away at it during our diner chat. Uncharacteristically, I didn't want to complain on Good Friday and while we were getting to know Lucas' girlfriend. The waitress came over once to ask how everything was, and my wife answered "fine" while I bit my tongue. After asking for the check, someone asked if I was finished, reaching for my plate just as I was pointing my phone at my dish--something that many do nowadays. Seeing me take the photo, they walked away and went right up to the owner, as my wife witnessed. During this evening, the owner stopped at nearly every table except ours... mostly filled with his "regulars". As we've noticed before in our area of Eastern Pennsylvania, most locals have no idea what a good Italian dish is. Our running family joke is about a German restaurant that is "famous" for its "incredible" pizza--flat, tasteless pizzas made and frozen before reheating! You know when the place that sells "pizza" also has Philly cheesesteak sandwiches on the menu, the pizza can't be good. Responding to my local review, the owner said he "knew these people would be trouble" as soon as we sat down, and that we just wanted a free meal. He also claimed that I pulled the plate out of the waitresses hand to take the photo, with my "agenda" to give a bad review. Never happened. The waitress (passive aggressively) did come back and asked why I took a picture and why I didn't want a "doggie bag". I then told her how dissatisfied I was and how the sauce was broke and oily. I didn't want to take the rest of the dish home. She offered to fix it, ridiculous as the bill was being paid and considering their lacking technique for preparing any classic risotto dish. She apologized and I said it was not her fault, and reminded her, "YOU aren't the chef". I never asked to comp my meal, but even after my complaint, the full charge was still on the bill when it arrived. Most places comp without even asking for it. I paid the full bill and a 20% tip and we left. We only drank water, had no desire to have desserts after our poor meals, and were billed over $150 for the privilege of eating at this phony Italian "ristorante" with busboys wearing Godfather T-shirts and Vic Damone and SInatra music pumping out of their speakers. Responding dozens of times to our local review, and literally dozens of locals defending this inauthentic place's food, the owner made himself look bad by his ridiculous and insulting accusations. There were also scores of people agreeing with my review and saying how the owner's nasty arrogance and lack of customer relations tact was hurting his own reputation. It was a typical social media flaming event. Shocking, really. All I did was post an honest review. His belligerence toward a simple, truthful diner's own experience is utterly out of place for someone wanting to make clientele happy. This owner's attitude is going to repel clients... look at other restaurant owners who offer condolence and ways to make them come back until they are served a satisfying meal. There is a New Jersey pizzeria that we order take-out from occasionally that gave me a rubbery chicken dish once. No questions asked, they offered a gift certificate as compensation. This is after all a hospitality business. Lisa is usually the one that wants to try the new places getting lots of social media buzz. I think after this, even she wants to call it quits. Our biggest complaint--even when we find a place with good food--is lack of consistency. The next time we return, we never are as satisfied as the first time. Bottom line: We've been saying this for years now... "Why waste big dollars on meals that we can cook better in our own kitchen?" Besides, we are nearing the end of our new kitchen renovation... We can't wait to have an oven again and cook on our new 36" gas cooktop with grill! Share your experiences from recent years at restaurants that others think are great. Are you disappointed too? Please leave a comment below. Ciao for now, --Jerry Finzi 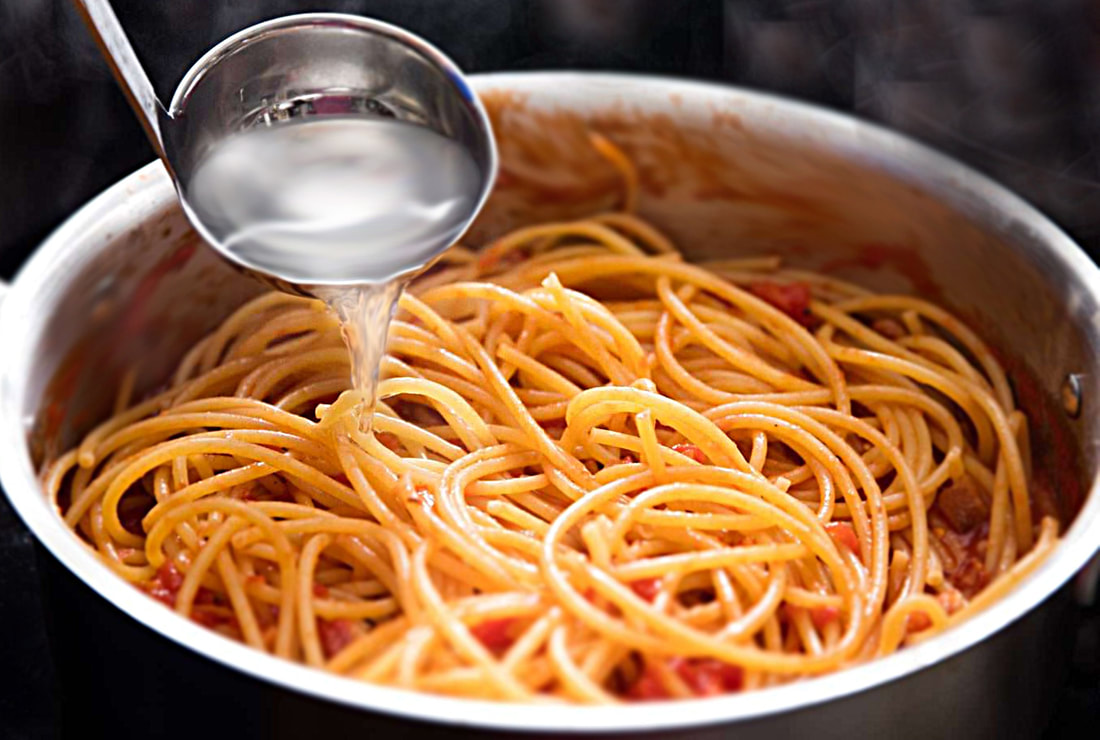 One of the primary philosophies of GVI is passing along ways to live a more Italian life (even if you're not in Italy), often shedding and evolving away from the often corrupted and devolved Italian-American traditions and methods of language, culture, and of course cooking. One of my biggest changes in recent years is to my old Italian-American method of cooking pasta--simply topping with sauce. I learned from my mother. She would boil and drain the pasta, then pour sauce over the top of each individual plate of pasta, leaving it up to us whether or not to toss with the pasta or not. The authentic, Italian method of cooking pasta is under-cooking the pasta, then finishing in the saute pan where you have prepared the sauce while the pasta is boiling. The next step is adding the under-cooked pasta to the saute pan, then adding a few ladles of starchy pasta water. Cooking further and tossing the pasta, the starch in the water allows the sauce to thicken and cling to the pasta. The pasta water both cooks the pasta and thickens the sauce, until the sauce becomes creamy and coats the pasta in a shimmering way. This method impregnates the sauce INTO the pasta and imparts enormous flavor. In Nostra Cucina, gone are the days of putting drained pasta on the plate and simply topping with sauce. Buon Appetito! --Jerry Finzi 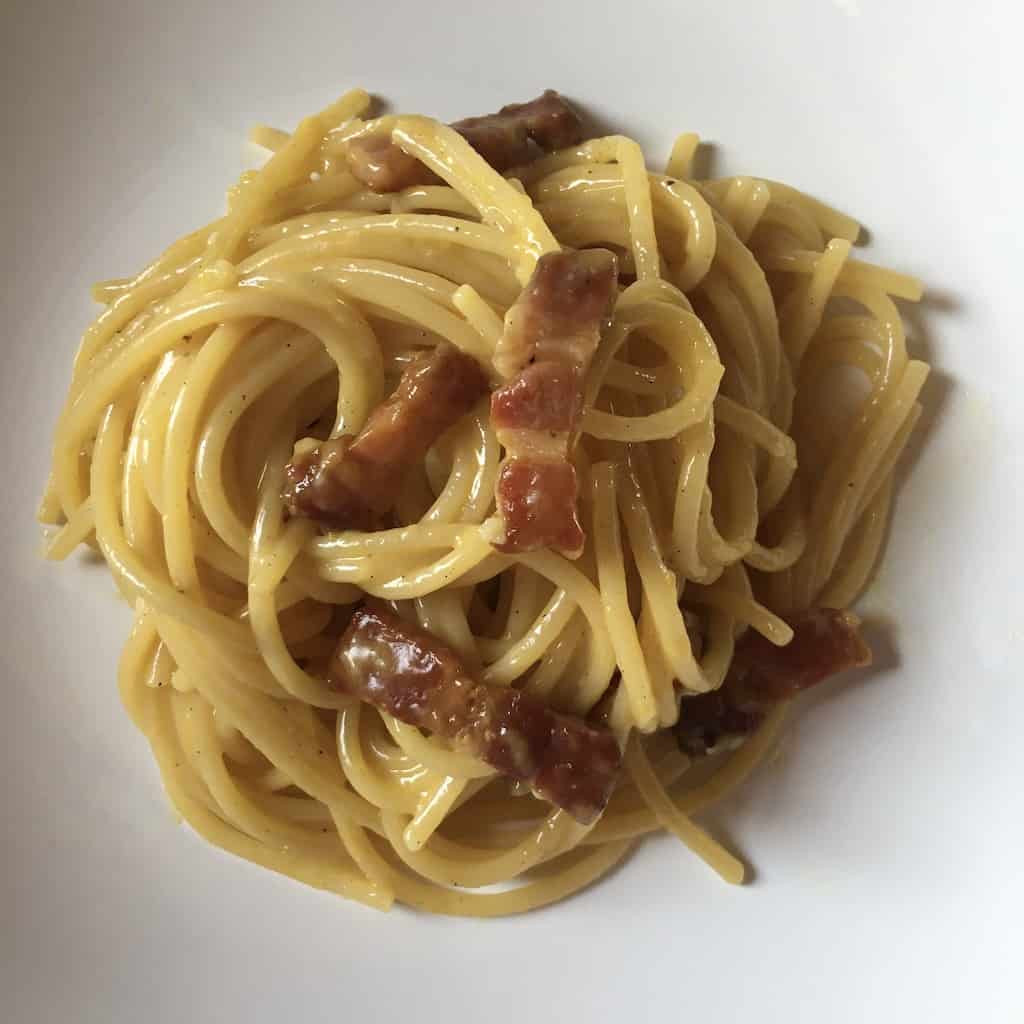 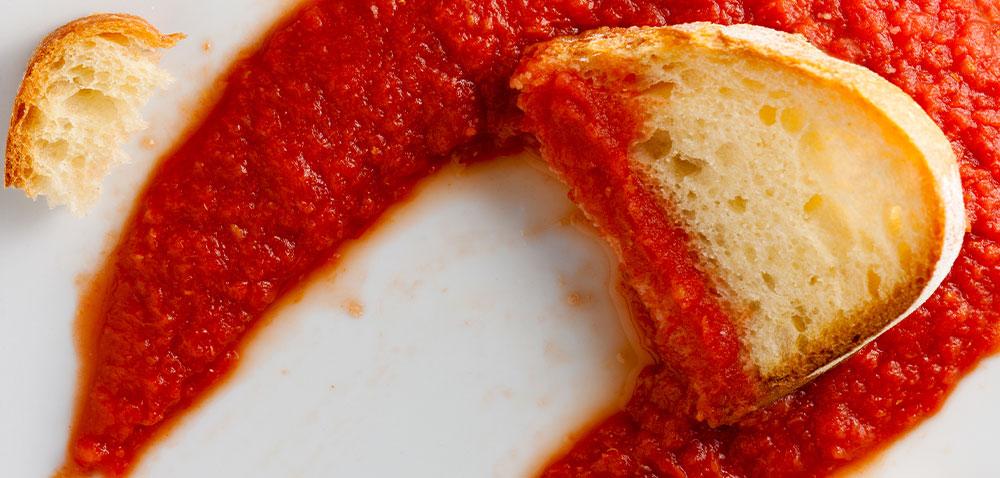 When I was a boy, we always had bread in our home. My Dad worked as a Deli man most of his life and would bring home beautiful Italian breads that he used to make cold cut and meatball sandwiches. In typical 1950s style, my Mom would keep loaves of white bread in what she called her "All-American house". When we had pasta with "gravy", we'd tear off some bread to use at the end of the meal to clean up the plate. Even when we had meat, like a roast beef, the bread would come out and we'd soak up "the blood" (the drippings) that oozed out of the meat in the bottom of the serving platter. If we had soup or a stew, the bread would work its way to the end of a meal to clean our plates. And if my Mom was making Sunday Gravy, we'd get out the bread, even if all we had was sliced Wonder Bread (ugh), and smear a ladleful of sauce on a slice for a pre-meal snack.  Why scarpetta (little shoe)? Wouldn't it be better to call it scopa (mop)? Little did I know what we were doing was carrying on an Italian tradition in dining--fare la scarpetta (making the slipper/shoe). Scarpetta means shoe in Italian. And to fare la scarpetta a tavola, means tearing off a piece of bread at the table to mop up the sauce or juices left on your plate, help in getting your food onto the fork or spoon. In my father's poor childhood--growing up in a Hoboken tenement with a large family--there weren't enough forks or spoons to go around, so using bread as a scarpetta was a necessity to lift bites of food out of the large communal bowl my grandmother would place in the middle of their table. Nothing goes to waste in Italy, and especially in the impoverished South where my parents came from, one would never leave anything on their plate. Food was life itself. After all, not wasting food is being furbo. And in the South, they don't shy way from having bread with pasta, like they do in the North. What is the preferred type of bread for use as a scarpetta? Curiously, it is ciabatta, which literally means slipper, but any crusty bread will do. Some say that the expression scarpetta comes from the fact that a torn piece of bread looks like a little shoe. I prefer to think that it really refers to wiping your feet... as wiping the bottom of the plate. Because of the extreme poverty suffered by many of our Southern Italian ancestors, others think scarpetta refers to being so hungry that one would eat the soles of their shoes. Sadly, there is historic evidence of desperate people doing just that, so perhaps there is some truth here.  Scarpetta can work with the right OR left hand Scarpetta can work with the right OR left hand However, the tradition of using bread to clean up plates goes back to the time of the Romans. I remember reading in my Latin study book how Romans would use bread after a meal to clean their hands--soaking up the juices and olive oil on their hands--and also cleaning the bowls and the table. They would then pop the soppy bread into their mouths. Again, furbo... nothing is wasted. Fare la scarpetta is an ancient tradition indeed. Perhaps because of its links to Southern culture and Cucina Povera, some areas of Italy consider using a scarpetta bad taste, even though its taste is actually pretty good. Most do it at home or in more casual trattoria and less in more chic ristoranti. But they all do it. And if someone tells you that they don't do it in Tuscany... nonsense. In fact, it's one of the only ways to add flavor to their saltless Tuscan bread. (That stuff is so dry on your palette without salt!) You'd be well served to consider Tuscan bread more of an eating tool, like a spoon or fork, than a bread for eating by itself. You can also do what many Italians do and consider the philosophical meaning of the phrase, fare la scarpetta: Live life fully. Never leave crumbs behind. Soak up everything that life puts in front of you. --Jerry Finzi   This is the time of year when tomatoes are ripening on the vine in both the U.S. and Italy. Even if you don't grow your own tomatoes, this can be also the time to make your own Italian style passata di pomodoro--a basic tomato sauce that has all the skins and seeds removed, with all the flavor left behind. Here in the states, the closest canned product is called "tomato puree". Many families in Italy make the processing and canning of passata a yearly event--a family event--making enough jars of passata to last the entire year, often enough for extended famiglia. If you're not growing enough of your own paste style tomatoes, you can always buy a bushel or two or three from your local farm stand. Some Italian families will process up to 500 pounds of passata each year! Think of passata as a basic tomato sauce which you can use in all sorts of recipes, or even as a base to make other tomato-based sauces, such as Puttanesca, Amatriciana, Bolognese (ragu), Vodka sauce, sugo ("Sunday Gravy") or for pizza sauce. The word "passata" (passed, screened, smashed) refers to the processing with a special food mill that removes the seeds, pulp and skins, leaving only the tomato sauce behind. Other family recipes might just use a common food processor or blender, but this can't really give you a genuine passata. The cleaned, ripe tomatoes are cut up, boiled and processed to remove the skins and pulp, and finally canned in a traditional manner using a hot water bath and canning jars. Some family recipes might also add other spices or flavorings such as garlic as they boil the tomatoes, but since passata is a base to make a wide variety of sauces, you might want to add them at the time of cooking the final sauce. It is traditional, however, to add one large basil leave into each jar canned. 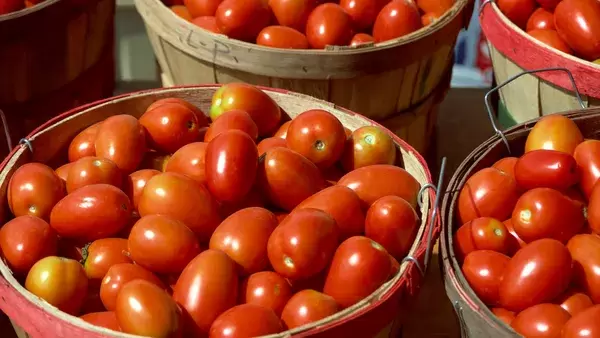  The Method of Making Passata Although you can make a passata in very small quantities, we will look at how to make a large volume for the purposes of canning and storage. We would love to promote this time honored, annual ritual here in the United States. Wouldn't it be better to have a yearly stock of your own tomato passata rather than buy supermarket sauces filled with chemical preservatives and other additives? What Type of Tomato is Best? In Italy, the best for this is San Marzano tomatoes (used in the best imported canned tomatoes), which have DOP protection and are only grown in the area of Naples surrounding Mount Vesuvius. Of course, many varieties are grown in the U.S. calling themselves "San Marzano", but they are only a similar variety. (You can't match San Marzano tomatoes because of their uniqueness of being grown in volcanic soils.) In reality, any good-tasting, full-bodied paste type tomato will work well. The tomato you select should have sweetness, depth of flavor, but also a touch of acidity--which benefits long preservation. Most paste tomatoes are thick fleshed and have a similar shape to San Marzano--that is, an elongated plum shape. You can also use larger cherry tomatoes or horn-pepper shaped varieties. Again, if it has a great taste, it will make a great passata. Leave the larger, beefsteak varieties for slicing and eating fresh. If you want to grow your own heirloom canning tomatoes from seed, we can highly recommend Striped Roma (horn shaped, sweet), Jersey Devil (horn shaped, very meaty), Debarao (plum shaped, juicy) and Martino's Roma (classic plum tomato). If you want to plant enough for lots of passata, plan on planting a minimum of 10 plants of one single variety that you earmark for canning. How Many Tomatoes? This really depends on how ambitious you are. if you use lots of tomato sauce in your recipes each year, then start with more tomatoes. You will also need more canning jars, lids and other varied supplies and tools. Having a very large pot or cauldron to boil the tomatoes helps prevent tedious, repeated boiling/canning sessions. I highly recommend doing it the way most Italians do it--using a tomato processing mill. I also love the way Italians use a very large pot to boil their jars and to do the final canning process--they use kitchen towels to layer in the glass jars to protect them from rattling around against each other.  Here are some guidelines: 3 pounds of tomatoes to make 1 quart of passata. 21 pounds of tomatoes will make 7 quarts of passata. One bushel of tomatoes (about 53 lbs per bushel) will give you 15-18 quarts of passata. You will also be using sea salt and placing basil leaves into each jar.
Things You will Need
(For a large volume...)
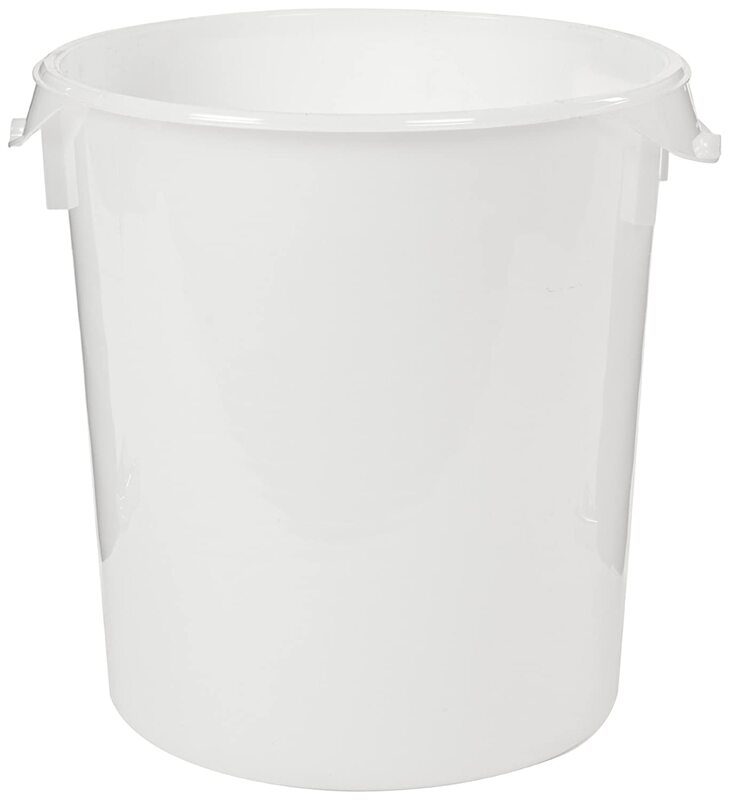
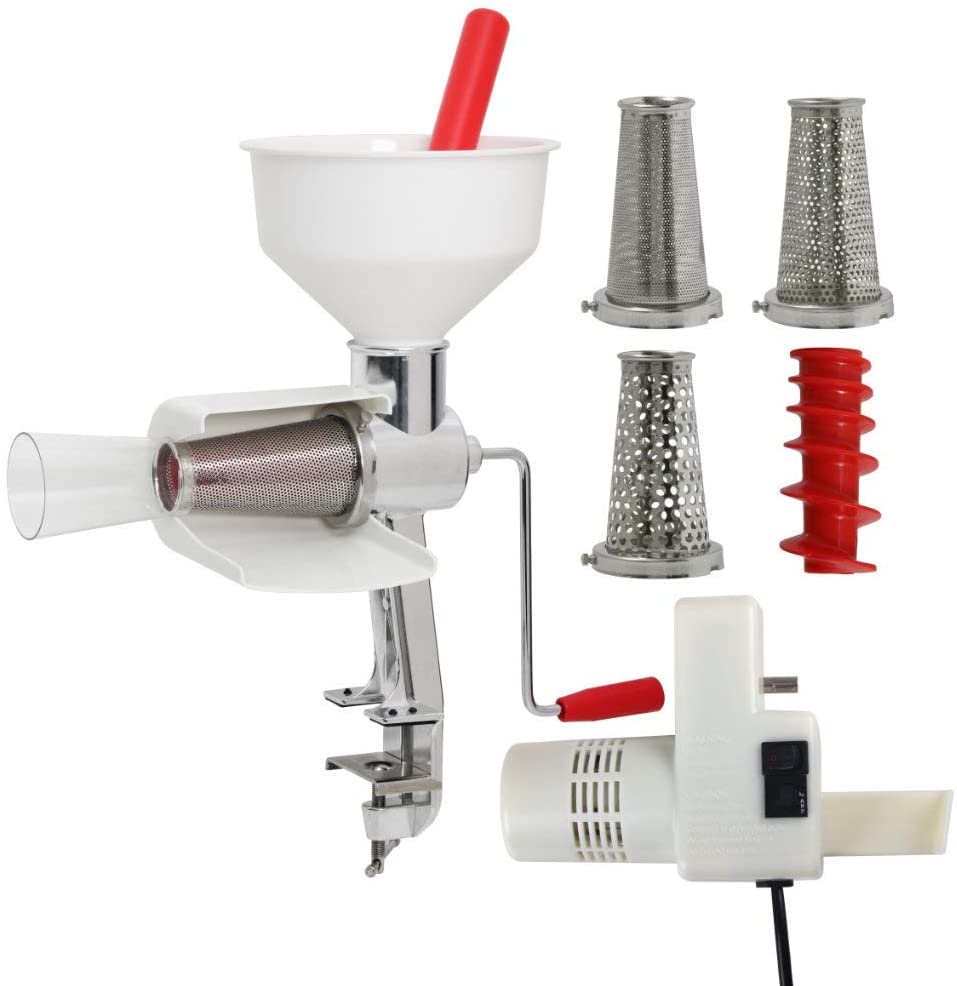
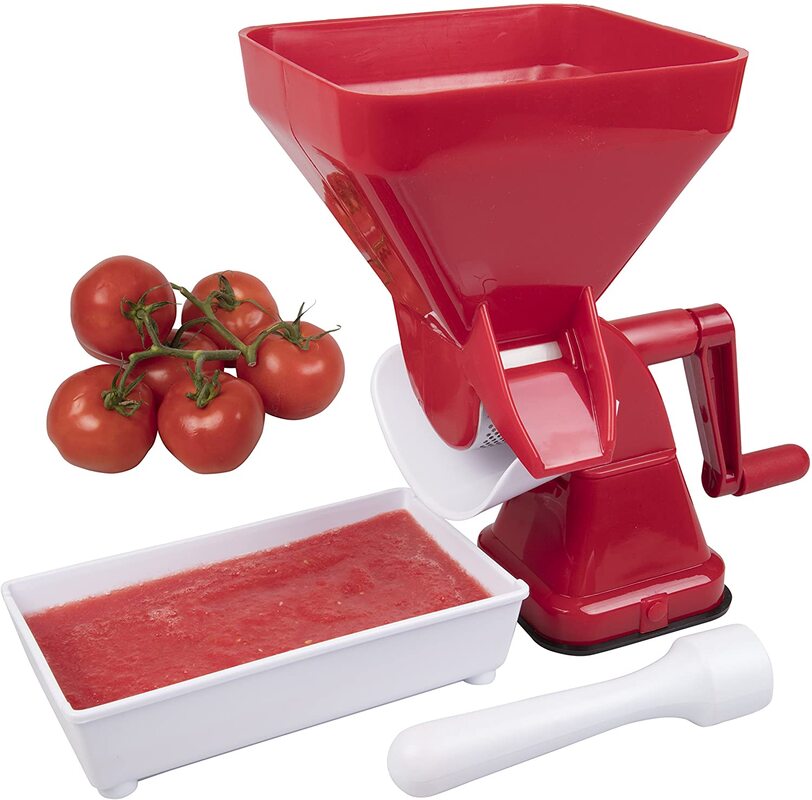
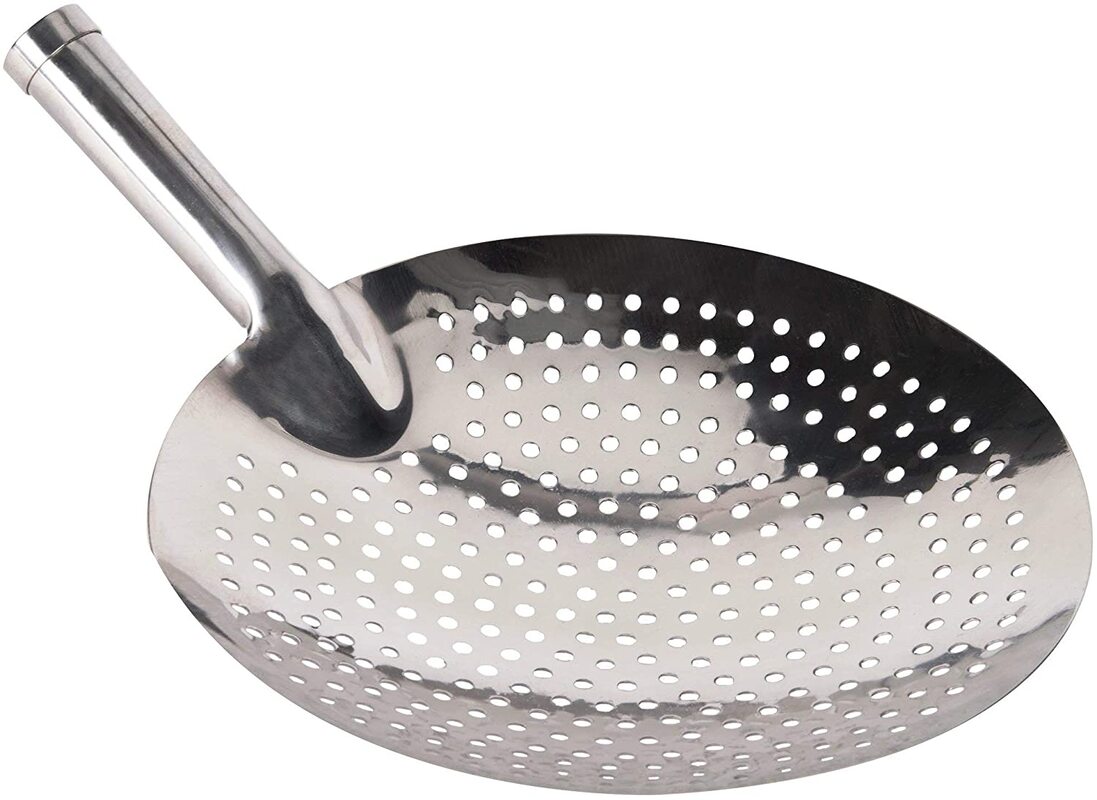
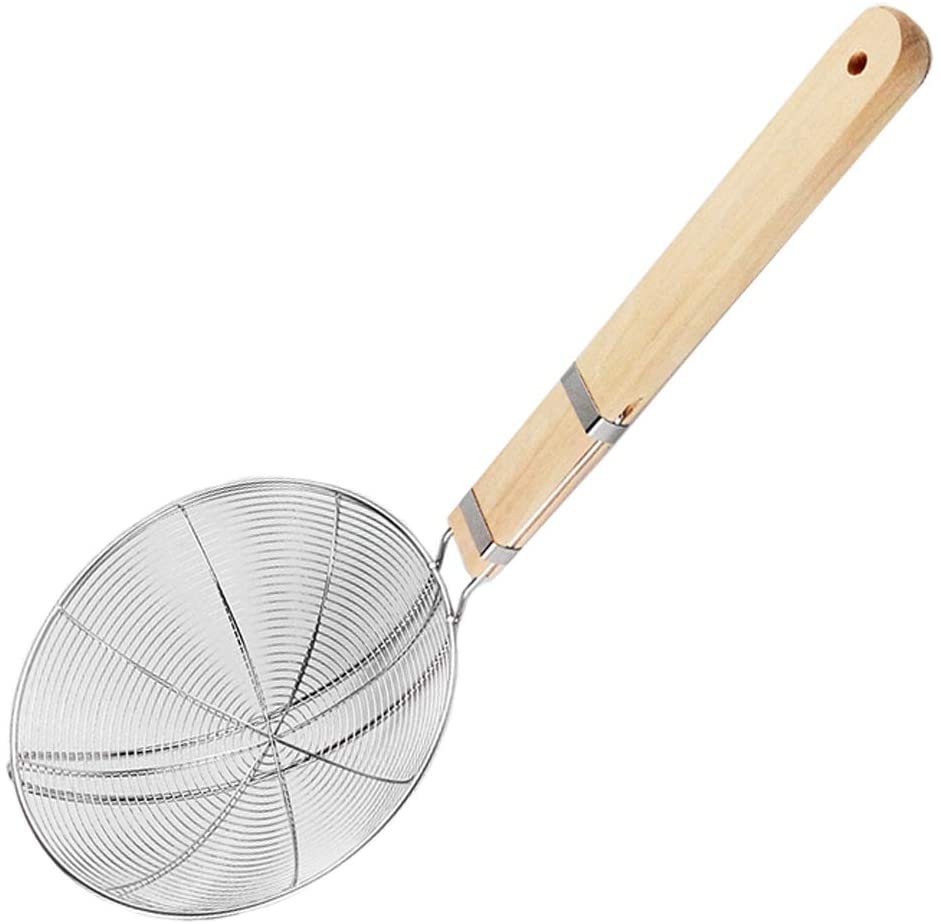
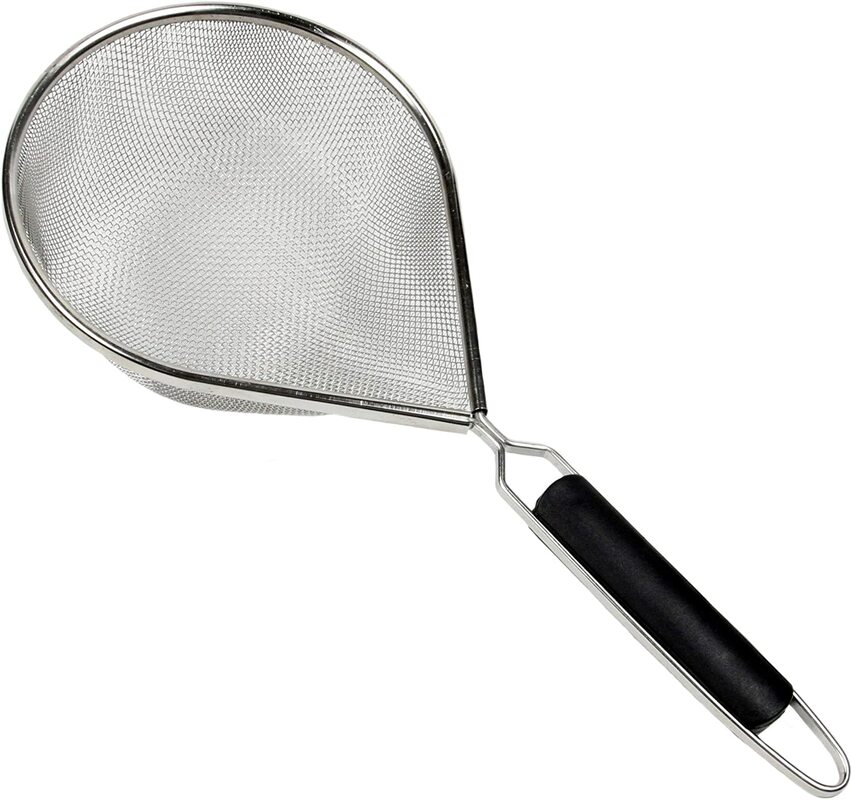
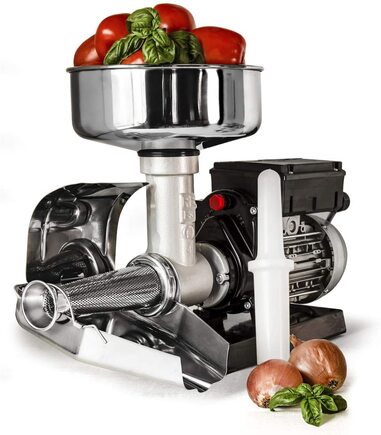
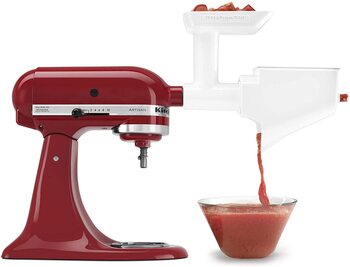
You can use a standard hand-cranked food mill or a manual tomato milling machine to process the tomatoes, but if you're doing a large volume, you should consider investing in a powered tomato mill. The more power the unit has, the faster your processing will go. You might need to set up your milling machine on a low table, with bowl on the table to capture the pulp and a large container on the floor to capture the passata.
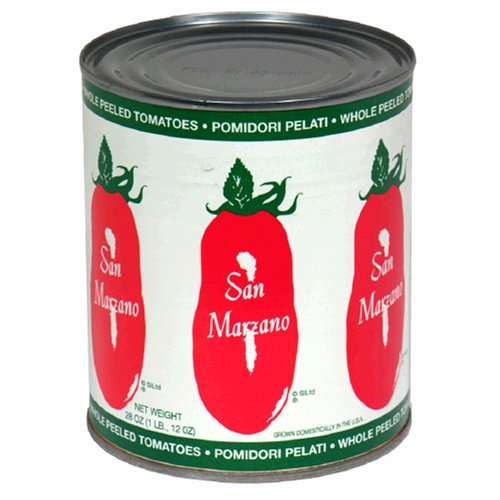
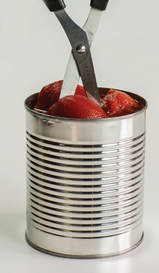
 What About Canning Whole Tomatoes? In Italy, whole canned tomatoes are called pelati, referring to the process of peeling the skins off before canning. In the area of Naples, many families invest in crates of locally grown San Marzano tomatoes, but any pear/plum shaped past tomato will do fine. Before caning whole tomatoes, the best way to prevent spoilage is to remove the skins. Canning peeled tomatoes also affords more options for use in recipes that might call for crushed tomatoes. Skinned, whole tomatoes are easy to crush by squeeze by hand or pulsing in a food processor.
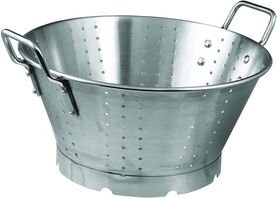
Don't forget to label your Passata and Pelati with the month and year. (Order oval Avery labels HERE on Amazon). Store them in a cool, dark place. They will last for as long as three years. Read this article carefully, watch the videos below and by all means, work safely! Make this a yearly event for your extended famiglia. I've read about families who take gather large teams together to process as much as 500 pounds of tomatoes! I would suggest starting small until you get used to the process. You can also make small volumes of passata or pelati right in your kitchen with a large stock pot, colander and tools you have lying around. And whether you use a manual tomato mill or powered, I'm sure you'll be successful and enjoy a fully packed cantina (pantry) all season long. --Jerry Finzi, GVI If you are new to canning, you can study the principles of safe canning HERE. Useful Processing Tools on AMAZON...

The video below is one of the best I have found covering many aspects of making Passata and Pelati. There are some titles in English, but it might also help to click the gear icon on YouTube to turn on Closed Captions and Auto-Translate to select English... 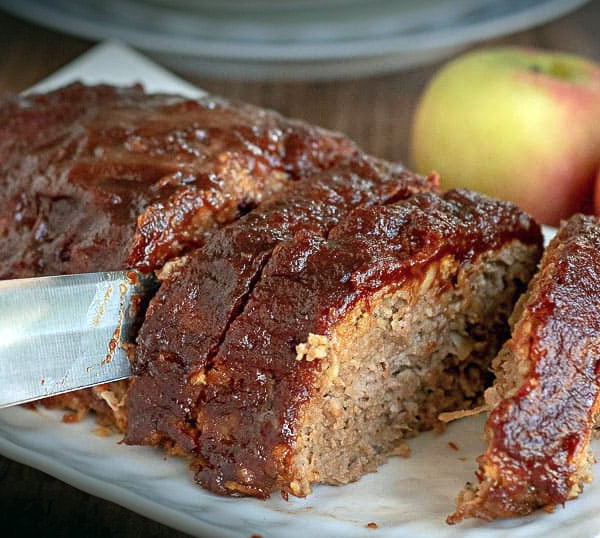 When I was a child, my mother would make meatloaf... plain, American style, ketchup covered, meatloaf. Filling, yes, but usually a bit dry and boring. After learning of the various types of polpettone (Italian meatloaves) they make in Italy, I wanted sometime more tasty with a little bit of a spicy kick. Here's my Polpettone con Salsa di Mele... For the Polpettone 1 small onion, finely chopped 2 tablespoons canola oil 1 large egg, beaten 2 cups fresh bread crumbs (honey wheat), cubed 1 cup cinnamon applesauce (of course, you can make your own) 1 teaspoon salt 1/8 teaspoon fresh ground black pepper 1 pound ground beef, extra lean 1 pound ground pork For the Glaze 1 cup cinnamon applesauce 2 tablespoons cider vinegar 1 tablespoon honey Dijon mustard 2 1/2 tablespoons brown sugar 2 tablespoons barbecue sauce (apple maple) 20 “cracks” of freshly ground black pepper Directions
Serve with some of the glaze on top of each slice, with a side of either potato croquettes or homemade spätzle (like they make in the Alto Aldige region of Northern Italy). Of course, best served with a bottle of Italian sparkling cider. Recipe copyright GrandVoyageItaly.com
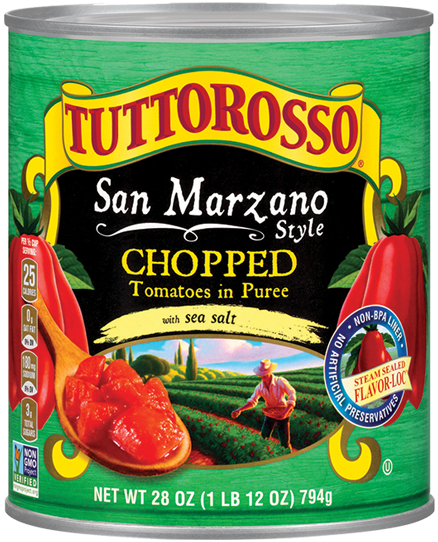
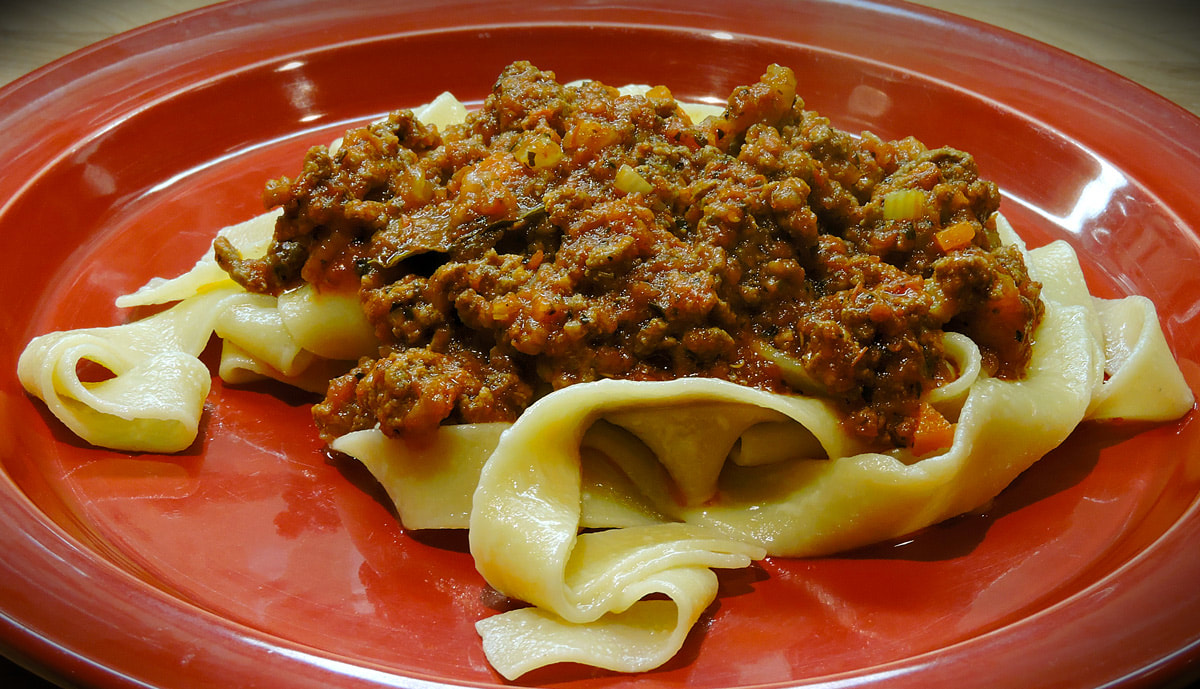 Growing up, one of my favorite things to ask for when my family went to a restaurant was "meat sauce". Meat sauce on spaghetti. Meat sauce on ravioli. Meat sauce on veal cutlets. I'd even ask for meat sauce on top of chicken parmesan! Well, I've grown up and matured (OK, somewhat). In this article I'll show you how to make a grown-up version of "meat sauce"--Ragù alla Bolognese. One of the very first meals we had during our Voyage to Italy was Pici al Ragù... a Tuscan version of Spaghetti Bolognese. We had just gotten off the train from Rome in the small Tuscan town of Chiusi Scalo ("Scalo" designates the part of a town that surrounds a railway station). Chiusi proper, an historic Tuscan town with proud roots back to the Etruscans, was up on the nearby hilltop. We were so weary from having traveled about 16 hours or more, first by air to Rome and then by train from Rome to Chiusi, where we were to pick up our rental car. And at this point we were also famished--needing to re-fuel. When we got off the train, the Hertz office was closed for riposa (a 3 hour siesta), so we had planned to have lunch while we waited. I had already picked out the trattoria that we would eat at, selected weeks before while fine-tuning the details on my Google Earth maps... we would eat our first Italian meal at Trattoria Porsenna, one block from the train station. It was a fantastic choice. With only 12 tables and a casual country style, we order a bottle of gassata for the table and waited for our meals. When the Pici al Ragù came, I couldn't believe how delicious it was. By the way... Pici is a sort of thick, hand rolled spaghetti. Ragù is basically a meat sauce, the best of which is Ragù alla Bolognese, which originated in Bologna but is found all over Italy nowadays. People will tell you that "spaghetti Bolognese" doesn't exist in Italy--but it does. The sauce will just be called "Ragù" instead of "Bolognese", as in "Spaghetti al Ragù", and typically in place of spaghetti the dish is usually served with tagliatelle, a long, flat, fresh pasta noodle--"Tagliatelle al Ragù". Historic records even prove that in centuries past, spaghetti (dried) was commonly used with a Ragù sauce anyway. (NOTE: In the weeks that followed, we saw "Spaghetti alla Bolognese" listed on many menus). So, whatever the name, and no matter what type of pasta you put under it, I knew that this was the Ragù I wanted to duplicate when I returned back home. Ingredients 2 pounds ground beef (80% or less fat) 1/4 pound speck (cut 1/4" thick), 1/4" dice (Speck is a smoked prosciutto) 1 large Vidalia onion (or 2 large yellow onions) 1 teaspoon sugar (for sauteing onions) 4 tablespoons canola oil (for sauteing) 3 carrots, 1/4" dice 3 celery stalks, 1/4" dice 4 garlic cloves, smashed then diced 5 bay leaves (remove after cooking) 1-1/2 tablespoons thyme 1/4 teaspoon dried red pepper flakes 1-tablespoon dried basil 1 cup full bodied red wine (Primativo, Montepulciano, Chianti, etc.) 1-28 ounce can Tuttorosso crushed tomatoes 1-6 ounce can tomato paste 1 cup heavy cream 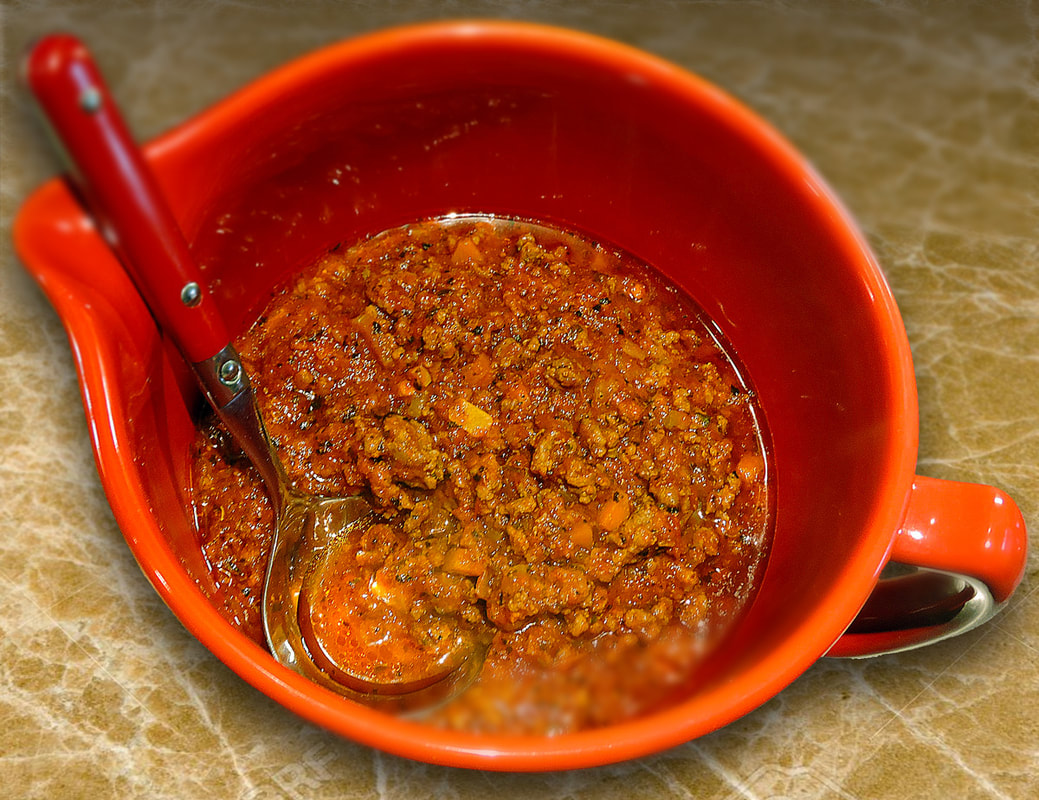 My Bolognese sauce Directions
This recipe will make enough Bolognese sauce for several meals. It also freezes very well. If you would like to make fresh tagliatelle to go with your Bolognese sauce, read Making Fresh Pasta at Home: Not a Necessity, but a Tradition. Or, try making our Torta Rigatoni Piede Bolognese al Forno - Baked Standing Rigatoni Pie with Bolognese. Or, try Baked Standing Rigatoni in a Mug. It's also wonderful spread on a bruschetta for a small lunch or snack. Buon appetito! --Jerry Finzi 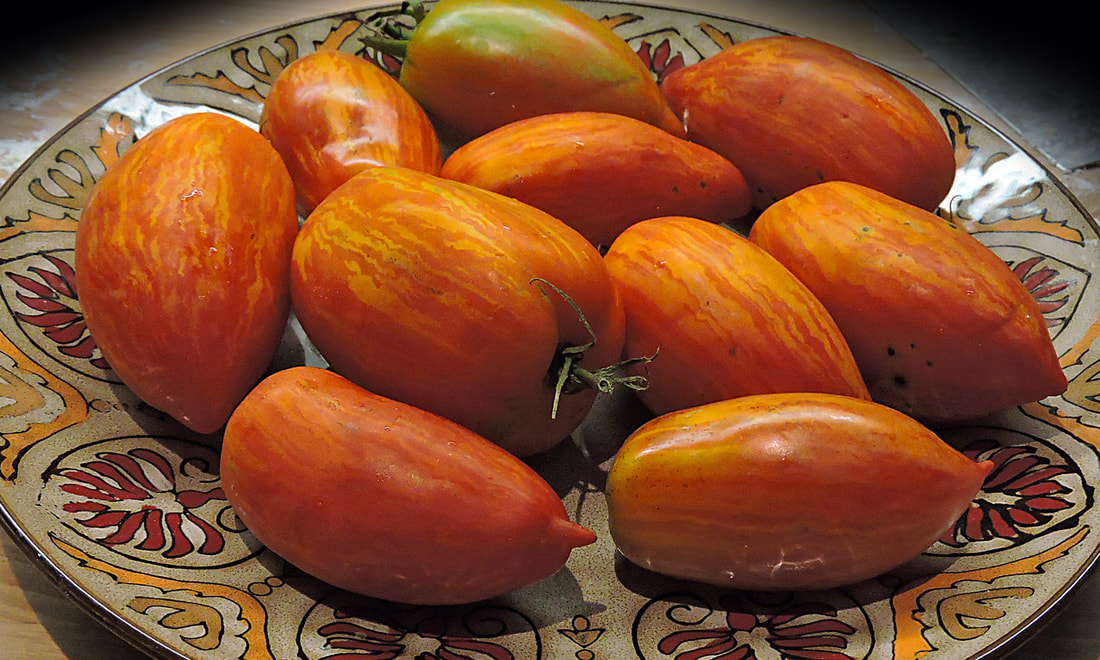 My all-time favorite tomato is Eva Purple Ball--a pink-purplish, 2-3" round globe heirloom tomato that I've been growing for almost 20 years. ("Sweet like sugar", as my Dad always said about his home grown tomatoes). Eva is impeccably disease resistant, with a smooth, flawless skin and produces well. Next in line is Giant Belgium--a large, pink beefsteak tomato. Like Eva, it has a rich, sweet flavor, but large enough for one slice to cover a small dessert plate (great for caprese). But last year I found a fat, orange striped tomato in a local farmers' market that I fell in love with. I saved seeds from one of the biggest ones and planted two plants this season. Well, I'm in love again! This tomato is a large, plum style that grows about 3-5-1/5" long, with a pointy end (often with a very pointy nipple). Some grew so fat that I could not wrap my hand around them. It's very fleshy with low acidity--perfect for making sauce. But it's very sweet! I've gotten into slicing ovals on the bias for my panini and American style hoagie sandwiches. I've made sauces twice for pasta, and even used them sliced as a pizza topping (like I'm doing again tonight).
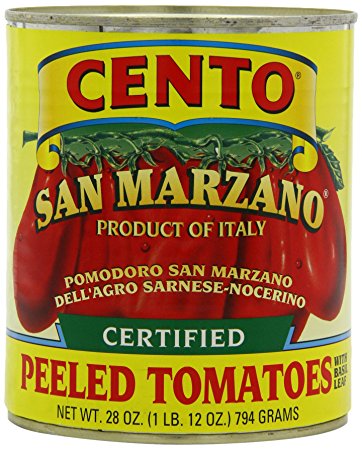
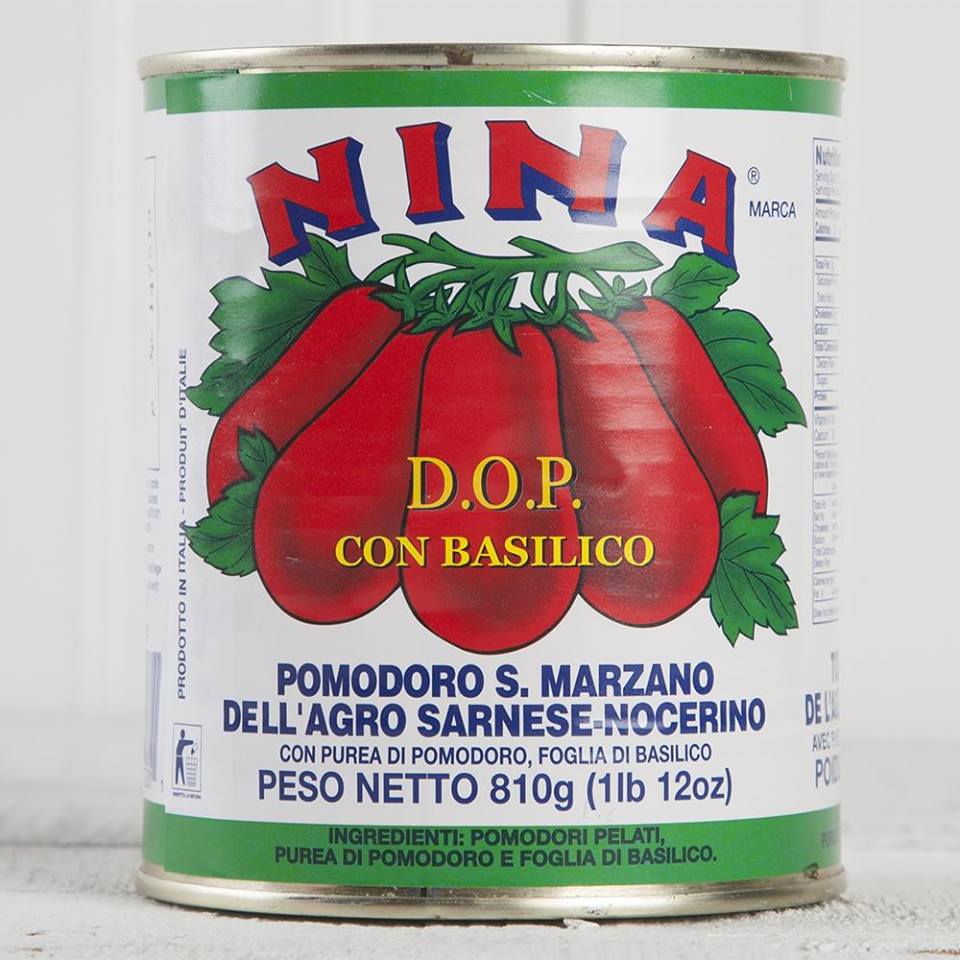
The only problem is, the chipmunks in my garden love them almost as much as I do.But even with those few losses, I'd estimate that the two plants produced about 20 pounds of these so far, and there's still a few on the plants coming ripe. I did several Google image searches until I verified the type--Striped Roma. I've already saved seeds for next season... You can find some seeds HERE. God, I love tomatoes. Home-grown, that is. --Jerry Finzi 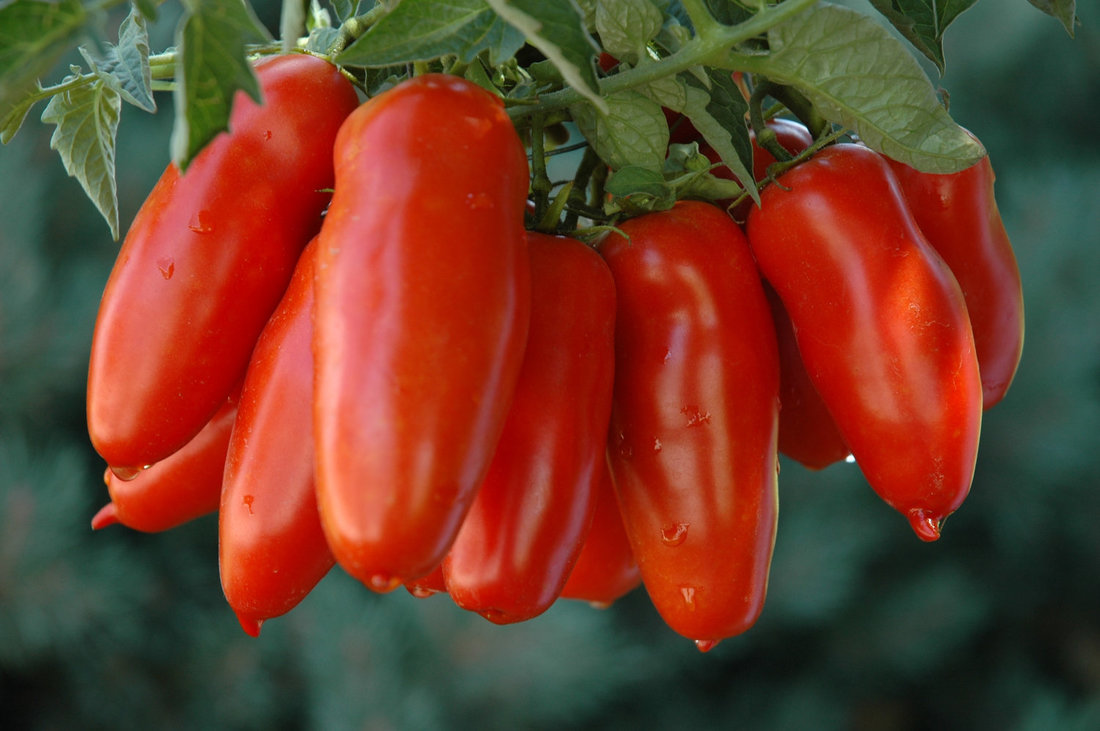 San Marzano tomatoes are the holy grail when it comes to sauce tomatoes. They often cost twice the price of other canned tomatoes, which is the reason why there are many counterfeit, bogus tomatoes in cans labeled San Marzano, or "San Marzano style". Experts say that up to 95% of the tomatoes labeled "San Marzano" are tomatoes grown in other regions of Italy or other countries. The Italian Mafia and other unscrupulous organizations will place lesser quality tomatoes into cans and label them as San Marzano, when in reality they are a mixture of less sweet, less meaty tomatoes. In was in 2011 that the president of Consorzio San Marzano (Consortium for the Protection of the San Marzano Tomato Dell'agro Sarnese Nocerino) said that only five percent of tomatoes marked as such are certified, D.O.P. San Marzano tomatoes. San Marzano tomatoes are elongated plum tomatoes that by decree, must be grown in Agro Sarnese-Nocerino, an area surrounding Mount Vesuvious near Naples. When they are canned, they come with a D.O.P.-Denominazione d' Origine Protetta (literally “Protected Designation of Origin”) emblem on the label, marking their authenticity. This is the same type of certification that ensures the authenticity of other Italian products, such as Parmigiano Reggiano, Prosciutto di Parma or Balsamic di Molena. To ensure you are getting San Marzano tomatoes, make sure that the can has one of the following on it: "Certified San Marzano", the DOP emblem, or the words "San Marzano dell'Agro Sarnese-Nocerino". The ingredients should list "whole (or peeled) San Marzano tomatoes". Some producers also include a statement something like, "San Marzano tomatoes (DOP-protected designation of Origin) are only cultivated in 41 approved municipalities, from San Marzano seeds, within the Sarno River valley surrounding Naples (or 'near the slopes of Mount Vesuvious'), in the Campania region." If the label says, "Grown in the USA", steer clear.
Certified Authentic San Marzano Tomatoes 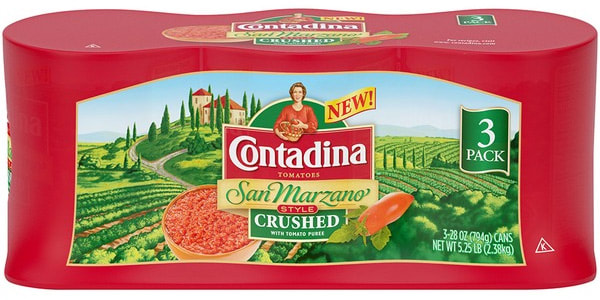
The Phony Stuff  A 1940s era canned tomato that might be San Marzano A 1940s era canned tomato that might be San Marzano Compared to the Roma tomato, San Marzano tomatoes are thinner, a bit longer and pointed at their ends. The thicker, meatier flesh has fewer seeds and is fantastic for making sauce. The taste is also stronger, sweeter and less acidic. (I've had pizza from one local chic, wood oven pizzeria who claimed the tomatoes in their sauce were San Marzano, but the amazingly high acidic level burned my lips. I called BS.) As many know, the tomato itself was imported to Europe after being discovered in the New World. Its first culinary appearance was in a 1692 cookbook as a base for a sauce. The San Marzano itself doesn't show up until much later, in a tomato manual published in 1940, the San Marzano is listed as a "recent cross" between the Re Umberto and Fiaschetto varieties. 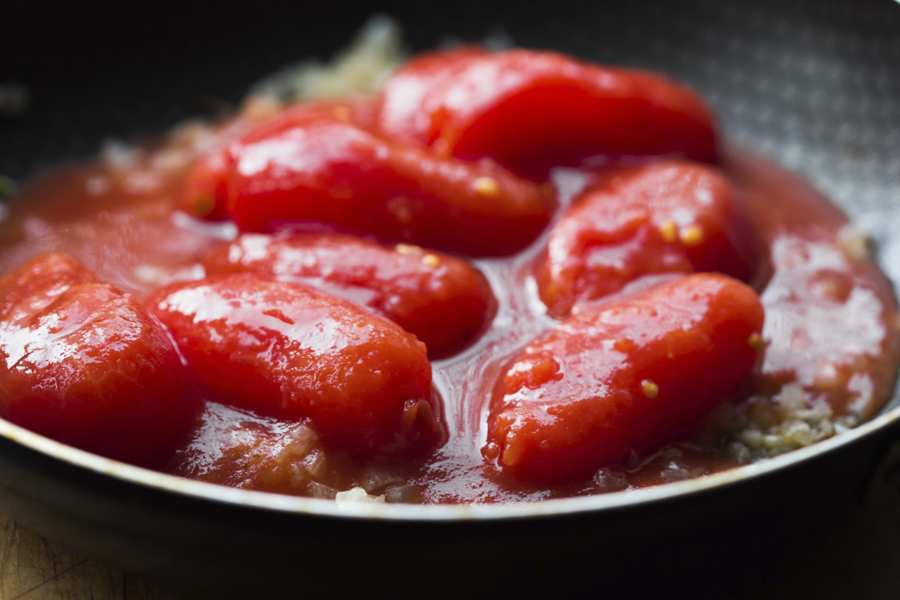 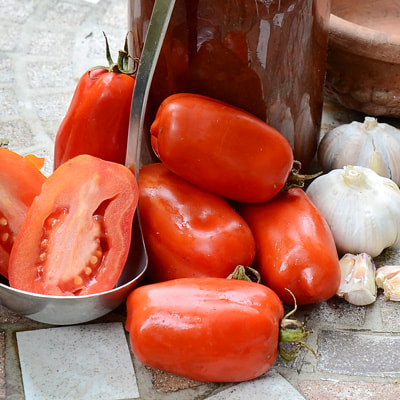 The San Marzano vines are indeterminate type, and have a somewhat longer season than other paste tomato varieties, making them well suitable for warmer climates. Indeterminate tomato plants will keep producing fruit as long as the warm, sunny weather lasts, whereas determinate varieties produce only a set number of fruit on shorter plants, and then die. Many heirloom tomatoes are indeterminate type (like the varieties I grow, producing 8' plants). San Marzano is an "open-pollinated", heirloom variety that breeds true from generation to generation, making seed saving practical for the home gardener or farmer. You can't save seeds from hybrid tomatoes because they cross-pollinate, which results in pot-luck tomatoes appearing on the vine. If you can get some authentic, D.O.P. San Marzano tomatoes while in Campania, save some seeds to plant in your home garden, although they won't have the D.O.P. designation, they will be fairly close the what is grown in Campania. (Of course, you can't exactly match the weather or soil qualities). You can also grow San Marzano seeds purchased from heirloom seed companies, but these wouldn't be from tomatoes harvested in the Sarno Valley area. You will find that even the highly respected Seedsavers Exchange doesn't list any "San Marzano" seeds out of respect for the D.O.P. designation of the originals. So, the next time you're in the Naples neighborhood, buy some San Marzano fruits and save the seeds. There's nothing like home-grown tomatoes, as my father always said... --Jerry Finzi
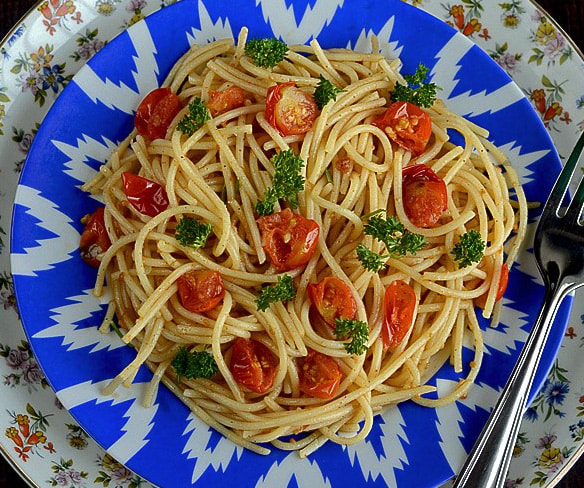
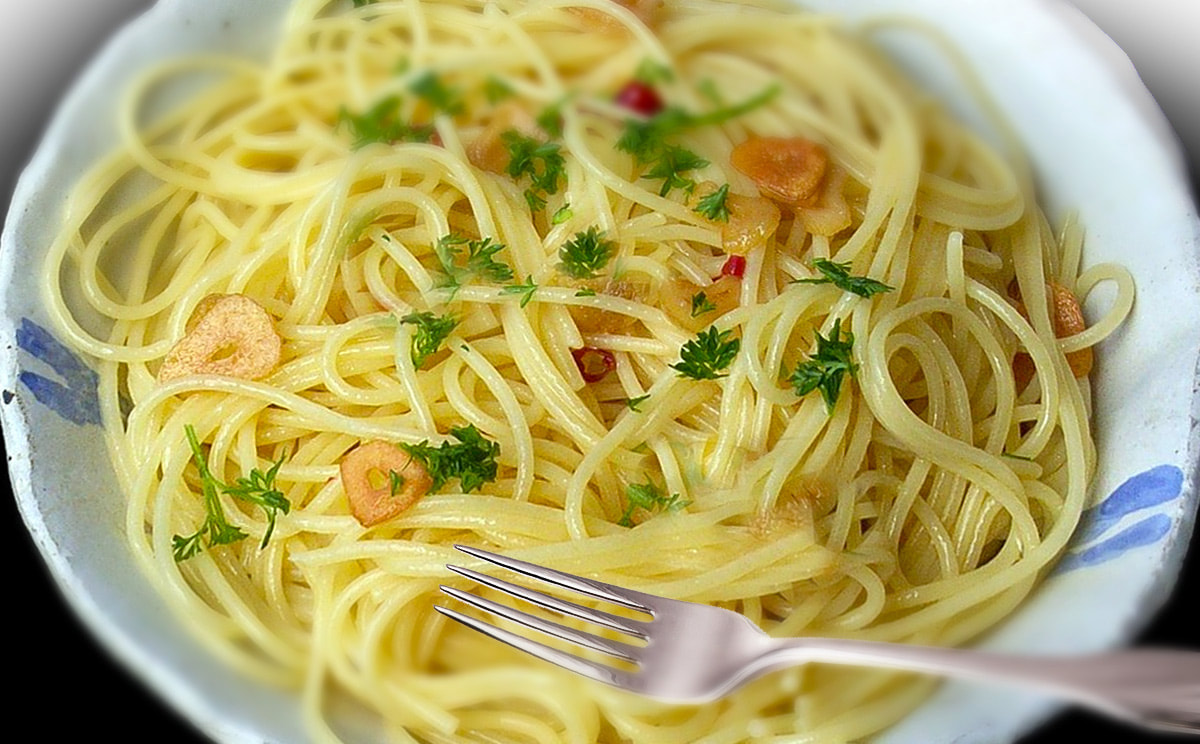 We all have days when we don't know the answer to the question, "What's for dinner?" Busy papa, busy Mama, busy Nonna... stuff happens and we forget to plan ahead. But even if you are a newcomer to the Cucina Italiana, there are always simple, quick meals that you can throw together without any pre-planning, as long as your Italian Pantry is stocked with essentials. Spaghetti Aglio e Olio (Spaghetti with Garlic and Oil) is one of the simplest, yet fulfilling meals any Italian can make. The cooking time is little more than the time it takes to boil your dried spaghetti and can be a base recipe for adding ingredients from leftovers. Even the most basic Italian pantries should have a box of spaghetti, extra virgin olive oil and garlic... 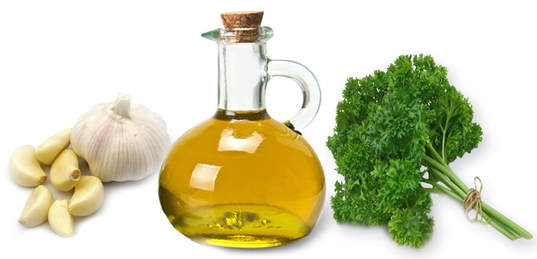 Ingredients
 Directions
Serve with slices of crusty bread and some Chianti for a simple and tasteful meal. This recipe is certainly a classic from Naples, but you can think of it as a base recipe for adding other ingredients: halved cherry tomatoes, diced prosciutto, capers, olives, etc. Don't ever hesitate to be creative with Italian recipes! Buon appetito! --Jerry Finzi |

Archives
May 2024
Categories
All
|