|
Without a doubt, one of the best ways to discover truly authentic Italian recipes is to subscribe to Pasta Grammar's YouTube channel. Follow them on social media too... @PastaGrammer. You see, aside from the nonnas on the Pasta Grannies YouTube channel, this raven haired Calabrese, Eva is one of the best cooks who uses traditional techniques for traditional Italian dishes. Her recipe for ciabatta is one you'll want to make every week. --Jerry Finzi 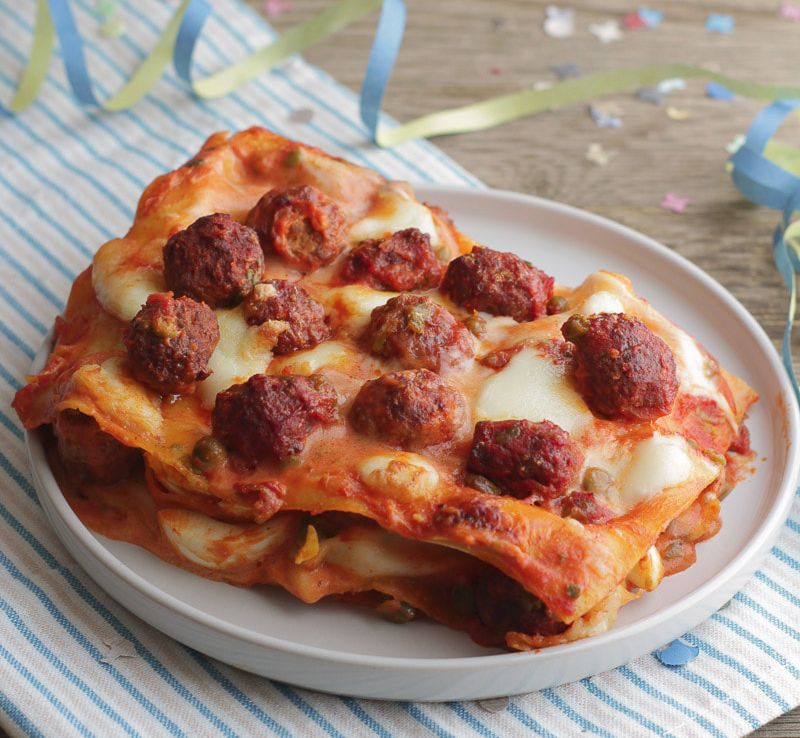 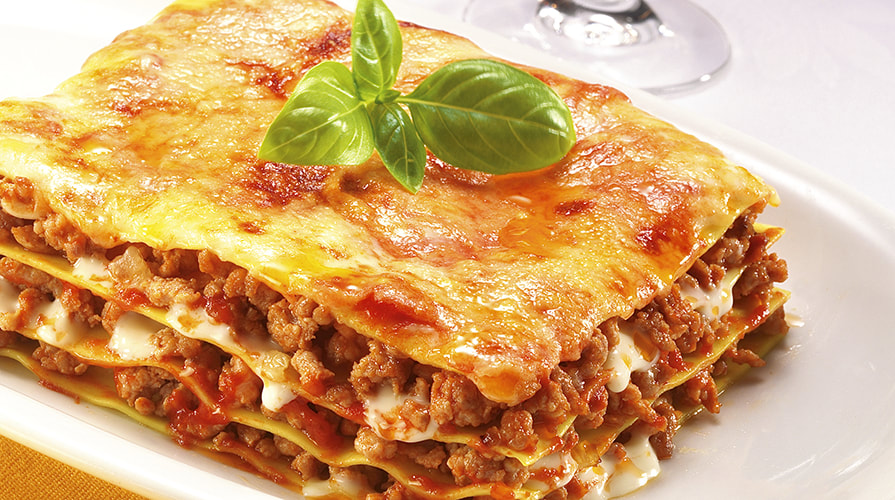 Fat Tuesday is called Mardi Gras in French but in Italy it's known as Martedì Grasso. Ash Wednesday--the beginning of Lent and fasting until Pasqua--happens the day before Martedì Grasso, which gives Italians a reason to feast and party. During Lent, Catholics are expected to give up something they love as penance. When I was a boy, the rules were very loose--giving up something you didn't like anyway was a way around the rules. But Italy is a Catholic state and many still observe full sacrifice. While some might replace meat only on Fridays with fish, others give up meat entirely during Lent. (More modern twists are giving up texting, Facebook or TV). Broken down from the Latin, Canem Levare (meat lift), the festive celebration of Carnevale can literally be thought of as a time when meat is lifted away from meals--as a sacrifice. Carnevale in Italy starts on Giovedí Grasso, the Thursday before Fat Tuesday. During this time Italy celebrates Carnevale in towns like Venice, Viareggio and the Emilia-Romagna town of Cento. But Carnevale is widespread in Italy, just as Lent is... so just before giving up meat, they feast on it... In Southern Italy, especially around Naples, the end of Carnevale is celebrated by eating Lasagne di Carnevale, a rich lasagna layered with a choice of meats, typically polpette (meatballs), sausage or a meat ragu. If you know how to make a lasagna (here's our Eggplant Lasagna recipe), then you know the basics of making a Lasagna Carnevale. Just layer in small meatballs or cut up large ones in small pieces or slices. You can also include slices of sweet or spicy sausage or a thick meat sauce (like our Bolognese recipe). Guess what we are eating tonight? --Jerry Finzi  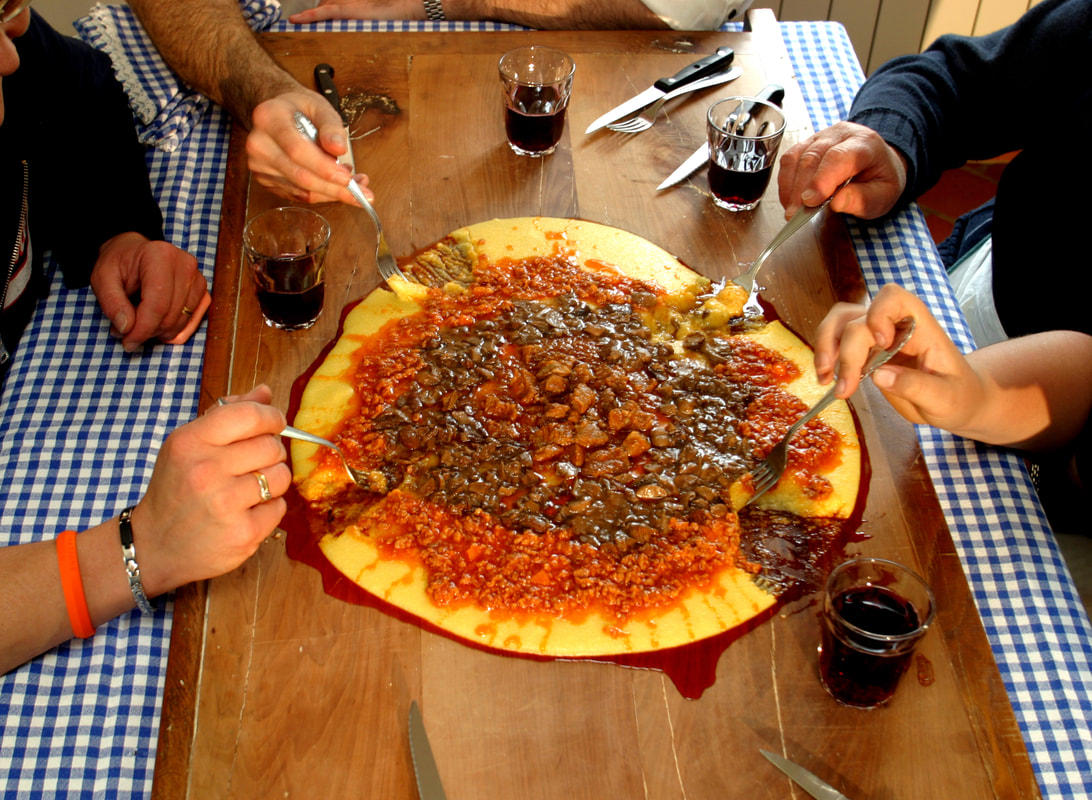 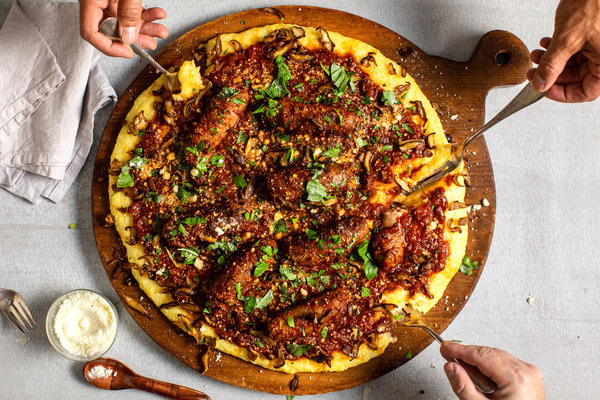 One of the cucina povera (poor kitchen) Christmas traditions in Italy is Polenta alla Spianatora (polenta on the board), a rustic meal of polenta served as a dinner during the cold nights between la Vigilia (Christmas Eve) and Capodanno (New Year's Day). What makes this meal so unusual is the manner in which it is served. In the old days, hot polenta was poured and spread out directly on the family's wooden table. A slow-cooked sugo (thick, meaty tomato sauce), peas and possibly sausages or pieces of braised pork were arranged in concentric circles. The bits of meat were a real treat for children in the poor, farming communities. Young and old alike were given forks and everyone would make their own trails in the hot mess of deliciousness, each staking out their own section. But as I've been told, in some homes there were rules: you weren't allowed to eat the meat until you ate a path to the center, with some slow eating children not having such luck! This manner of eating is a celebration of nature from the 15th century when corn was introduced to Italy from the New World. This dish is a celebration of the recent harvest... the circular shape of the polenta represented the sun, and it's corn having come from Mother Earth herself. All the ingredients topping this sun would have also been nurtured by the sun during the growing season: lentils, chickpeas, pork, chicken. This is an ancient meal that also celebrates life--and family. So everyone was at the table digging in. This is a big meal... with a large amount of polenta traditionally prepared in a copper pot resembling a modern wok. Nowadays, people tend to use a Spianatora (or spianatoia)--a modern day wooden cutting or pastry board--to pour the polenta onto. There are even some restaurants in southern/central Italy that will service this during the holiday season. 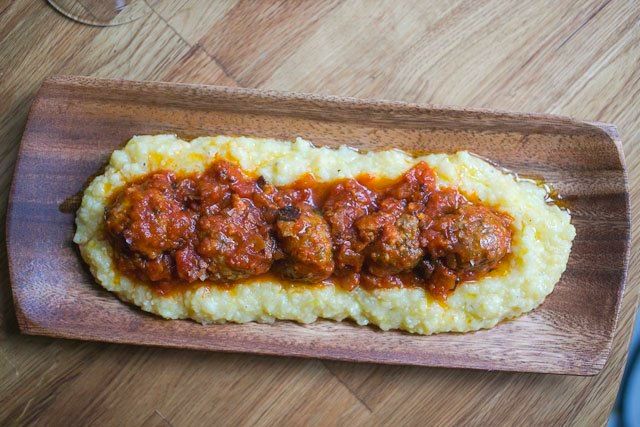 To make this warming meal for your famiglia, first you need to make a Sugo. Here's a link to my own family's Sugo Recipe.  on Amazon on Amazon For the Polenta
Top this beautiful, hot mess with Parmigiano Reggiano or Romano and invite your amici and famiglia to start scraping. Buon appetito, Buon Natale and Felice Anno Nuovo! --Jerry Finzi 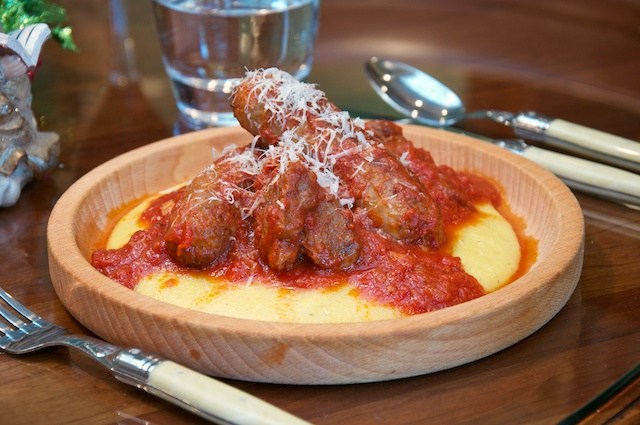 If you prefer, here's a more personalized serving 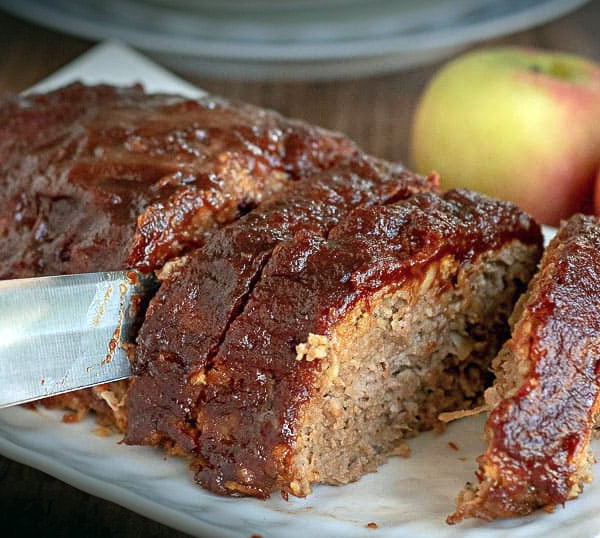 When I was a child, my mother would make meatloaf... plain, American style, ketchup covered, meatloaf. Filling, yes, but usually a bit dry and boring. After learning of the various types of polpettone (Italian meatloaves) they make in Italy, I wanted sometime more tasty with a little bit of a spicy kick. Here's my Polpettone con Salsa di Mele... For the Polpettone 1 small onion, finely chopped 2 tablespoons canola oil 1 large egg, beaten 2 cups fresh bread crumbs (honey wheat), cubed 1 cup cinnamon applesauce (of course, you can make your own) 1 teaspoon salt 1/8 teaspoon fresh ground black pepper 1 pound ground beef, extra lean 1 pound ground pork For the Glaze 1 cup cinnamon applesauce 2 tablespoons cider vinegar 1 tablespoon honey Dijon mustard 2 1/2 tablespoons brown sugar 2 tablespoons barbecue sauce (apple maple) 20 “cracks” of freshly ground black pepper Directions
Serve with some of the glaze on top of each slice, with a side of either potato croquettes or homemade spätzle (like they make in the Alto Aldige region of Northern Italy). Of course, best served with a bottle of Italian sparkling cider. Recipe copyright GrandVoyageItaly.com
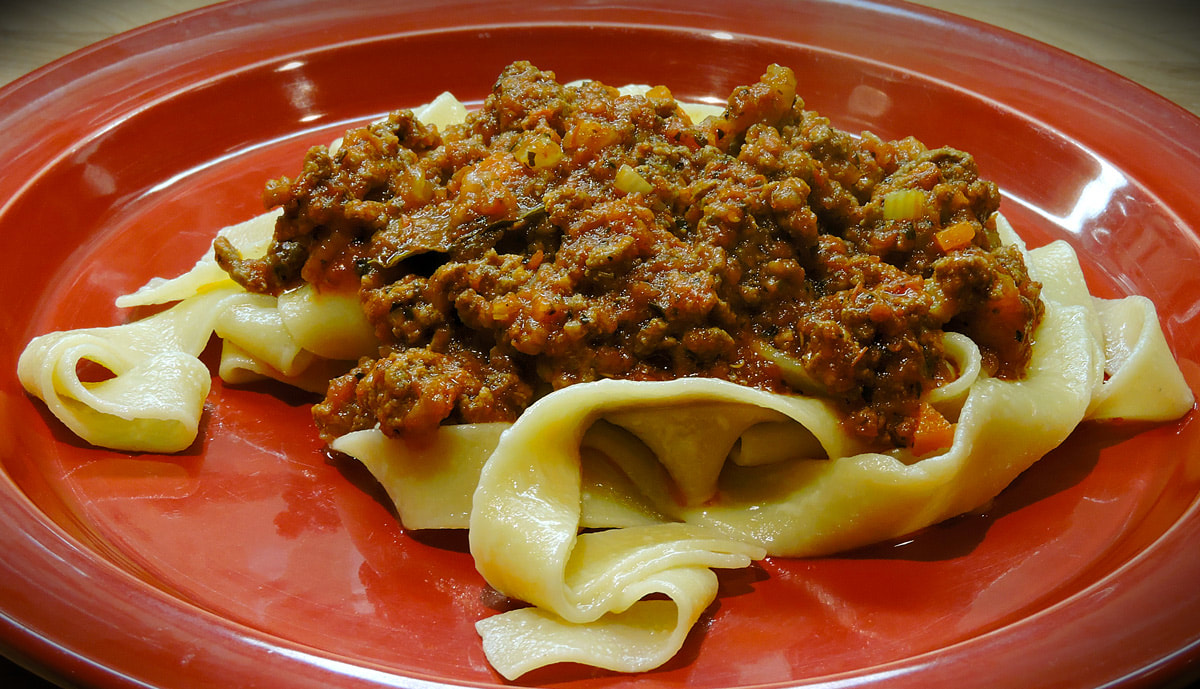 Growing up, one of my favorite things to ask for when my family went to a restaurant was "meat sauce". Meat sauce on spaghetti. Meat sauce on ravioli. Meat sauce on veal cutlets. I'd even ask for meat sauce on top of chicken parmesan! Well, I've grown up and matured (OK, somewhat). In this article I'll show you how to make a grown-up version of "meat sauce"--Ragù alla Bolognese. One of the very first meals we had during our Voyage to Italy was Pici al Ragù... a Tuscan version of Spaghetti Bolognese. We had just gotten off the train from Rome in the small Tuscan town of Chiusi Scalo ("Scalo" designates the part of a town that surrounds a railway station). Chiusi proper, an historic Tuscan town with proud roots back to the Etruscans, was up on the nearby hilltop. We were so weary from having traveled about 16 hours or more, first by air to Rome and then by train from Rome to Chiusi, where we were to pick up our rental car. And at this point we were also famished--needing to re-fuel. When we got off the train, the Hertz office was closed for riposa (a 3 hour siesta), so we had planned to have lunch while we waited. I had already picked out the trattoria that we would eat at, selected weeks before while fine-tuning the details on my Google Earth maps... we would eat our first Italian meal at Trattoria Porsenna, one block from the train station. It was a fantastic choice. With only 12 tables and a casual country style, we order a bottle of gassata for the table and waited for our meals. When the Pici al Ragù came, I couldn't believe how delicious it was. By the way... Pici is a sort of thick, hand rolled spaghetti. Ragù is basically a meat sauce, the best of which is Ragù alla Bolognese, which originated in Bologna but is found all over Italy nowadays. People will tell you that "spaghetti Bolognese" doesn't exist in Italy--but it does. The sauce will just be called "Ragù" instead of "Bolognese", as in "Spaghetti al Ragù", and typically in place of spaghetti the dish is usually served with tagliatelle, a long, flat, fresh pasta noodle--"Tagliatelle al Ragù". Historic records even prove that in centuries past, spaghetti (dried) was commonly used with a Ragù sauce anyway. (NOTE: In the weeks that followed, we saw "Spaghetti alla Bolognese" listed on many menus). So, whatever the name, and no matter what type of pasta you put under it, I knew that this was the Ragù I wanted to duplicate when I returned back home. Ingredients 2 pounds ground beef (80% or less fat) 1/4 pound speck (cut 1/4" thick), 1/4" dice (Speck is a smoked prosciutto) 1 large Vidalia onion (or 2 large yellow onions) 1 teaspoon sugar (for sauteing onions) 4 tablespoons canola oil (for sauteing) 3 carrots, 1/4" dice 3 celery stalks, 1/4" dice 4 garlic cloves, smashed then diced 5 bay leaves (remove after cooking) 1-1/2 tablespoons thyme 1/4 teaspoon dried red pepper flakes 1-tablespoon dried basil 1 cup full bodied red wine (Primativo, Montepulciano, Chianti, etc.) 1-28 ounce can Tuttorosso crushed tomatoes 1-6 ounce can tomato paste 1 cup heavy cream 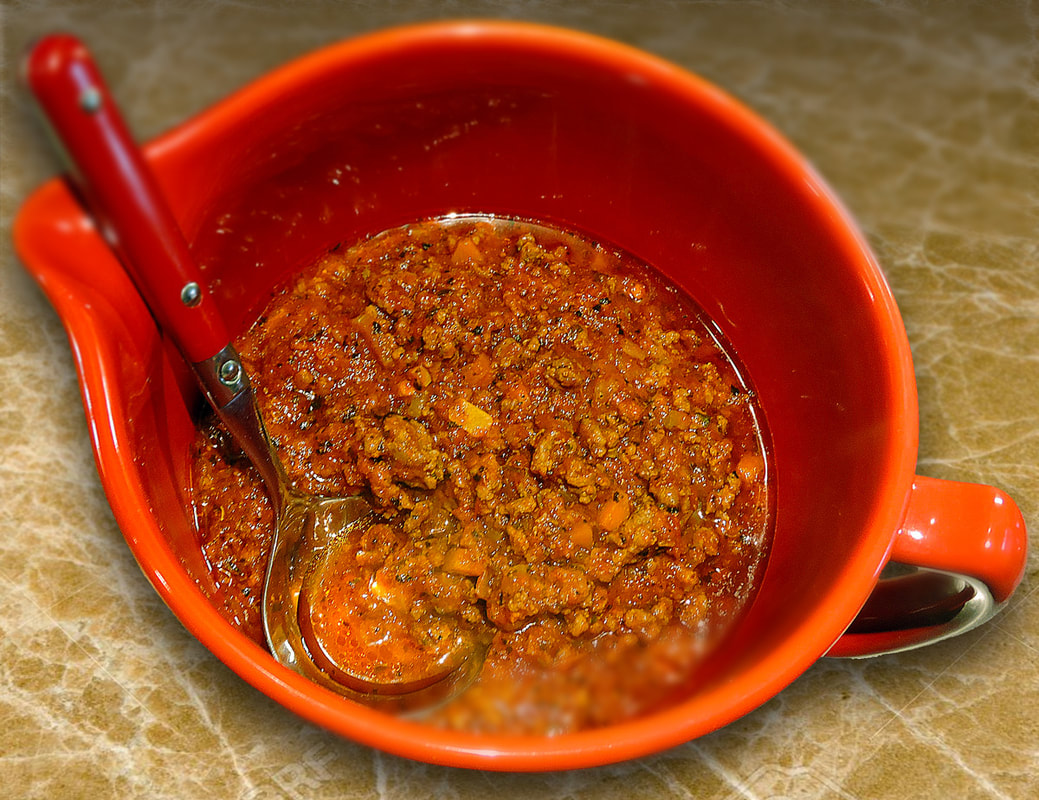 My Bolognese sauce Directions
This recipe will make enough Bolognese sauce for several meals. It also freezes very well. If you would like to make fresh tagliatelle to go with your Bolognese sauce, read Making Fresh Pasta at Home: Not a Necessity, but a Tradition. Or, try making our Torta Rigatoni Piede Bolognese al Forno - Baked Standing Rigatoni Pie with Bolognese. Or, try Baked Standing Rigatoni in a Mug. It's also wonderful spread on a bruschetta for a small lunch or snack. Buon appetito! --Jerry Finzi  You know, I always thought I'd have a problem eating weird things if I ever traveled in the Orient. I'm a person with a fairly narrow palate... I admit it. Even my 14 year old, Lucas has a much broader palate than I do. I like what I like and won't try what I know I don't like. I'm old enough to say that I have tried lots of stuff--for instance, I hate caviar and cooked spinach makes me gag. I know what I can't stomach. In my research and travels about Italy, I've come across things that I wouldn't eat if you paid me. Some things I'll try--once--while others... well, you just sort of know to stay clear. Still, we have to respect the culinary traditions of our Italian heritage and try not to be so grossed out by it. Food is fuel--fuel is food. In Italy, nothing goes to waste--not beast or flora. So, I hope you pardon me as I poke a little fun at some of Italy's oddest culinary creations--even though I may tease a bit, I still want to honor the complexities if la Cucina Italiana... In ancient Rome peacock eggs, boiled ostrich and stewed parrots were common on menus.  Stuffed Mice There is a protected, fluffy tailed species of dormice (Glis glis or Ghiro) that have been eaten since the days the Caesars ran things. Down in Calabria the rodents are still stuffed and chomped on. They are stuffed with meat, nuts, raisins, onions and spices. You can imagine little squeaks as you take a bite. I have no idea what they do with all those cute fluffy tails. Ghiri alla pizzaiola : Ingredients : . 2 Ghires, 50 g of lard, 50g of pancetta, gr 600 gr peeled tomatoes, 1 tablespoon of chopped parsley, 1 tablespoon of oregano, 1 tablespoon extra virgin olive oil, 1/2 teaspoon of salt Engage the dormice lengthwise, peel them, quickly remove the bladder without breaking it and leave it in running water for a few hours. Rinse them and blanch in boiling water for a couple of minutes. Chop the lard and the bacon and put the mince in the belly of the dormice. Place them in a large pan, pour the oil and cover with chopped tomatoes, parsley and minced garlic, oregano and salt. Cook over moderate heat, keeping the pan tightly closed with the lid.  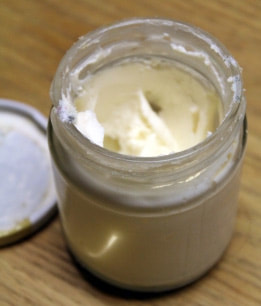 Riccota Forte (or Scanta) The Pugliese are a resourceful bunch. I know--mu Dad was from Puglia. Many of you may know that ricotta means twice cooked or re-cooked... basically, ricotta is a by-product of normal, everyday cheese making. You take the little bit of whey left over, add an acid, boil it and presto, you have ricotta cheese. It's a fresh cheese and should be eaten within a couple of days. When it dries out, the frugal Pugliese add salt, and let it dry even more into Ricotta Salada (one of my favorite cheeses). But some go even further. Some just let it go bad... and stinky... and acrid, turning it into a Apulian delicacy called Ricotta Forte, or Scanta. Many think this acrid, foul smelling cheese is worse than any other stinky cheese they've even eaten--but in a good way. We tried it during our stay in trullo B&B outside of Alberobello. Yes, it stinks, and our host told us how it's just kept in a dark, un-refrigerated place (under his sink) to grow more bacteria and even sometimes microscopic worms--but we actually liked it! (But it did burn my eyes a tad).  It's the kind of taste that shocks your eyes open, assaults your nose but somehow in the end pleases your palate. It's also a surprise when you are first introduced to it in a plain jar that looks like it's your Aunt's 1950s era home brew face cream. Enjoy. (Oh, just don't get it on anything sweet... I got it on some Nutella and bread by mistake and nearly got whiplash when I popped it in my mouth.) 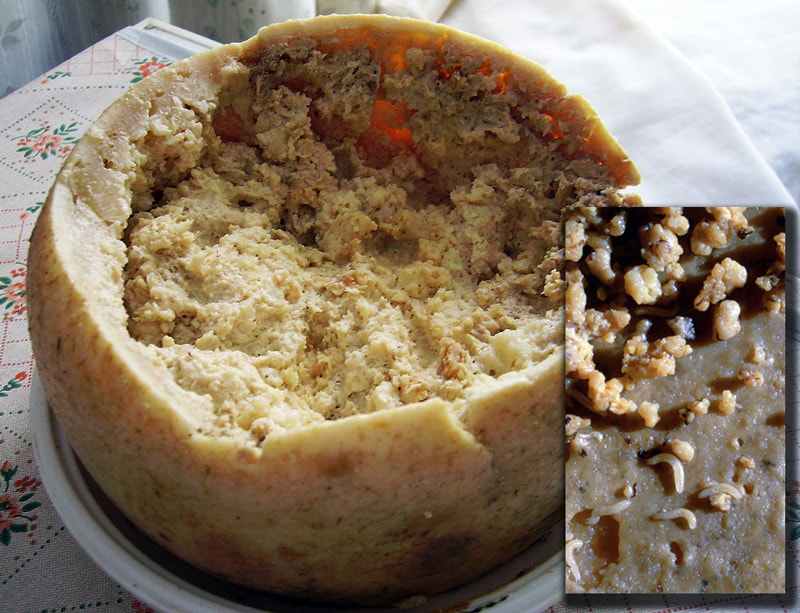 Casu Marzu or Formaggio Marcio (Rotten Cheese), with Maggots Casu Marzu is a sheeps' milk cheese from Sardinia and Corsica (they call it Casgio Merzu) that actually contains maggots--live ones. Most cheeses rely on fermentation and bacteria to develop their flavor, but this cheese relies on actual decomposition caused by the Cheese Fly larvae. The texture is an oozing, seeping liquid, essentially caused by... well... maggot poop. Some people eat this stuff with the larvae, some will tickle the cheese, causing the larvae to be disturbed enough to actually jump out... as much as 6 inches! The daring who have tasted it say this muck is so acidic that it leaves an after taste in your mouth for hours afterward. I recall a cheese like this in France years ago--I wouldn't go near that either! 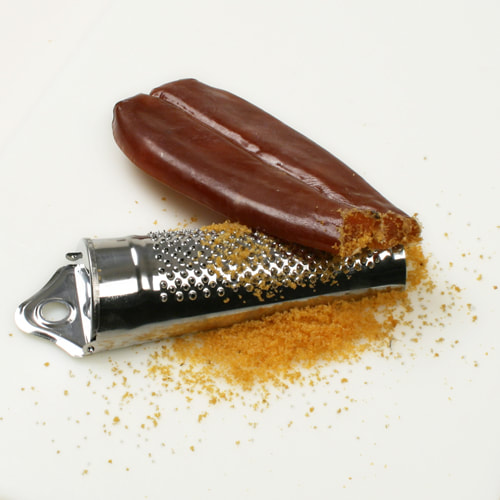 Batarga From what I hear, battarga is definitely an acquired taste that's at least a thousand years old and perhaps more ancient than that. It's made from the roe (fish egg) pouch of either grey mullet or Atlantic blue-fin tuna. The roe pouch is manipulated by hand to get rid of any air bubbles and then cured in sea salt for several weeks. After curing, the result is a hard, dried salty slab which is usually (but not always) coated in beeswax. 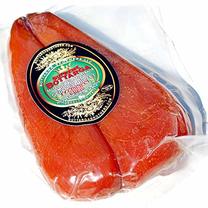 To use it, you grate some on top of pasta or on top of crostini (toasted bread) and drizzled with olive oil. It also can be used as a main ingredient along with garlic for tomato sauce. It has a tremendously long shelf life and is often smuggled out of Italy due to its high price--up to $140 a pound! You can actually order some on AMAZON.  Colatura di Alici, Fish Sauce In ancient Roman times there was a fishy concoction called garum, a clear sauce made from salting and compression of various types of fish. The clear garum on top was used by the upper classes, while the sludge left over, called allec, was used by the lower classes to add flavor to polenta, porridge or on bread. Today there is a modern version called Colatura di Alici made in one of my favorite villages on the Amalfi Coast, Cetera (click the photo to see it on Amazon). The first time I took a tour of Cetera at ground level on Google Earth I started seeing barrels and wondered why this village had so many. It's a fairly simple recipe... 
The golden liquid is prized in Italy and is used to flavor all sorts of dishes. Watch the video of Colatura being made... 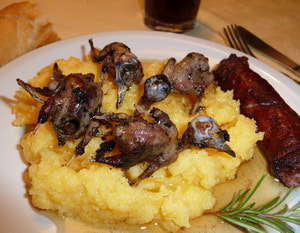 Polenta Uccelli (Polenta with Songbirds, or Polenta e Osei) Yes, the same song birds that will awaken you on a misty Tuscan morning are being shot or captured in hanging nets by hunters to supply their illegal bounty to select restaurants throughout Italy. Yes, it is illegal, but those doing it consider the practice as being furbo (crafty). They make a living while carrying on a tradition. In Tuscany the birds are flambéed, in Sardinia they are boiled and preserved, in the Veneto rolled in pork belly and fried. Perhaps the best known version is in Lombardy where they are grilled or fried. It seems this is an elite recipe item in Italy. Ladies and gents get dressed up in all their finery and make an event out of eating these little skylarks, goldfinches and other types of song birds. Our hot air balloon pilot, Stefano told us they shoot anything in Italy, especially song birds, so much so that some species are becoming endangered. Oddly, we flew directly over some "hunters" in their treetop blind, releasing pigeons only to shoot them a moment or two later. The little tweetys are usually stuffed with pork, beef, rabbit or even other birds. They are served with their heads and beaks on top of polenta, an attempt to mimic a bird's nest.  To illustrate how much Italians love this special dish, certain pasticcerie have created a legal version: a dessert called Polenta e Osei, made to look just like the real dish. It's made of a soft light sponge cake filled with hazelnut cream that is rolled in a yellow fondant. On top are little chocolate birds made from chocolate marzipan. You can find this in the town of Bergamo. As for the real song bird dish, the macho thing is to pick up the birdie by the beak and leave nothing... devouring bones, beak and all. At least they are not as ruthless as a similar dish I saw in France years ago--where they drown the birds in the local brandy, then when eating drape a napkin over their heads and the dish to inhale the fragrances and crunch down on the bird, apparently head hidden in shame. 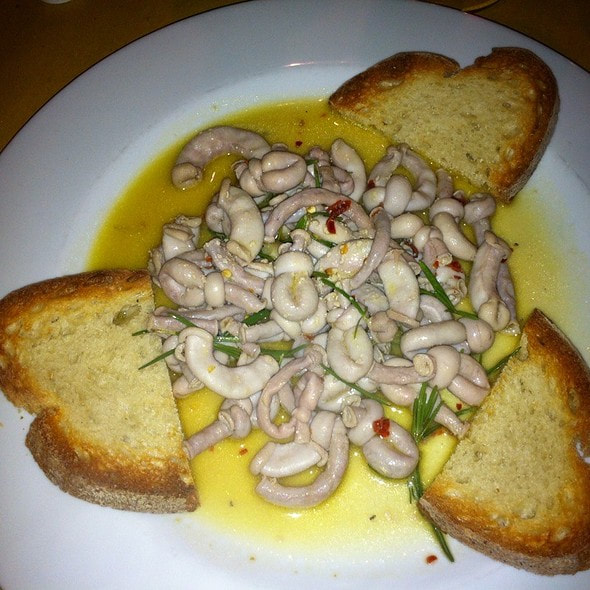 Pajata (Cheese from Cow's Intestines) This is either a Roman dish or what the Devil himself would order up. A young, milk fed (no grass feed) calf is slaughtered, and besides getting veal, brains and other delicacies from it, the intestines are used to make this delicacy--pajata. The intestines are washed, but not emptied. When cooked, the partially-digested milk inside turns into a thick, funky cheesy substance which is used as a pasta sauce, and often served on its own with crostata. No grazie! 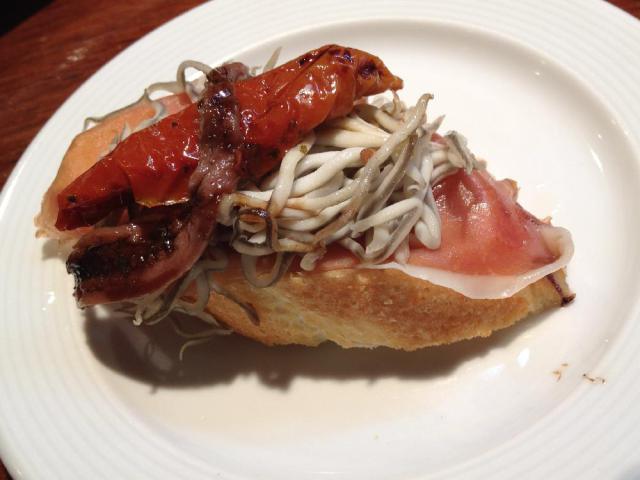 Cieche (Baby eels) Cieche are baby eels that migrate upriver after being born in the sea. The name, Cieche (cieco) literally means blind – these babies have no eyes. In coastal areas of Tuscany, cieche are usually fried or boiled alive. Just be careful they don't jump out when you're trying to dump them into the boiling water or saute pan. 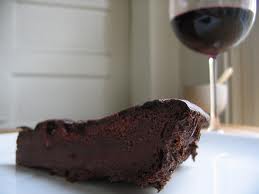 Tuscan Blood Torte Enough said. A torte or cake made from the blood of pigs? I've tried Argentinian blood sausage and British blood sausage, and if the flavor is anything close to what I experienced, I would never go near this stuff. But this recipe contains cocoa and has a chocolate taste, albeit a bit more... er... pungent because of the pig's blood it contains. The pudding used is similar to Sanguinaccio Dolce, a traditional recipe in the South made when a pig is slaughtered using the pig's blood, chocolate, raisins pignoli and sugar. This is an example of the Italian philosophy that nothing goes to waste, not even the last drops of blood. Watch the video below from the Two Greedy Italians series where Gennaro shows how they make the pudding (at 9:45).
 Vending Machine Pizza As all of the above proves, Italians will eat anything... even pizza made totally inside a robotic vending machine. Not THAT's a real crime! Let's Pizza machines were initially designed and manufactured in Northern Italy. It offers a choice of four kinds of pies, and makes the pizza while you watch the whole process through windows--adding water to flour, kneading the dough, placing the sauce and toppings, and baking the pizza via infrared oven in just 2.5 minutes. It can produce 90 to 100 pizzas before it needs to be refilled. Ugh. Just because you can, doesn't mean you should!  Ok, so vending machine pizza isn't such a big deal, but how about (suspenseful music...) Gatto in Umido? This translates as "Stewed Cat"!
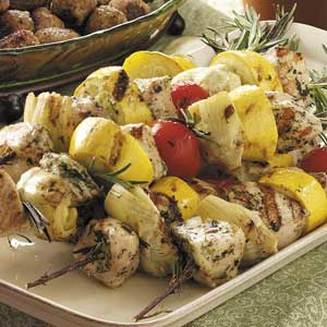
Calmati, Betty White... "Gatto in Umido" is simply Stewed Cat-Fish. As I said, we all have to keep an open mind. I hope you enjoyed this look into the traditions of culinary Italy. Via la Cucina Italiana! --Jerry Finzi Memorial Day Weekend is here. And so is the corn on the cob, French fries, burgers, hotdogs, hot wings and brisket. In Italy the equivalent of our Memorial Day is April 25, la Festa della Liberazione which commemorates the end of WWII, followed by Festa dei Lavoratori (Labor Day) on May 1st. Many Italians combine the two and go on holiday to celebrate the beginning of spring, and like Americans, they love their BBQ, but typically over a wood fire. Many Italian-Americans are looking for ways to bring a little of Italy into their choices... here are some ideas. 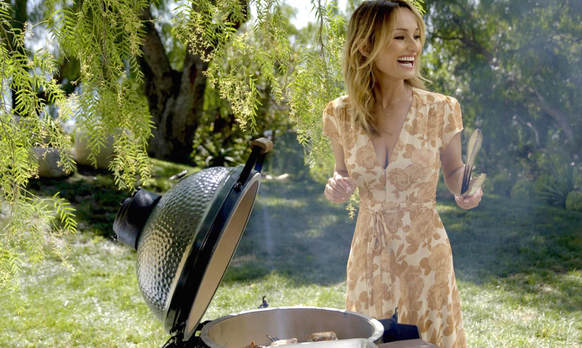 From Giada's Giadzy: Burrata and Kale Salsa Verde Bruschetta The salsa verde for these decadent toasts can be made a day ahead, making assembly a breeze once the grill heats up. Bistecca Fiorentina Florence's signature dish doesn't need to be made with that famous Tuscan beef - a good-quality rib-eye marinated in this herb-garlic mixture will do the job perfectly. Tomato, Avocado, and Escarole Salad Bitter escarole is a perfect foil for the rich steak in this simple side salad, while tomatoes and Castelvetrano olives add bright acidity. And you can never have too much avocado! Chocolate Ice Cream Sandwiches Ice cream on the grill? It's true! Grilled bread topped with luscious chocolate-hazelnut spread encloses scoops of vanilla ice cream for a perfect ending. 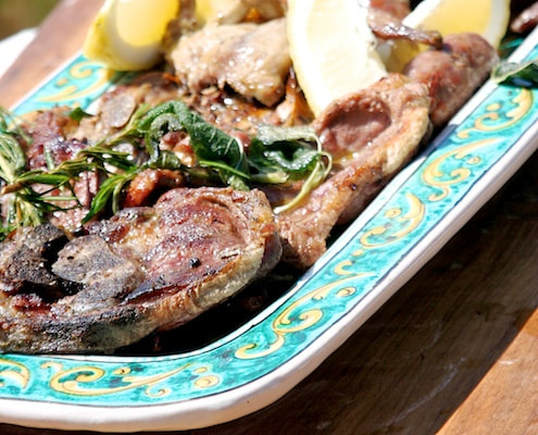 A here are some tips on how to recreate an Italian Mixed Grill from Honest Cooking, using a variety of meats grilled over a wood fire, as Italians do.
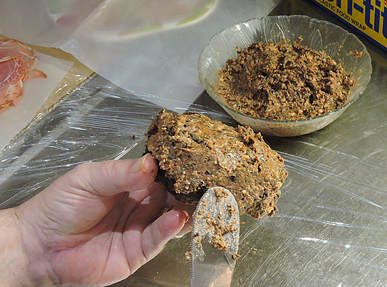
 And of course, the ultimate Italian BBQ is the Tuscan classic, Bistecca alla Fiorentina, offered here from Memorie di Angelina. In Tuscany, the steaks used are from the Chianina, an Italian breed of cattle raised mainly for beef. It is the largest and one of the oldest cattle breeds in the world. In the U.S. 1-1/2 - 2"" thick porterhouse or T-bone steak are good substitutes. In Tuscany, these steaks are grilled over wood coals until dark and smoky outside and bloody toward the center. They are sliced thin and enjoyed by all with a salad of Italian greens (especially arugula) grilled potatoes or beans in olive oil and sage. There are always wedges of lemons, course sea salt, pats of butter or extra virgin olive oil to top it off. Chianti Classico or Brunello di Montalcino are good choices to add to the celebration. 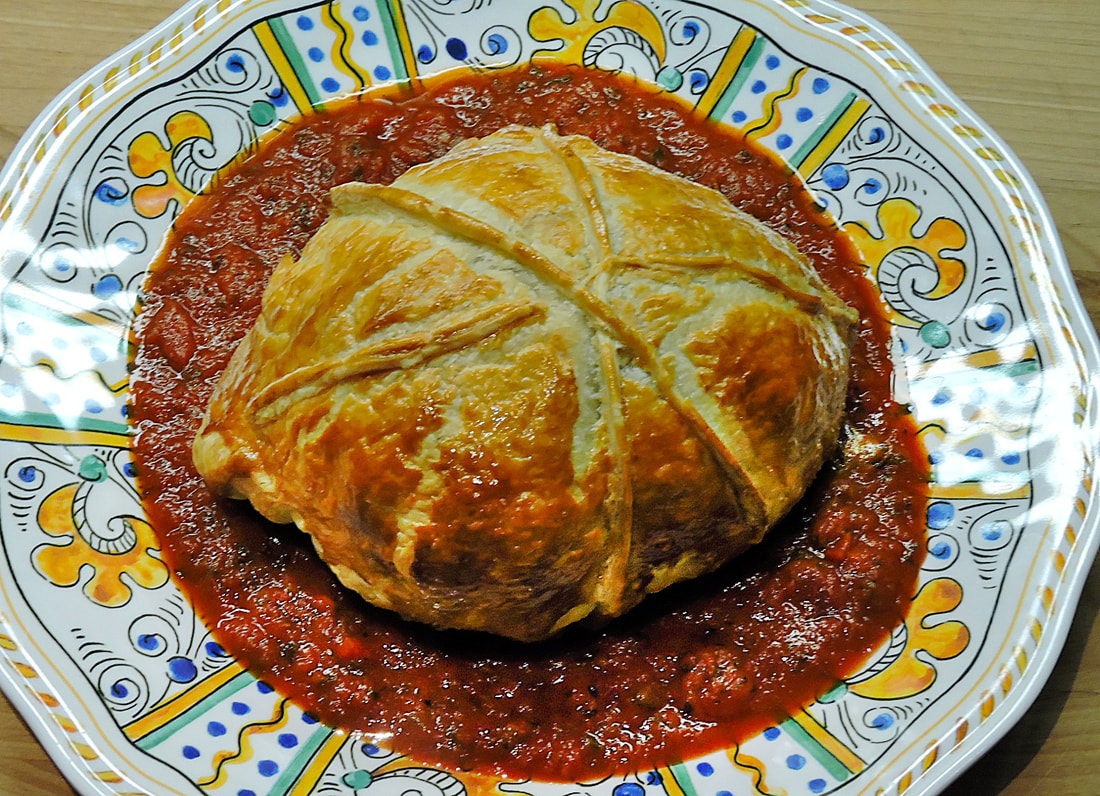 by Jerry Finzi For Valentine's Day, my wife treated us to a Beef Wellington dinner, prepared and delivered by a local chef. Even though she got rave reviews, we weren't really Wow'd. Having had Wellington in the past, I knew that there were a few things lacking... The cut of beef wasn't tender enough, the mushroom duxelle was a bit funky tasting, and it was missing a wrap of Parma ham inside the (greasy) pastry. Thinking I could do better, I started thinking... and thinking... Why not transform the Wellington into an Italian version? The idea was to design a recipe similar to Beef Wellington... but instead of using a tender loin steak inside, it would be a large, flattened Italian style polpette (meatball), wrapped in prosciutto and provolone cheese with an black olive/pesto Tapinade just inside the puff pastry. There are similar recipes in Italy called Polpettone in Crosta, but these are loaf-size meatloafs, often stuffed with hard boiled eggs or other ingredients. I wanted mine to remain a Polpette--a true meatball... I set out to make my Polpette alla Wellington! 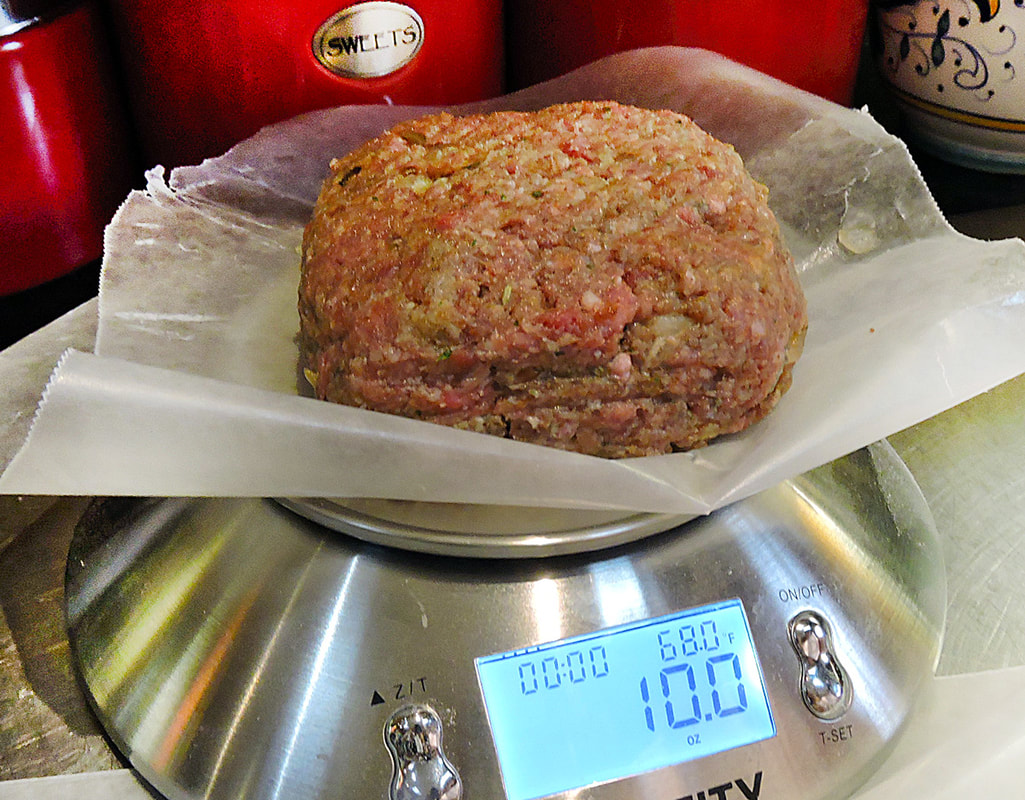 Each polpette weighed about 10 ounces Each polpette weighed about 10 ounces Ingredients for the Polpette 2 pounds ground chuck 1 medium Vidalia, small dice 1 egg 2 tablespoons red wine 1/3 cup finely grated Parmigiano Reggiano 1-1/4 cup breadcrumbs 1 teaspoon dried sage 1 tablespoon sea salt 1 teaspoon dry thyme 1 tablespoon dried basil 15 cracks black pepper (from a pepper-mill) 1 cup canola oil + 2 tablespoons olive oil for frying for the Tapinade 1 - 16 ounce can of black olives, well drained 2 tablespoons tomato paste 2 tablespoons pesto (from jar or Make it Fresh) 3 cloves fresh garlic, chopped 1/4 teaspoon red pepper flakes for the Pastry Wrap 4-6 slices delicatessen sharp provolone 1/4 pound prosciutto, speck or Boar Head Brand Piccolo Prosciutto 2 packages frozen puff pastry (butter or shortening type, your choice) 1 beaten egg (for egg wash) 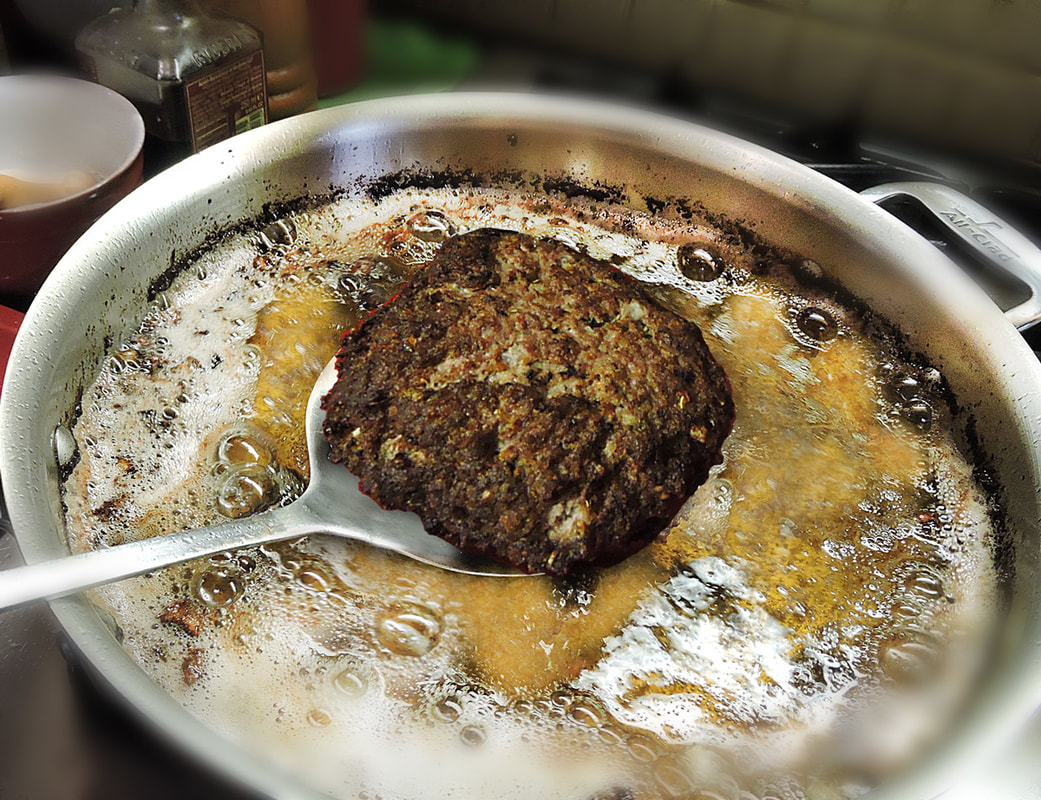 Removing the fried Polpette from the pan 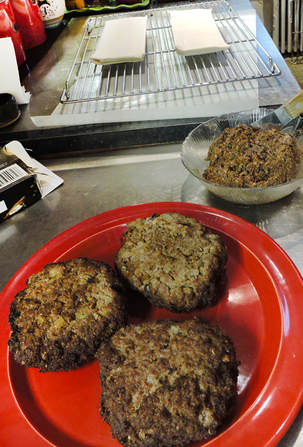 Directions
Frying the Polpette
 Coating the polpette with Tapinade Coating the polpette with Tapinade Making the Tapinade Next, to make the Tapinade, drain the olives and place into a food processor along with the pesto, tomato paste, garlic, red pepper flakes and Reggiano. Pulse several times to get a spreadable texture... but not too smooth. You might have to scrape down the sides of the mixer between pulses. 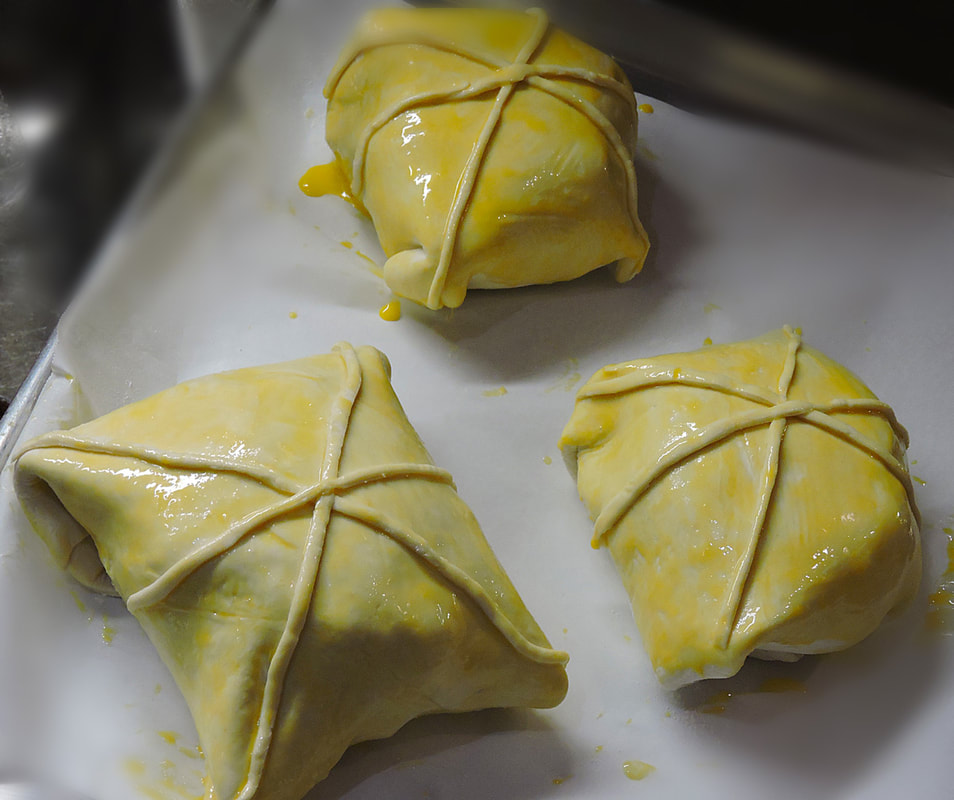 Wrapped and egg-washed, ready for the oven Assembling the Wellingtons
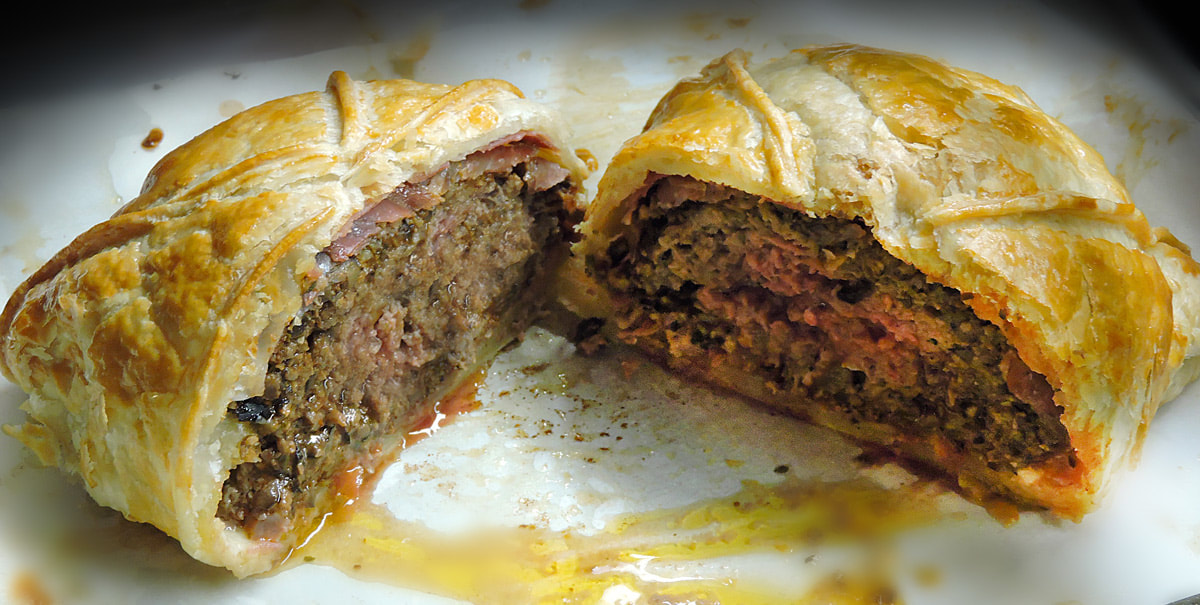 Half of this size Wellington was perfect for each person You can serve your Polpette alla Wellington over a bed of marinara, as we did for one meal, but to be honest, we thought the tomato sauce masked some of the flavors. Also, even though I made the size of our polpette match the size of most beef tenders used to make a traditional Wellington, we felt the serving was too large. If we make this again, we would serve as we did for our second "leftover" meal--each serving was one-half a Wellington. In fact, the second meal we served with a side of Italian flat beans and no tomato sauce. We actually enjoyed this meal much better... the Tapinade's flavors came to the forefront and the spices in the polpette were obvious. The half-sized servings were a perfect portion. I actually thought that 2 days later, after setting up in the fridge, wrapped in foil, the flavors melded and intensified a bit. We re-heated the leftover halves in loosely wrapped foil for one hour. If we make this recipe again, we will make smaller Polpette so each person can have a completely pastry-wrapped Wellington. Enjoy this recipe and let us know how yours turned out! © GVI 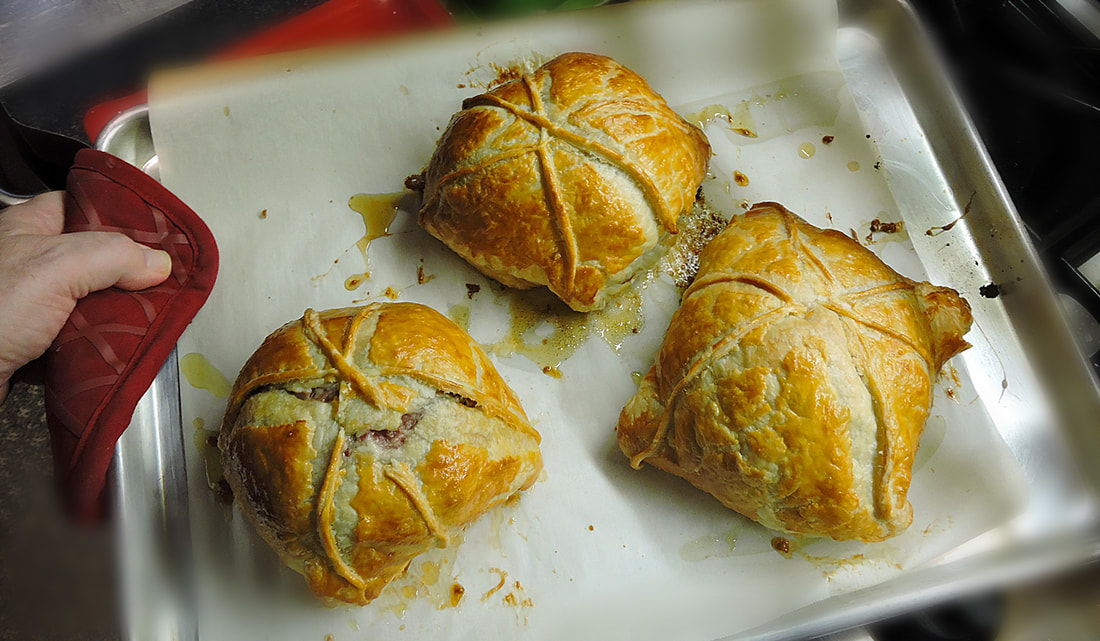 Fresh out of the oven: The two on the left were half-sheets of pastry that were rolled out a bit to fit. They puffed less than the one on the right which wasn't rolled out. 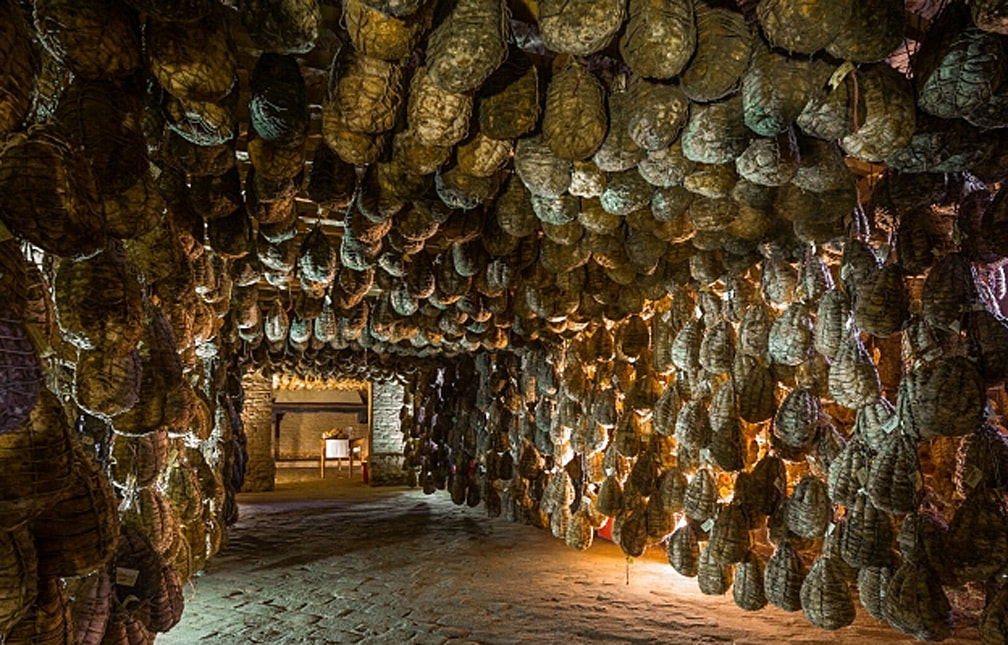 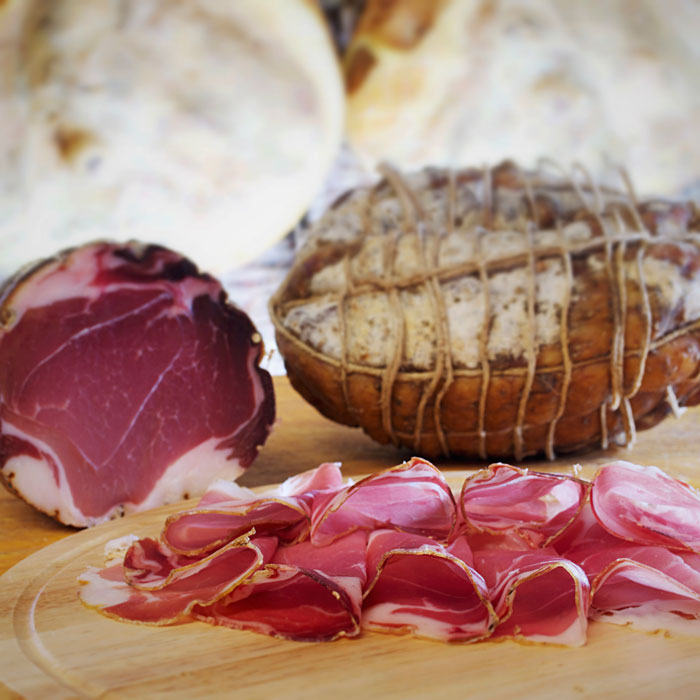 Culatello is one of the most prized salumi in Italy, dating back to the 15th century. Culatello is produced in the flatlands located north of Parma, near the Po River. The city of Zibello is epicenter of production (Culatello di Zibello), due to its particular climate that is ideal for aging the meat. The thick fog that rolls off the Po and the biting cold of the winter give culatello its characteristic sweetness and fragrance. Culatello is made with the muscular part of the hind leg of pigs that were born, raised and slaughtered exclusively in Emilia Romagna and Lombardy. The meat is then processed in the communes of Polesine, Busseto, Zibello, Soragna, Roccabianca, San Secondo, Sissa and Colorno, in the province of Parma. The thigh is skinned and de-boned, and the best part, or heart, is removed and salted immediately. Twine is then wrapped around the meat in a spiral fashion, giving the culatello its signature pear shape. The meat is left to rest and after a couple of days it is massaged, causing the salt to further penetrate the meat. The culatello is left to rest again, in a cold environment, and is then encased in a clean, dry pork bladder and tied up well. At this point, the culatello is placed in humid, room-temperature cellar for at least 12 months. Once it has been aged, the culatello should weigh between 6 ½ and 11 lbs and have kept its characteristic pear shape. Parma versus Colatello Parma ham is sweet and tender. Culatello is a bit saltier than Parma ham, with lots of flavor that comes out when chewing it--rich and sometimes peppery and aromatic. D.O.P. culatello on AMAZON. 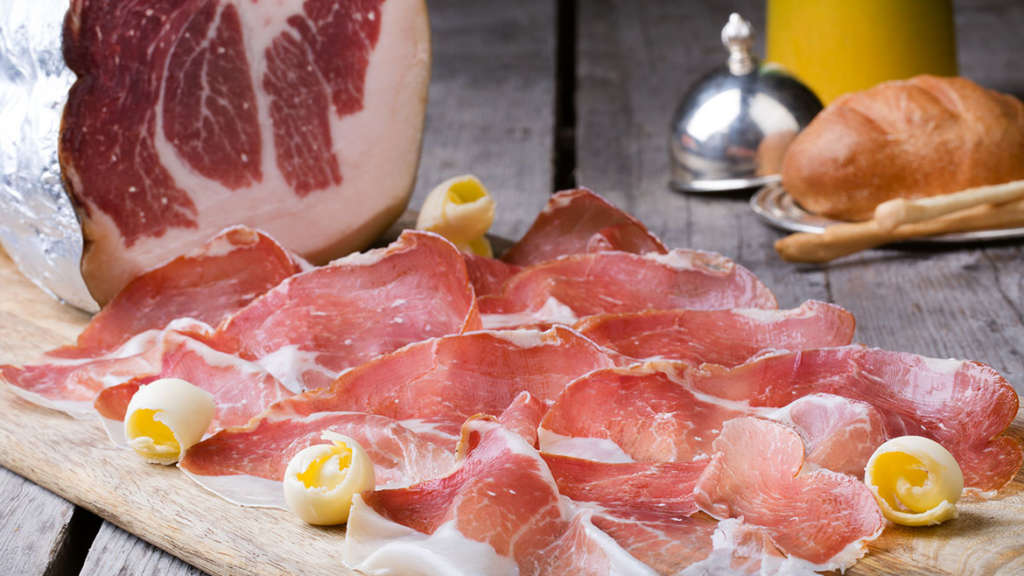   on AMAZON on AMAZON Beef Ragu over Cheesy Polenta
A rustic, belly-filling recipe from simple ingredients. The cook time from pan to table is under an hour, so it's great for a quick family meal during the workweek... Ingredients Polenta
Directions
--Jerry Finzi |

Archives
May 2024
Categories
All
|