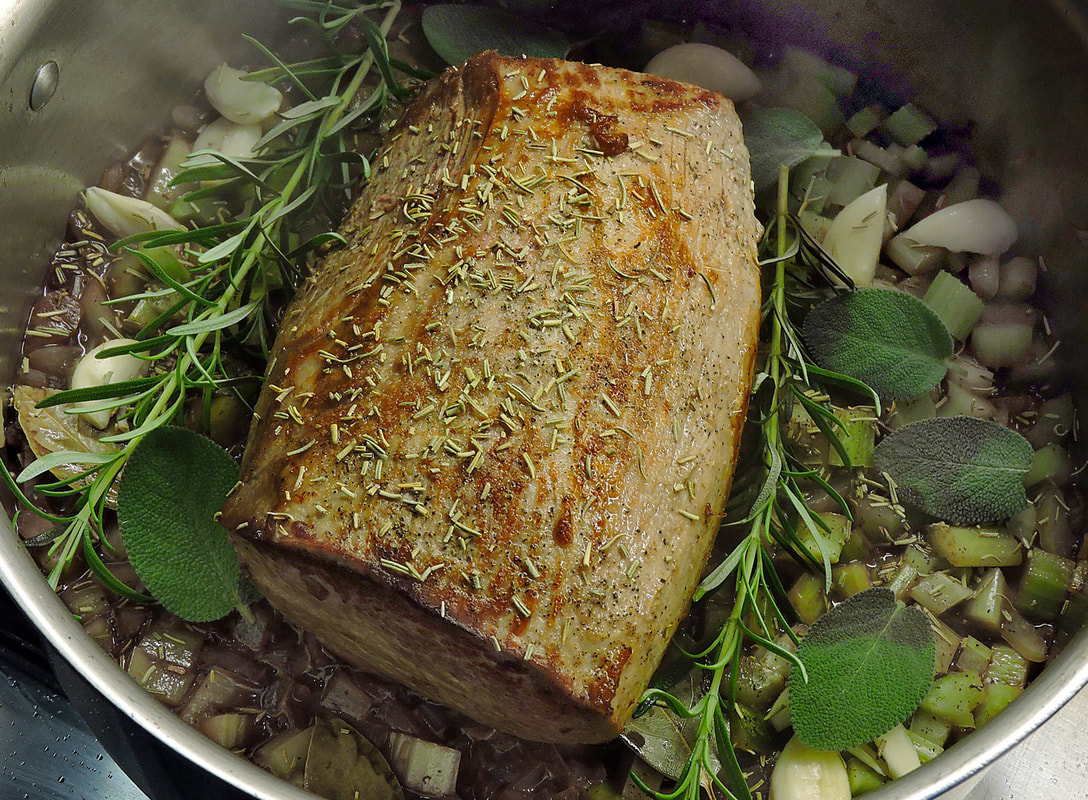
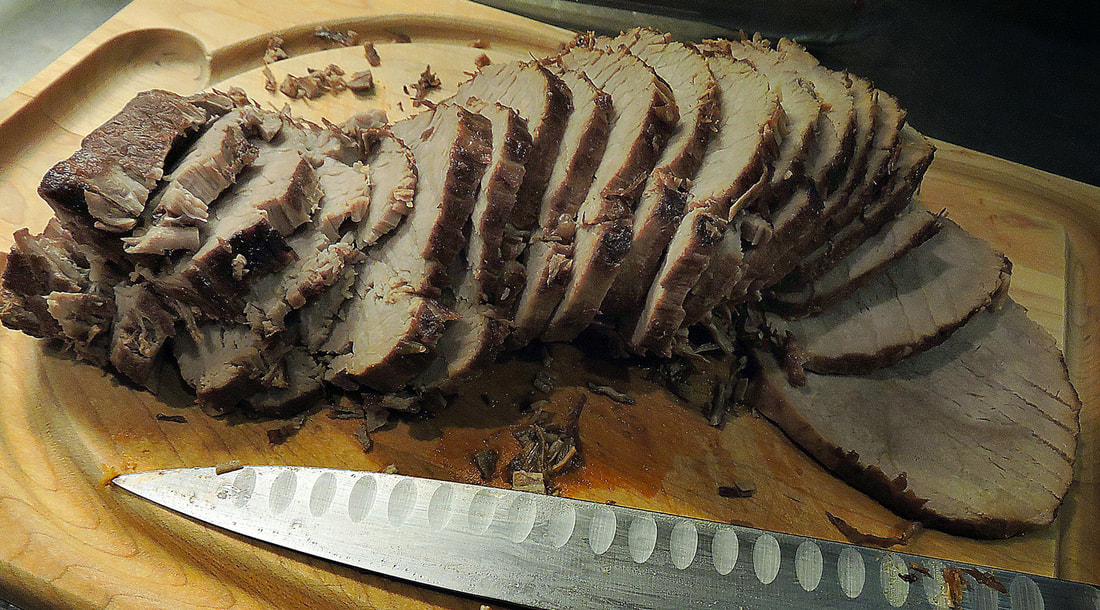
Of course, I was first introduced to pot roast by my Mom, but being a working mother, she always looked for shortcuts--a big thing for Moms back in the 50s and sixties. Although it was delicious, her shortcut was to use cans of Campbell's Onion Soup and to cook it in her very scary, rattling pressure cooker (Mom managed to blow up a few of those beasts). Even as I moved on to my own life, he loved making this for me as a special treat, believing it was my "favorite" meal. (I really liked her lasagna much better). Well into my thirties, as I developed my own culinary skills, I wanted something more authentic, so I opted for using sweet onions like Vidalia or Walla Walla to add a sweet, deep flavor to my version. In recent years, I've developed my Italian Style Pot Roast, reminiscent of Sugo (Sunday Gravy), but with a much lighter stew type sauce. In Italy, this type of recipe is called Stracotto (literally, overcooked), because of its slow cook time. Another name for this recipe, or rather, style of preparation is simply Brasato di Manzo (braised beef).  Simple ingredients, make a robust meal To ensure that the meat is tender, you should plan this as a weekend meal, allowing most of the afternoon to slow cook the roast on a gas range (OK, electric would be fine also). Yes, as my mother did, this pot roast isn't done in the oven but rather in a heavy pot on a cooktop. This method takes a minimum of 4 hours of slow-cooking. Technically, it's a braise and not a true roast. (One day soon I should show you how I do my Dad's Oven Roasted Beef). I cook mine in our tri-bond, stainless steel, flat-bottomed All-Clad Stockpot, rather than our Dutch oven. I find the wider base spreads the heat out rather than concentrating it in the center, as the narrow-bottomed Dutch oven does. (Which would tighten the proteins in the beef rather than relax them). I also use a heavy cast iron Heat Diffuser over our medium diameter gas burner to diffuse the heat even further. I suppose I could also use one of our other options, like our Staub Coq au Vin Cocotte or our Emile Henry Brasier (for a smaller roast) but I like working with steel. 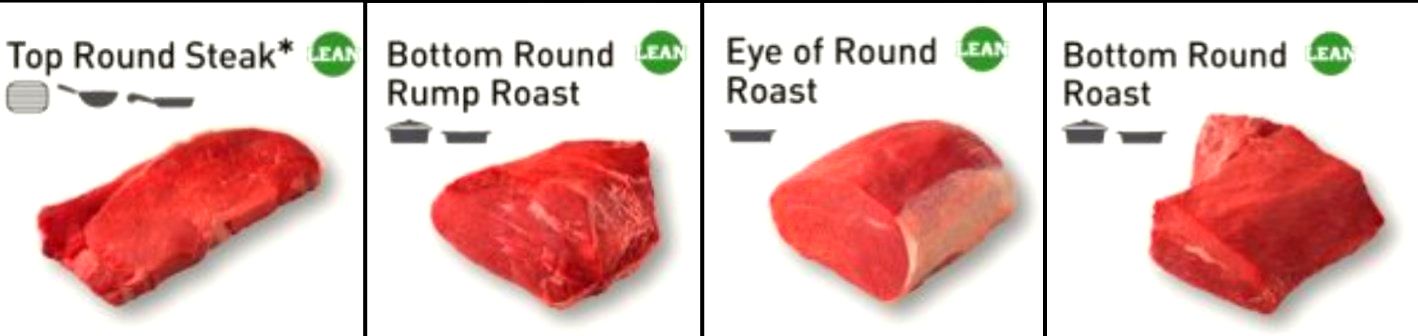 What Cut of Beef? You will see cuts of beef labeled "chuck roast" in the supermarket, but you can use pretty much any type of beef--as long as it's a tough cut--not tender. A slow cooking time and very low temperature really define the process--not the cut of beef. Pot roast is a braise (slow cooked in liquid) that cooks at a low temperature for a long period of time. The tougher cuts work best because the slow cooking gently breaks down the proteins and collagen, giving you a luscious, nearly-fall apart, fork-cutting texture. These cuts are from the parts of the animal that are very muscular with lots of connective tissue and very little fat. If you quickly grilled these cuts, the result would be very tough. The following three cuts will all make a fine pot roast:
 Ingredients
 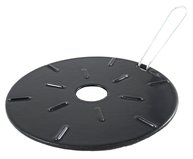 Heat Diffuser Heat Diffuser Directions
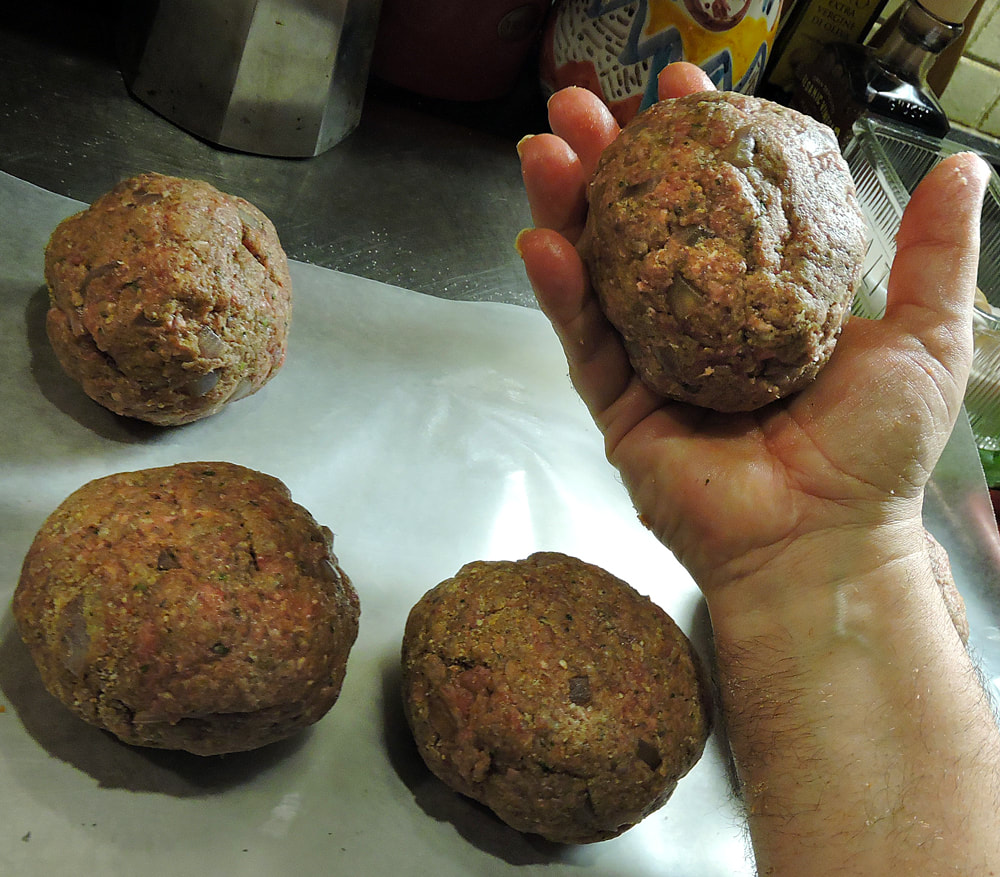
Allora... Buon appitito! Don't forget to write and tell me how yours turned out... --Jerry Finzi GVI CUCINA HACK In this recipe, I shared the trick of thickening with breadcrumbs, which gives a rustic charm to the dish. Of course, if you'd like a richer, even more tomato-y version, you can thicken the sauce during cooking by adding a little tomato paste--perhaps a couple of tablespoons. You can also thicken by using cornstarch... dissolve a tablespoon of cornstarch in a 1/4 cup of cold water and then stir it into the hot, bubbling sauce while stirring to distribute it. (High heat is needed for it to thicken). 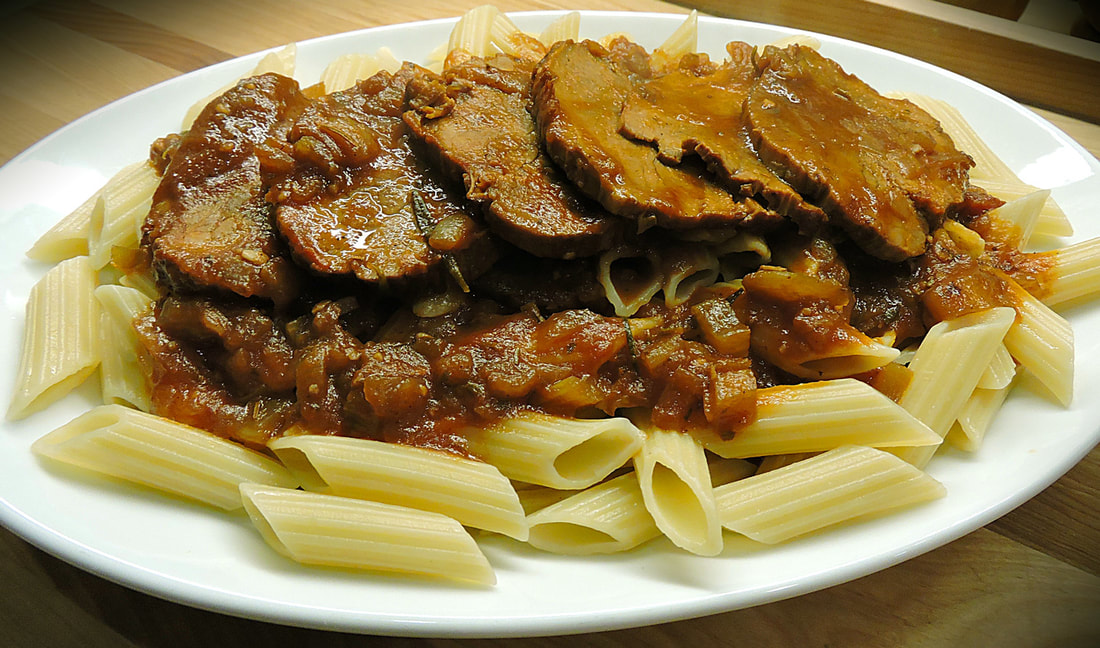 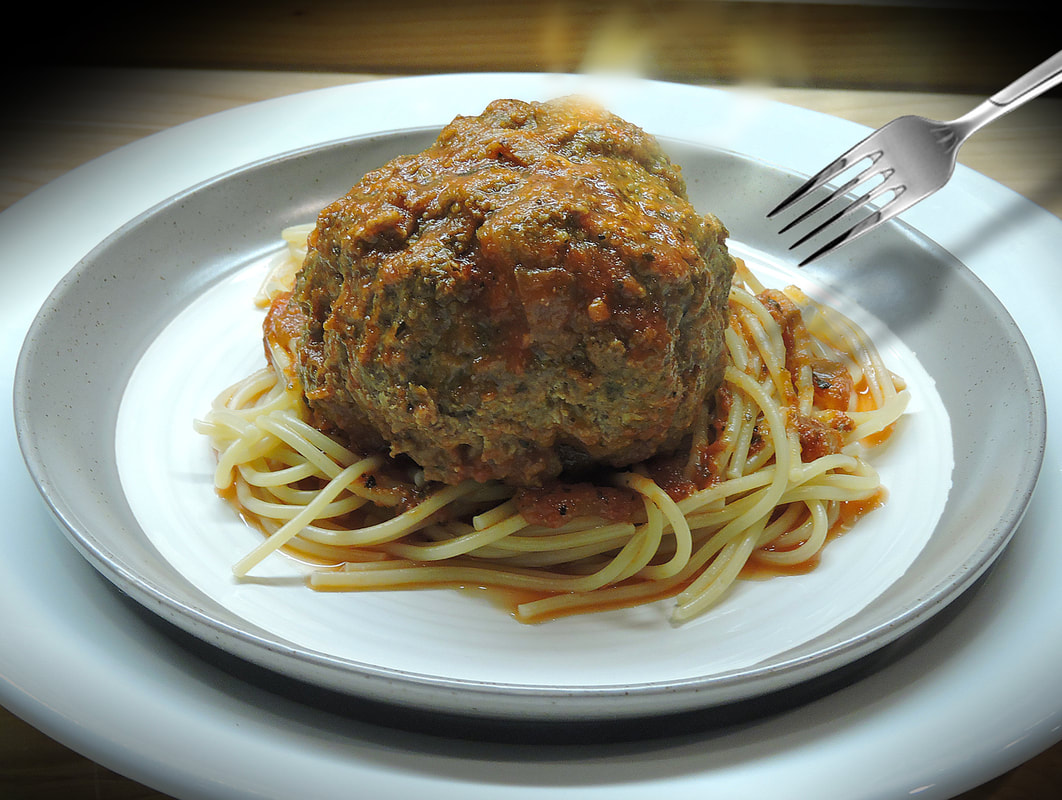 My dad, Sal was a great cook. He loved food and worked with it every day, starting out selling produce down by the Hoboken waterfront with his brother Anselmo and their "three-legged (lame) horse " and cart. Later on he worked as a greengrocer and as a deli man. He even grew food in our tiny backyard garden--especially tomatoes. When his customers saw him around the county, they'd shout out "There's My Baloney Man!" My Mom did all the daily cooking--soups, chicken, pastas and all that, but my Dad did the special meals: Thanksgiving turkey, Christmas Baked Ham, Roast Beef and lots of other Italian specialties like smelts, fried eel, and quick lunches like his "potatoes and egg" frittata. He was always great at making something from pretty much anything he found in the fridge. But what I loved best was the way he made fist-sized meatballs in the deli. Only one of them would fit into a pint sized container. It was always a special treat when he brought some home. One of these giants on a plate with spaghetti was a feast--one meatball equal to about 4 or 5 the way my mother made them. No need to ask for any other meatballs--one was certainly more than enough. Once every few years, in honor of Dad, I set out to make his meatballs, his way. His size.
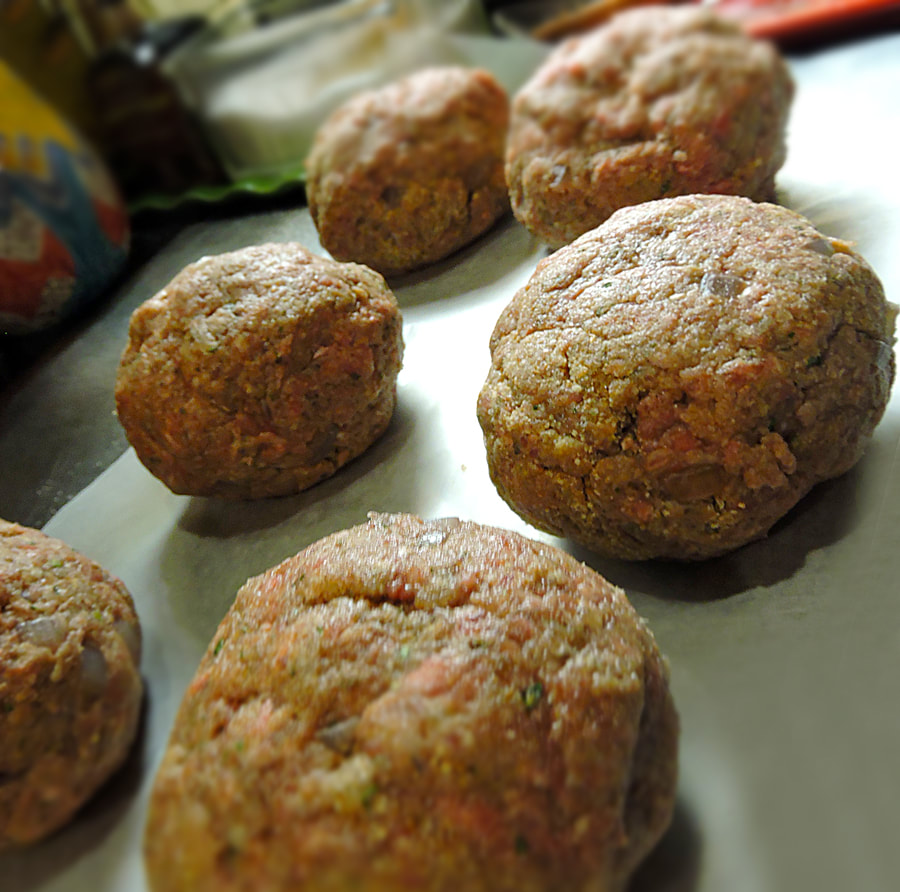
 They measure around 3-1/2" in diameter  Before roasting, I brush them with some Extra Virgin olive oil
In this recipe, we used about 4 pounds of beef--ground chuck. You can use your own family's meatballs recipe or ours HERE. The ingredients would need to be increased to account for the 4 pounds (if you're making a lot), or simply make less meatballs. Four pounds would give you from 6-8 giant meatballs--2 pounds, probably 4 meatballs.
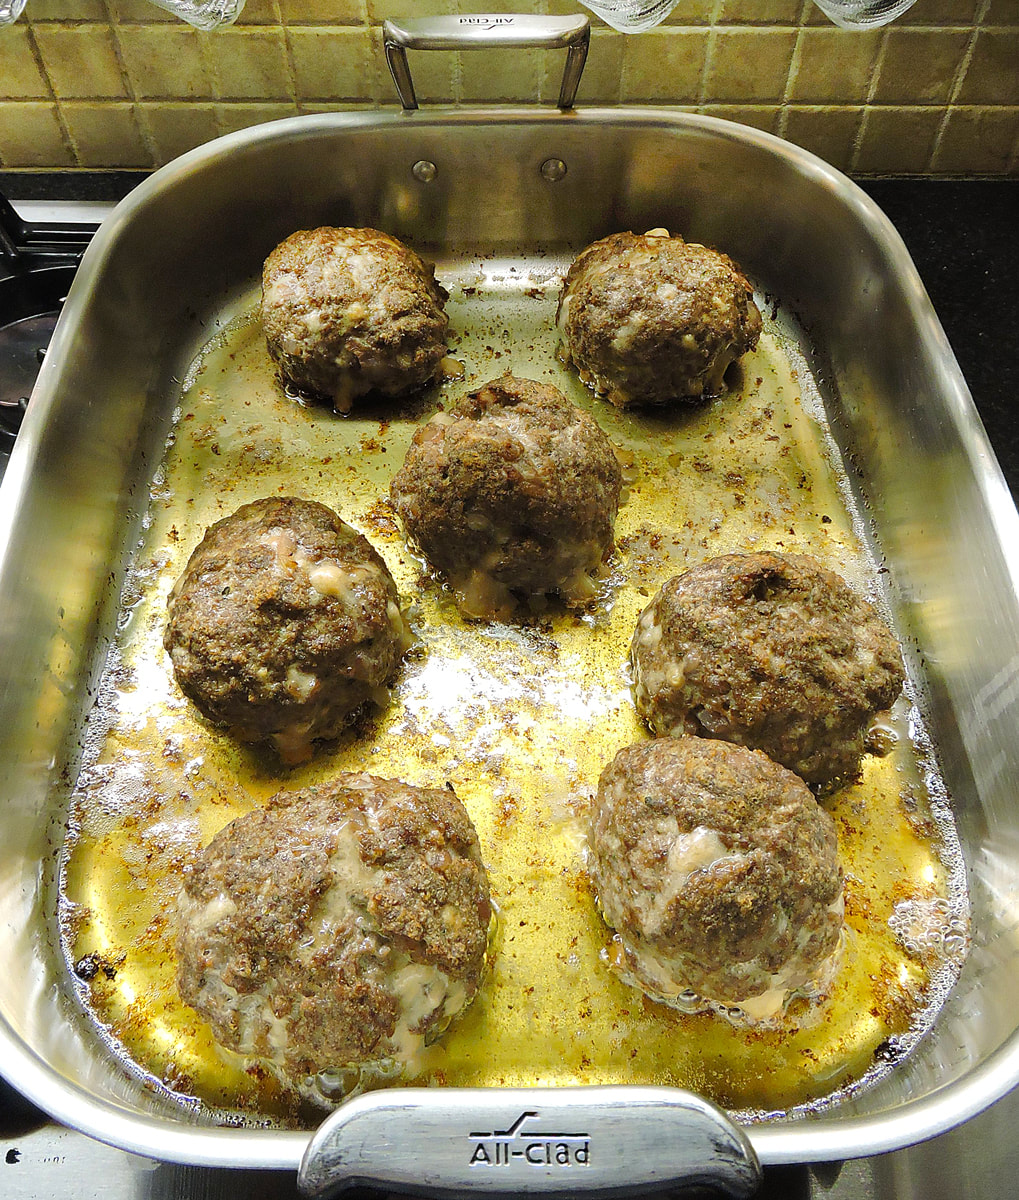
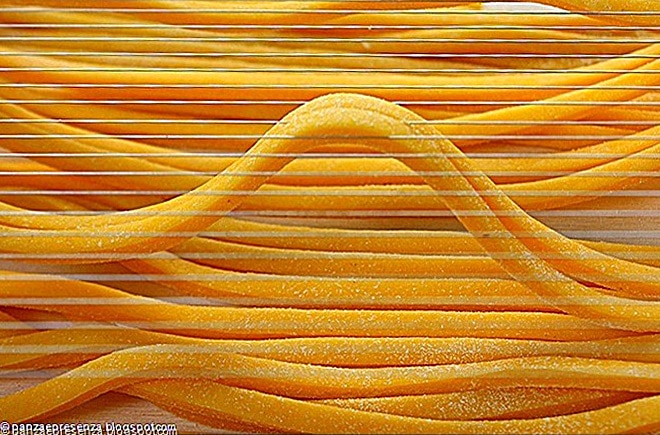
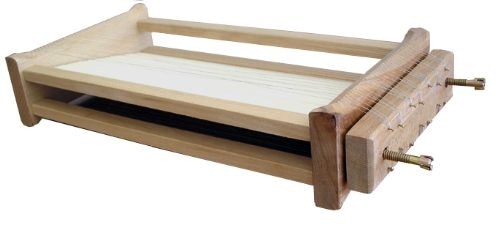
In the bottom of a roasting pan, I placed light olive oil, about 1/4" deep. The meatballs are placed in the pan and brushed with Extra Virgin Olive Oil to help the browning. The oven should be pre-heated to 450 F at first, then roasting the meatballs, uncovered for about 30 minutes. Next, cover lightly with foil and turn the oven down to 350 F and bake for another 30-45 minutes (ovens vary). Check occasionally to ensure the bottoms aren't burning. Turn the meatballs over a few times if necessary. You want them nicely browned, or until the internal temperature reaches 165 F (using an instant digital probe thermometer). After the meatballs are done, you can serve over pasta with some of your tomato sauce, or place them into a large pot of your Sugo (Sunday Gravy) to flavor the sauce. You can also cut up one meatball to make a large meatball hero (sub) sandwich, topped with grated parmagiano and toasted in the oven, or smash one with sauce and sliced provolone cheese inside a large flatbread, like the type used to make a muffaletta sandwich. You might also serve half a meatball, cut side down on separate plates with pasta for an intimate supper... calling the half-moon dish Mezzaluna. "When the Moon Hits Your Eye... That's Amore!" No matter how you enjoy them, you'll love making these huge polpette--my dad, Sal's Giant Meatballs. Buon appetito! --Jerry Finzi (Share this post with your friends!) 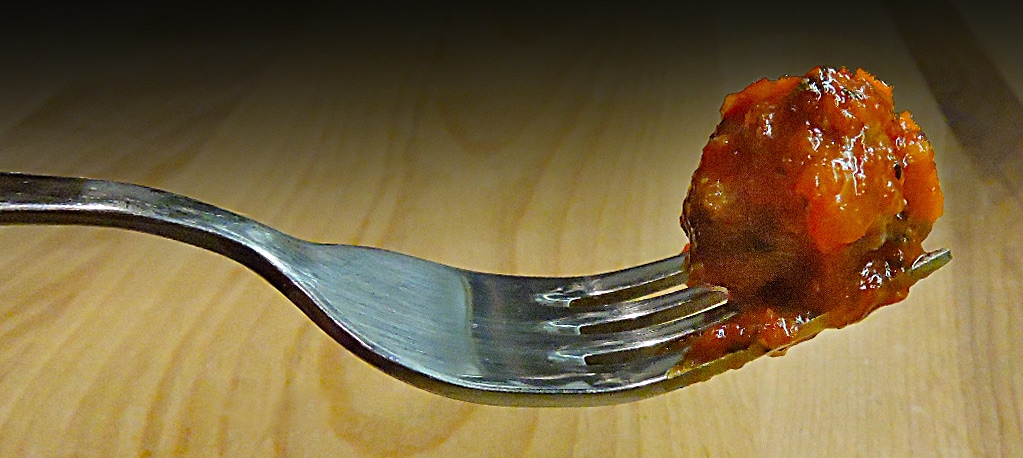 In the province of Teramo, in Abruzzo there is a recipe that rivals the Sugo of the Neapolitan tradition: Chitarra con Pallottini. If there is any ancestor of Italian-American style "spaghetti & meatballs" (a dish that doesn't exist in Italy), then this is it... Let me explain the name first. Chitarra means guitar in Italian, but in this case it refers to the pasta making tool called a chitarra because it's wire strings resemble a guitar (OK, perhaps it looks more like a zither or auto-harp, but let's not quibble.) The chitarra is used to make a type of spaghetti with a square edged profile, called Pasta alla Chitarra. A thin sheet of fresh pasta is laid on top of the chitarra and a small matterello pin is rolled over the pasta to squeeze it down and through the wires, creating the square sides. The pasta falls below, picked up and dried or cooked fresh. Kids would love to help make this pasta. The name of this type of pasta has taken on the name chitarra.
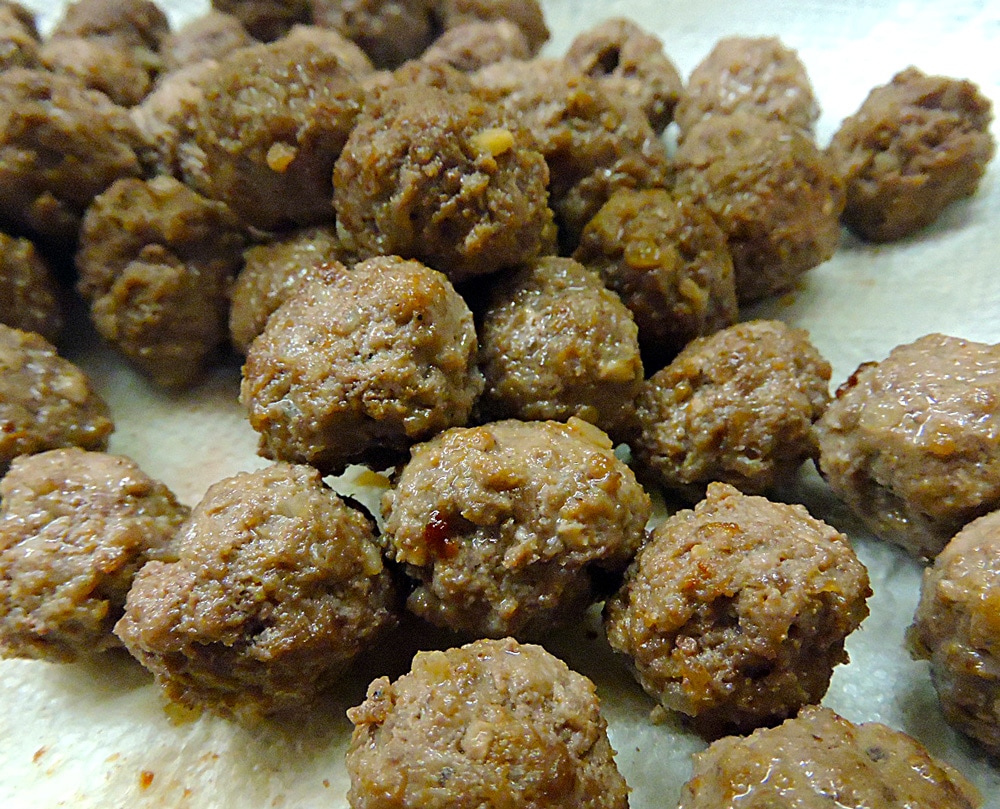
As for the Pallottini... palla means ball, the "-ini" ending means they are small. Small isn't the word. These Abruzzo meatballs are absolutely tiny. When I made this recipe, it took me well over an hour to make 268 tiny pallottine from about 3 pounds of minced, lean chuck. (Yes, I counted them). I should have waited until my son, Lucas came home from school to help me! While making them, I discovered that it was difficult to make the pallotine as small as the ones I found in authentic Abruzzese recipes. Mine came out around 3/4 inch in diameter... instead of the 1/2" or smaller seen in Abruzzo. The problem was trying to pinch a small enough bit of meat in between the tips of my fingers. Perhaps using a 1/4 teaspoon measure would have worked better. Tiny fingers and hands of young children would be perfect for the task, but knowing how tedious this task is, more than likely it would be considered as child labor. On Sundays, when Neapolitan nonnas and mamas are making their Sugo, the kitchens in Abruzzo are filled with similar scents of Nonnas making their Sugo, pasta alla chitarra and pallottine. Traditionally, the dish is accompanied by a rich meat and tomato based Sugo rather than a simple marinara sauce. The sugo is slow-cooked all day with lamb, beef, and pork added to a large pot of crushed tomatoes. The sauce isn't finished until the meat easily falls or shreds apart and can be mixed into the sugo. In my recipe, I slow cooked the pallottine with crushed tomatoes and spices, leaving out the other meats. My thinking was that 3 pounds of tiny meatballs will still add loads of meaty flavor to the resulting sugo. 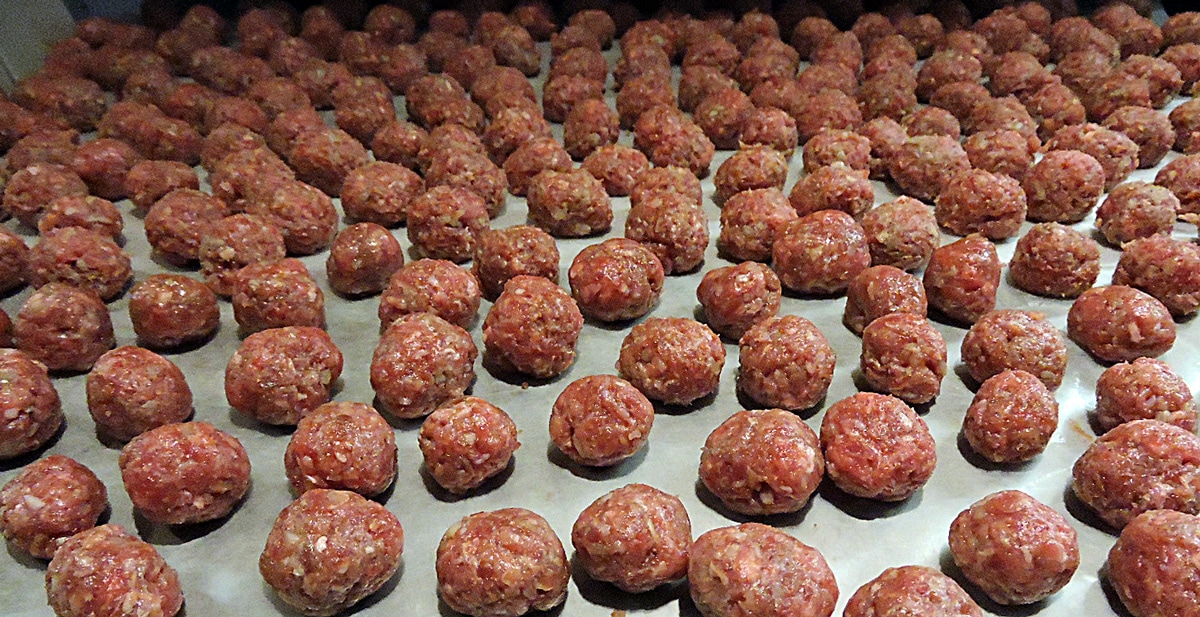 I made 268 little meatballs... And yes, I counted them. Some claim that Chitarra con Pallottini is a dish from the Piedmont region in the north from the early 20th century. In Abruzzo people have been making and eating pallottini since the early 1800s, a full 100 years earlier. To add to the confusion, a recent report by an Italian expert in archeological gastronomy discovered a Piedmont recipe in a monk's cookbook dated 1344 that described tiny meatballs used in a rice and pork blood dish. Wherever it stemmed from, this dish is unique and well worth making...
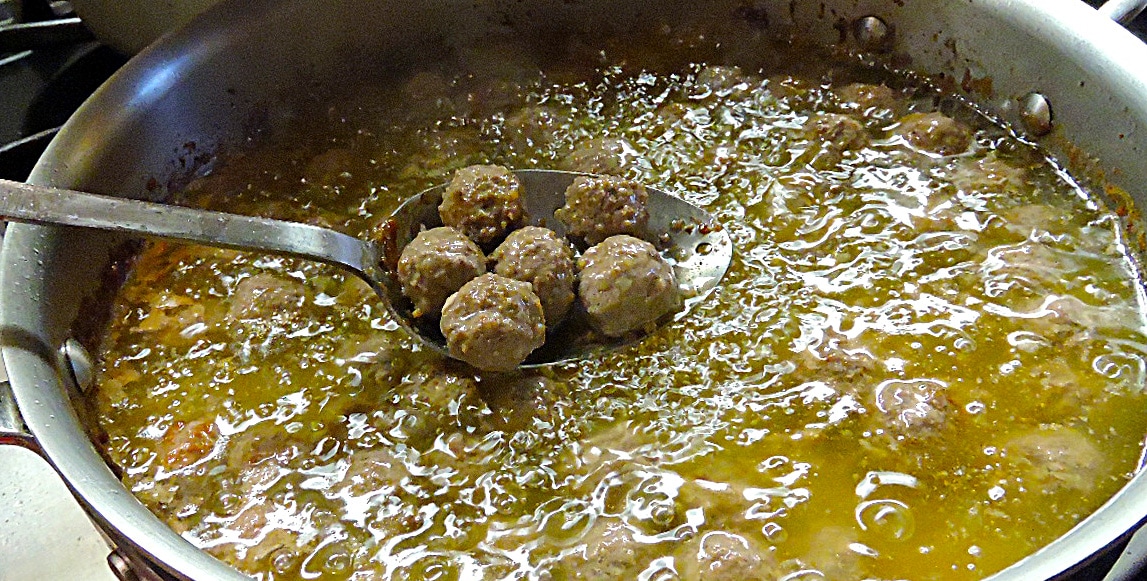
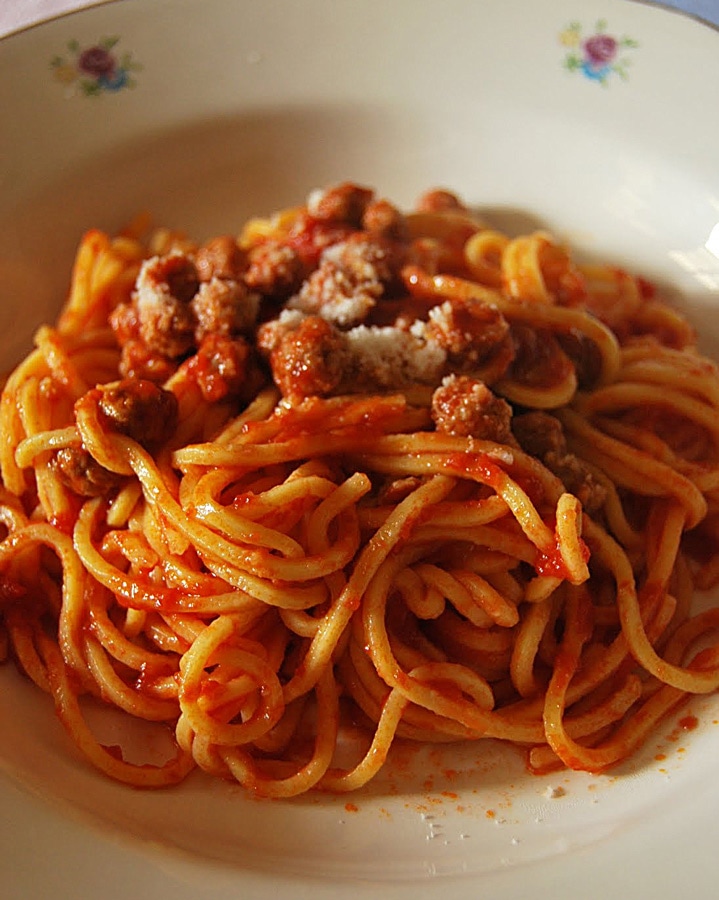 Amazingly small Pallottine--perhaps half the size of the ones I made--served with the square-edged Chitarra pasta.  Since I didn't have a chitarra to make the proper type of pasta, we had our Pallattine with tagliatelle. (Our Chitarra tool is on order). For scale, this is a salad plate. Since I didn't have a Chitarra when I made this recipe, I used some 3/4 inch wide tagliatelle for my dish. I also changed up the recipe a bit from the originals I found. They tend to use nothing but ground beef, one egg and a sprinkle of nutmeg to make the pallottini. I wanted to add a bit more flavor, so I added a very small minced of garlic (in a jar, imported from Italy) and since these meatballs were SO tiny, I couldn't use fresh diced onions as I do in normal sized polpette. Instead, I used dried onion flakes, knowing they would re-hydrate when added to the meat mixture. I won't get into the recipe for the traditional Sugo here, but if you like, you can make my recipe HERE. Otherwise, for a fresher sauce, make a quick marinara with crushed tomatoes, a bit of sugar, and a decent amount of dried basil. Ingredients (pallottini) 3 pounds of lean, chopped (minced) chuck/beef 2 tablespoons dried onion flakes 2 teaspoon minced garlic (in jar) 2 tablespoons fine sea salt 40 cracks fresh black pepper 1/2 teaspoon red pepper flakes 1 beaten egg Directions In a large mixing bowl, mix the minced chuck with the beaten egg, the minced garlic and all the other dry spices. Get in there with your hands and mix really well, until you are certain that each and every tiny meatball will get an assortment of garlic, onion flakes and other spices. Lay out several sheets of wax paper on your work counter and start making the pallotine. If using your bare hands, barely pinch a little bit of meat mixture in between the tips of your thumb and two forefingers. Roll the meat into a ball shape between your palms. As I mentioned, the pallottine should be less than 3/4 inch around. If you want to try a 1/4 teaspoon measure, this might help to measure out a smaller amount. Once you finished making all of the pallottine, heat a large saute pan with light olive oil filled to a depth of 3/4 inch deep. If you would like to brown the pallottine a bit more, you can use half the amount of oil, but you will have to pay much more attention to turning them as they brown. These tiny balls cook quickly! Cook them in batches and remove with a slotted spoon, then place on a large baking tray covered with several layers of paper towels to drain. When completed, you can place them in your marinara or Sugo and slowly simmer for about 1-1/2 hours or longer if you are adding them to a Sugo with several other meats. So, the next time someone claims there is no such thing as Spaghetti and Meatballs in Italy, try winning a bar bet with your knowledge of Pallottine!
Buon appetito! P.S. When I get my Chitarra tool, I'll update this article with photos of the Pallottine on top of fresh made Pasta alla Chitarra. --Jerry Finzi 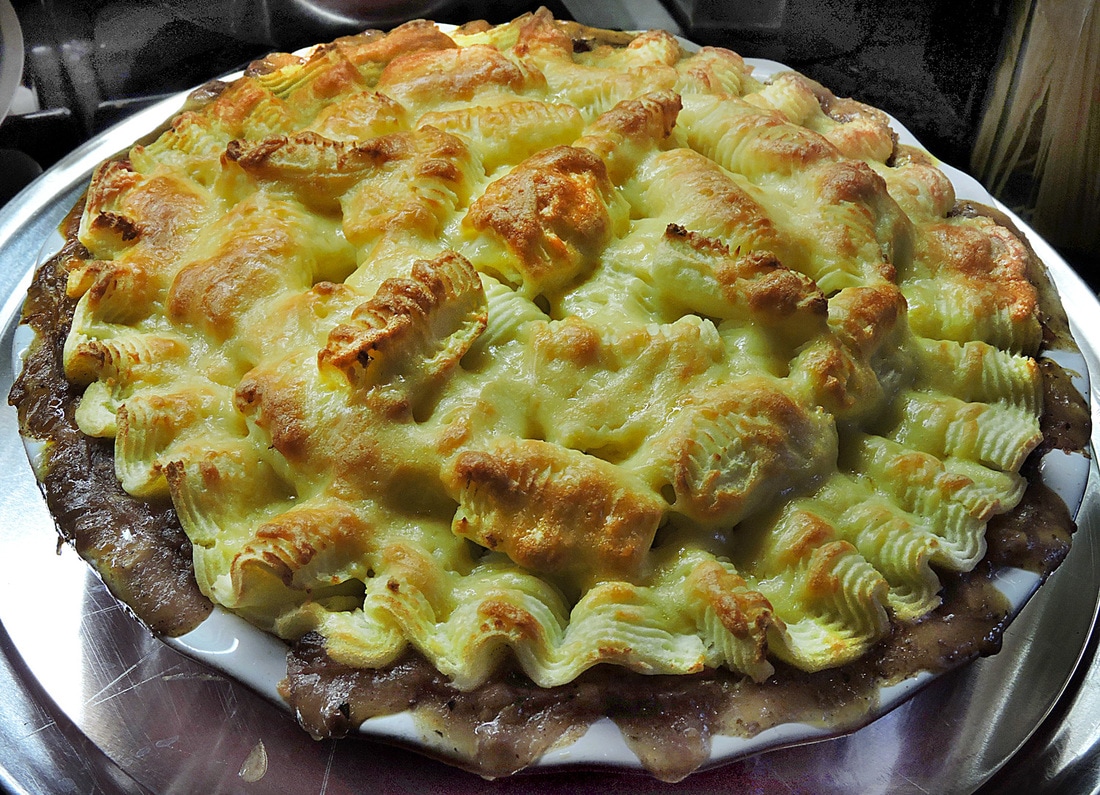 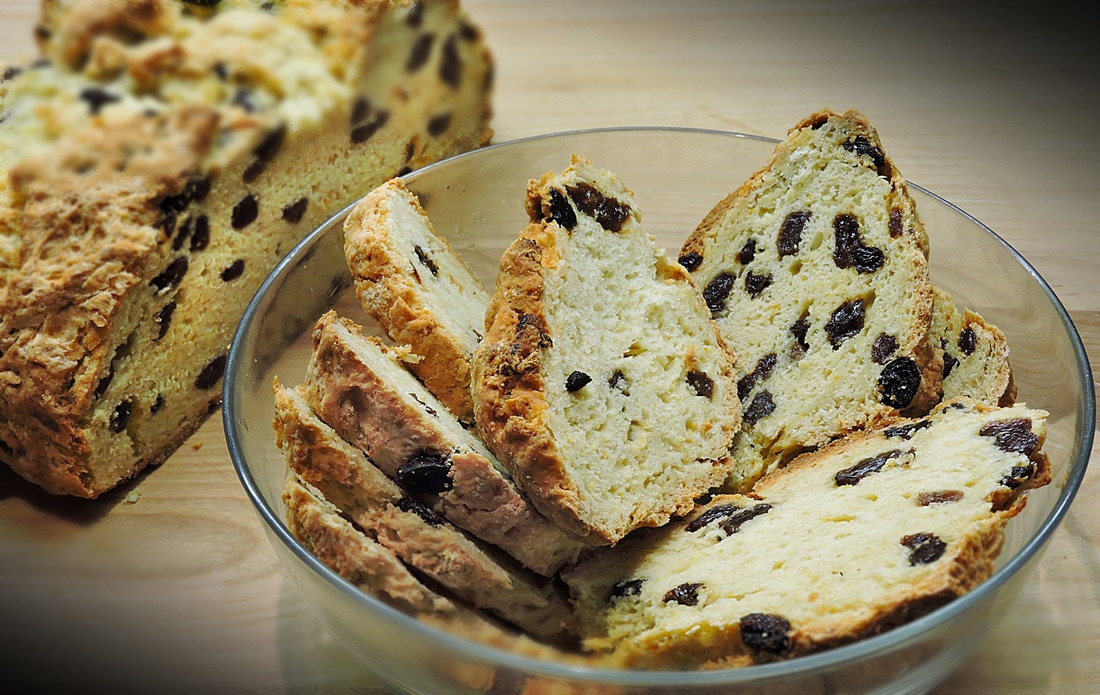 An many might know, each year for St. Patrick's Day we make a Shepherd's Pie and Irish Soda Bread to celebrate. I usually forget to "wear the green" and my son Lucas usually reminds me, but we still enjoy our Irish food, Celtic music and some stout.
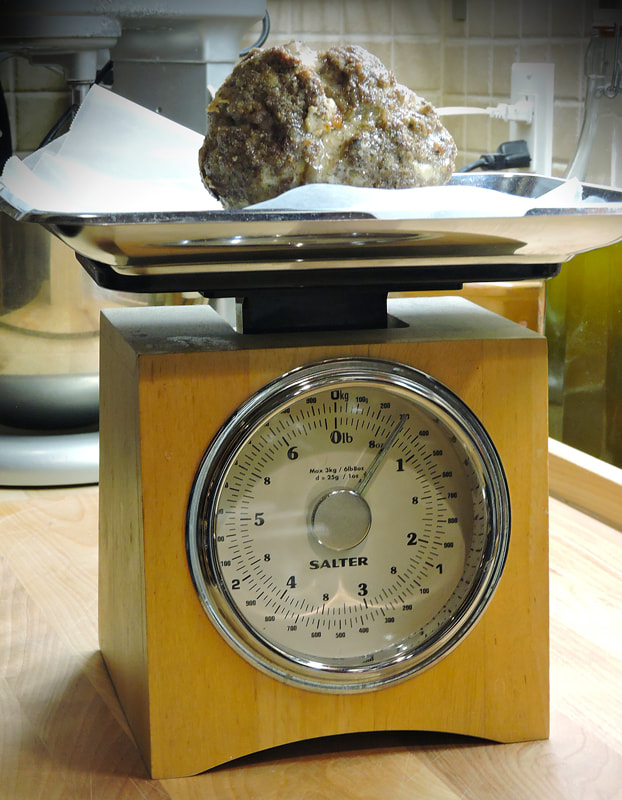
Above is a photo of this year's efforts, still steaming from the oven. I gave it an Italian look of gnocchi on the top by using a pastry bag with the larges flat tip I own, with teeth running along it's 2" length. The texture of the potatoes gave a nice crispy surface. This was made in a 12" ceramic deep dish pie plate and weighed about 5 pounds when done. We had two meals out of it, and Lucas had a thermos-full for his school lunch on another day. I was considering topping a pizza with some of the leftovers, but thought that would be going too far... For the original Shepherd's Pie recipe HERE. For the recipe for Lisa's Soda Bread, click HERE. --Jerry Finzi |

Archives
July 2023
Categories
All
|