GRAND VOYAGE ITALY
  • Piazza
    • Older Posts
  • Travel
    • Our Family's Voyage
  • Cucina
  • Culture
  • History
  • Style
  • Photos
  • Videos
    • Music Videos
  • About
    • Survey
    • Links
  • Shop 🛒
  • Piazza
    • Older Posts
  • Travel
    • Our Family's Voyage
  • Cucina
  • Culture
  • History
  • Style
  • Photos
  • Videos
    • Music Videos
  • About
    • Survey
    • Links
  • Shop 🛒
We're All About Italy

Cucina

The Light Way to Make Potato Gnocchi

3/21/2018

Comments

 
Picture
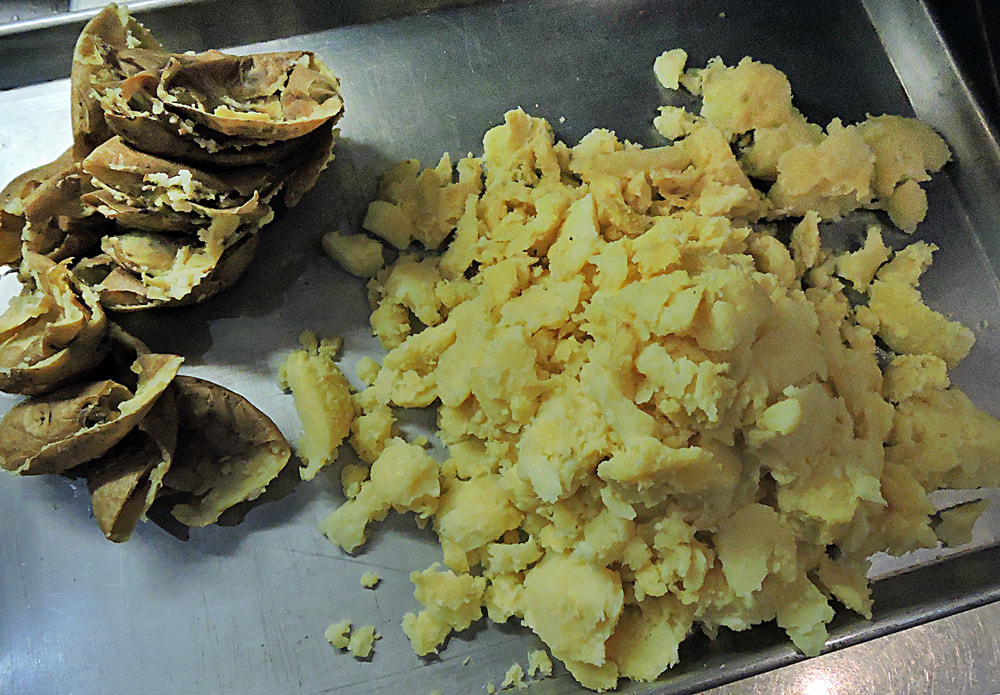
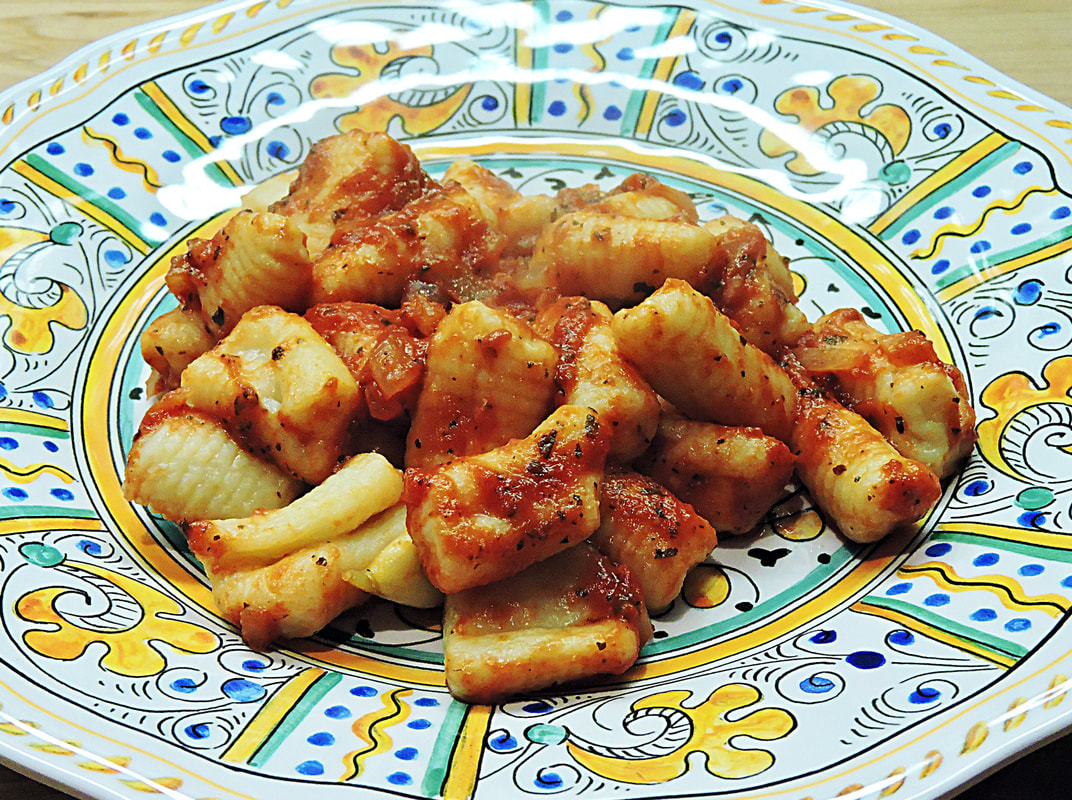
Our gnocchi with a fresh tomato and onion sauce
I remember one of the first times I had potato  gnocchi (pronounced "NYO-kee"), was at a New Jersey, Italian-American restaurant when I was a teen. I wasn't impressed. They were gluey and heavy. Perhaps they were frozen, but more than likely they had lost something in the translation from the old country. Still today, people in New Jersey might still pronounce them, "Nocky". In our family, we didn't have gnocchi until I was older. I remember one of my sisters making them on occasion. We nicknamed them, "sinkers" because they were so heavy.

Well into my 30s, and after I had learned how to cook pretty well, I asked my mother to teach me to make gnocchi--especially after learning that her mother, Nonna Mariantonia, had taught her. When I asked why she never made them when I was a kid, she just shrugged and said, "Sure, with all the free time I had raising five kids plus working all day?" She's right. She worked in a factory as a supervisor her whole adult life, yet somehow still managed to put dinner on the table for us after she got home. Better late than never, and I was eager to learn...
Picture
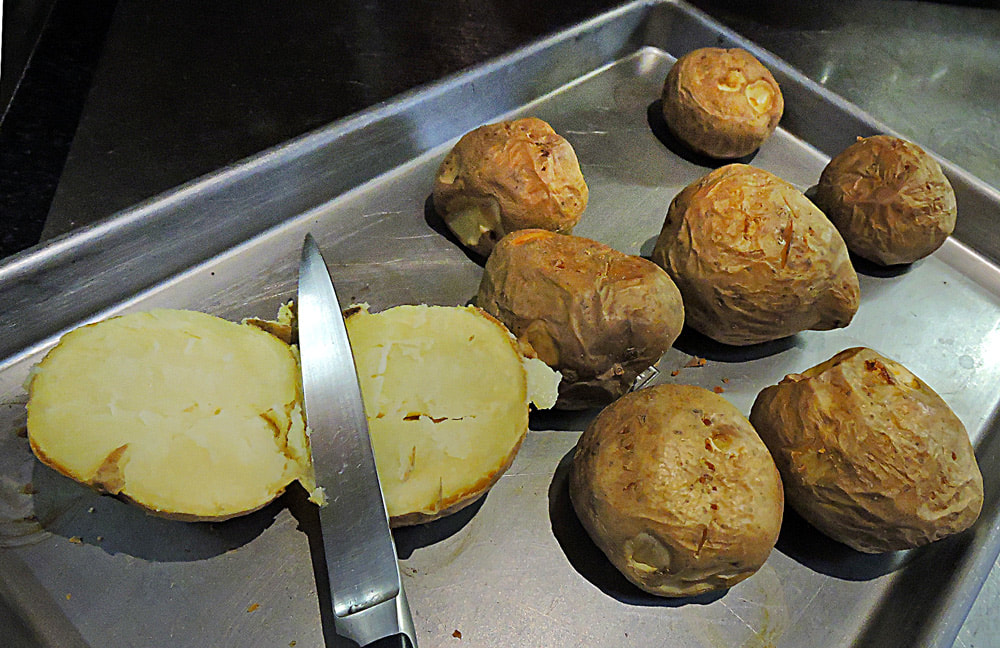
No boiling--Baking helps remove moisture
So, she set out to teach me on her kitchen table, where all miracles of Italian cuisine take shape. Her secret? "Not too much flour and use yellow potatoes", similar to what we call Yukon Gold today. Apparently, these mimic the starch and low moisture content of the typical yellow potatoes they use in Italy. The old Nonnas in Italy warn of using perfectly smooth-skinned, "pretty" yellow potatoes, but recommend using the "wise, old" potatoes. The more sporco (dirty), the better. In fact, even my Mother told me that they would buy large bags of potatoes and store them in the cellar. Then waiting until most were gone and only then, they would use the older ones to make gnocchi. Older means drier and more starch turned into sugars, adding to the lightness and flavor of the finished results. The drier the potato, the lighter the gnocchi.
Picture
Potatoes scooped out of their skins while hot
Picture
Rice the potatoes while still hot
Picture
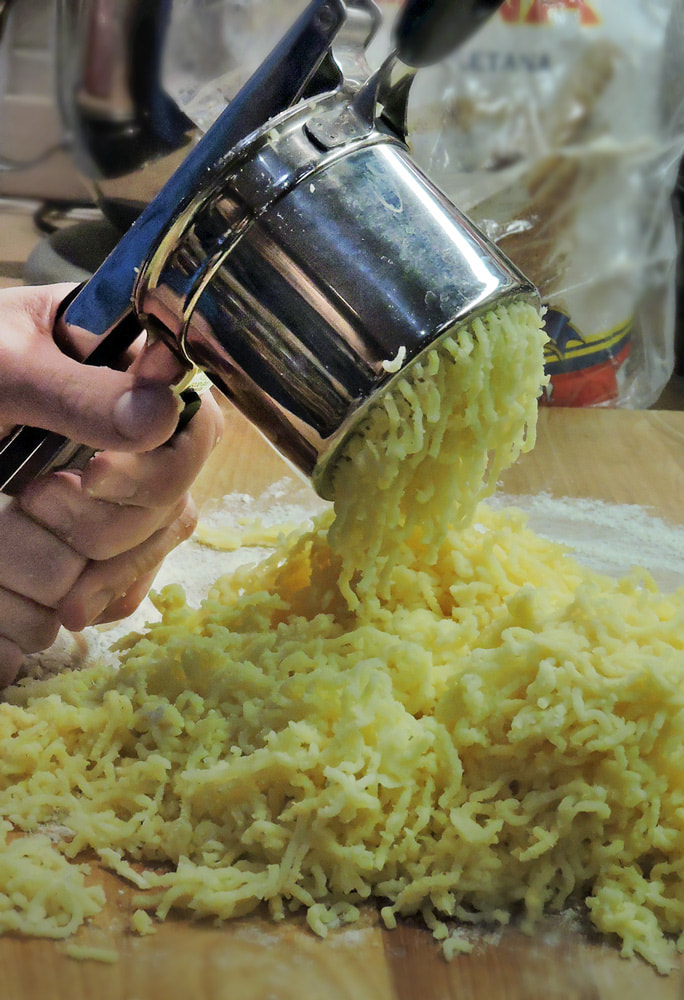
After one yolk is mixed in, blend with your hands. After this, add the beaten eggs.
Ingredients (for two batches: one for eating fresh, the other for freezing)
4 pounds
of Yukon Gold or similar yellow potato--stored 1 week in a dark place before using
1 egg yolk

2 whole eggs, beaten
2 tablespoons sea salt
"00" Italian style flour - 1/4 cup per pound of potatoes (or more, depending on humidity)
("00" makes a more tender gnocchi.)
Equipment needed
a Gnocchi board, or fork, fingers, or the back side of a cheese grater
 (each makes a different shape/texture)
2 half sheet pans
(For drying and for freezing half the batch)
Potato ricer (Do not use a masher)
cotton kitchen towels or parchment paper
Picture
Rolling the snake
My Mom didn't use a gnocchi paddle, or rigagnocchi. She used her fingers and the back of a fork. She actually taught me two methods for two different shapes--the back of a fork and her first two fingers. The fork makes ridges on the back side---good for holding a thick ragu. The two fingers made a sort of cavetelli shape, by taking a small cylinder of dough and pressing into it while dragging toward herself on the work surface. This made one smooth side and a little cave in the other--good for cream and thinner sauces. I can still remember Mom's bent, arthritic fingers rapidly producing them one by one. In this recipe, I'll be shaping with a fork and gnocchi board.
Instructions
  1. Preheat your oven to 400 F.
  2. Place the 4 pounds of potatoes on a half sheet pan, piercing each with a fork to allow moisture to escape while baking. An alternative method is to place them on a rack on top of your sheet pan, or even to slice them in half for baking (this might require less baking time).
  3. Bake the potatoes for 45 minutes to 1-1/4 hours, depending on size and moisture content. They are ready when you piece with a fork or paring knife with no resistance.
  4. When finished, cut the potatoes in half and let them cool just long enough for you to handle them--about 5-10 minutes. You don't want them to cool off--ricing needs to be done when they are hot or warm.
  5. Scoop the potatoes out of their skins with a spoon onto a baking sheet or waxed paper.
  6. Dust a work surface with some flour and start ricing the potatoes onto it. When done, cover with plastic wrap and let the riced potatoes cool for at least 20 minutes.
  7. When cooled, make a well in the middle of the potato pile and drop one egg yolk into it. Mix with a fork and then with your hands for a moment to incorporate the yolk.
  8. Sprinkle the salt on top of the potatoes.
  9. Now, make another well and pour the beaten eggs into the middle of the potatoes. Mix with a fork, then with your hands until well blended, but do not overmix!
  10. Next, start dusting the flour all across the dough mixture, while kneading the dough, just until it starts to form into a dough. Use only enough flour to create a dough ball that will stay together. Unlike pasta dough, you do not want this dough to be overworked and smooth. Mold it with your hands... if if stays together without crumbling, that's enough flour. If for some reason, you think your dough has gotten too heavy and thick, misting with a spray of water, then reworking a bit should loosen it up.
  11. Because this is a double recipe, you may want to half the dough at this time, forming each into a ball and covering with plastic wrap.
  12. Wait for 15 minutes or so--the dough relaxes and incorporates itself during this step.
  13. Take one of your dough balls and, using a bench scraper or chef's knife, cut off a piece and with floured hands, roll a snake out--about 1/2 - 3/4" thick.
  14. Start cutting gnocchi from about 1 - 1/2" long. Working in batches of 10 gnocchi or so, start forming your final gnocchi shape with either the back of a fork, a ridged gnocchi board or even the back side of a cheese grater (as seen below).
Picture
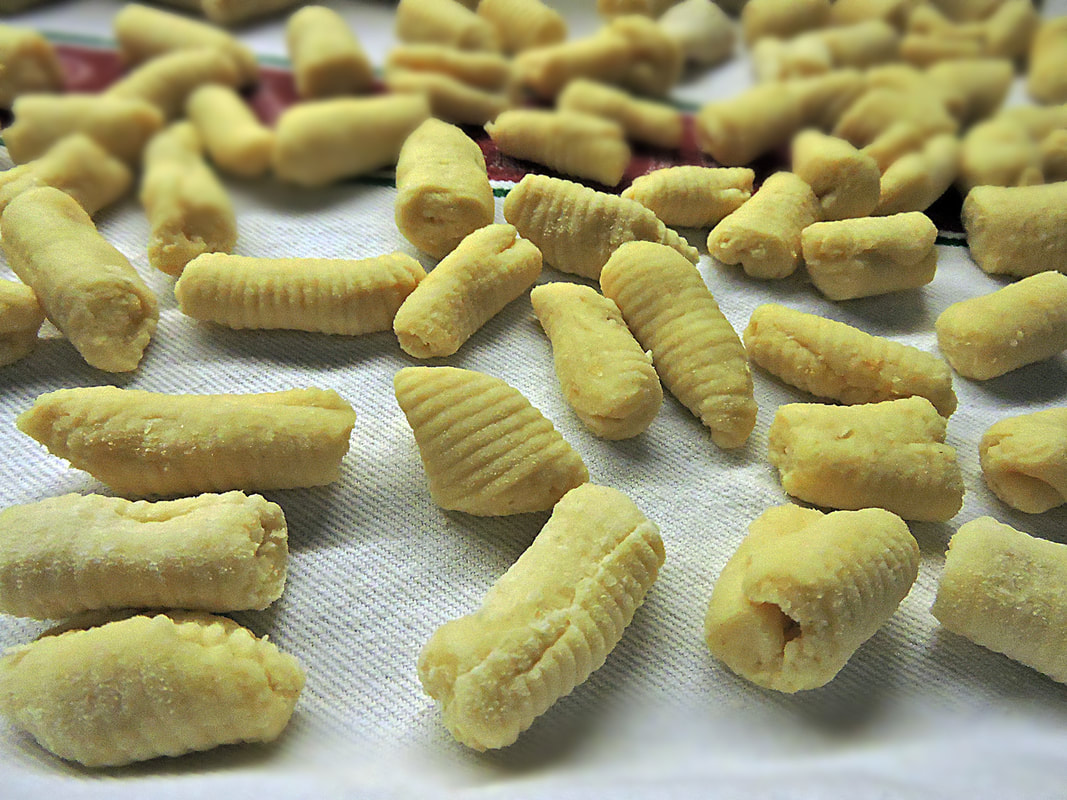
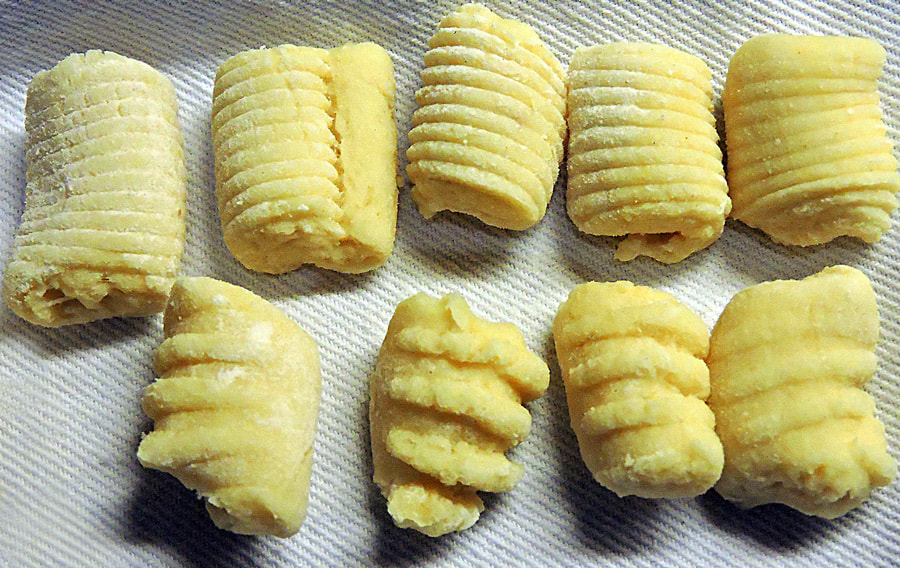
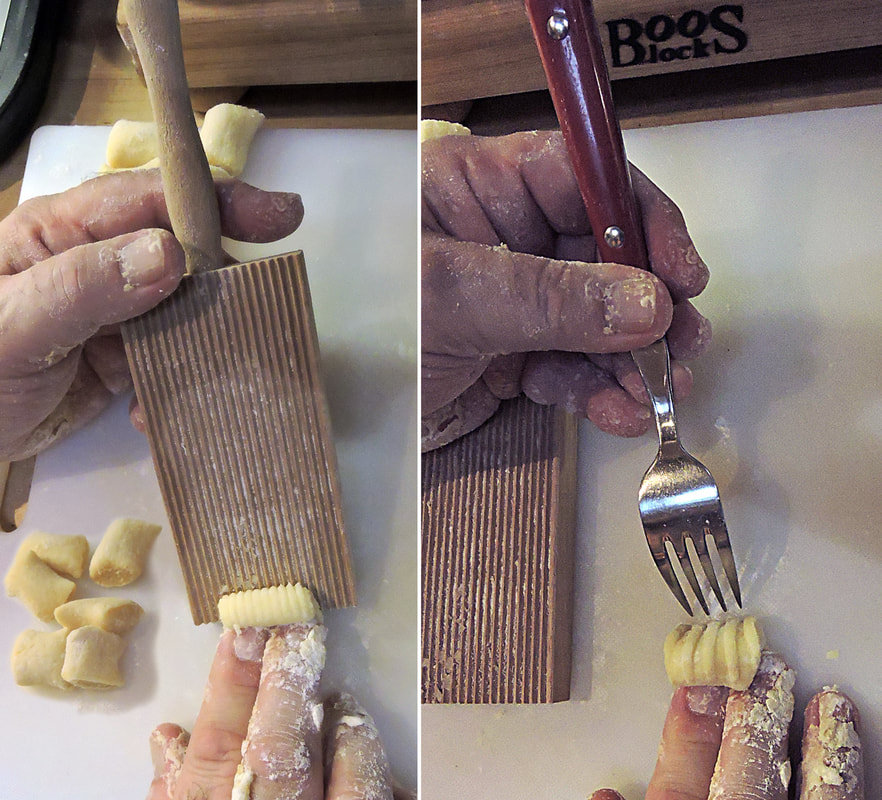
A gnocchi board for delicate sauces, a fork for thick sauces
Picture
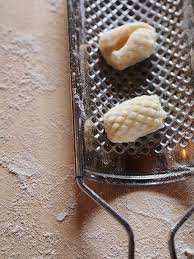
The reverse side of a cheese grater makes a raised nub texture
Shaping Gnocchi
As you shape your gnocchi, place them (not touching) on a cotton kitchen towel spread on top of a half sheet pan. Let them dry for 15 for about 1 hour before cooking. Then place them into a large pot of well-salted, rapidly boiling water, give a couple of gentle stirs, then cook until they all float to the top.

After all are floating, cook for another minute, then drain in batches using a spider, placing them into either a saucepan containing your preferred sauce, cooking and turning gently for a minute or two until the gnocchi have absorbed the sauce's flavors. Turn out into a pasta bowl, and top with your favorite cheese--Parmigiano-Reggiano, Pecorino, cacciocavallo, etc.

Picture
My son Lucas shaped all the gnocchi for this recipe
Picture
Back Row, gnocchi board - front row, fork
Picture
To shape a cavatelli shape, pull and roll toward you with two fingertips
Freezing the Second Half of The Gnocchi
After the first half of your dough is finished, repeat and fill a second sheet pan, then let dry as with the first batch. The second pan can then be placed immediately into a freezer for a future meal. (If a half sheet pan won't fit, place the gnocchi on smaller trays that will fit).

After they are frozen rock solid (at least 10 hours), immediately place them into a large zip-lock plastic bag, squeeze to remove all the air and zip it closed. To prevent against freezer burn, place it into a second bag. 

Once you hone your gnocchi-making skills, you can experiment with all sorts of different types--pumpkin, sweet potato, carrot, ricotta and more. Gnocchi are great with both simple sauces (like butter & sage or olive oil, garlic and pepperoncino) or complex sauces like bechamel, pestos or even ragu Bolognese.

Enjoy, and don't forget to let me know how yours turned out!

--Jerry Finzi
Comments
    Picture

    Archives

    March 2025
    July 2024
    May 2024
    April 2024
    July 2023
    March 2023
    January 2023
    August 2022
    July 2022
    May 2021
    December 2020
    October 2020
    August 2020
    July 2020
    May 2020
    April 2020
    March 2020
    February 2020
    December 2019
    November 2019
    August 2019
    April 2019
    March 2019
    February 2019
    December 2018
    November 2018
    September 2018
    August 2018
    July 2018
    June 2018
    May 2018
    April 2018
    March 2018
    February 2018
    January 2018
    December 2017
    November 2017
    October 2017
    September 2017
    August 2017
    July 2017
    June 2017
    May 2017
    April 2017
    March 2017
    February 2017
    January 2017
    March 2016
    October 2014
    September 2014

    Categories

    All
    Antipasti
    Baking
    Beverages
    Caffè
    Carne
    Colazione
    Dolce
    Education
    Formaggio
    Hacks & Tips
    Healthy Diet
    History
    Holiday Recipes
    Humor
    Kids Recipes
    Kiitchen Style
    Olive Oil & Balsamic
    Pane
    Panini
    Pasta
    Pastry
    Pesce
    Pizza
    Pranzo
    Primo
    Restaurants
    Riso
    Sauces
    Shopping In Italy
    The Italian Gardener
    Tomatoes
    Tools For La Cucina
    Vedura
    Vino
    Zuppe

Copyright 2014 - 2024 by GrandVoyageItaly.com
Picture
  • Piazza
    • Older Posts
  • Travel
    • Our Family's Voyage
  • Cucina
  • Culture
  • History
  • Style
  • Photos
  • Videos
    • Music Videos
  • About
    • Survey
    • Links
  • Shop 🛒