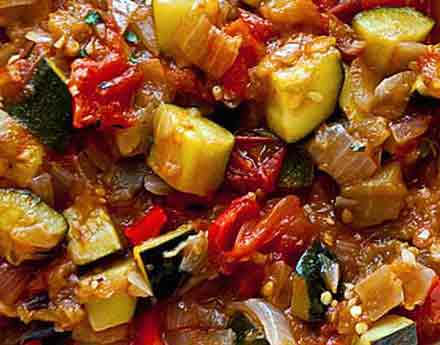
  My son, Lucas loves the animated film Ratatouille, and so do Lisa and I. It's a wonderful jaunt through a vintage Parisian kitchen through the eyes of "Little Chef", a rodent who loves to cook. After seeing the film, Lucas wanted to make ratatouille, so we set out to do a rustic, delicious version and have made it many times since. But ever since re-discovering our Italian roots during our Grand Voyage of Italy, we have been concentrating more on Italian recipes. Well, this time we though we'd combine the best of both worlds--French country cuisine with the height of Italian culinary skills--in the making of a great risotto. I think we succeeded with our Ratatouille & Risotto. It's perfect for autumn or winter--a stick to your ribs supper. But this dish has two distinct personalities... the obvious simplicity of making the ratatouille--basically a vegetarian peasant stew--and the technically demanding risotto. For the Ratatouille Ratatouille is a very basic vegetable stew made in Provence and around Nice in southern France. It uses several basic ingredients: eggplant, zucchini, tomatoes, onion and pepper. There are many variations on the recipe, but the one I use is fairly rustic and traditional. Ingredients: 1 large Vidalia (sweet) onion - diced 1 bell pepper, diced 2 medium sized eggplant-skinned, cut into 3/4 -1" cubes, (the larger the eggplant, the more seeds and more bitterness) 5-6 whole garlic cloves 3-4 young, slim zucchini - skin on, sliced once lengthwise, then into 3/4" half moon slices, (smaller & younger are more sweet and less seedy) 1-16 ounce can of diced tomatoes (I use Del Monte, oregano & basil spiced, in summer use fresh heirloom paste tomatoes) 1 cup chicken (or vegetable) broth 1/4 cup port wine 1 tablespoon salt 2 tablespoons oregano 1 tablespoon rubbed sage 3 bay leaves (remove after cooking!) 40 cracks of fresh pepper (from a pepper mill, fine grind) 1/2 teaspoon hot pepper flakes Olive oil for sauteing
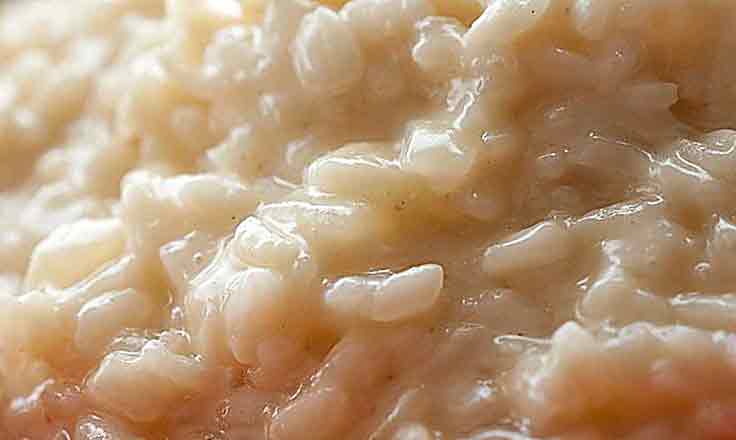 For the Risotto We mainly use Arborio rice when we make risotto, but even better is if you can find Canaroli rice--it makes an even creamier risotto and is a bit more forgiving. The trick with making risotto is patience. It can take the better part of an hour or more--constantly adding broth and stirring--until the starchy exterior of the rice breaks down enough to make a creamy risotto, while still keeping a pasta-like "tooth" in the cooked rice. You don't want any crunch, there shouldn't be any mushy rice, and the texture when finished should be loose, glistening and creamy. While there are some tricks for making risotto faster, but there's no substitute for a strong arm and standing at the stove top for up to an hour... Ingredients: 2 cups arborio or carnaroli rice 2 tablespoons light olive oil 1 medium sweet onion (or half a large Vidalia)-diced finely 1 cup dry white wine (Frascati or Pinot Grigio, or one of your choice) 6 cups of chick or vegetable broth, heated in a saucepan (for ladling into the rice) 1/4 teaspoon salt 1/2 stick unsalted butter 1-1/4 cups of finely grated Parmigiano-Reggiano cheese (plus additional for topping off the dish)
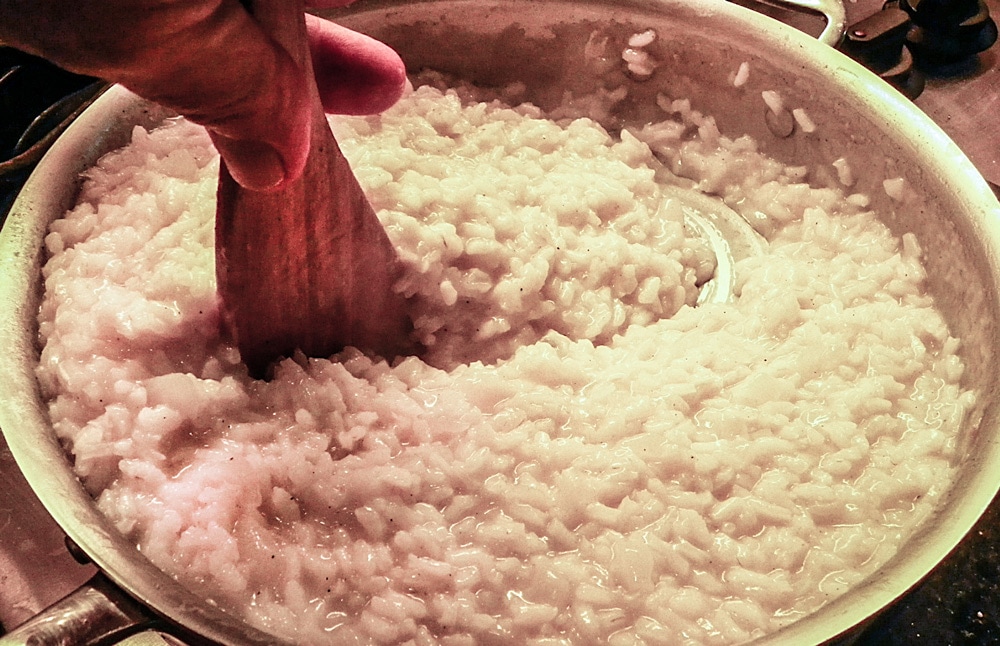 The "wave" slides in and closes itself behind your spoon as you drag it around the pan... è finito! Add the butter and cheese and serve. Toward the end, you will notice the starch in the rice being released to make a creamy consistency. Occasionally, taste the rice to make sure it is cooked through while still having a little bit of "tooth". You do not want it mushy, but you don't want crunch on individual grains. You will also know when the rice is nearing completion when you experience a sort of "wave" when you stir the rice, making a circular motion with the flat edge of your spoon around the bottom of the pan. Italian chef's call this the all'onda (wavy) effect. When your spoons passes and the rice behind it slides back in a slow motion like a silky wave, the risotto is at the right texture.
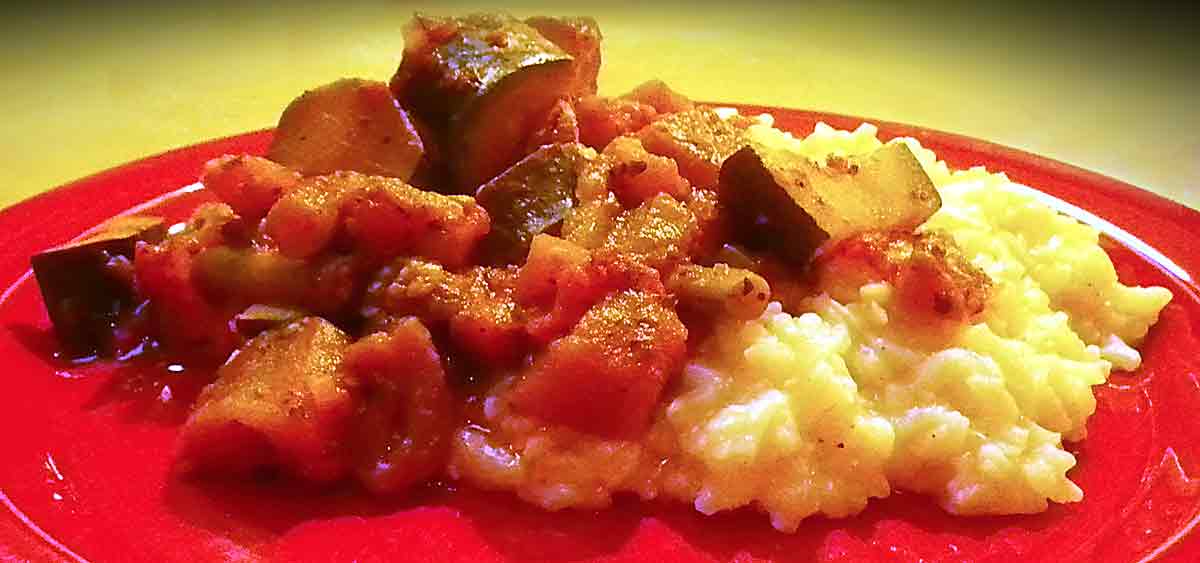
Some recipes say that this will take only 30-35 minutes, but I have found it takes me 45-65 minutes until the rice is cooked and getting creamy. Risotto should be served immediately when completed, so timing is key. But in the event you have to let your risotto sit for a bit, just leave covered, unheated... then before serving, revitalize it by heating it with a little bit more hot water on a medium low flame until the water is incorporated and it has reached the "wave" stage once again. To service, place a portion of the risotto on your plates and add some ratatouille on top, toward one side (let the creamy risotto show itself off too). You decide to have a hearty Italian Chianti or a nice French Bordeaux with the dish... after all, it does have a split-personality. I'd also like to add that the risotto recipes used in this dish is a basic risotto recipe. Once you learn how to make this, you can experience with adding all sorts of other things into the risotto... mushrooms, saffron, peas, shrimp, etc. And the ratatouille recipe is great topping a pizza, with pasta or even as a filling for a stuffed baked potato! Buon appetito! --Jerry Finzi Copyright 2016, Jerry Finzi/Grand Voyage Italy - All Rights Reserved
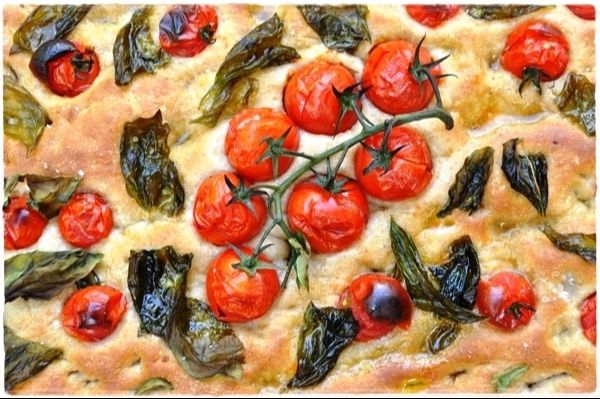
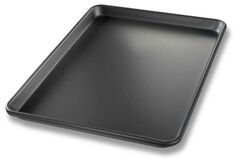
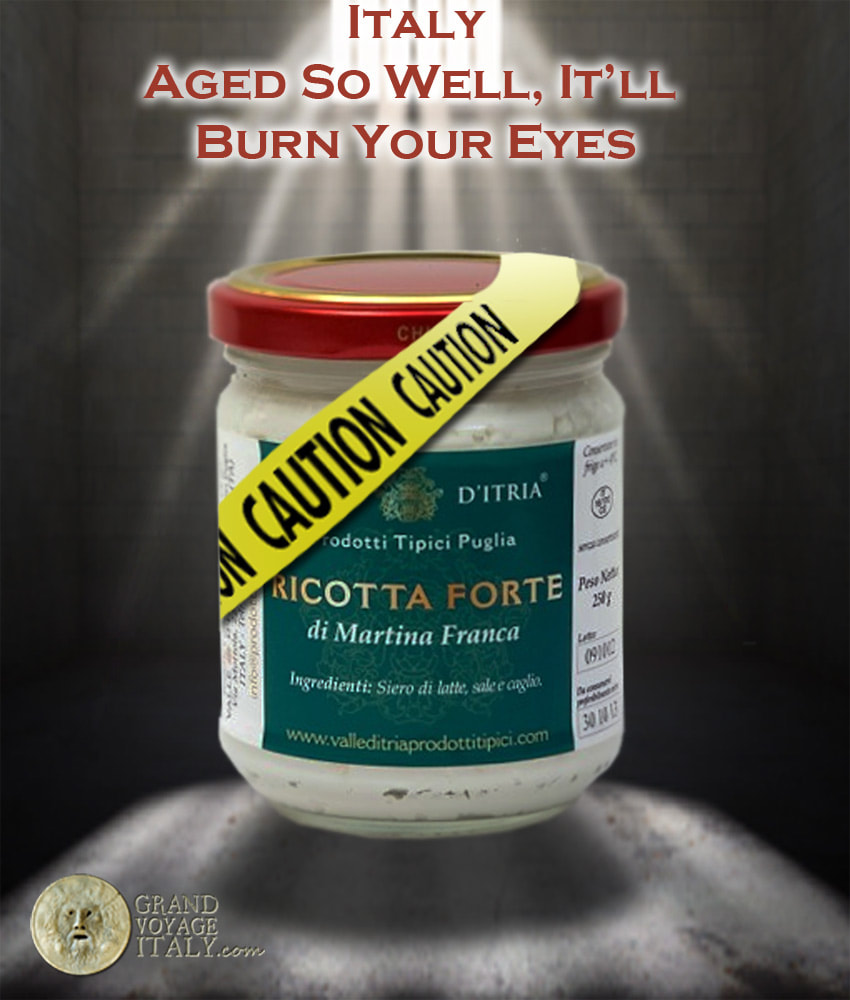  Lucas at 11, surviving the tasting of this evil cheese Lucas at 11, surviving the tasting of this evil cheese Ricotta forte is a traditional Apulian cheese, typically made at home under the kitchen sink or in a dark cantina (cellar), although can be found in supermarkets in Italy. Found in both Puglia and Basilicata, it might also be called Ricotta scanta, 'scante, scanta, ascuante, or "ashquant" in local dialects. Initially, it is made in the same way as ricotta, but using a strong flavored milk such as goat or sheep. The texture is similar to cream cheese, usually with an off-white color. It's definitely a cheese that spreads easily. The aroma coming from this cheese is not for the faint-at-heart, as we can attest to when confronted with ricotta forte one morning at a trullo bed & breakfast near Alberobello. One sniff snapped our heads back, but we spread it on our toast anyway, our host drizzling some honey on top, then we tasted... To be honest, it reminded me of when I was a kid and out bread developed mold, but that was bland compared to this stuff. The flavor is sharp as a Neapolitan criminal's stiletto, pungent, sour, bitter, with an intensity that burns your nostrils. This cheese is a total assault on your palette. Our eyes snapped open and then teared up. I got some on a sweet pastry sitting on my plate and later on when I bit into it, the whole sweet taste was ruined. It took literally an hour or two for our taste buds to relax back to normal. Many Pugliese still make this cheese today, a remnant from the days when shepherds came up with this devilish bastardization of the ricotta we all know and love. They placed the freshly made ricotta into small ceramic or glass jars, sprinkled with sea salt, then placed it under their sink or other dark place. A few times each week the lid is removed and stirred in a process that lasts for 3 months. As it matures it grows a fungus which gives this a flavor with more kick than any blue cheese you've ever tasted. 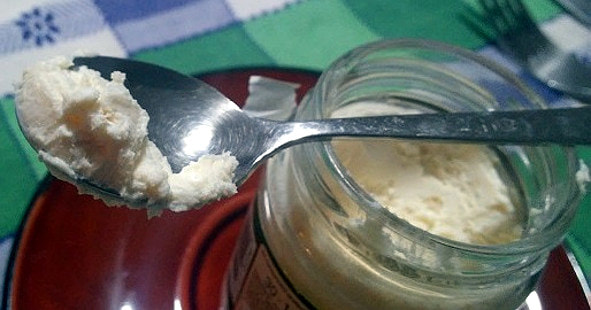 It's a regional specialty that locals enjoy spreading on warm crostini, either plain or drizzled with honey or balsamic. In my opinion, it contrasts too much with sweet things like figs or grapes, but tomatoes and other savory items like anchovies are a better match. 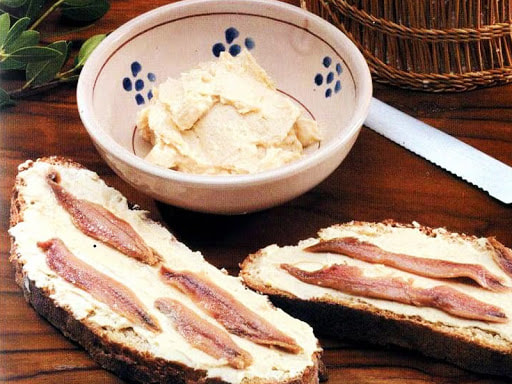 Watch the following video to learn how Ricotta Forte is made. It's in Italian with Italian text, but if you remember the words giorno (day) and mesi (months) you'll figure out how to make it and the time period intervals involved. In case you'd like to try it yourself, here is one place you can buy a jar. Enjoy! --Jerry Finzi 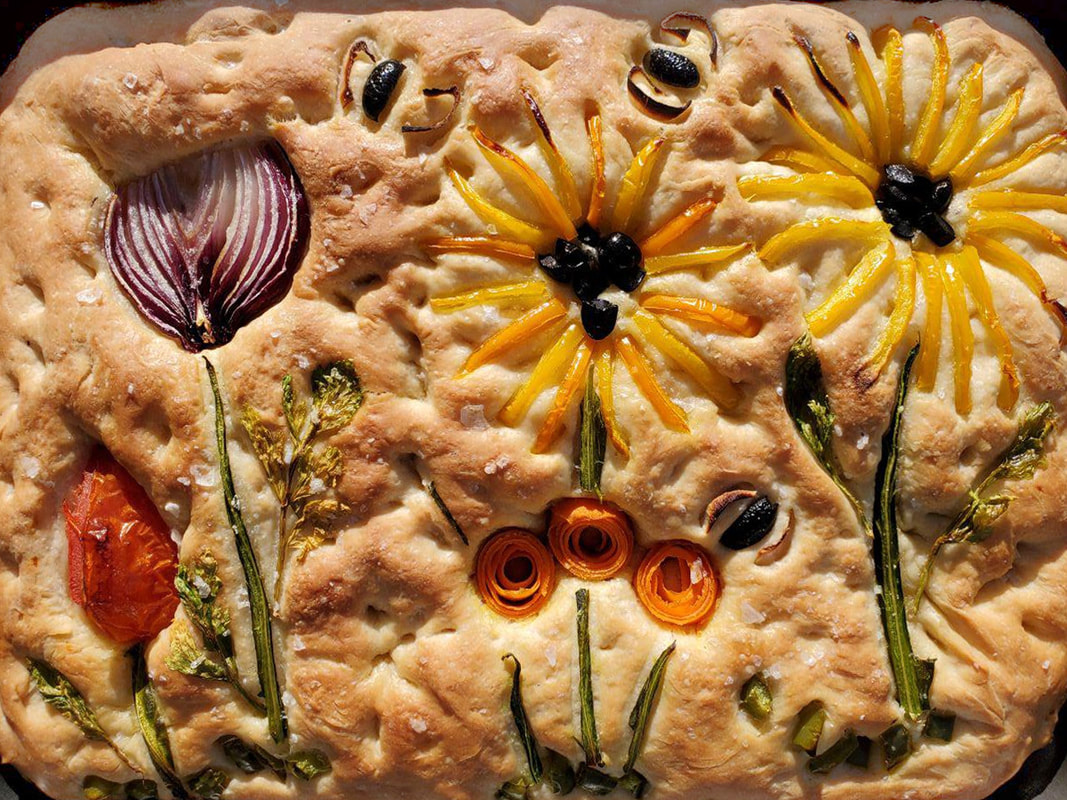 Focaccia is one of the world's oldest flatbreads with roots in ancient Greece and with the Etruscans, even before the Roman Empire reared its head. The Romans called it panis focacius (bread of the hearth) in Latin. In its basic form, it is a leavened bread, very similar to pizza but without all that cheese. There have been versions of focaccia all through the Mediterranean coastline in Europe and northern Africa. In ancient Roman days, it looked like a very simple, flat round of pull-apart bread. It was a meal to be carried by shepherds and fishermen and meant to be eaten later. In regions of neighboring France it's called fougasse. In Argentina and Brazil--both with large Italian immigrant populations--its name is fugazza and they can be either topped with stringy cheese or even double-crusted and stuffed. The common modern form of focaccia is dimpled with fingertips to make little wells that can hold savory items like olives, cherry tomatoes, peppers, red onion, sliced potatoes, garlic or even sweet things like figs, pear slices, blueberries, walnuts, dates, honey, anise seeds, bulbing fennel (finnocchio), orange zest or grapes. The top is usually brushed or drizzled with extra virgin olive oil and sprinkled with rosemary, sea salt, pepper or other spices. Of course, you can sprinkle a bit of cheese (usually grated), but go to far and you've crossed the line between focaccia and pizza. The variations are endless. In Italy, most pasticceria (pastry shops), panetteria (bread bakery) and even bars will have slices of focaccia often sliced and priced by weight. (Note: A "bar" in Italy is a family friendly place to get cappuccino and pastry in the morning and panini for lunch.) 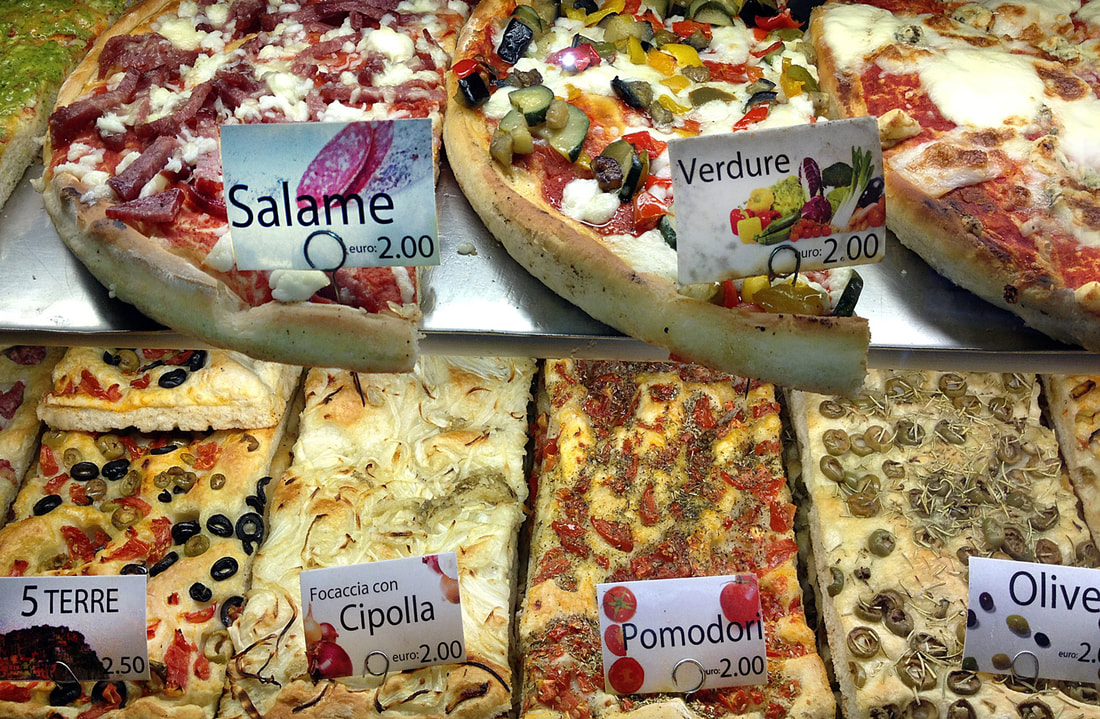 Typical Italian offerings of focaccia Focaccia is usually baked in 1" deep, dark steel pans. The texture is usually bready and for that reason a high protein "strong" flour (bread flour here in the U.S.) is used. The thickness also has the benefit of being used to make panini, slicing through the middle and stuffing with provolone, mozzarella, prosciutto or thing slices of salami. 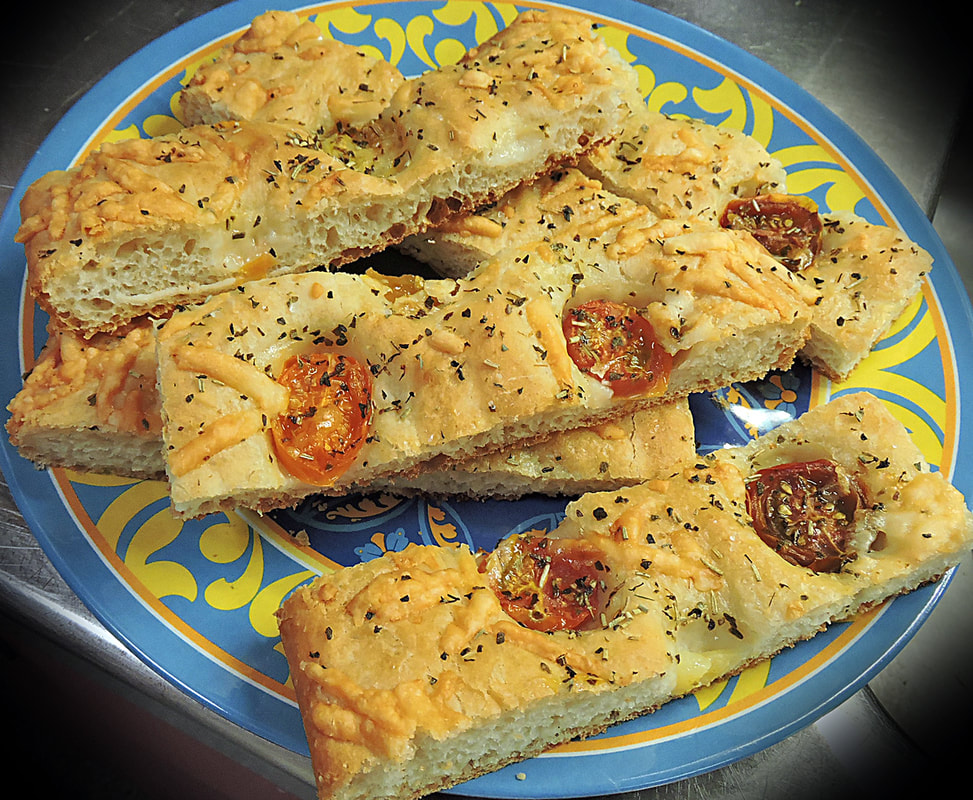 Slices of focaccia ready for snacks, lunch or along with dinner 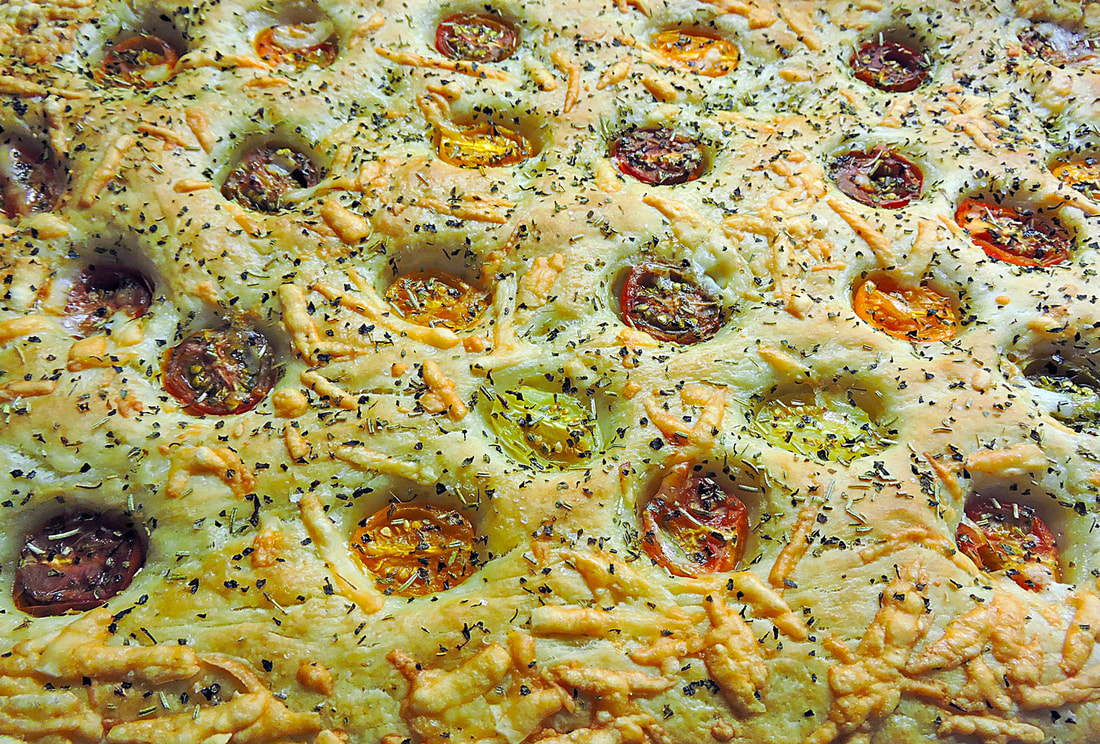  Dark, half sheet pan available on Amazon Dark, half sheet pan available on Amazon Ingredients Yeast mixture: 1-3/4 cups warm water (110-115F) 1-1/5 tablespoons fast acting yeast 1 tablespoon honey  For the dough: 1 cup King Arthur all-purpose flour 2-3 cups King Arthur bread flour (plus extra bench flour) 1 tablespoon sugar 1 tablespoon sea salt 2 tablespoons extra virgin olive oil Extra virgin olive oil for the pan Toppings: Extra virgin olive oil (for brushing) Cherry tomatoes 1/4 cup grated cheese (using 1/4 holes/box grater), provolone, asiago, or caciocavallo (cheese is optional) Dried thyme, rosemary, oregano, fresh ground pepper, sea salt Directions Preheat oven to 435F with a pizza stone or steel on the center shelf.
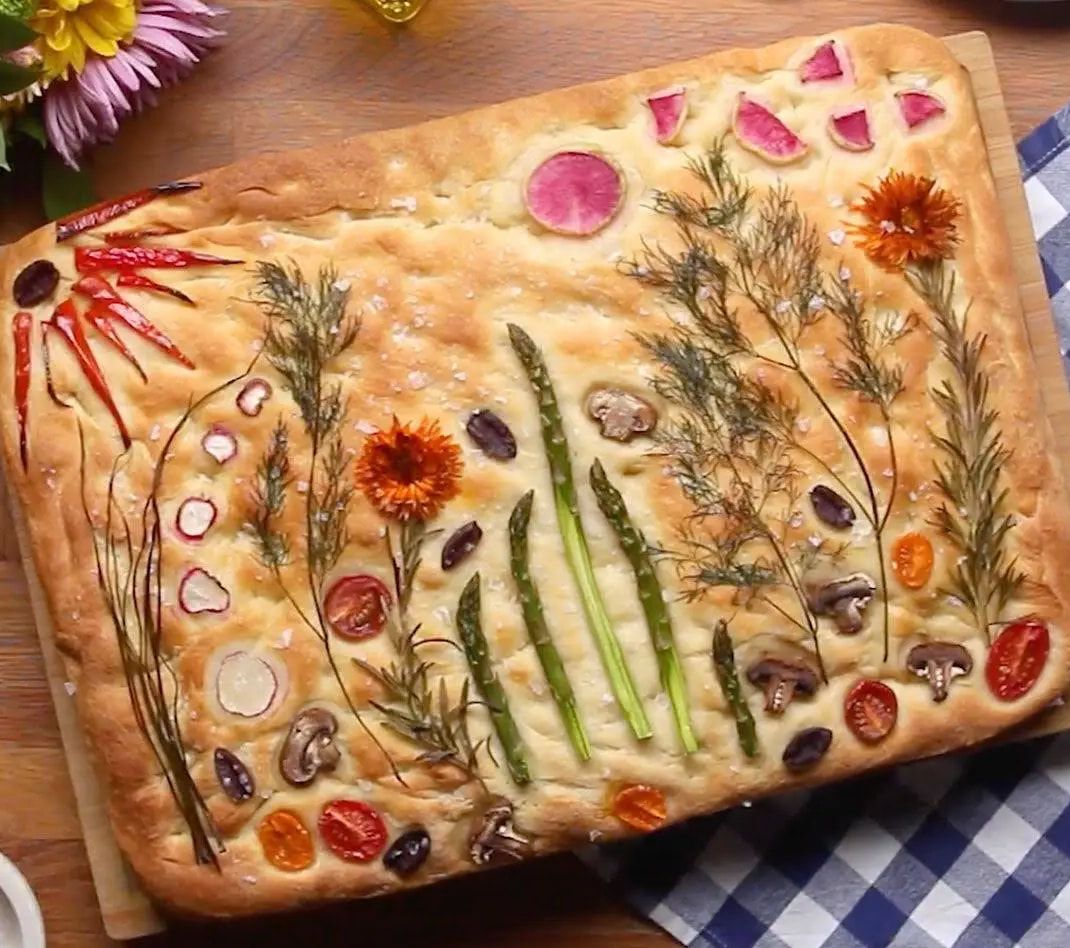
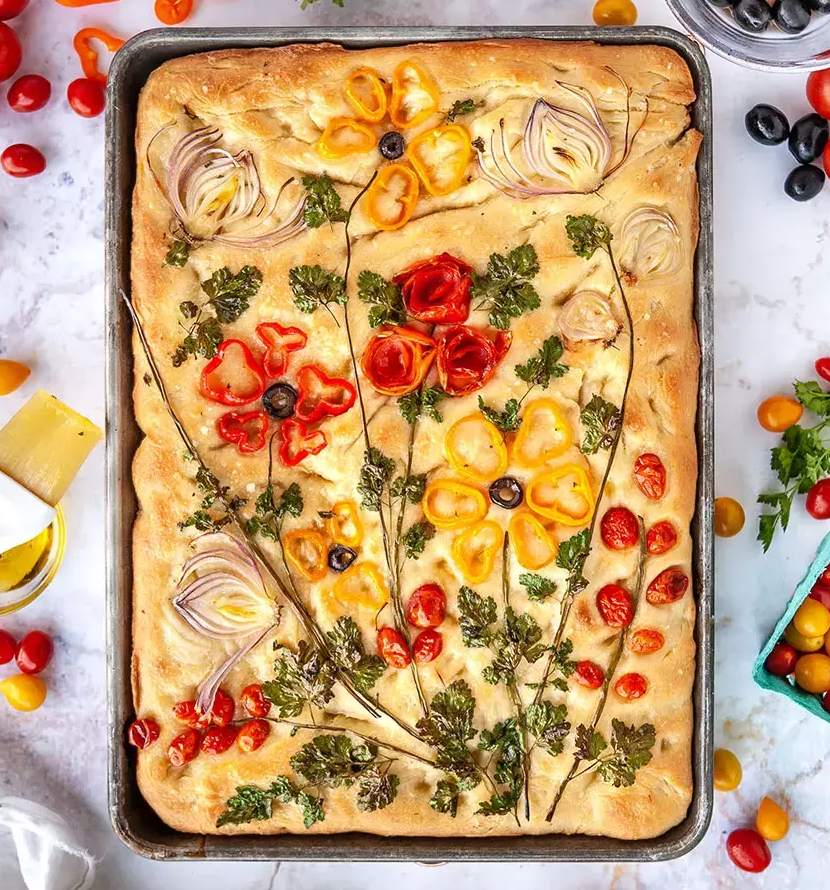
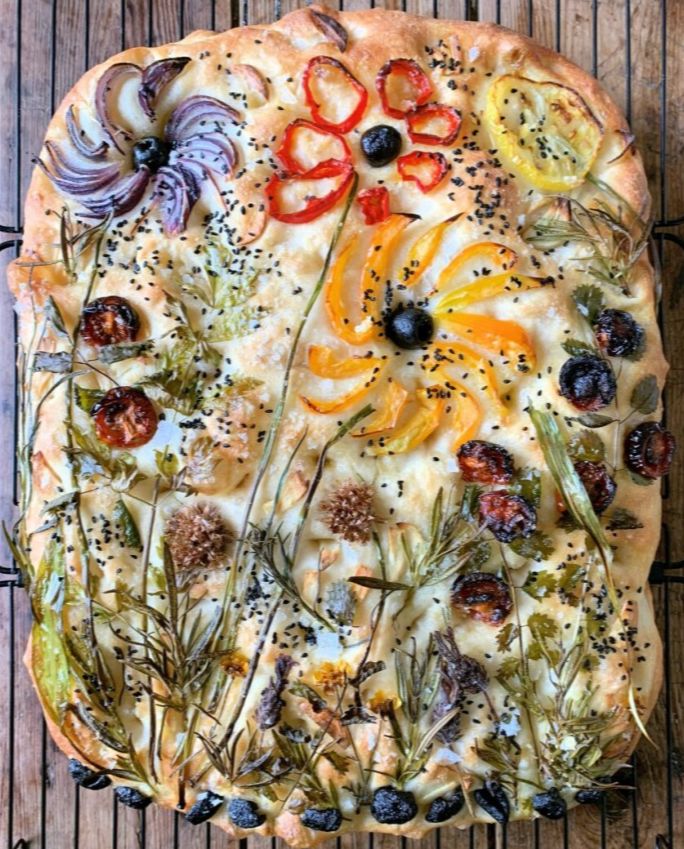
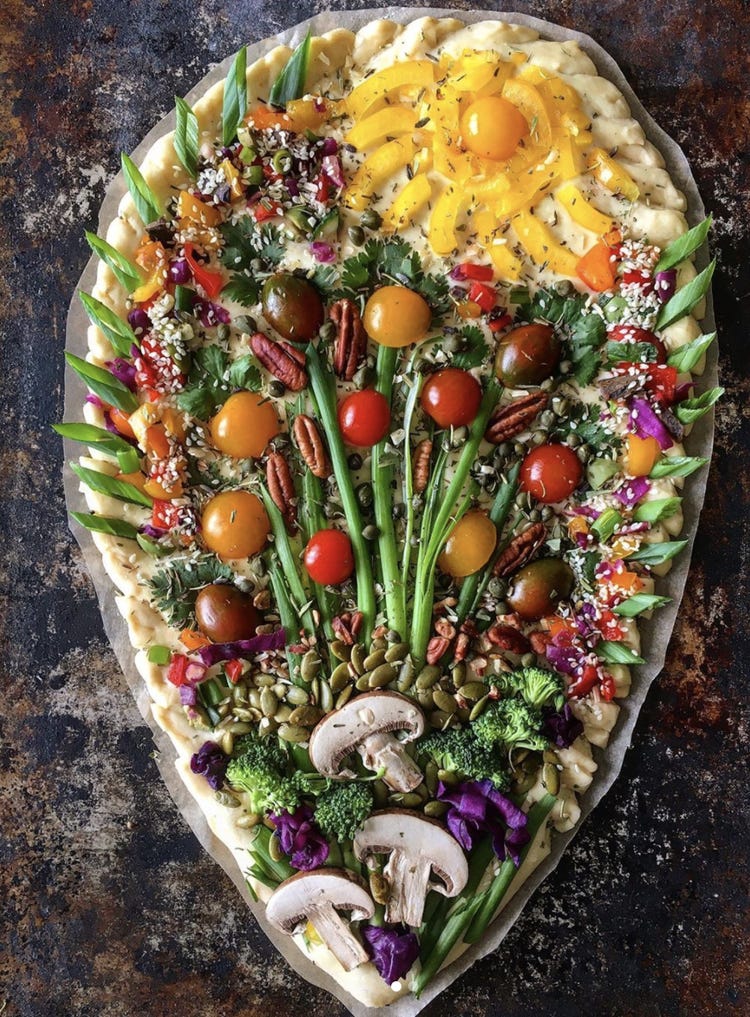
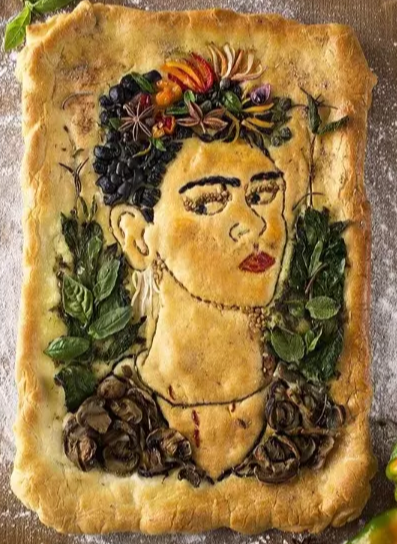
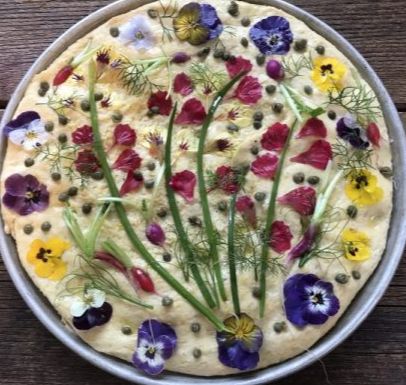
You can reheat in a microwave by wrapping with a damp paper towel, then heating for 30 seconds (time depends on the power of your unit). To kick it up a notch, try a fresh drizzle of extra virgin olive oil (we really recommend unfiltered) or an aged balsamic. For a quick lunch, top with a draping of prosciutto. You can also slice focaccia in half and use to make a panino (sandwich) filled with thin sliced colt cuts and cheese or even cooked ingredients like grilled eggplant, tomatoes and mozzarella or roasted vegetables. Getting Creative 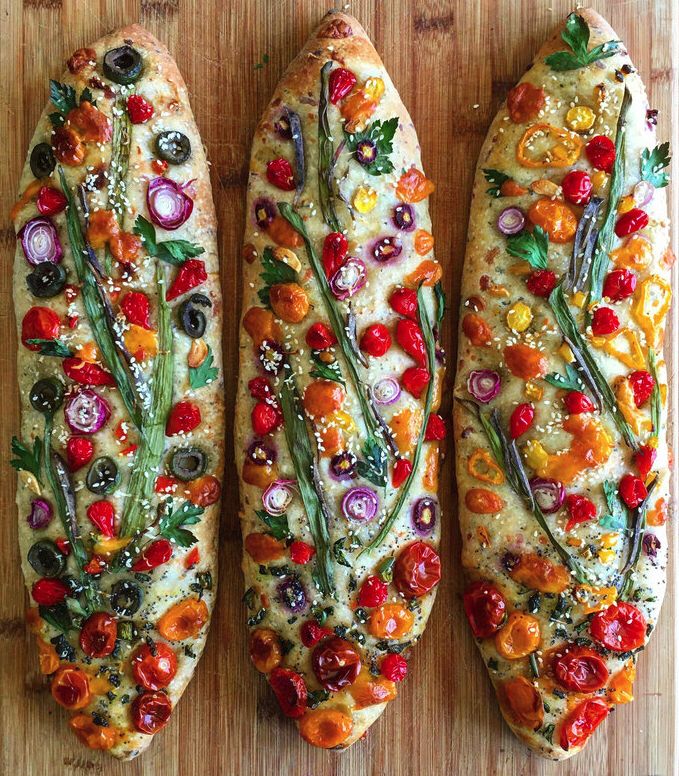 Now that you know the basics of making focaccia, consider getting creative, as these examples illustrate. Look for color contrasts, textures and interesting shapes with your choice of toppings. Consider unusual things like asparagus, cauliflower, beets, basil, cilantro, kale, mushrooms, berries, capers, chives, colored course sea salt, and various seeds. Depending on your ingredients, you might have to partially bake your focaccia first with ingredients that can cook during the entire bake time and need to be pressed into the dough. For other things that might burn, like seeds or tender leaves like basil, position on top during later stages of baking. Be creative and make a masterpiece for a special occasion, or simply make simple focaccia for every day snacks and meals... Buon appetito! --Jerry Finzi
 You might also be interested in...
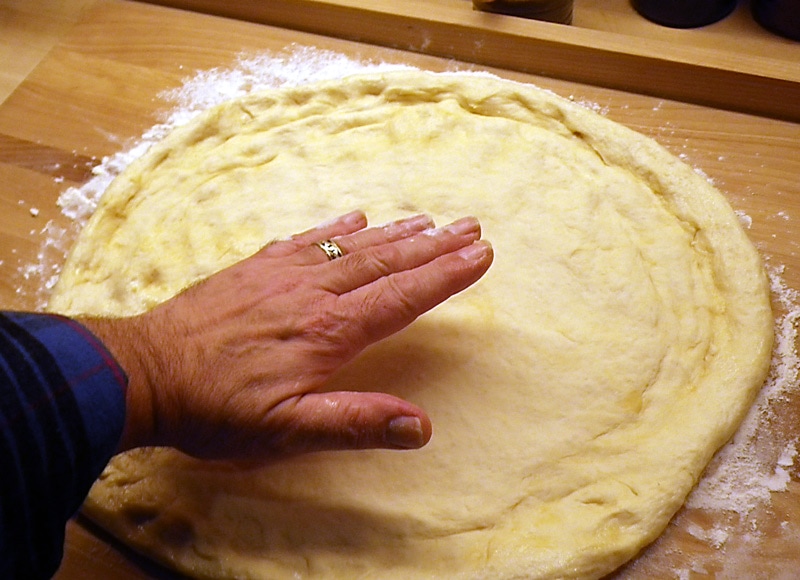
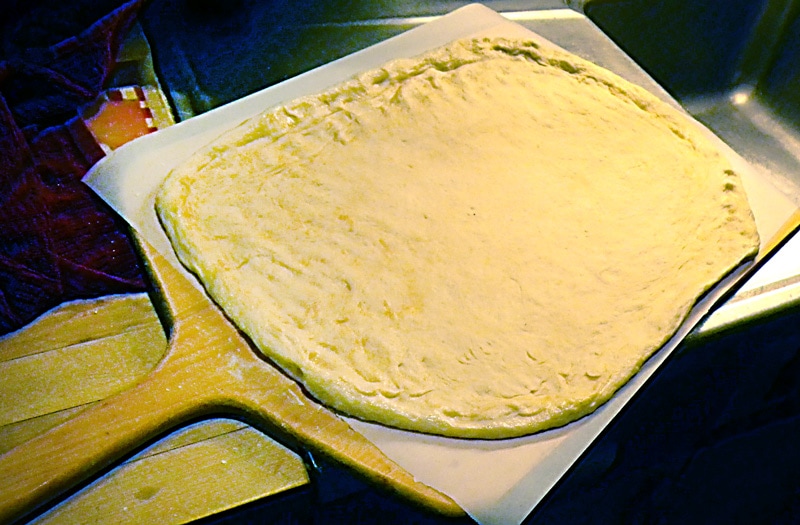
Forni Italiani: 21 Regional Breads from Italy The Secret Life of Ciabatta Scarpetta: Bread Wipes the Italian Plate Clean Italian Easter Bread: Pane di Pasqua Recipe Pane Coccoi: The Amazing Sardinian Art of Decorated Breads Forno Antico Santa Chiara: More than Just a Bread Bakery  Forming and Topping your Pizza To use the dough, turn it out onto a floured surface and to shape your pizza. A larger recipe will make one large pizza, divide into two or more smaller balls to make individual pizzas. If you divide the dough, either do it before the rise (each one rising in separate bowls) or to save bowls, divide using a bench scraper, then fold and form the dough back into ball shapes. If they seem too elastic to form balls, let the dough rest a few minutes before shaping your dough balls. You can let your dough balls relax in the fridge, laid out on an oiled sheet pan and covered with plastic wrap or a floured kitchen towel before use. Take them out a few minutes before forming your pizzas. There are many ways to shape a pizza. If you want a really thin crust you can use a floured rolling pin--a simple log shaped one is best to ensure an even thickness. A tapered French pin will not roll out dough evenly. One of the easiest ways to form a pizza is to use all of your fingertips... pressing down and pushing out to flatten and then widen your dough into a round. To make it easier for you, you can shape your pizza on a sheet of parchment paper and then when done, slide your peel under the paper for topping off. I tend to shape it on a floured surface, then transfer by hand (draped over my floured forearms) onto my peel which has a sheet of parchment covering it. You can also transfer using a "booking" technique. Once you have your dough shaped on your work surface, get your peel ready, placing it next to your work surface with a sheet of parchment paper on top. To "book" your dough, lightly flour the top of the round, spreading the flour over the top with your hands. This will ensure the dough doesn't stick to itself when you start folding it over onto itself. You want to fold into thirds--the two side thirds fold in toward the center third. Fold one over the center first, then the other. Quickly (to prevent sticking), transfer to your peel and carefully unfold your dough round and adjust its shape. A more advanced technique is to shape your dough like pizzaioli do in Italy. Below is one of the most instructive videos I've found on this technique... 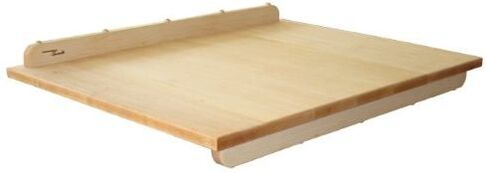 A great dough board for pizza, breads, pastry and making pasta A wood surface gives you "grip" for shaping pizza dough. Marble, granite or Formica surfaces can make the dough stick, so be liberal with bench flour while kneading and forming your artisinal dough. I use a bread board (like the one pictured above) that sits on top of your counter. Don't forget your best tools--hands. I mainly use my hands when shaping pizza. Since I'm really making a more delicate, artisanal style pizza dough, you really can't throw it like in a commercial pizzeria. First, make sure you have a decent amount of flour on the workbench. Now, toss more flour on top of the dough before you start. Basically, you want the dough to have enough flour under it to slide easily when working it. You also to flour your hands so your hands don't stick to the dough. Basically, I tend to leave a slight mound in the middle, then press with the sides of my hands to form a thicker crust edge (I like a thick crust on the perimeter of a pizza). Pat the middle with your flat hand, or use your finger tips (all of them) to push down the high spots of the dough until you make the diameter the size you need. As you press, push outward to where you need more width. If the dough won't move or slide, lift up and dust some more flour underneath. If you make a hole, tear a little dough off the side and patch it. If you aren't using the parchment paper underneath, gently lift one side of the dough round and lift it on top of your floured forearm. Then with the other hand, help to lift and slide it onto your pizza peel on top of the waiting parchment. Pull the edges of the dough to fill your peel or into a circle, whichever you prefer. Rustic shapes are fine too. By the way, instead of using parchment, you can also sprinkle a good amount of coarse corn meal on the peel and put the raw shaped pizza on top of that. The corn meal acts like little ball bearings making it easy to slide your pizza onto the stone. I've switched to using parchment simply because it's a bit neater... some corn meal winds up at the bottom of the oven and tends to burn, messing up both pizza stone and the oven. I never would recommend topping off the dough while it's still on the work counter. I've even seen TV chefs do this and then have some trouble when trying to slide a metal peel underneath, pulling and tugging the loaded, wet dough. Just have all your toppings ready beforehand, place your dough on your parchment lined peel, and top-away! You can use my Basic Pizza Sauce Recipe or any jar sauce, as long as it's not too thick. Pizza sauces tend to be on the watery side. (Click Here for our Basic Pizza Sauce Recipe.) 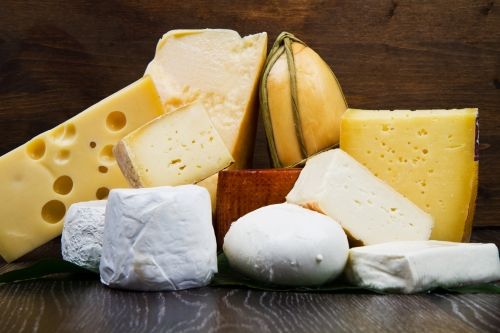 As for cheese, while most home pizza makers will use supermarket mozzarella, don't forget to try others: Sharp provolone, burrata, Italian Fontina, smoked or fresh mozzarella, buffalo mozzarella, bocconcini, mascarpone, ricotta, ricotta salata (or feta), Gorgonzola, cacciacavalo (our favorite sheep cheese), asiago, Parmigiano reggiano or formaggio fresco (called basket cheese in some Italian neighborhoods). Depending on the type of cheese, it can be sliced, diced, grated or simply dolloped on top of your pizza. With mozzarella, cut it into thin slices with a knife or grate it with the 1/4 inch holes on a typical cheese grater. Mozzarella is easier to grate if you place it in the freezer for 15 minutes first. When using fresh mozzarella, try pinching off rough pieces and dropping them randomly on your crust. You might even try partially baking your crust first and then adding cheese and toppings for the final few minutes of baking. This is a method used in Italy when using very fresh cheeses like buffalo mozzarella, fresh ricotta or burrata. As for the rest, live it up and experiment. If you want a simple Pizza Margherita, all you need is sauce, basil leaves and some mozzarella, with perhaps a drizzle of extra virgin olive oil and sprinkle of oregano (we grow our own in summer). We love olives (buy pitted and just squish them in your fingers and drop them on), smoked or Virginia ham, prosciutto, speck (Italian smoke-cured prosciutto), leftover bacon from Sunday breakfast, paper thin (cut on my mandoline) slices of dry sausage or zucchini, caramelized onions, fresh heirloom tomatoes, smoked turkey, home made meatballs... whatever suits your taste. After Thanksgiving we use leftovers for a Thanksgiving Day Pizza--turkey, stuffing, cheesy mashed potatoes, fresh cranberries and for the sauce, turkey gravy. Recently, I even made a Chicken Marsala pizza. Lisa likes a white pizza--easy to do (without red sauce), smeared with ricotta cheese (she makes it fresh) and drizzled with olive oil finished with grated Romano and oregano.  Our traditional Thanksgiving Day Pizza TIP: Don't let your topped off pizza sit too long on the peel. Get it in the oven quickly or it could stick to your parchment or peel (making it difficult to slide off into the oven), or the wet ingredients might soak too far into the dough. 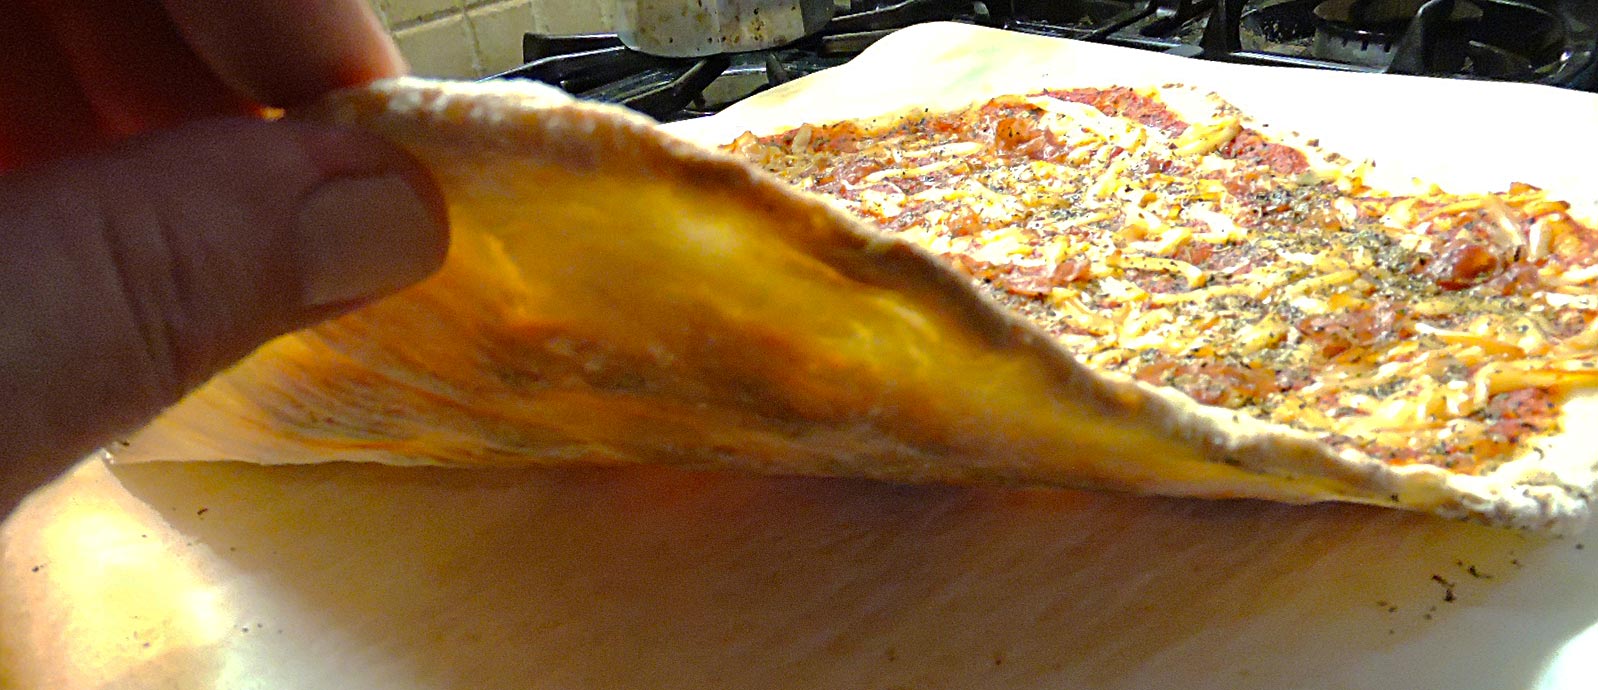 A cracker-thin crust you can almost see through After you've topped it off, slide it into your oven onto your preheated stone/steel. Place the leading edge of the peel about 1" from the rear edge of your steel, then give a gentle slide at first to touch the rear edge of pizza onto the surface. Next, give a quick thrust backwards, pulling your peel out from under your pizza. This should land the pizza perfectly, but practice carefully at first. Just be careful not to allow the edge of the pizza to droop over the edge of your stone! True confession... when rushing one Saturday night to get my pizza into the oven, I swung the oven door open, slipped it from the peel into the oven and suddenly realized I forgot to put the steel into the oven! With the help of my metal peel and a large metal spatula, I managed to get it out, folded it into a pan and made a fairly presentable stromboli. Dinner saved! If your oven is around 510-515 degrees a pizza should cook between 3 and 5 minutes. You can try using a higher temperature (my oven goes to 550F) but that might cook the bottom crust before the toppings. Use a metal spatula or peel to check under your crust to make sure it's browned. (The sugar added to the dough aids browning). After the timer goes off, use the peel to slide under the parchment and pizza (or your pan pizza), lifting out and transferring to a wooden serving board or serving pan. Use a pizza wheel shears to cut your slices. If you've made thin crust individual pizzas, place them directly on large plates and eat them Napoletano style... either with a knife and fork, or da portare via (take out) style and fold them in half or quarters and eat it like a sandwich. The world is your pizza, when you just stop and think about it... but, don't stop... make pizza!
--Jerry Finzi, la Pizzaiolo di Famiglia Finzi If you enjoyed this article, please SHARE it with your friends on Social Media. Grazie! 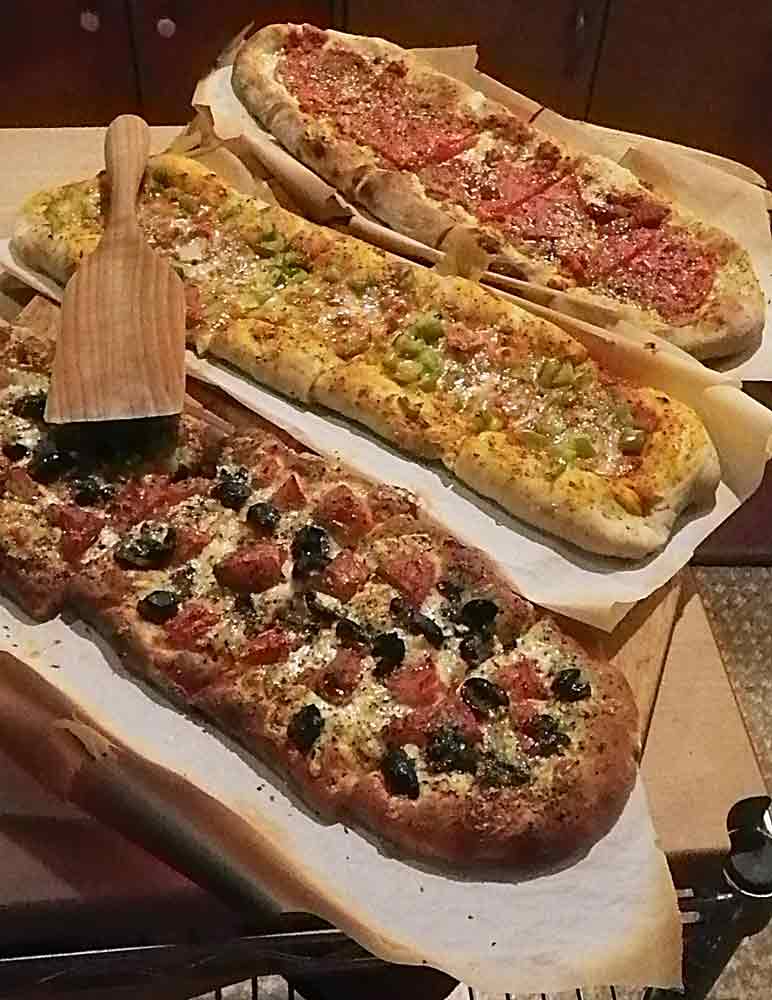 Pizza al Taglio done three ways Now that you've gathered together a basic pizza making toolkit, let's start actually making one... My "Measure Water First" Method First, I'd like to explain my basic concept that I've developed over the years. Most pizza dough recipes will give you precise measurements for flour in either cups (in the U.S.) or by weight (Europe). I don't really measure flour. Instead, I focus on measuring the water, depending on the type of pizza, style or size that I'm making, and then judging the look and feel of the dough as more flour is added while mixing or kneading. You can and should learn what a good dough for a particular type of pizza should look like. Making any type of dough for bread, pizza or even pasta is not precise like pastry or cake recipes. It's all about the look and feel. There are many advanced pizzaiolo's recipes as ratios by weight of all ingredients, especially the ratio of flour to flour. They talk in terms of "60% hydration", sometimes more, sometimes less. This is true, but it's a complex, fussy method for beginners who just want to learn how to make great pizzas easily. Still, they are correct in that the hydration of a particular dough gives each type of pizza its unique characteristics. Hydration also governs how light and airy a crust can be--or how dense. Of course, as you get more advanced you'll learn that other things also contribute to each type of crust: mixing types of flour; using honey versus sugar; using salt or not; olive oil or not; and how long and how many rises the dough is given. Often a subtle change makes a big difference in texture, taste and structure. Water & Yeast The first thing I do is place warm water (110-115 F) into a glass measuring cup, and ensure the measurement is correct for the size and type of pizza I'm making. For example: 1 - 1/4 cups water for a 12"-14", basic pizza, baked on parchment, on stone or steel. 1 - 1/2 cups water for a 14-16" basic pizza, either on stone or in large pan. 1 - 3/4 cups water for half sheet pan focaccia or "Grandma's Pizza", or 2-4 personal pizzas. For now all you have to learn is how your dough should look in the mixing bowl. Some basic things to look for in the bowl of a stand mixer after adding the first 1 -1/2 cups of flour and pouring in the water/yeast mixture:
So, if you understand my method, the water measurement is critical for the type/size pizza being made, but the amount of flour added will always vary depending on if it's a rainy day, if it's in the middle of a hot humid, summer's day, or if it's the middle of a dry winter with your heat drying out the air in your house. Remember, you can't remove flour if you add too much. Add flour slowly and use your eyes to see when it's getting thick like a pliant, damp, sticky putty... but NOT as dry as a child's Play Dough. If you add too much flour, your pizza will be dense and heavy. When a dough is dense, it makes it difficult for the yeast's gasses to lift and rise the dough--in other words, if there are no air spaces, all you have is a dense bread.  Neapolitan with heirloom tomatoes and fontina  Ingredients for Three Types of Pizza Dough Proofing the Yeast For a 12-14" pizza... 1 - 1/4 cups warm water (about 115 degrees F) 1 packet "instant" yeast (or 1 tablespoon packaged/dry yeast) 1 tablespoon honey or sugar Use 1 to 1-1/2 cups All-Purpose flour to start, then use Bread Flour for the rest. Proofing the Yeast For a 14-16" focaccia or pan pizza... 1 - 3/4 cups warm water (about 115 degrees F) 1 heaping tablespoon packaged/dry yeast 1 tablespoon honey or sugar Use only Bread flour. Proofing the Yeast For a 3-4 individual, thin crust pizzas... 1 - 1/2 cups warm water (about 115 degrees F) 1/2 tablespoon dry yeast 1 tablespoon honey Use only All-Purpose flour. Proofing the Yeast 2 Neapolitan style, individual pizzas... 1 - 1/4 cups warm water (about 115 degrees F) 1/2 tablespoons packaged/dry yeast 1 tablespoon honey Use only Italian style "00" Flour.  Wheat pan pizza with olives, mozzarella and sausage 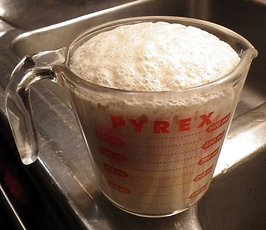 Mix the yeast and honey (or sugar) with the warm (115 degrees F) water in a medium size measuring cup. Set aside for 10-15 minutes to "proof" (foam up). If the yeast doesn't show "proof" that your yeast is alive and growing, you should shouldn't use it. Yeast should be alive. To understand what's going on, the honey (or sugar) feeds the yeast and as it grows, it produces gasses that will lift the dough. After you make your dough, the yeast is still working during any successive rise periods and and will lift the dough (puff it up). Pizza dough is a leavened crust (more akin to bread). A dough without yeast (or less yeast) makes more of an unleavened bread--like a cracker. If you want a bread-like dough (focaccia, sfincione or Grandma's style) use more yeast. If you want a thin, crusty pizza, use less. TIP: In case you don't have a thermometer, here's a method I've come up with to ensure the water is the right temperature... Turn your water on HOT and then try to hold the inside of your wrist in the stream of water coming from the faucet. At first it'll be way to hot to hold it for even a second. Start turning down the temp (add cold or turn the valve toward the cold side if it's a mixer valve) and try holding your wrist there again. When you can comfortably hold your wrist in the stream of hot water, it's hot enough without being too hot, killing your yeast. I've tested this method with a thermometer and it usually lands me around 110-115 degrees F.  A pizza on my baking steel Preheating the Oven, Pizza Stone, Temps and Times First, place your pizza stone/steel in the oven on the center rack, and preheat your oven. For a basic pizza baked directly on the stone/steel, set your oven to 515 F and preheat for 30 minutes/stone, 60 minutes/steel. This pizza should bake within 3-6 minutes, depending on your home oven. Do not use convection! If the toppings need a more time than the bottom, place the oven to Broil for 1 more minute. Thin crust and Neapolitan style pizzas should also be baked at 515F. For pan pizzas, the rule is low and slow... less heat, more time. Preheat your oven & stone/steel to 425-435 F. Most pan pizzas in dark, heavy pans should bake in about 15 minutes. Ingredients for the Dough 1-1/2 cups all-purpose flour (all-purpose is needed to create a more crisp crust) 1 - cup bread flour (bread flour makes pizza more bread-like, I recommend King Arthur's) 1 - tablespoon sugar 1 - teaspoon salt 1- tablespoon extra virgin olive oil  Making the Dough
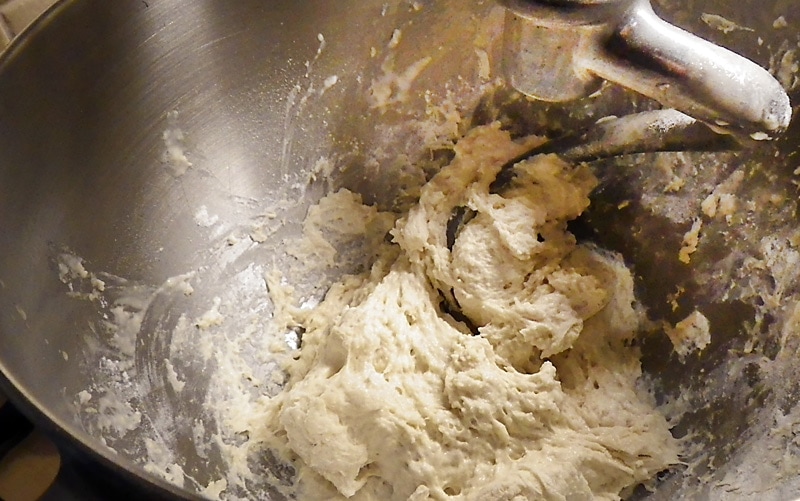
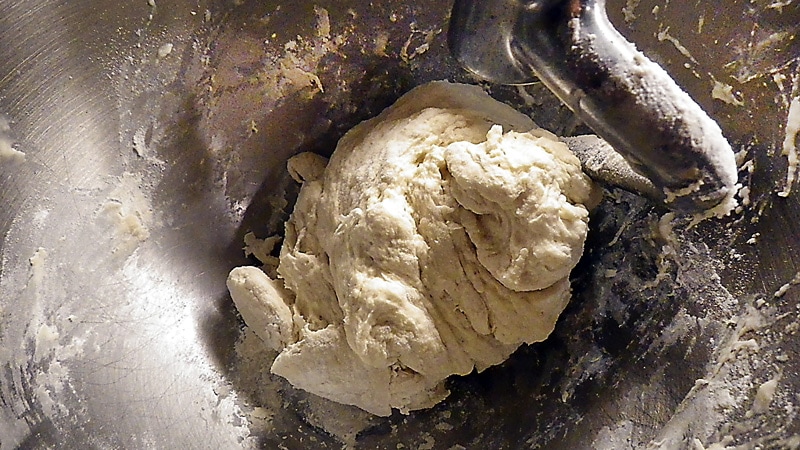
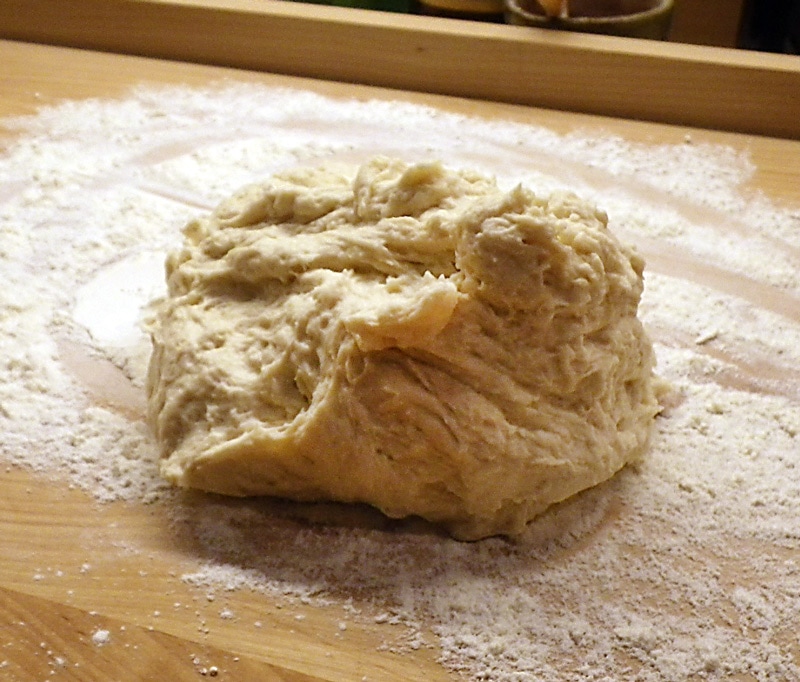
The photo on the left needs more flour but is almost there. The center one has the right amount of flour--it's still a bit sticky. The third shows the dough as it looks on the bench before kneading. 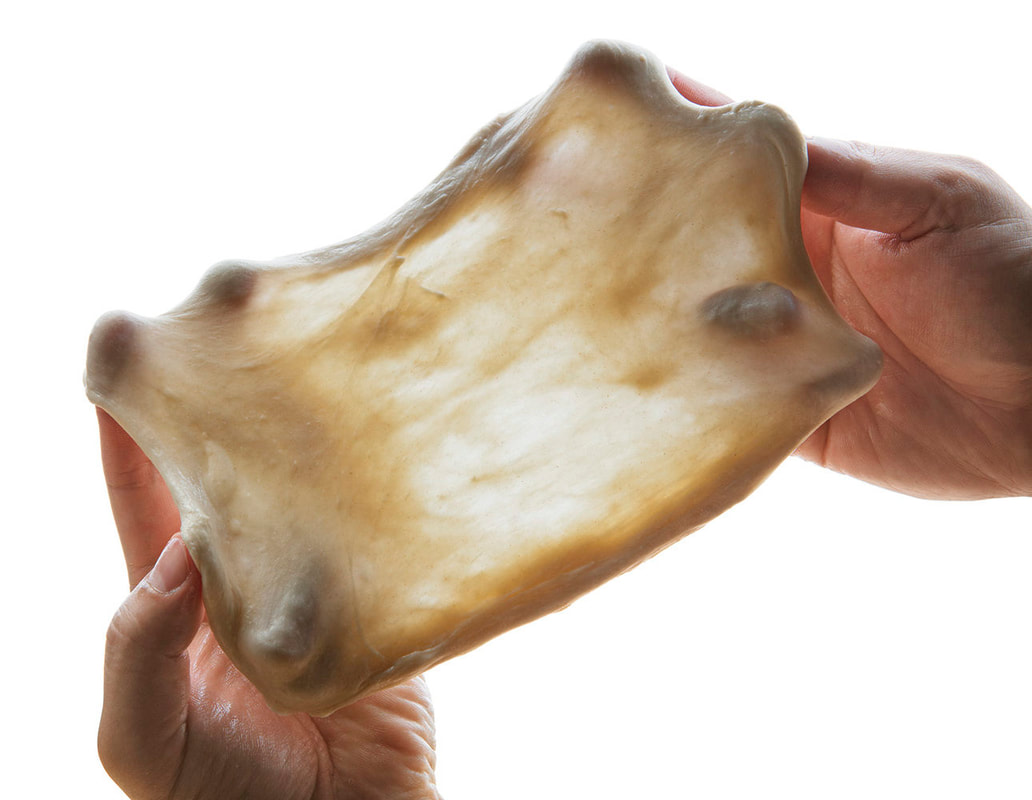 After kneading, you can do a "window" test as in the above photo. Stretch the dough until it gets paper thin and translucent without tearing. If it tears easily, there isn't enough gluten development.
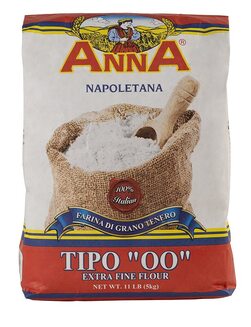
TIPS: You want to mix the dough until it separates from the bowl--but it should still be a bit sticky. Go slow with adding more flour. A dough that's too dry will make a tough, leathery crust. You want it soft and a bit sticky. One more tip... I use mainly King Arthur's flours for my pizzas. I've done tests using others like Gold Medal or Pillsbury and never got good results. The protein level of King Arthur's is higher, resulting in better gluten development. For Neapolitan style, I'll use 00 type flour (doppio zero, double zero), either Caputo or Anna brand.
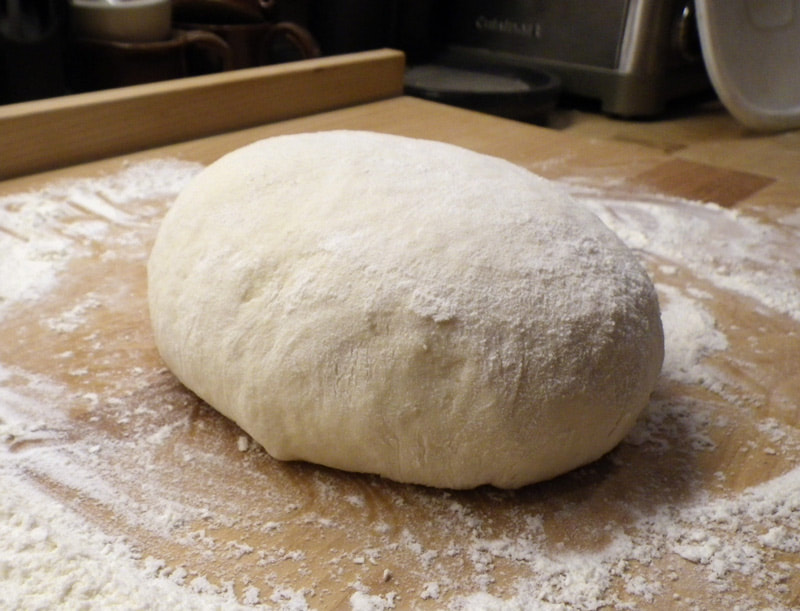
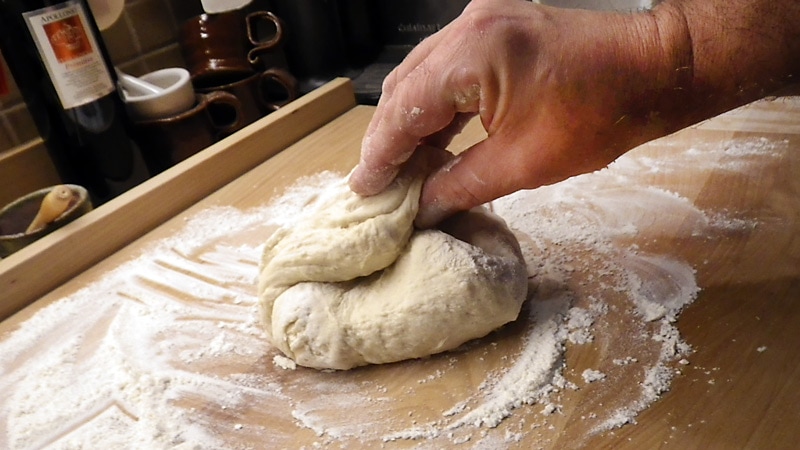
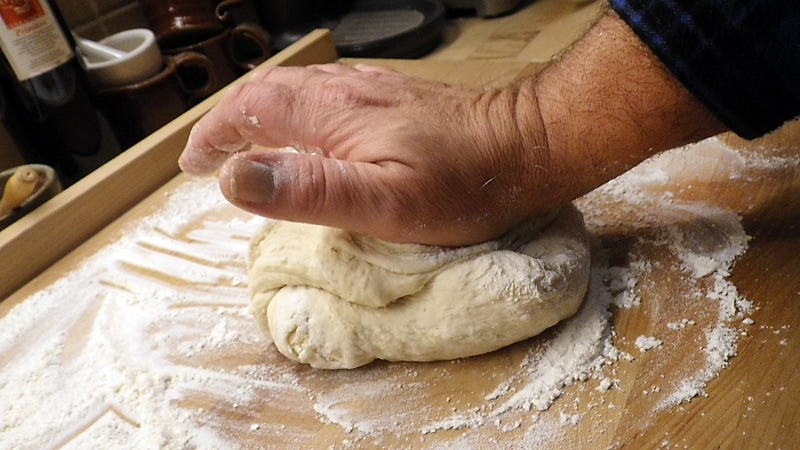
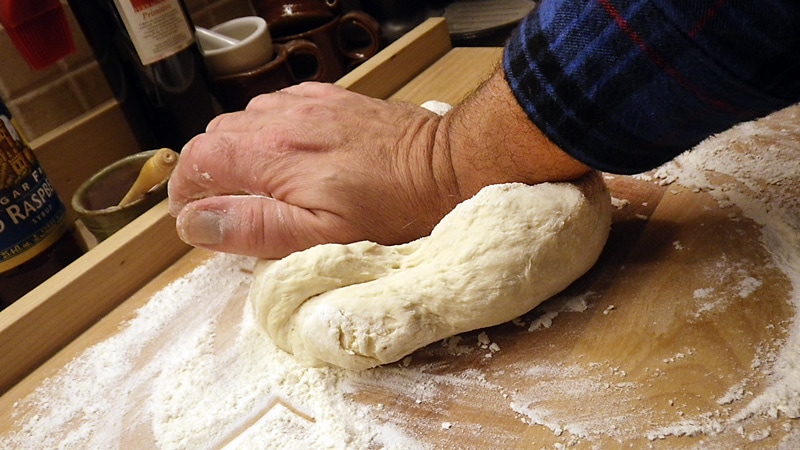
How much flour to add really depends on the humidity... on a rainy you might have to add more flour, while on a dry winter day you would add less. Making pizza dough, or bread for that matter, is a "feel" craft. It's not as precise as cake or pastry baking.You really have to learn the "feel" of a dough that works well for you. This will come with time and after having made many pizzas. Learn to recognize the stages: wet (not ready), very sticky (almost there), a little bit sticky (best), too dry or rubbery (you've added too much flour). Just remember that you can always add more flour, but you can't take it out once you've added too much. Go easy on adding flour toward the end of mixing. You can always add a bit more when it's on the work table.  Why Mix Different Flours? When using bread flour, the body of the pizza softer, breadier and heavier--more like a focaccia or a deep dish pan pizza, but the crust bottom might be too light. Adding some all-purpose flour makes a barker bottom crust. If you use only all-purpose flour, it will be leaner, thinner and often crustier--as with a thin crust pizza. I find using both types is a good compromise between the two types for most pizzas I make. Experimenting with this ratio is a good way to learn how to control what type of crust you need. After gaining experience, you'll experiment with adding 1 cup of whole wheat flour, rye, corn flour or even buckwheat into the mix. However, if you use only a heavy flour, like wheat, your pizza will be tough and leathery and hard to roll out. I tend to use all bread flour or bread flour mixed with wheat or rye flours when I do pan pizzas, Chicago style and focaccia This gives a thicker, more luscious bready texture. When adding heavier flours (like wheat), I also tend to add a touch more yeast to help rise the heavier dough. Use less yeast with a bread-wheat flour mix and you can have a thin wheat pizza crust. Kneading the Dough Turn the dough out onto a floured surface and knead by hand. Flour both your hands and flour the top of the dough on the board. Fold the dough over toward you, push forward with the heel of your hand, then turn 1/4 turn and keep repeating until the dough looks smooth, soft and slowly bounces back when you stick it with your thumb.
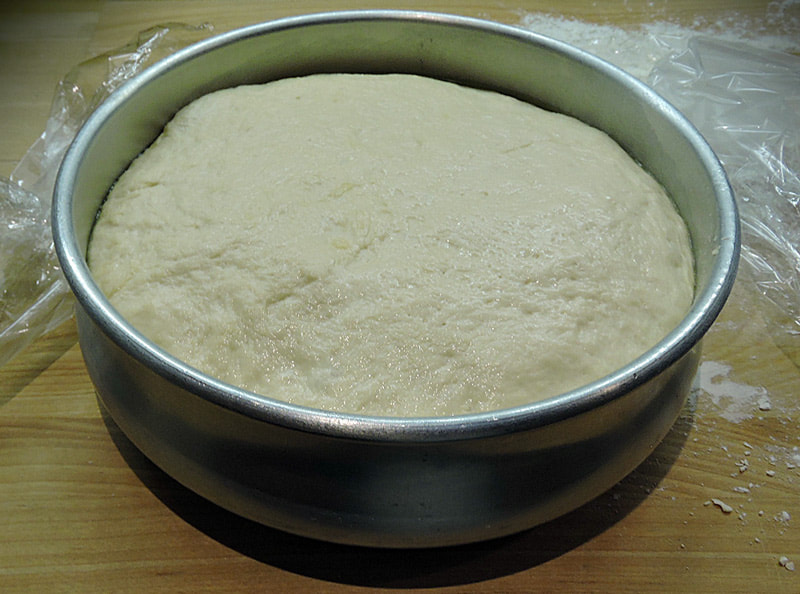
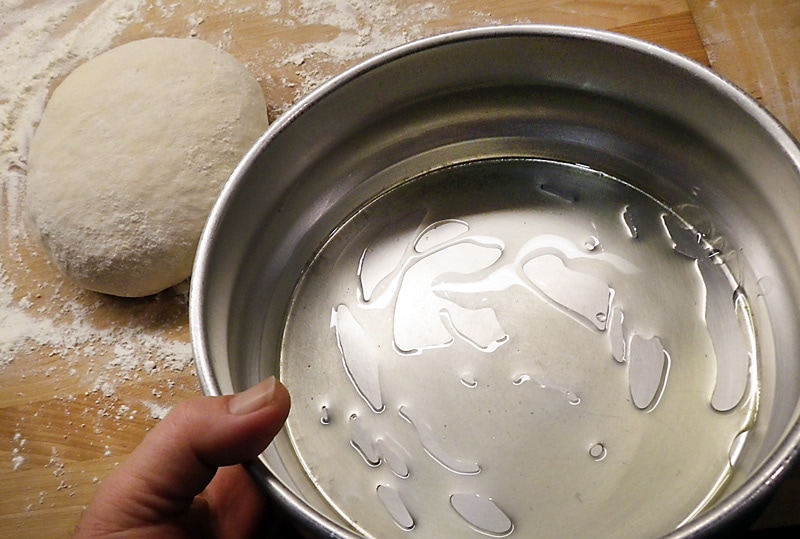
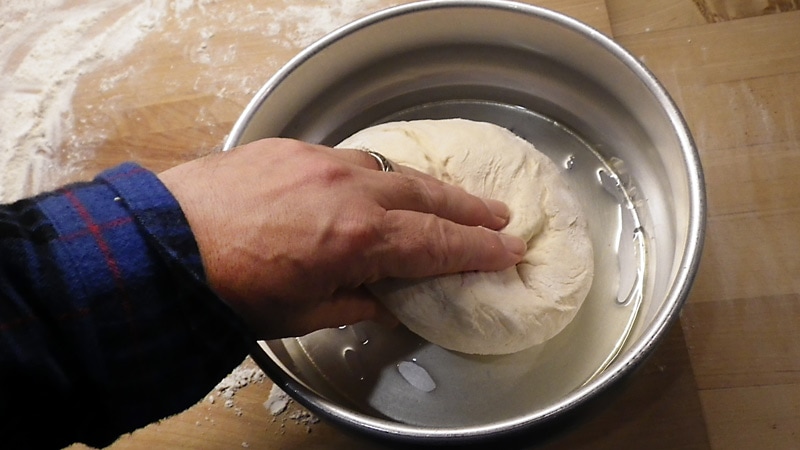
Some say you must knead the dough for 5 or even 10 minutes or more, but I think this produces too much stringy gluten--the glue in dough--and can cause the dough to be tough. Gluten development happens even without much kneading. Besides, I'd rather be eating my pizza sooner rather than later. Tuck in or pinch together the bottom of your dough round and shape into a flat, round shape, then put it in the oiled bowl to rise. Oil both sides of the dough. Cover the bowl with plastic wrap and let it rise at room temperature for 45 minutes. On dry days, I usually help along the humidity a bit and lay a damp paper towel on top of the plastic wrap. You could even use a damp cotton chef's towel. There are two ways to proceed now. One is the quick way--a single rise--the other is longer... a double rise. Typically, for our weekly, Saturday night pizza, I'll do a short, single rise, unless I'm trying something a bit different:
If I'm trying to make a special artisan pizza or focaccia recipe I'll do a double rise:
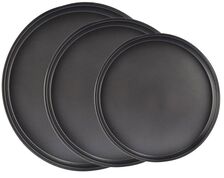
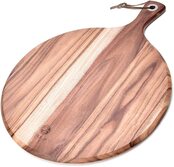
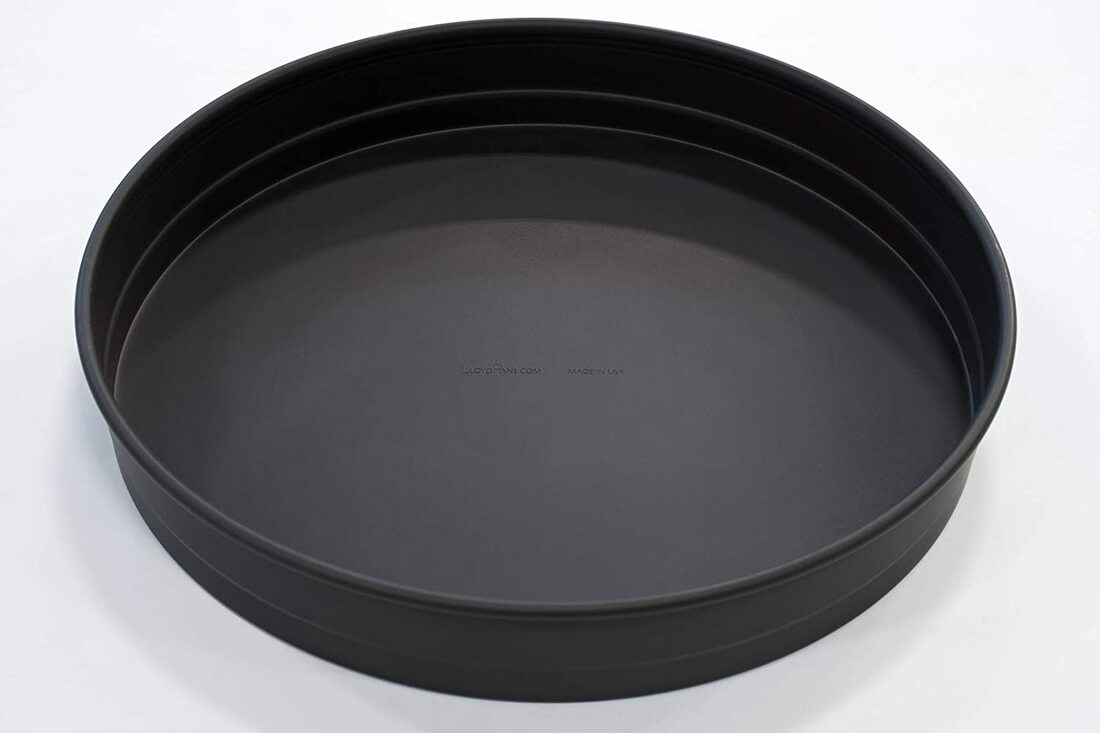
The longer the rise, the more complex flavor develops in the crust... something I think is unnecessary for a quick "get dinner on the table" pizza. But if you like to experiment, let your dough rise overnight before making pizza. A longer, cold rise will develop better flavor! --Jerry Finzi  When I starting making pizza about 20 years ago, I made a lot of terrible pies... doughy, pale-looking, tasteless, flat, oily, floppy, burnt--you name it. Lots of mistakes. But that's the part of life I love--learning from our mistakes and really fine-tuning a craft, talent or skill. You have to crawl before you walk or run. On guitar, one must pluck before you strum and then learn chord changes before making really beautiful music. On my penny whistle, I squealed like a pig before I could play a tune that my wife wanted to sit and listen to. My love of carpentry started when I was 5 years old... with me holding the board while my father sawed it through. Now, I can built pretty much anything I set out to build. Learning to make truly great Pizzas requires the same attitude--learning from mistakes--and successes, as they add up. I would say that it took me about a year to learn how to make a really pizza deliziosa. It was perhaps another few years until I could make pretty much any style of pizza... crispy thin crust, bready focaccia, steamy Chicago deep dish, Detroit style, Grandma's pizza, Sicilian sfincione, a classic Neapolitan or even variants like pizza rustica or pizzagaina during the holidays. I'm not saying it will take you a year, especially since you have me to help you along! You have to start somewhere, and with that simple fact, you need a simple dough that works. I am going to show you how to make my all-around, Basic Pizza Dough... But, first...  What Tools Do I Need to Make Great Pizzas? First, a brief mention of tools... To start with, you need a large enough work counter to make your pizzas on. Hopefully, this won't be too far from your oven. The work-space can be anything: marble, granite, Formica or wood. Personally, I like using a wood surface. I use a large board designed for making breads and pie crusts that always sits on my work counter. Keeping it well floured keeps dough from sticking, but when I need it, the texture of wood can be an aid when kneading. A bench knife (or bench scraper) is also a must-have too, used when dough does stick, for scraping and cleaning the counter and cutting dough into smaller portions. Processing: A large capacity food processor (with a dough blade) can work well, but I prefer a stand mixer with dough hook. I use a Kitchenaid unit and love all the accessories that can accomplish many specialized tasks. If you really want to go "green", don't plug anything in and learn how to make your dough using the old-school technique of starting with a fontana (fountain, or volcano) shaped mount of flour, with the wet ingredients added and mixed in a well in its center. You can also make your dough in a large bowl like many nonne would do using just their hands and a large wooden bowl. Still, a stand mixer speeds things up. After all, this is Old World quality with modern technology. When making pizza in your home, think of it as making artisanal pizza--not pizzeria pizza.  To make a good crust, you really need a rectangular pizza stone... or better yet, a baking steel. A baking steel transfers heat to the crust or pan much more quickly. The size should be at least a 16" rectangular or square to make virtually any type or shape of pizza (or bread). Round stones are limited and difficult to slide loaded doughs onto without overshooting and dropping dough over the back edge. A rectangular stone/steel can efficiently bake pan pizzas, regardless of shape. Remember to preheat your stone in the oven before baking. With a baking steel, preheat for 45 minutes to an hour before baking. Baking pan pizzas on a pizza steel or stone a stone affords shorter bake times and a crispier bottom crust. Placing a pizza in a metal pan directly on a stone speeds up the transfer of heat from the stone to the pan. On a rack, the air in between the rack's wires insulates most of the metal and slows down this transfer of heat from the rack to the pan. TIP: A dark pan will brown your pizza faster, brown better and gives a crispier bottom crust.  You should also pick up a pizza peel to prep your pizzas on and to remove pizzas from your oven. You might have seen a TV pizzaiolo on occasion loading up their dough rounds with toppings right on their floured, marble work surface, and then drag it onto a peel. Don't even try this. Your dough could stick, you could tear it and heavier toppings will go all over the place. (Because of the way it's made, commercially made dough is often tougher than home-made, artisan pizza, which can be very delicate.) Also, don't be tempted to toss your pizza round up in the air. This is a very advanced skill that requires technique and a stronger dough. While I shape my pizzas on a wooden peel I use a metal peel to remove them from the oven. if space is a premium in your cucina, a wooden one can also do double duty. If you plan on using a wooden peel to remove your pizzas form the oven, select one with a longer handle to make lifting heavily topped pizzas more manageable and make sure it has a tapered front edge. In my opinion, a long handled metal peel for removing pies from the oven is a lot easier to slide under finished, loaded pies. For most kitchens, a 30" long peel will do fine. TIP: In case you have a small, galley style kitchen, make sure you have room to back a long handled peel in or out of the oven before buying one! 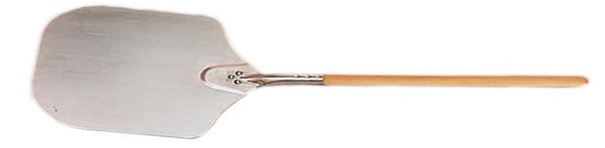  When planning to bake pizzas directly on the stone, I recommend using parchment paper on top of your wood peel when shaping your dough. The process: cover your wood peel with parchment; after kneading the dough on your work counter, shape the dough on top of the parchment; next, add the toppings. An alternative method is to shape your pizza round on the work counter on top of a sheet of parchment, then slide the round and parchment onto your peel. Parchment does two things: It helps slide your pizza (with the parchment underneath) onto the baking stone (even with heavily loaded pies); and it helps keep your stone and oven clean. When I first started making pizzas, I used to use stone ground corn meal on the wooden peel (some use flour). You can do this, but I've found that some always falls into the oven itself, gets burned and makes a mess on both the oven and stone.
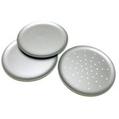 For serving, buy flat, round 16-18" pizza serving pans (the larger size can also fit 16" rectangular pizzas with a little ovehang). Do not use this type of pan to bake pizzas on, simply because they are usually silver and won't crisp a crust bottom that well. 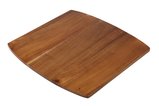 You might also consider a large wooden pizza serving board for serving--and cutting--your pizzas on. Finally, don't forget to buy a decent, large diameter pizza wheel (cutter). 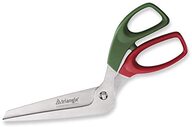 Another good addition to your pizza toolkit is a pair of pizza shears. Common kitchen shears are too short, plus its best to have offset blades for slipping under loaded pizzas. When making pan pizzas, a pizza wheel can cut across the pie, but a scissor can be used to go back and cut the edges the wheel missed.
--Jerry Finzi You might also be interested in:
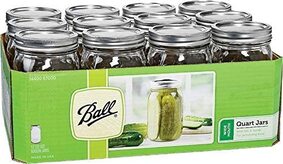
My Recipe for Pizza Rustica, or Double Crust Pizza Our Secrets for Making a Great Pizza Sauce A Brief History of Wood Fired Ovens  This is the time of year when tomatoes are ripening on the vine in both the U.S. and Italy. Even if you don't grow your own tomatoes, this can be also the time to make your own Italian style passata di pomodoro--a basic tomato sauce that has all the skins and seeds removed, with all the flavor left behind. Here in the states, the closest canned product is called "tomato puree". Many families in Italy make the processing and canning of passata a yearly event--a family event--making enough jars of passata to last the entire year, often enough for extended famiglia. If you're not growing enough of your own paste style tomatoes, you can always buy a bushel or two or three from your local farm stand. Some Italian families will process up to 500 pounds of passata each year! Think of passata as a basic tomato sauce which you can use in all sorts of recipes, or even as a base to make other tomato-based sauces, such as Puttanesca, Amatriciana, Bolognese (ragu), Vodka sauce, sugo ("Sunday Gravy") or for pizza sauce. The word "passata" (passed, screened, smashed) refers to the processing with a special food mill that removes the seeds, pulp and skins, leaving only the tomato sauce behind. Other family recipes might just use a common food processor or blender, but this can't really give you a genuine passata. The cleaned, ripe tomatoes are cut up, boiled and processed to remove the skins and pulp, and finally canned in a traditional manner using a hot water bath and canning jars. Some family recipes might also add other spices or flavorings such as garlic as they boil the tomatoes, but since passata is a base to make a wide variety of sauces, you might want to add them at the time of cooking the final sauce. It is traditional, however, to add one large basil leave into each jar canned. 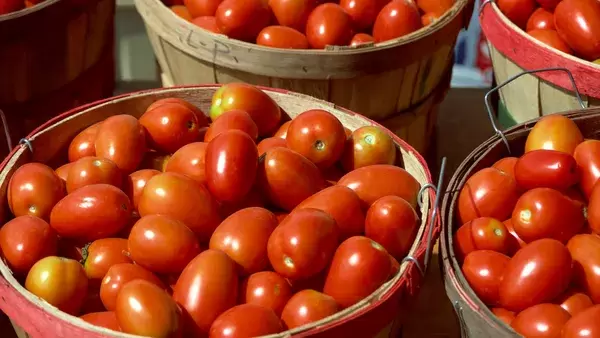  The Method of Making Passata Although you can make a passata in very small quantities, we will look at how to make a large volume for the purposes of canning and storage. We would love to promote this time honored, annual ritual here in the United States. Wouldn't it be better to have a yearly stock of your own tomato passata rather than buy supermarket sauces filled with chemical preservatives and other additives? What Type of Tomato is Best? In Italy, the best for this is San Marzano tomatoes (used in the best imported canned tomatoes), which have DOP protection and are only grown in the area of Naples surrounding Mount Vesuvius. Of course, many varieties are grown in the U.S. calling themselves "San Marzano", but they are only a similar variety. (You can't match San Marzano tomatoes because of their uniqueness of being grown in volcanic soils.) In reality, any good-tasting, full-bodied paste type tomato will work well. The tomato you select should have sweetness, depth of flavor, but also a touch of acidity--which benefits long preservation. Most paste tomatoes are thick fleshed and have a similar shape to San Marzano--that is, an elongated plum shape. You can also use larger cherry tomatoes or horn-pepper shaped varieties. Again, if it has a great taste, it will make a great passata. Leave the larger, beefsteak varieties for slicing and eating fresh. If you want to grow your own heirloom canning tomatoes from seed, we can highly recommend Striped Roma (horn shaped, sweet), Jersey Devil (horn shaped, very meaty), Debarao (plum shaped, juicy) and Martino's Roma (classic plum tomato). If you want to plant enough for lots of passata, plan on planting a minimum of 10 plants of one single variety that you earmark for canning. How Many Tomatoes? This really depends on how ambitious you are. if you use lots of tomato sauce in your recipes each year, then start with more tomatoes. You will also need more canning jars, lids and other varied supplies and tools. Having a very large pot or cauldron to boil the tomatoes helps prevent tedious, repeated boiling/canning sessions. I highly recommend doing it the way most Italians do it--using a tomato processing mill. I also love the way Italians use a very large pot to boil their jars and to do the final canning process--they use kitchen towels to layer in the glass jars to protect them from rattling around against each other.  Here are some guidelines: 3 pounds of tomatoes to make 1 quart of passata. 21 pounds of tomatoes will make 7 quarts of passata. One bushel of tomatoes (about 53 lbs per bushel) will give you 15-18 quarts of passata. You will also be using sea salt and placing basil leaves into each jar.
Things You will Need
(For a large volume...)
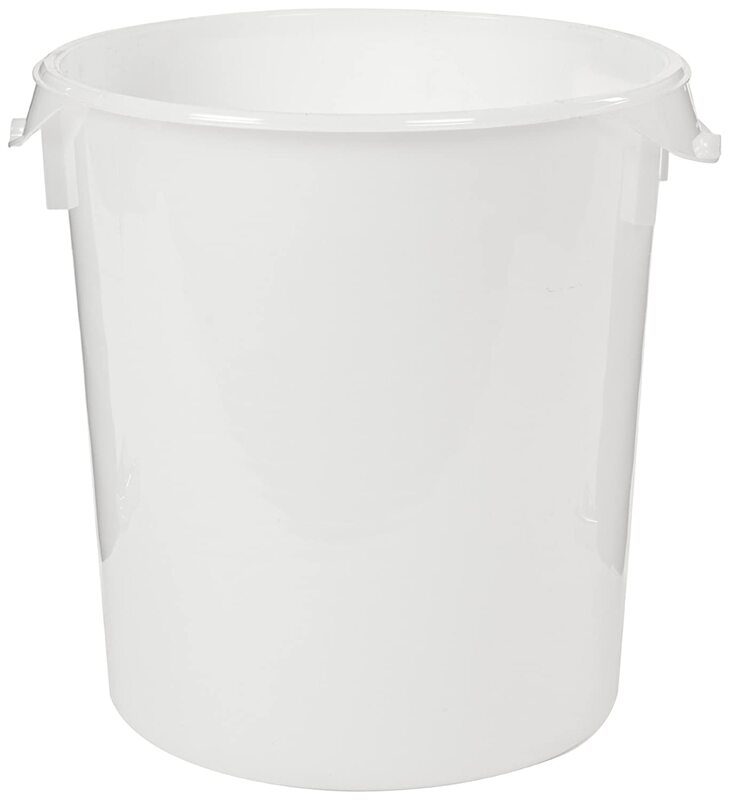
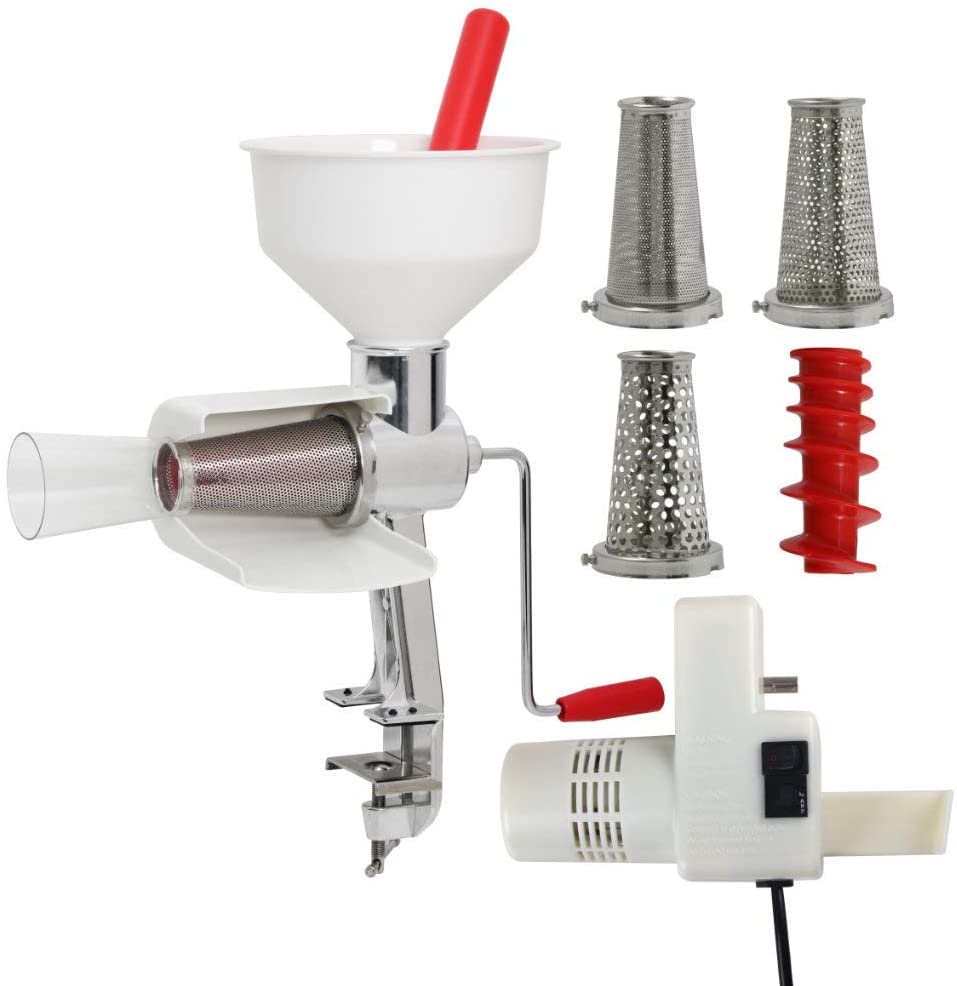
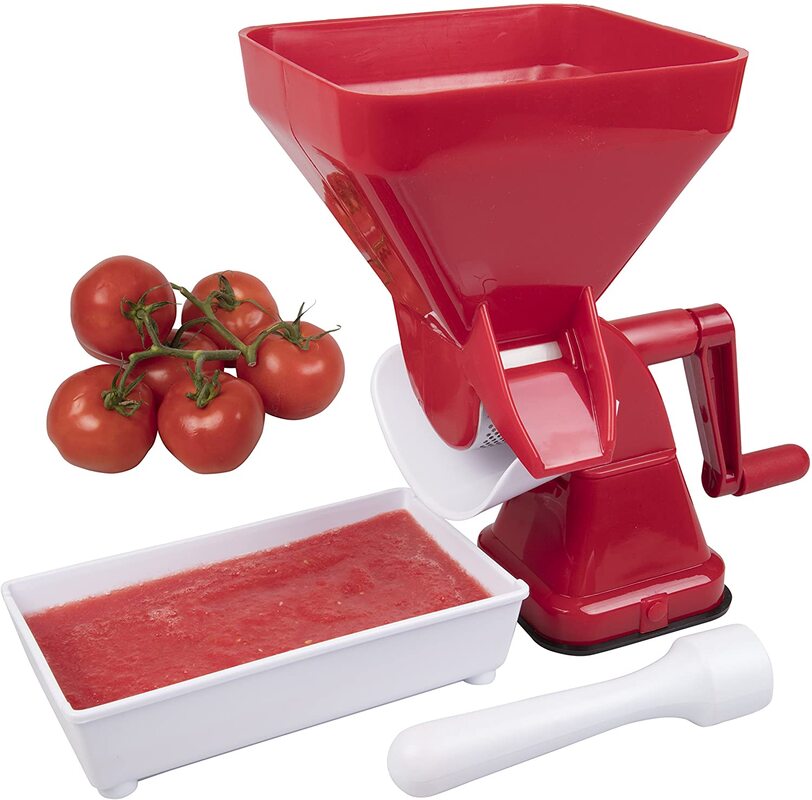
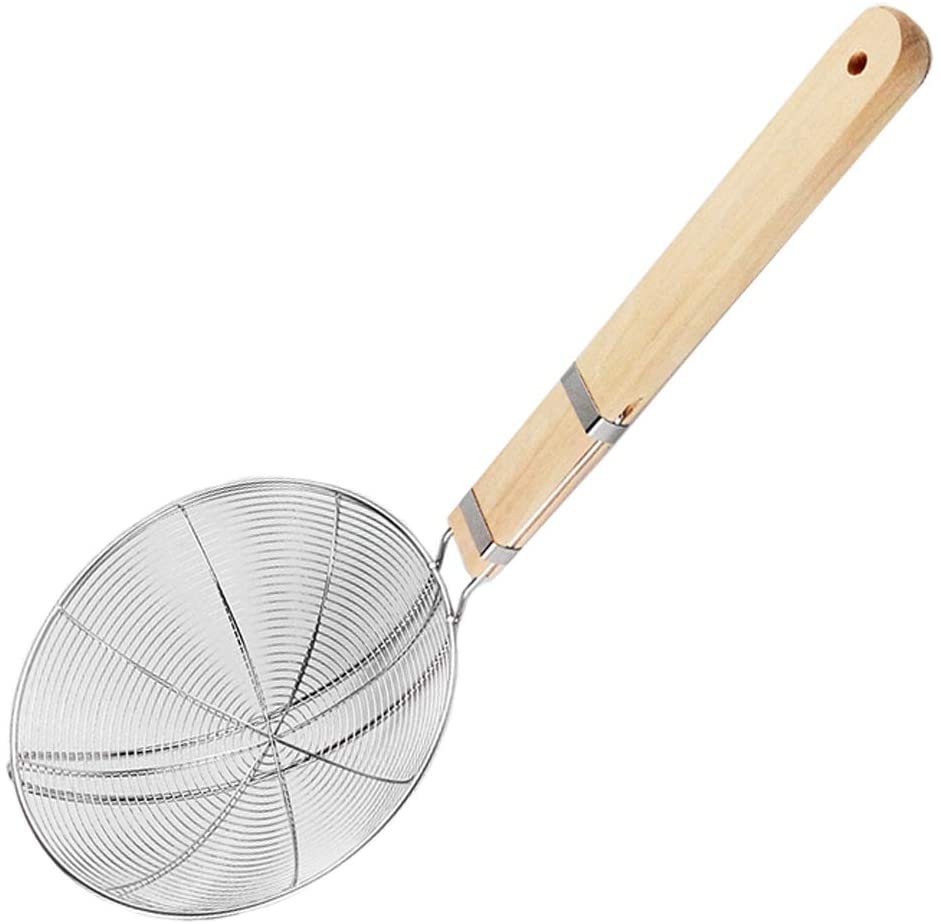
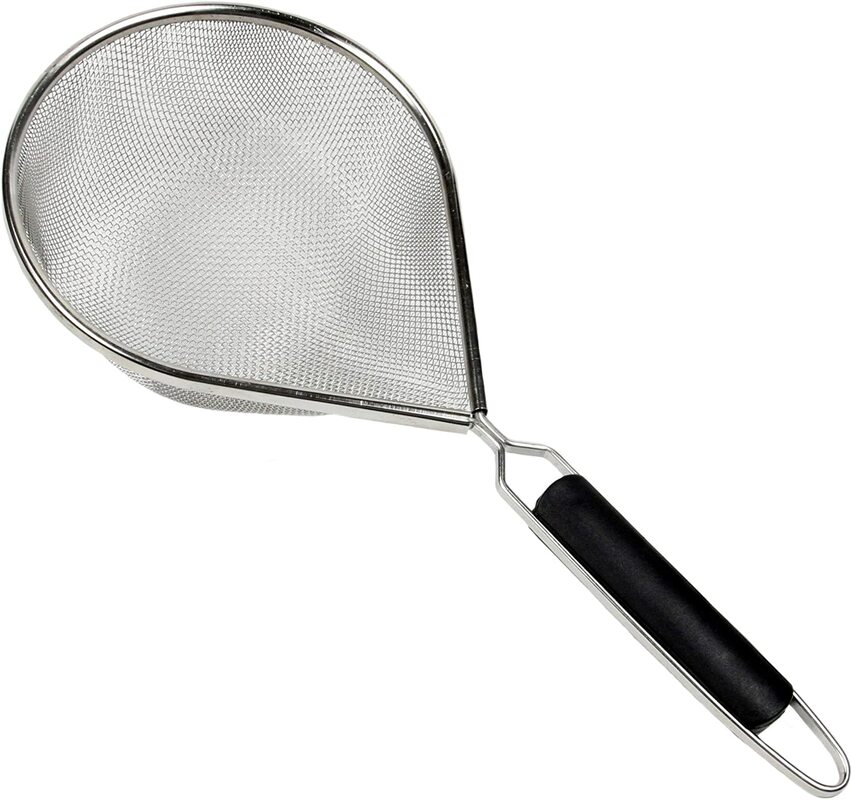
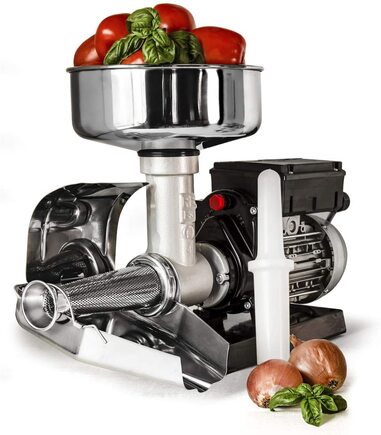
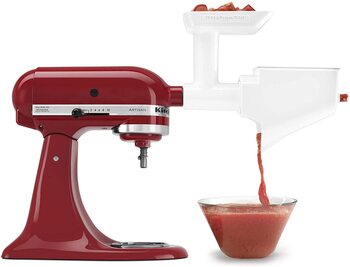
You can use a standard hand-cranked food mill or a manual tomato milling machine to process the tomatoes, but if you're doing a large volume, you should consider investing in a powered tomato mill. The more power the unit has, the faster your processing will go. You might need to set up your milling machine on a low table, with bowl on the table to capture the pulp and a large container on the floor to capture the passata.
 What About Canning Whole Tomatoes? In Italy, whole canned tomatoes are called pelati, referring to the process of peeling the skins off before canning. In the area of Naples, many families invest in crates of locally grown San Marzano tomatoes, but any pear/plum shaped past tomato will do fine. Before caning whole tomatoes, the best way to prevent spoilage is to remove the skins. Canning peeled tomatoes also affords more options for use in recipes that might call for crushed tomatoes. Skinned, whole tomatoes are easy to crush by squeeze by hand or pulsing in a food processor.
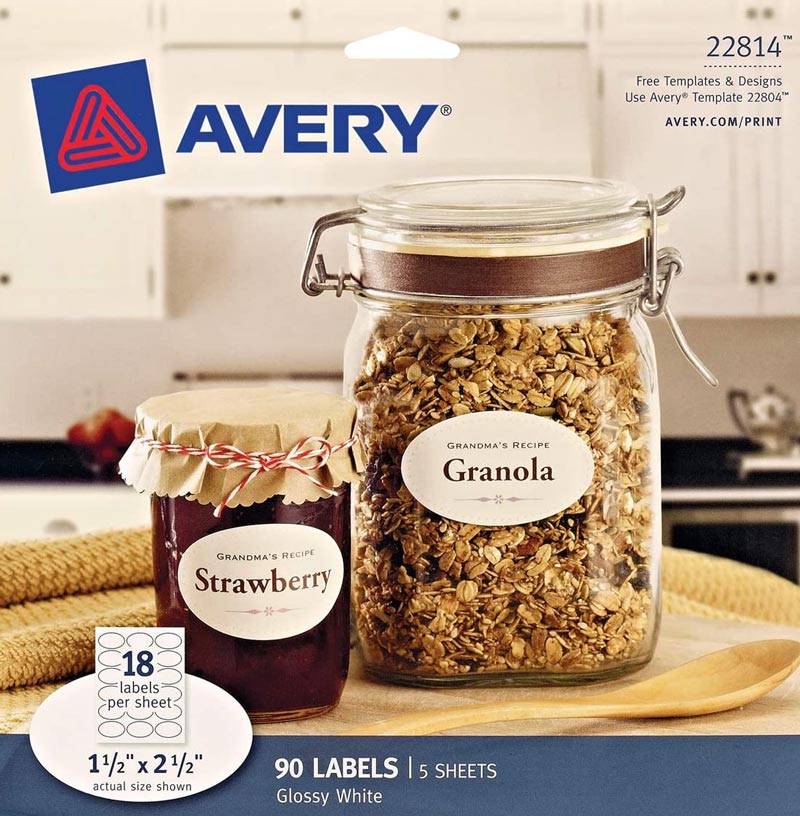
Don't forget to label your Passata and Pelati with the month and year. (Order oval Avery labels HERE on Amazon). Store them in a cool, dark place. They will last for as long as three years. Read this article carefully, watch the videos below and by all means, work safely! Make this a yearly event for your extended famiglia. I've read about families who take gather large teams together to process as much as 500 pounds of tomatoes! I would suggest starting small until you get used to the process. You can also make small volumes of passata or pelati right in your kitchen with a large stock pot, colander and tools you have lying around. And whether you use a manual tomato mill or powered, I'm sure you'll be successful and enjoy a fully packed cantina (pantry) all season long. --Jerry Finzi, GVI If you are new to canning, you can study the principles of safe canning HERE. Useful Processing Tools on AMAZON...

The video below is one of the best I have found covering many aspects of making Passata and Pelati. There are some titles in English, but it might also help to click the gear icon on YouTube to turn on Closed Captions and Auto-Translate to select English... 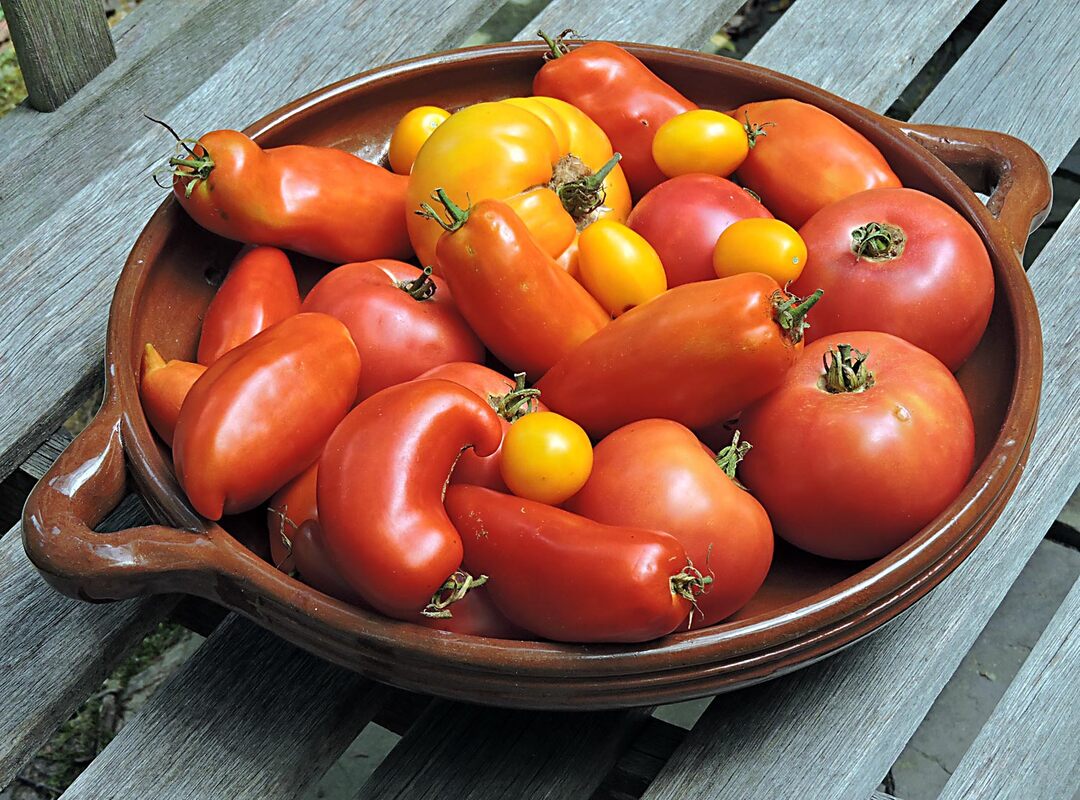 These are about 6 pounds worth of just a few of the 11 varieties of heirloom tomatoes we are growing in nostro giardano this year... The Large yellow beefsteak is Regina, the horn-shaped one is Jersey Devil, the small yellow grape shape is Olivette Juane, the large pink globe tomato is Giant Belgium (not so giant this season), and the smaller pink ball shape is Eva Purple Ball. All long lasting friends that I have grown for a couple of decades. All absolutely delizioso. Happy pesto season, tutti! --Jerry Finzi You might also be interested in...
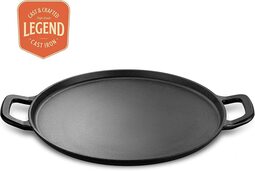
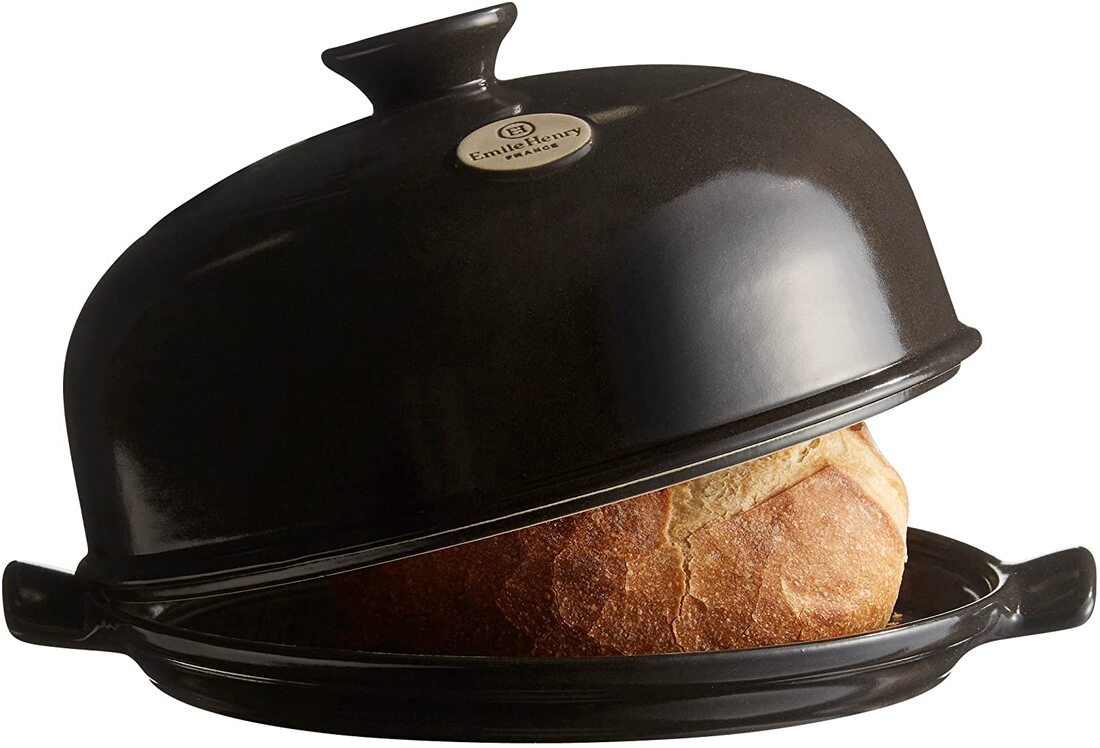
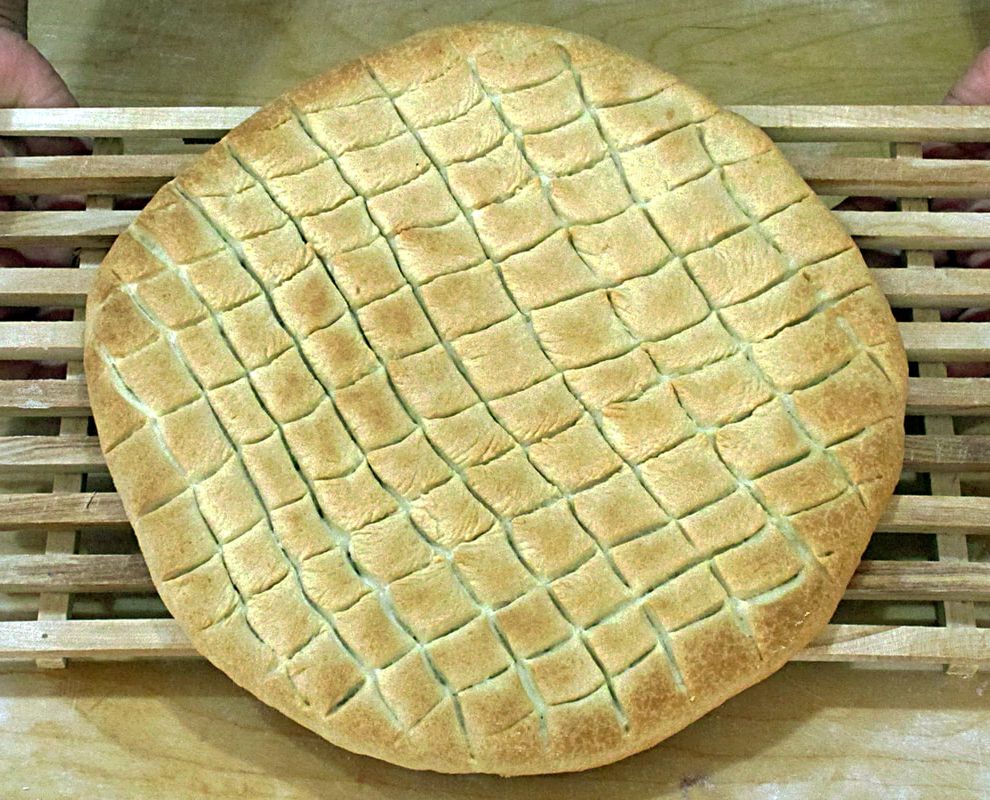 Some people called my Dad acting "silly" as a negative, but not me. Anything silly, I love. Something offbeat, oddball, out of the norm, and I'm automatically drawn to it. The time Dad wore vampire teeth at a fancy wedding's cocktail hour was wonderful. My discovery of this interesting pizza is also wonderful: pizza scima ("silly pizza") from the cucina povera traditions of Abruzzo. It's authentic and offbeat. Why is it called "silly"? To understand the name, we have to get into the evolution of the Abruzzese dialect word "scima". This is an unleavened bread, and the Italian word azzimo (masculine) or azzima (feminine) in Italian means unleavened, referring to any bread that's made without yeast. In dialect the word is ascime. Southern Italians tend to shorten words, in this case the word was simplified to scima (SHEE-ma). Scema in Italian can mean either stupid or silly, perhaps in this case referring to someone silly enough to make bread without leavening...  Il Coppo, covered in coals with the pizza baking underneath The history of this pizza evolved from the 13th century Jews who settled in Abruzzo and made unleavened bread. Traditionally it is baked directly on an open wood fired hearth, common in many country homes even today. After coming up to temperature, the wood coals are cleared to the sides and the dough round is placed directly on the brick base. Next, the dough is covered with a 5" tall dark steel coppo (like a large pot cover) and coal embers are placed on top. This baking method is similar to the Colonial American method of baking bread in a cast iron Dutch oven in an open fireplace. The baking method below tries to mimic the open hearth by baking on a pre-heated pizza stone (to cook the bottom) with a dark pan placed over the top of the pizza (to create a moist, but hot baking environment). You might even try to make this pizza using a baking cloche. Common in the southern towns of Casoli, Roccascalegna, Altino, Lanciano and San Vito Chietino, this pizza is characterized by the addition of extra virgin olive oil and wine. Each year there is even a pizza scima sagra (food festival) in Casoli.  A similar method of baking bread in a Dutch oven Ingredients
Instructions
Useful Tools on Amazon...
|

Archives
May 2024
Categories
All
|