GRAND VOYAGE ITALY
  • Piazza
    • Older Posts
  • Travel
    • Our Family's Voyage
  • Cucina
  • Culture
  • History
  • Style
  • Photos
  • Videos
    • Music Videos
  • About
    • Survey
    • Links
  • Shop 🛒
  • Piazza
    • Older Posts
  • Travel
    • Our Family's Voyage
  • Cucina
  • Culture
  • History
  • Style
  • Photos
  • Videos
    • Music Videos
  • About
    • Survey
    • Links
  • Shop 🛒
We're All About Italy

Cucina

Our Pane di Pasqua (Easter Bread) Recipe

4/10/2017

Comments

 
Picture
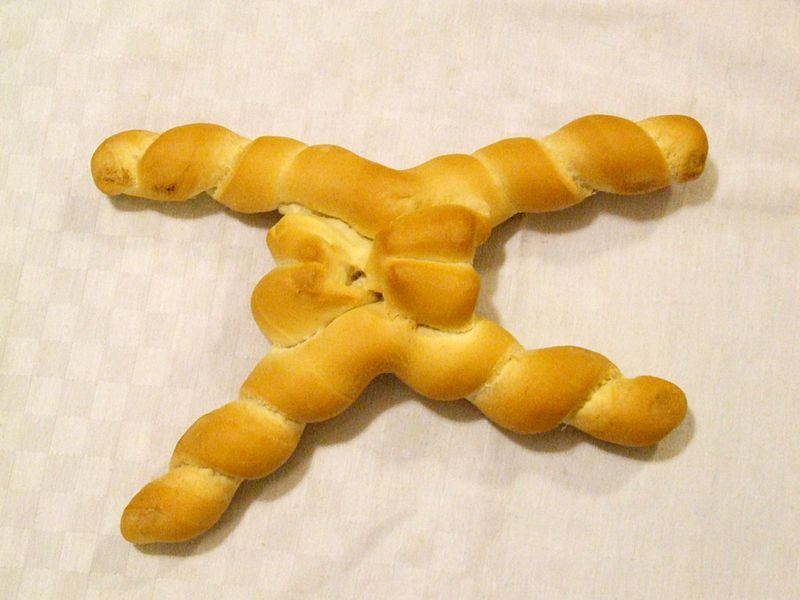
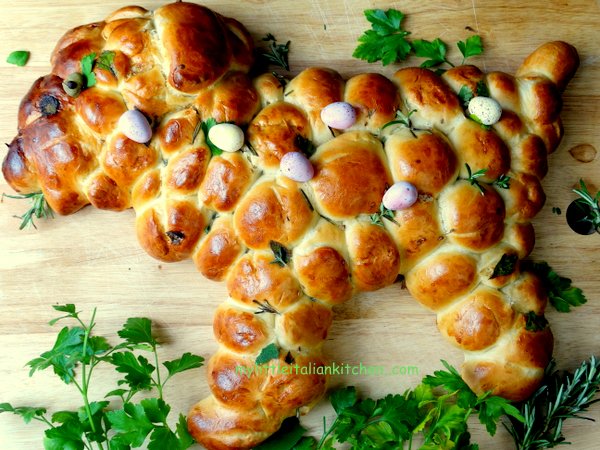
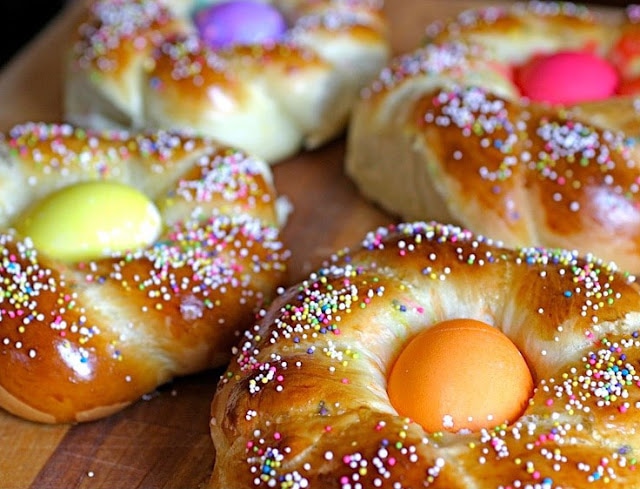
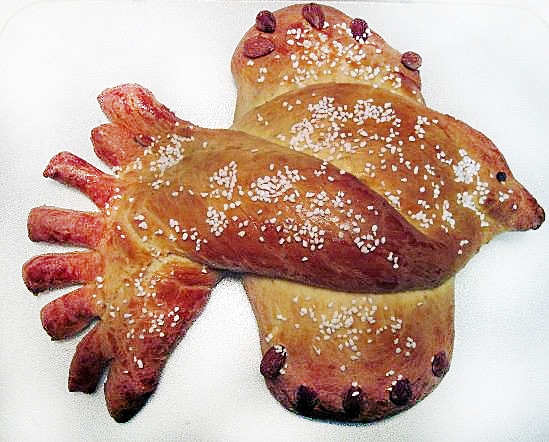
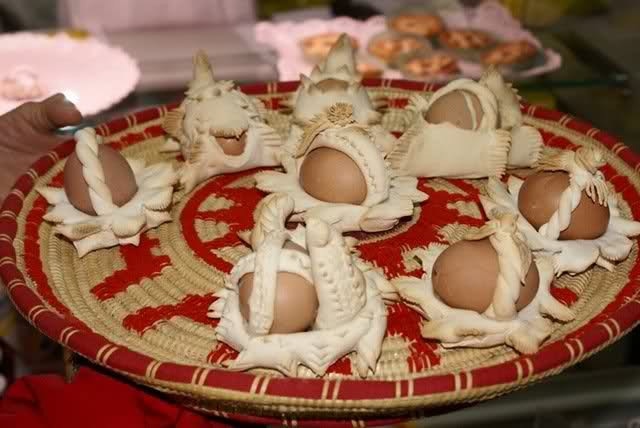
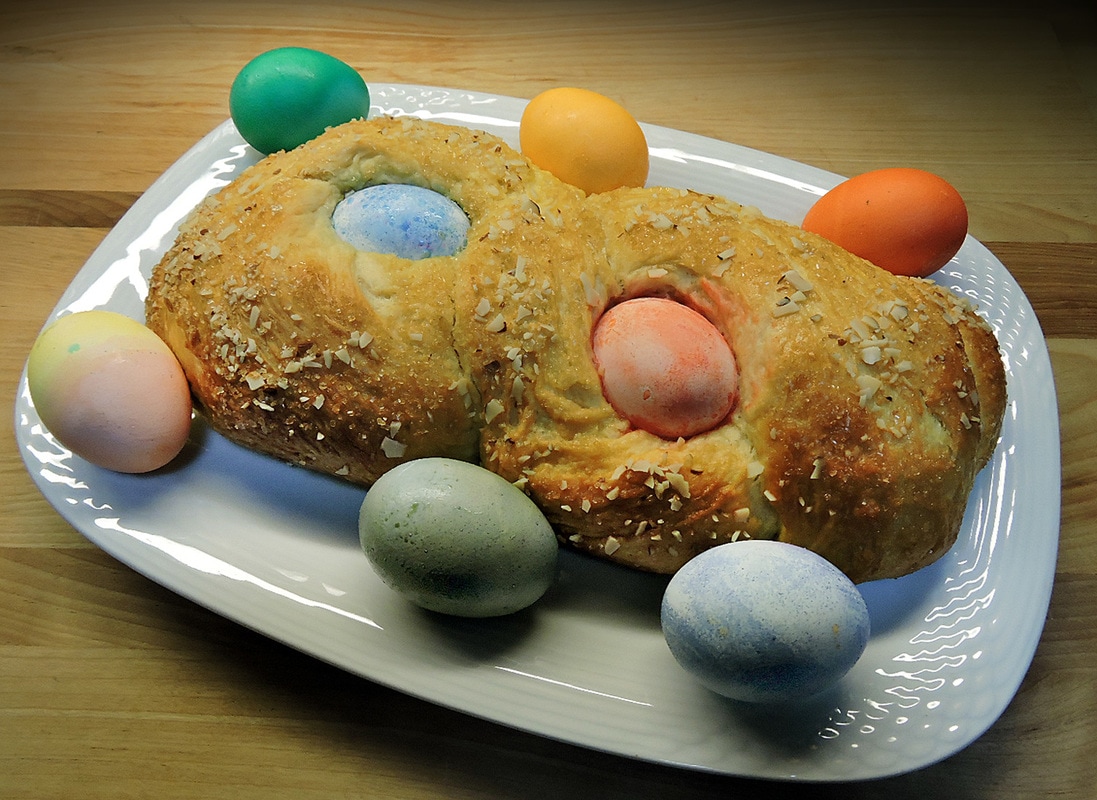
There's nothing like making a Pane di Pasqua for Easter. This is a traditional holiday egg bread that usually contains hard boiled eggs--baked right into the bread. It can be eaten as a snack with honey or jam, served with a meal or given as gifts when visiting family.
Variations of Easter celebration breads are made throughout Italy. To celebrate Easter in Sicily, they make "baby-doll" breads for girls, and breads shaped like ducks, lambs and horses for boys. In most areas of Italy, there are Easter breads and mostly are sweet and contain whole, brightly dyed eggs which are braided into the bread, with the eggs cooking during the baking.

In Lombardy there is the Colomba Pasquale (literally "Easter dove"), which has become popular throughout Italy. In Sardinia, the celebration breads get even more intricate, with scissor work on the dough adding amazing details in Easter egg baskets. The eggs can be brightly colored or natural. In the Greek tradition, the same sort of bread is made with eggs dyed red by using onion skins. The eggs represent birth, or rather, at Easter the re-birth.
Picture
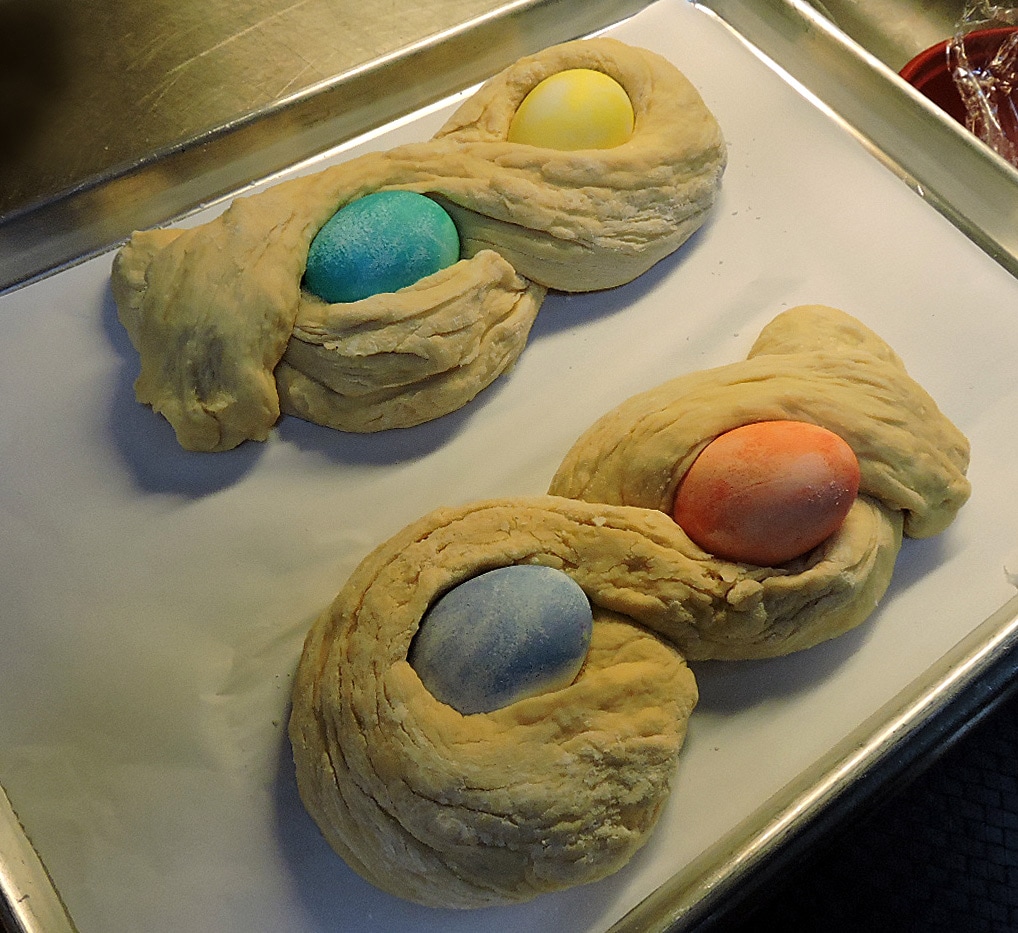
This recipe can make one round bread or two smaller straight braided breads, or 6 individual breads.

Boiling and Dying the eggs:

For perfect eggs:
  1. Place 4-6 eggs into a saucepan and pour in cold water to cover. Slowly, bring the water to a boil. When the water just the boil, turn off heat, cover pan with a lid, and let stand for 12 minutes.
  2. Place the pan under a faucet and run cold water over the eggs--slowly replacing all the hot water with cold. Let the eggs sit in the cold water until cool, 20 minutes. Peel eggs under running water.

You can dye 4-6 eggs, only after hard-boiling them. In the past, I've tried to use raw eggs placed directly in the dough, but they often are a bit under-cooked--not soft boiled, but a bit under. If you want to make real looking like partridge eggs, dye them a pale blue and then use a tooth brush with brown dye to put blotches and spots all over each egg.

Proofing the Yeast:
1 tablespoon instant or active dry yeast.
1/3 cup milk (at 115 F)
1 tablespoon sugar
  • Proof the yeast first by placing the warm milk, sugar and yeast into a 2 cup measuring cup or small bowl and mixing well. Wait 5 to 10 minutes until you see bubbly foam rising about 1 inch or more above the liquid.

For the dough:
2 1/2 - 3 cups all-purpose flour (depends on humidity... don't put in all the flour if it doesn't need it, but if it's a rainy day or you're using jumbo eggs, you might need 4 cups).
1/2 cup warm milk (115 F)
1/4 cup orange juice (room temperature)

1/2 cup sugar
1 teaspoon salt
8 tablespoons butter (softened & cut into small pieces)
3 eggs well beaten  (You can substitute Egg Beaters if you like).
1 teaspoon vanilla (or almond flavoring for a more Italian flavor)

For egg wash and topping:
2 eggs beaten (egg wash for brushing)
2 tablespoons sliced almonds
2 tablespoons turbinado sugar
colored sprinkles (optional)


Directions
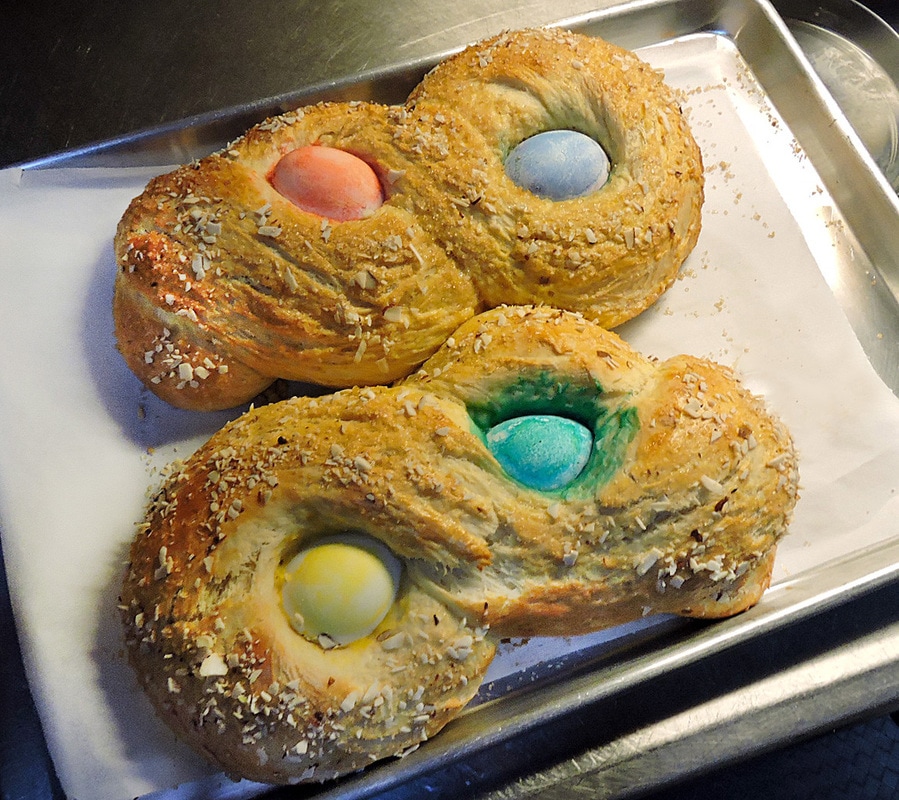
  • Warm the milk in a small saucepan until 115 F.
  • In a large bowl of your electric mixer (using a dough hook), combine 1 cup of flour, sugar, teaspoon of salt.
  • Add the pieces of butter, little by little as you mix on low speed to disperse the butter.  Scrape down the bowl as needed.
  • Next, add the yeast mixture, the 1/2 cup warm milk, orange juice and vanilla into your mixing bowl and mix on low speed into a slurry.
  • Add the three beaten eggs and 1/2 cup flour; keep mixing on low speed...
  • Add the remaining flour, 1/2 cup at a time, scraping the sides of the bowl as needed.
  • Continue to add flour until a soft, sticky mix starts to form and clear the sides of the mixer. It should be soft, a bit sticky but be able to hold together in a mound when taken out of the bowl.
  • Turn out the dough to a lightly floured surface and knead for a minute or two until smooth, adding a dusting of flour if it gets too sticky, then shape into a ball. 
  • Place the dough ball into a large bowl coated with extra virgin olive oil to rise. Cover with plastic wrap and let rise at room temperature until doubled in volume, about 1 hour.
Picture
Forming the Bread
  • After your dough has risen, preheat your oven to 350 F, preferably with a large pizza stone on the center rack.
  • I suggest lining a large baking tray with parchment paper rather than a greased sheet to place your formed bread on for baking. You may also form it on a pizza peel on a parchment sheet, which can slide onto a pizza stone for baking.  
  • Gently punch down your dough, turn it out onto a floured work surface and roll out into a long rope, about 20-24 inches long. Put the two ends together and twist into a rope braid. An easy way to do this is to hold up your rope from the middle, then spin one rope around the other. 
  • Lay the rope braid onto your parchment paper and baking sheet (or parchment/pizza peel). Pull the ends around to form a ring, then pinch and fold under to seal. Place the dyed eggs (careful, remember, they are raw) in between the ropes at evenly spaced positions along the ring. An easy way to make it even is position one egg on one side, then another on the opposite side. Then divide the space between each egg in half and put another egg there, and so forth. Make sure the eggs are tucked well into the ropes with about 1/3 of their tops showing through.
  • Next, cover and let rise until doubled in size before baking. 
  • Before placing the bread into the oven, brush egg wash over the dough.  If you want, you can put colored sprinkles or turbinado sugar (Sugar in the Raw) over the top (they will stick to the egg wash). I used the turbinado sugar and sliced almonds on top of the egg wash. Some people like to do a drizzle of a sugar glaze (after the bread is baked and cooled). I'll leave this up to you. (You can make a simple sugar glaze with 1 cup powdered sugar, 1/2 teaspoon vanilla or other flavoring, and 1-2  tablespoons of milk.)
  • Bake the risen and decorated bread for 30 - 45 minutes until golden brown. You can use a cake tester to make sure the center is cooked. Stick a tester wire or piece of straw from a broom into the bread... it should pull out cleanly. Transfer the bread to wire racks to cool completely. Keep in the fridge until serving.

    A variation on this bread would be to add a mix of regular and golden raisins that have been soaked in water (or an orange liquor) to the dough before forming the ropes. About 1-1/2 cups would work well. You might also incorporate the zest from 2 large lemons and replace the orange juice with either lemon juice or Limoncello to give it a southern Italian flavor.

    Do the Italian thing and bring your finished bread to Easter Mass and have the priest bless it for you.... You and your family will have good blessings all year!

    Another thing to do for the kids... Put a coin or two in the bread dough. The person finding the coin will have buona fortuna all year!

Here are some other variations on Pane di Pasqua...
--Jerry Finzi
You might also be interested in...

Breads and Tarts for Easter
Our Pane di Pasqua Recipe
Vintage Italian Easter Cards
Decorated Italian Easter Eggs
How Italians Celebrate Easter
Celebrating Easter in Italy
Comments
    Picture

    Archives

    August 2022
    July 2022
    May 2021
    December 2020
    October 2020
    August 2020
    July 2020
    May 2020
    April 2020
    March 2020
    February 2020
    December 2019
    November 2019
    August 2019
    April 2019
    March 2019
    February 2019
    December 2018
    November 2018
    September 2018
    August 2018
    July 2018
    June 2018
    May 2018
    April 2018
    March 2018
    February 2018
    January 2018
    December 2017
    November 2017
    October 2017
    September 2017
    August 2017
    July 2017
    June 2017
    May 2017
    April 2017
    March 2017
    February 2017
    January 2017
    March 2016
    October 2014
    September 2014

    Categories

    All
    Antipasti
    Baking
    Beverages
    Caffè
    Carne
    Colazione
    Dolce
    Education
    Formaggio
    Hacks & Tips
    Healthy Diet
    History
    Holiday Recipes
    Humor
    Kids Recipes
    Kiitchen Style
    Olive Oil & Balsamic
    Pane
    Panini
    Pasta
    Pastry
    Pesce
    Pizza
    Pranzo
    Primo
    Riso
    Sauces
    Shopping In Italy
    The Italian Gardener
    Tomatoes
    Tools For La Cucina
    Vedura
    Vino
    Zuppe

Copyright 2014 - 2022 by GrandVoyageItaly.com
Picture
  • Piazza
    • Older Posts
  • Travel
    • Our Family's Voyage
  • Cucina
  • Culture
  • History
  • Style
  • Photos
  • Videos
    • Music Videos
  • About
    • Survey
    • Links
  • Shop 🛒