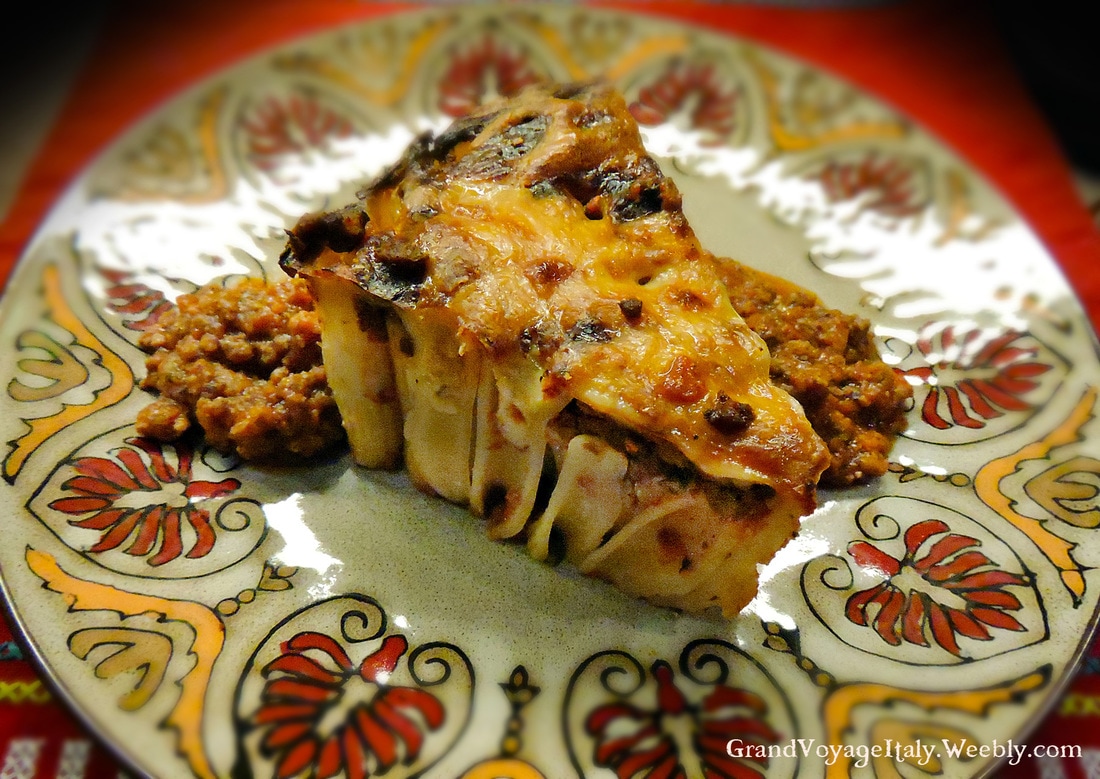
 In the past, I've made fried spaghetti, pasta fritatti, timbali and other such pasta-centrist dishes, where the pasta is bound together by eggs, cheese and other fillings. But, I've never made this dish: Torta Rigatoni Piede Bolognese al Forno. (A literal translation: Baked Standing Rigatoni Pie with Bolognese Sauce.) I figured I'd give it a try for a post-holiday dinner for some friends that were coming for a visit. I was a bit intimidated about the techniques used in this dish. Would the rigatoni stand up? Would enough of the Bolognese get inside the rigatoni? Would it fall apart as I popped it out of the spring-form pan? I set out to research this recipe in Italian. I often do this when I want to find authentic recipes... I use Google Translate to help translate the recipe name I am looking for, and then use the Italian name with the word "ricetta" (recipe) after it. In this way, I often find a myriad of authentic, traditional recipes and methods--often from home cooks or Nonnas. I did find many variations of this dish, and different methods of preparation. For instance, some put the ricotta cheese mixture on top of the rigatoni and press it into the holes. I didn't want an overly cheesy version, but instead opted to press the bolognese into the holes. The funny thing is, I actually came across one particularly fussy recipe where the cook actually used a pastry bag to pipe the cheese mixture into each and every piece of rigatoni! If I want that much cheese, I'll make manicotti anyway. I'm not going to get into my recipe for Bolognese Sauce here, but I'll write a separate post with that recipe since it can be used in other dishes. I'll concentrate more on the techniques to put this whole thing together. I will say that you should use the largest diameter rigatoni that you can find. I actually tested a few pieces each of two brands of rigatoni by cooking them beforehand to be sure I had the correct cook on them and to see if the holes were large enough. I wanted to be sure they would maintain their round shape and be able to stand up. I also didn't want them too long (tall in the pan) or there wouldn't be enough room for the Bolognese and cheese toppings. In the end, Colavita had a rigatoni that worked well. I discovered that you have to boil the rigatoni about a minute or two less than you would for a well cooked al dente pasta. This is very important! If the pasta is overcooked, each rigatoni will collapse with flattened holes that won't be able to accept any filling. You will need a spring form pan with to make this recipe.  Ingredients 1 pound large rigatoni pasta Bolognese sauce (allow extra for serving on the side) 8 ounces Italian style Fontina cheese, shredded 1 cup of grated Parmigiano Reggiano light olive oil (for coating the inside of the spring for pan) For the filling: 16 ounces ricotta cheese 1/4 cup (a handful) of grated Parmigiano Reggiano 1 whole egg 1/2 teaspoon salt 20 cracks of fresh black pepper (from a pepper mill - alt., 1/4 tsp ground pepper) dash of nutmeg
 One pan for spills, the other stops burning One pan for spills, the other stops burning Preparation
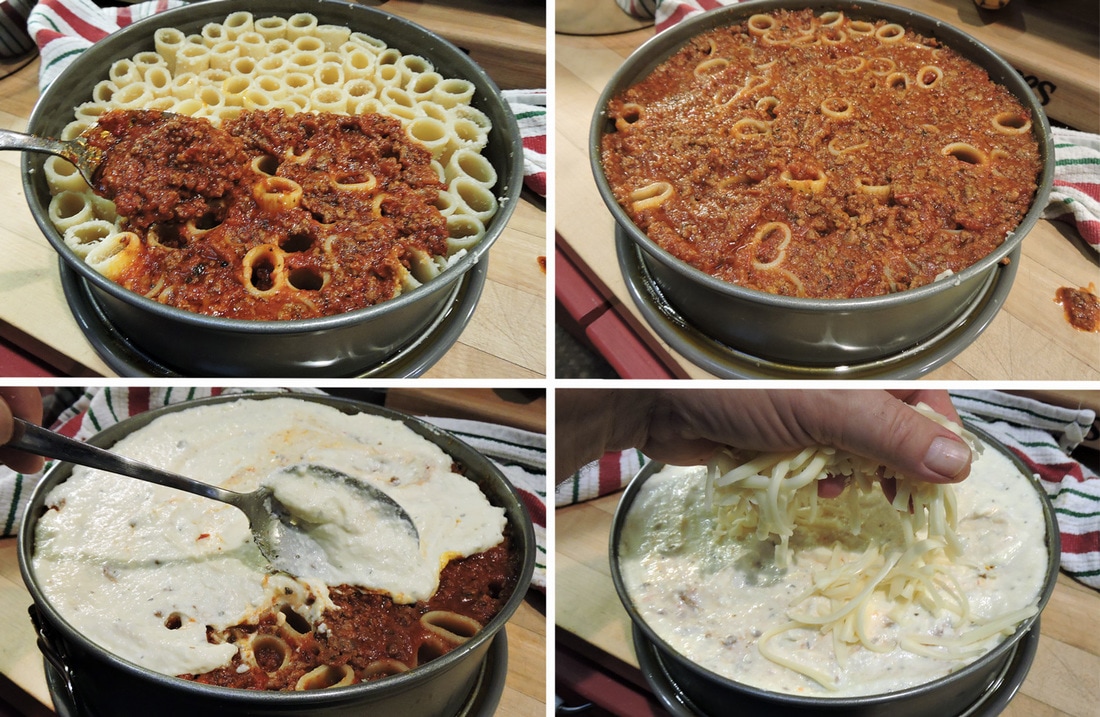 13. Next, spoon a layer of Bolognese sauce on top of the rigatoni, trying to press the meat down into the pasta holes (see the series of photos above). 14. Then spoon a layer of the ricotta mixture over the top of the sauce. 15. Top off the ricotta with half the Fontina cheese. (You will add the rest at the end). 16. Place the pan it into the oven on the middle rack (in between the two baking pans, as described above), and bake for 40 minutes on a center rack. 17. When done, remove the pan and spread the rest of the Fontina on top. Set the oven to broil, place the pan back into the oven, and cook for 1-2 minutes, or until the cheese is a bit browned and bubbling. 18. When done, remove from oven and let cool for 30 minutes before serving! 19. When cooled, you can take a knife or thin spatula and slide it around the edges to release the pasta from the sides of the pan. Release the lock and gently lift the sides of the pan away. After removing the pan sides, rest for another 5 minutes. You should now be able to slice and serve. Use a pie server to plate each slice.
Cooling down at the end for 30 minutes is very important. When I made this, I let it cool only for 10 minutes or so (we had 3 hungry kids waiting for dinner, so I was a bit rushed). While most held together just fine, when I pulled the first slice out, a bit of the pie started to collapse. This dish doesn't have to be piping hot, so don't rush it. Serve with a dollop or two of more Bolognese on the sides of each wedge slice. We had it with a nice Prosecco... the kids had some non-alcoholic cider in wine glasses. One slice of "pie" and a salad was enough for each of us, and we still had several portions left over for another meal for "we three".
One more note: If you'd like, you can place the ricotta cheese mixture onto the rigatoni first, forcing it down into the holes, and then the Bolognese followed by the ricotta mixture on top. Personally, I liked getting bits of meat down into the pasta. If you're more of a cheese person, they by all means, prepare it the other way around. For a variation, try making one with an Alfredo sauce rather than the Bolognese. Trust me, this meal is well worth the effort, especially when trying to impress some friends. Buon appetito! Leave a comment if you make this recipe. I'd love to hear how it came out! --Jerry Finzi |

Archives
May 2024
Categories
All
|

