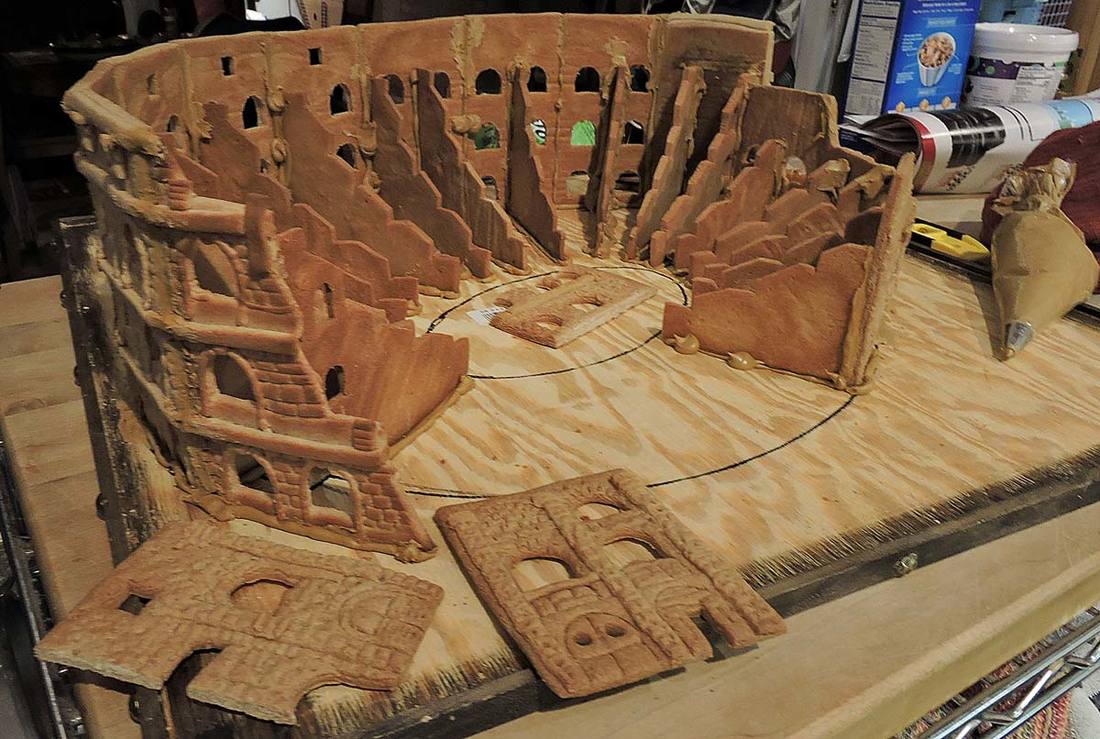
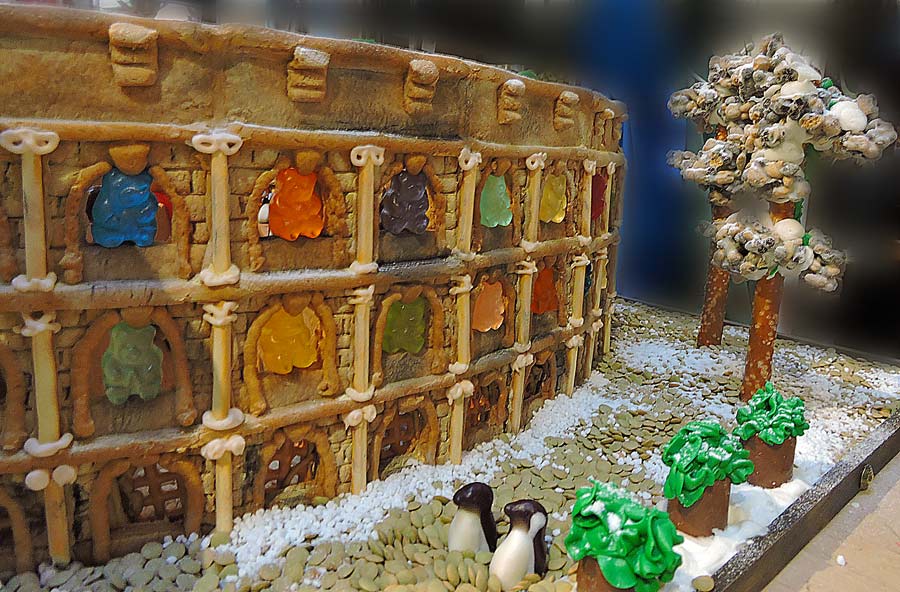
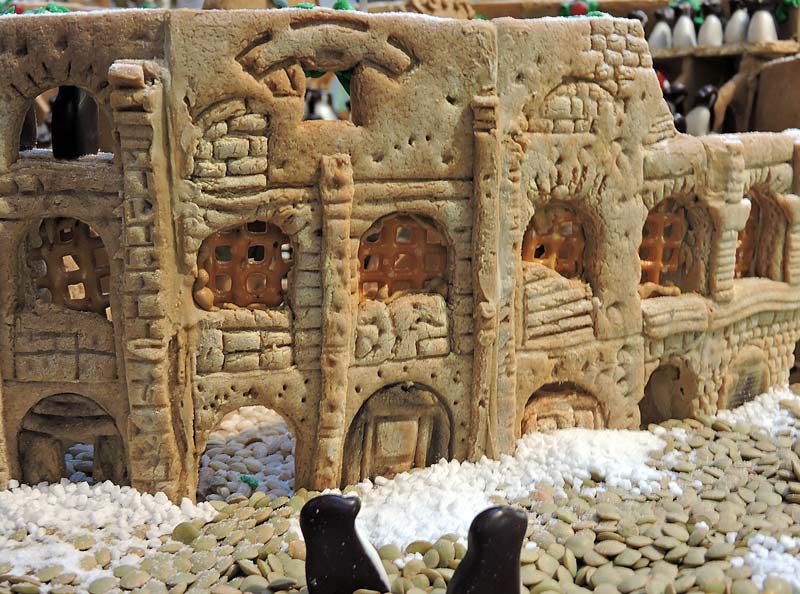
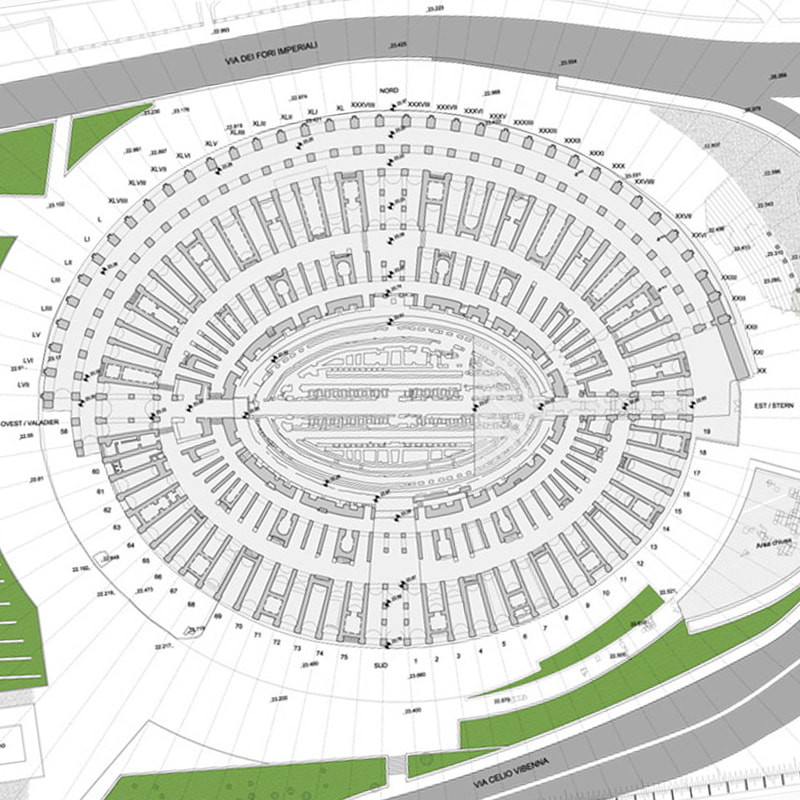
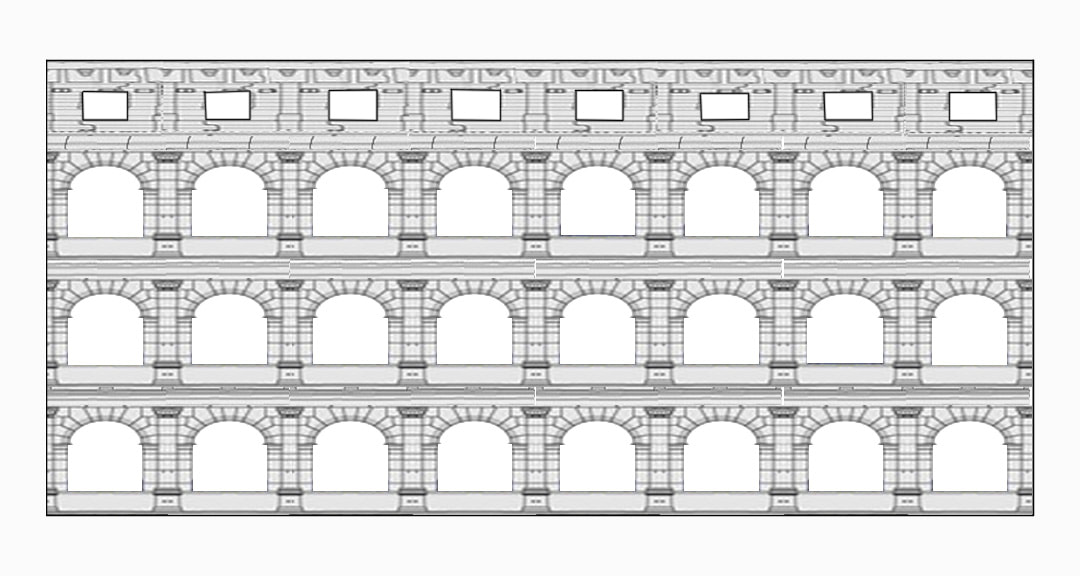
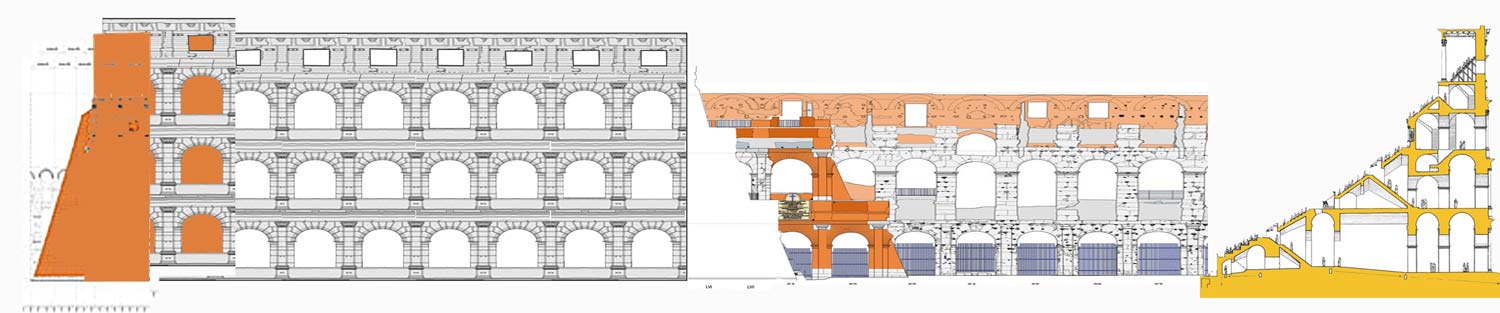
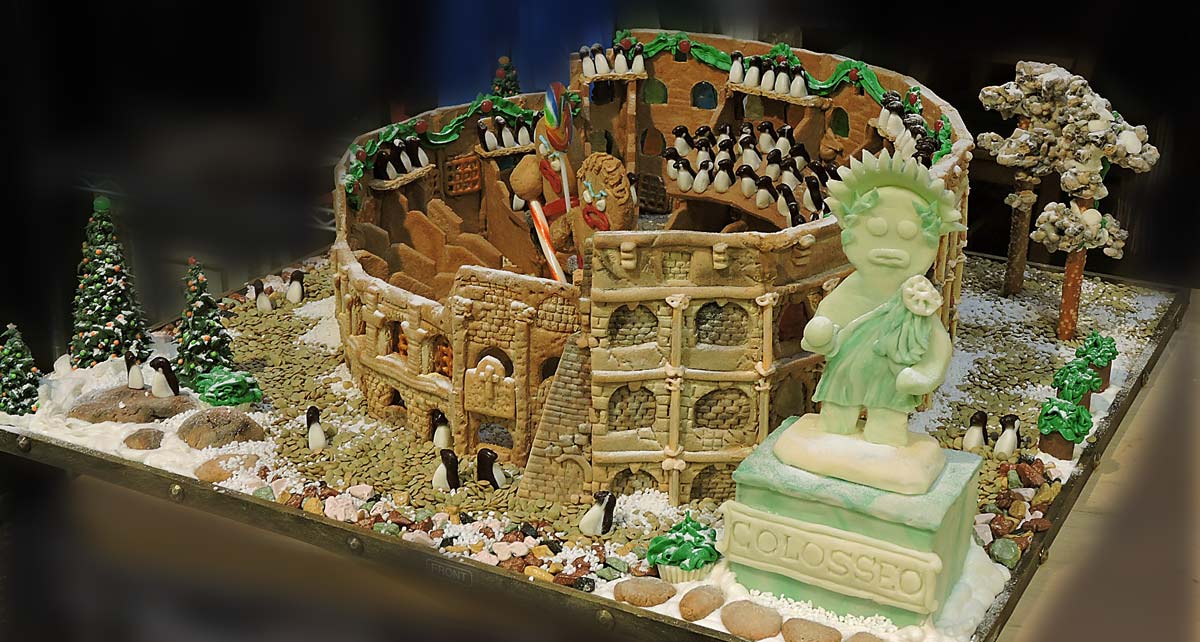
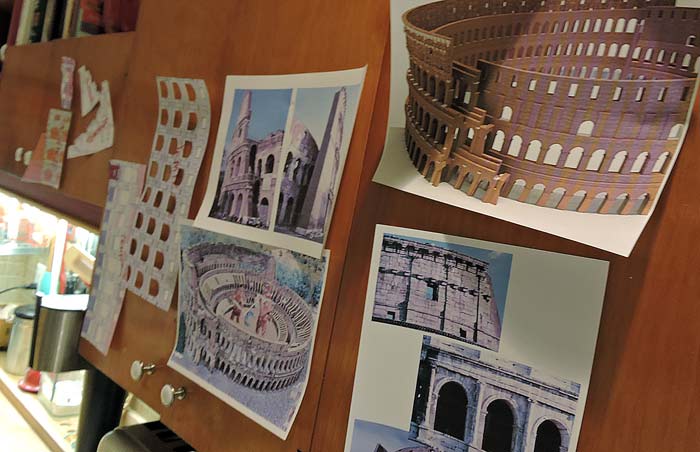
  We had reference photos of the real Colosseum tacked up all around the kitchen as we worked We had reference photos of the real Colosseum tacked up all around the kitchen as we worked Last year, our Leaning Tower of Pisa gingerbread project got an honorable mention from our local county competition. We knew we'd have to ratchet it up for this year, so we decided to build a the Roman Colosseum in gingerbread. The first thing to decide is how to create the curves for the oval shape of the Colosseum's walls. Last year, we developed a technique to mold sections of gingerbread as soon as they come out of the oven a bit under-done... we formed the curved walls of the Pisa tower like this. But in this case, the Colosseum is oval with each section of wall at a different radius. I would have had to build large multi-sectioned forms to create the curved parts. Instead, considering the scale we were working in (on a 24" square base) we thought we would make the walls in sections and then cut them apart and mortar them back together with colored royal icing. OK, so we had a basic plan to approach the overall shape, but how about the details?  Playing with the 3-D paper model until we were sure everything would fit together  We used lego parts for some cutter shapes and textures, cleaning up cuts with a paring knife or razor blades We used lego parts for some cutter shapes and textures, cleaning up cuts with a paring knife or razor blades After some exhaustive research, I found architectural drawings of both the floor plan and the wall elevations and used Photoshop to scale them to fit our 24" square board onto which our Colosseum would be built. I had to make adjustments to the scale of certain elements of the plans first. Instead of 80 arches I cut it in half to 40, afraid that if I cut arches to scale out of the gingerbread, the narrow arches (they would have been less than 1/2" wide) might have closed up as the gingerbread baked. I also wanted larger arches so I could install something to represent the statues in each arch as it appeared in ancient times. We were going to use gummy bears for the statues. It took some doing, scaling things up and down, taking lots of measurements and Photoshop work, then porting the resulting plans over to MS Publisher so I could print the plans out life size as tiled prints, which I taped back together. There were sets of prints that I used to make templates for walls and other elements, and other prints that I used to assemble a three dimensional paper model so I could figure out where specific elements needed to go or where I might have to tweak the scale a bit more (for instance, we shortened the inner wall a bit so our audience could more easily look into the arena to see the "Battle of the Colossus" we were planning to install.
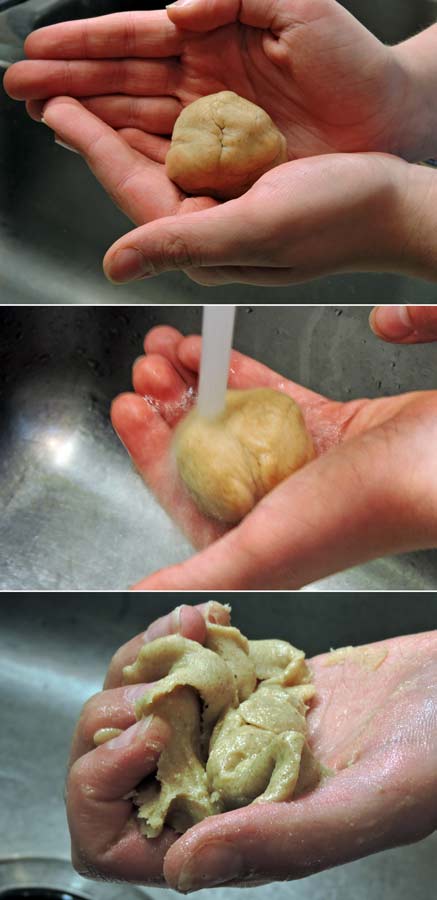
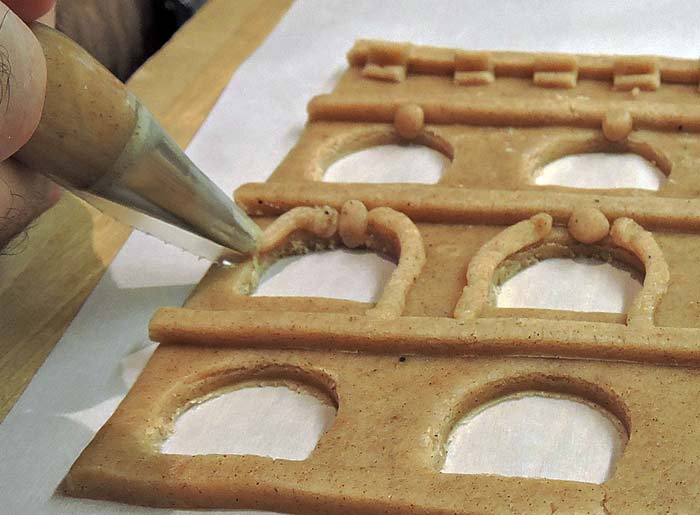
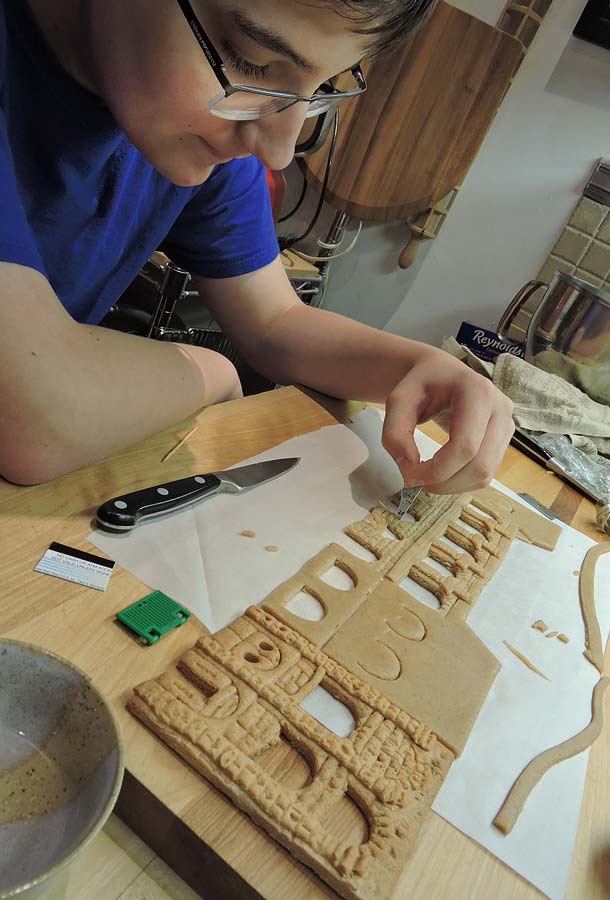
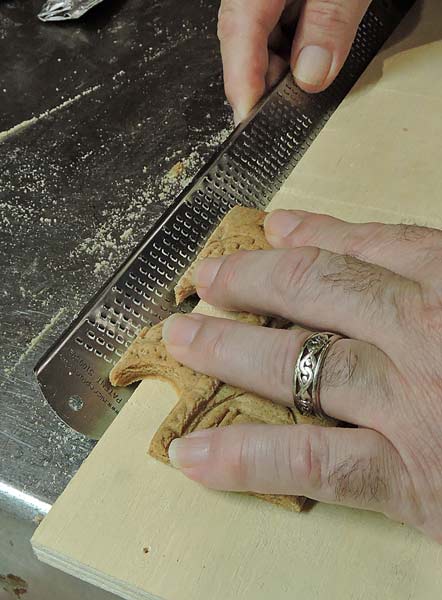
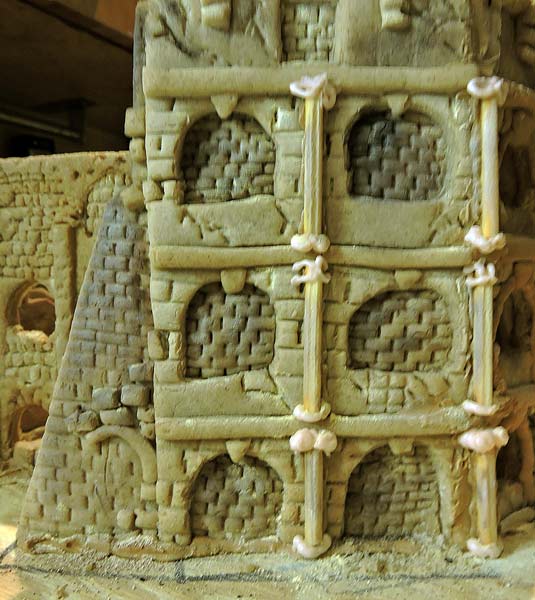
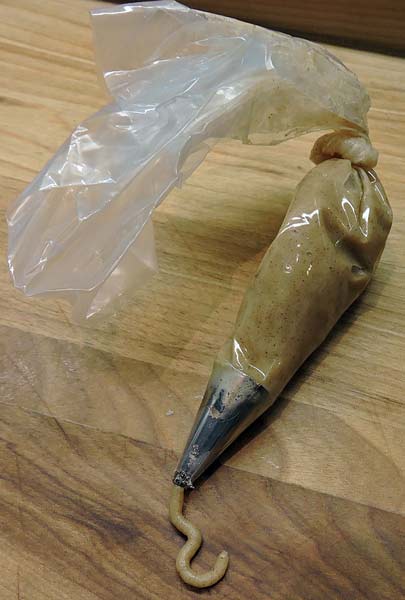 After we had our templates cut out, we started to roll out gingerbread from a special recipe we use for construction--it's harder and spreads less than standard recipes. We used two batches: one with light corn syrup and one with dark corn syrup so we would have two slightly different colors of walls or elements to work with. (The real Colosseum has many different colors of earth tones on its facade). Both my son Lucas and I worked on making the elements... cutting out arches, hand cutting special shapes, texturing the walls to look like brick and stone, and sawing apart wall sections to make the appearance of curved walls. As you can see in the photos above, we even developed a technique to pipe the gingerbread dough. We took balls of dough and wet them briefly under the faucet, then worked water into the dough until it got very slushy without being too wet--just slippery enough to be pumped out of a piping bag and pastry tip. It worked fantastically. 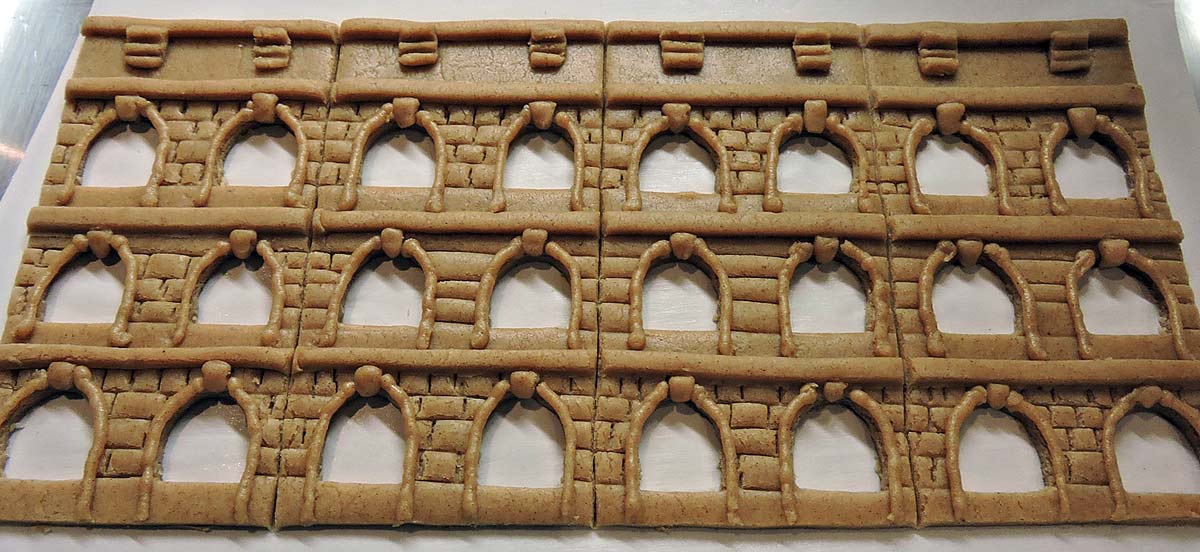 A section of outer wall, textured and sectioned (two arches wide for each panel) ready to go into the oven. 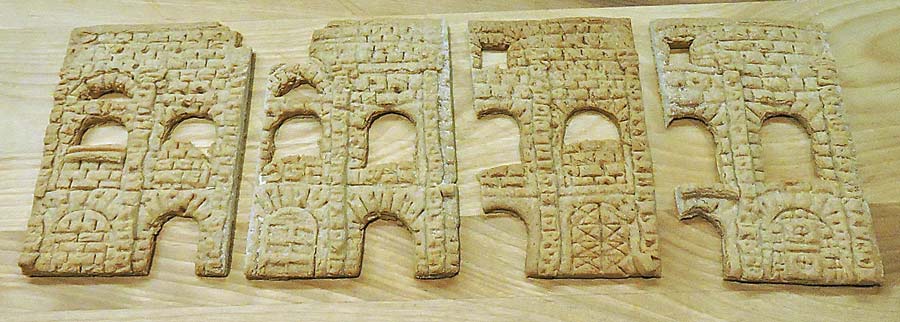 A section of inner wall cooled down and cut apart using a carpenter's dovetail saw. After about a week of research and another 3 days of baking and prepping wall sections and other elements, we filled three pizza boxes with all the gingerbread parts for our Colosseum and got to work assembling with only two days left before we had to present our creation...
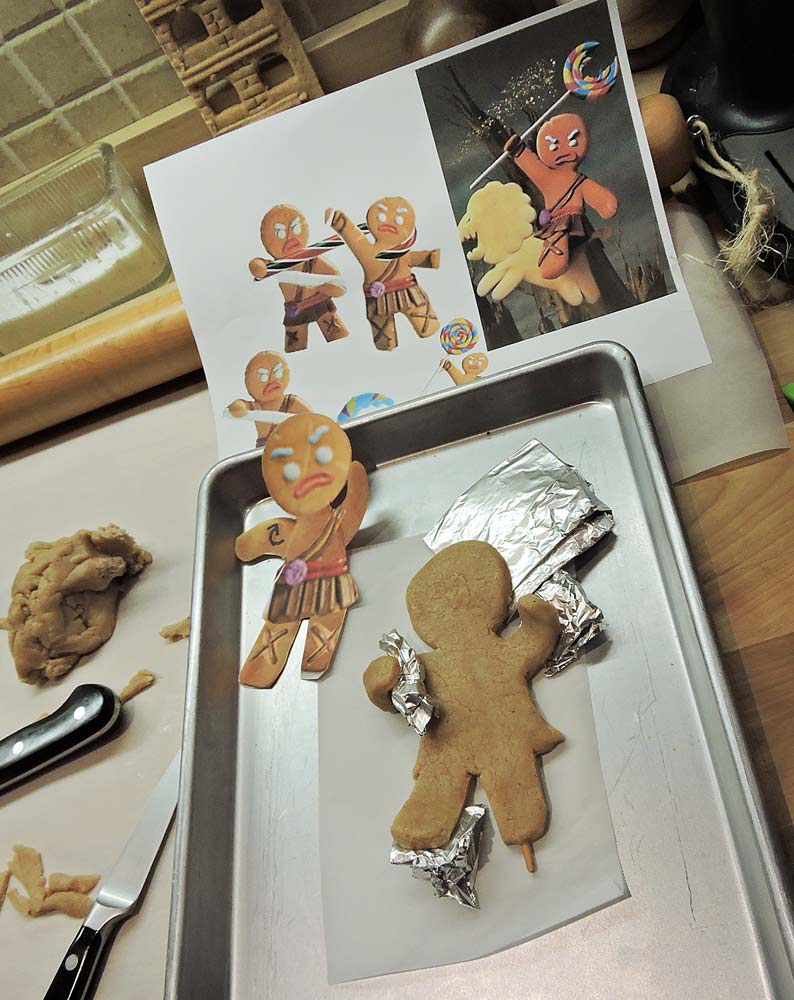
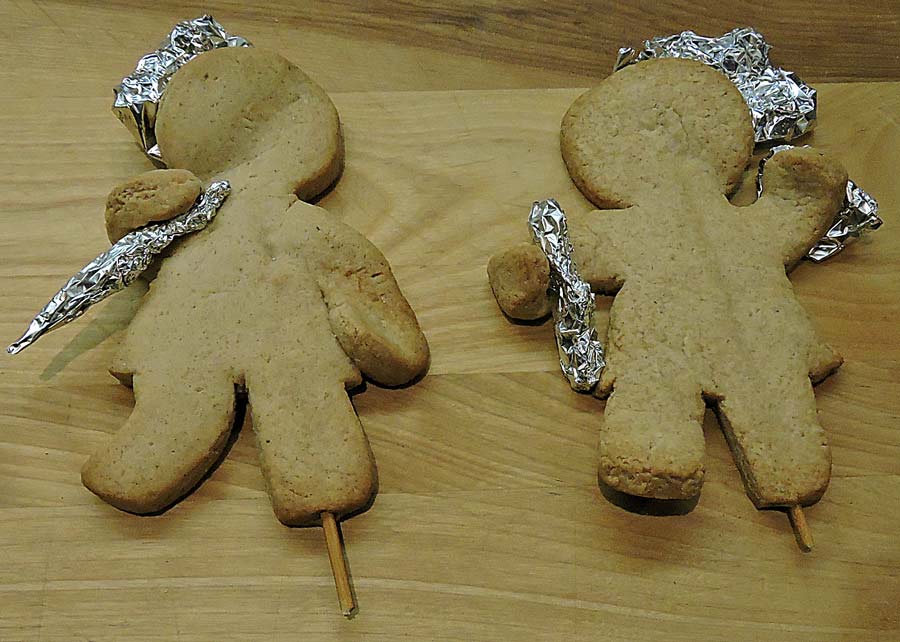
Although we were entered into the "Authentic Reproduction of a Significant Structure" category, we wanted to add a bit of humorous element for the kids that would be viewing our Colosseum for 6 weeks during the holiday season. We decided to place two gladiator combatant Gingerbread Men in the arena styled after the "Gingy" character from the Shrek film franchise. We would have one tripping the other using a candy cane, and the other bopping a lollipop sucker over his head. I wanted these to look animated, so I used foil to prop up parts of the arms, legs and heads during baking. A long bamboo skewer for support was baked into each gingerbread gladiator and would be hot glued into the plywood base of the arena.
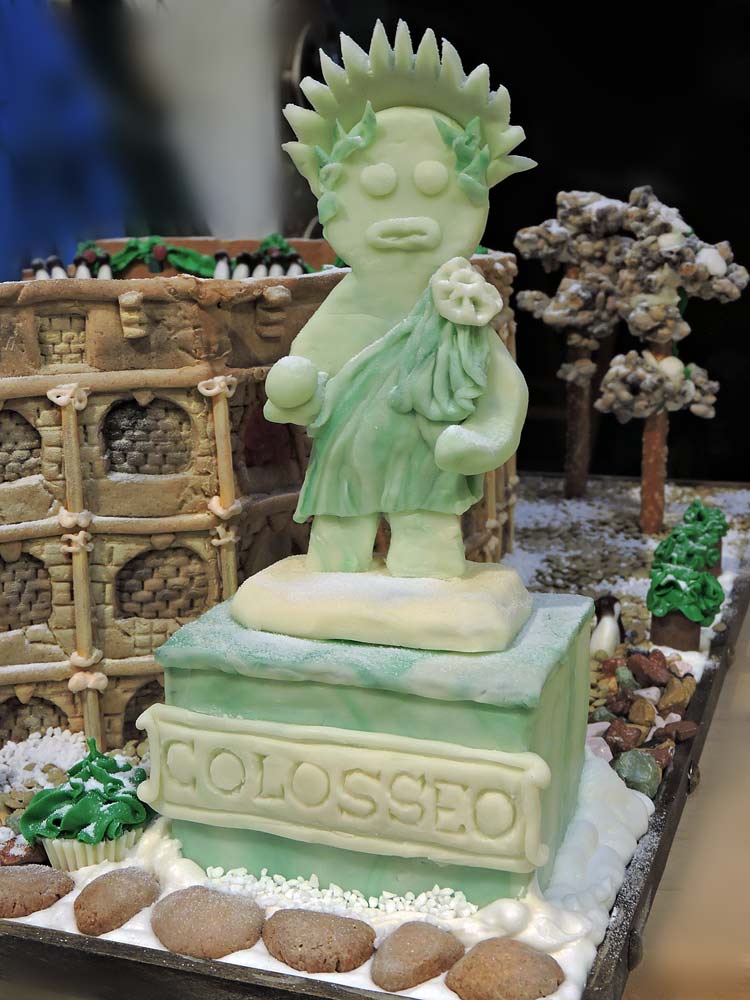
I was originally going to sculpt a human form for our Sun God-Colossus statue, but thought it would be funnier to make him into a gingerbread man--except instead of bronze (I didn't have any bronze Luster Dust) I used modeling chocolate to sculpt a marble statue. 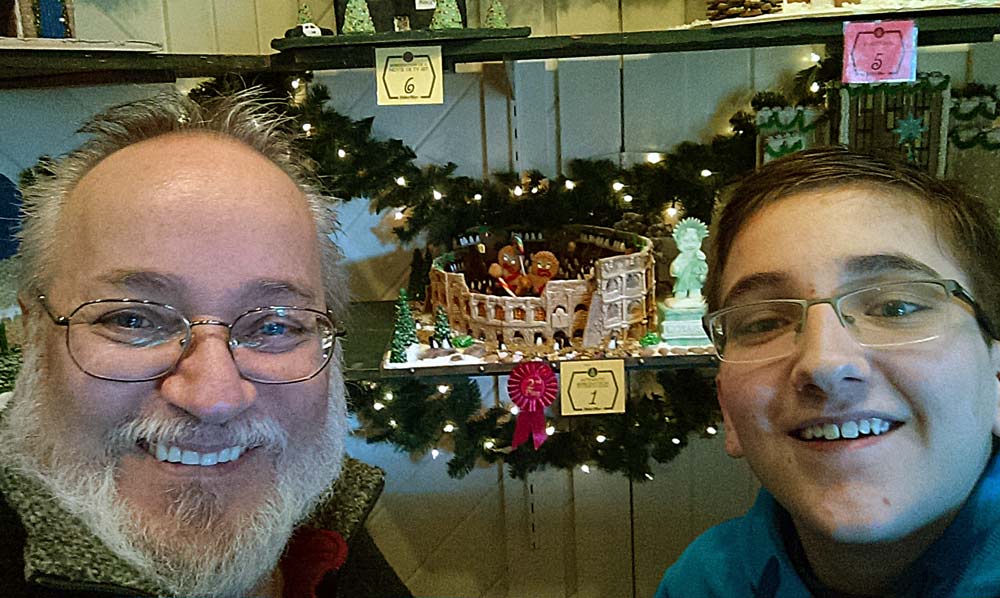 In the end, we were very satisfied with the results and won Second Place (with a decent cash prize and ribbon) for our efforts. I will admit to being frustrated and confused about not taking First Place over the poorly executed and not architecturally correct "Rockefeller Center Ice Skating Rink" that won the grand prize. We had put so many different techniques into ours and had built a nearly architecturally correct Colosseum, while the First Place winner had only flat panels of gingerbread and no architectural details at all (no gold statue of Prometheus?) No matter, we're still proud of our effort this year! What do you think? --Jerry Finzi 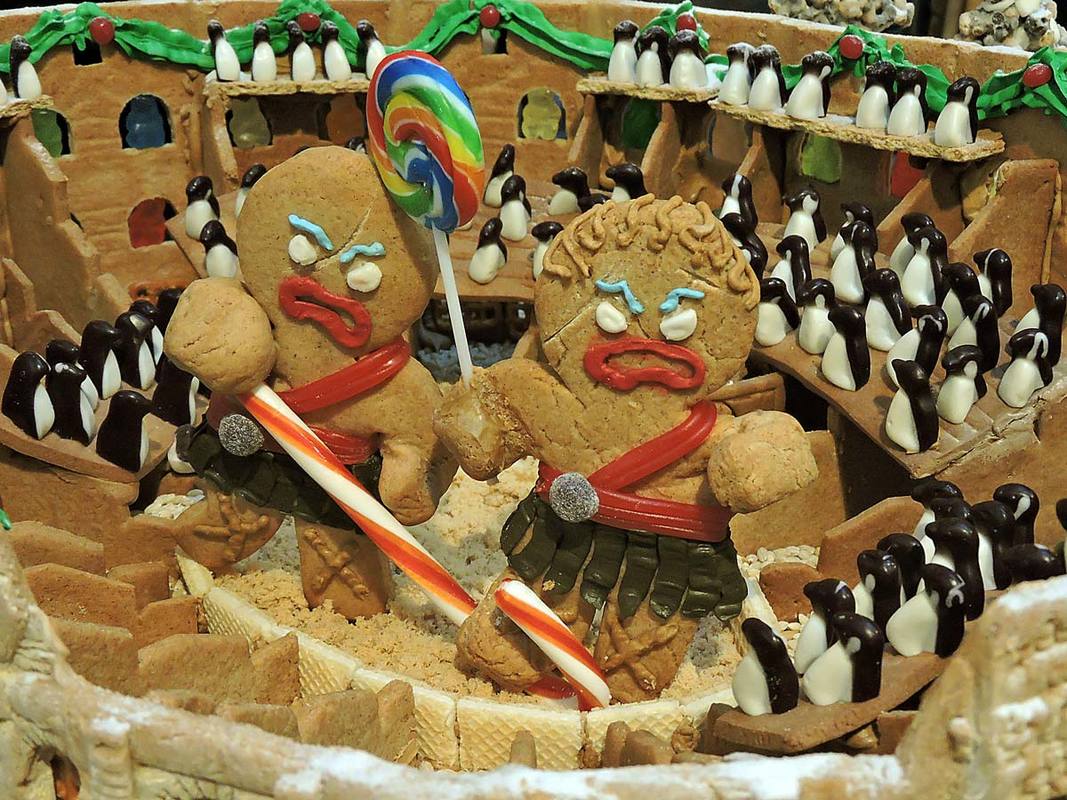 Our "Gingy" Gladiators doing battle, while penguin citizens enjoy the show
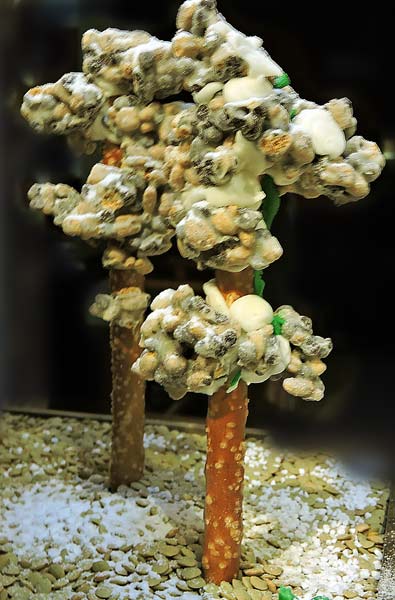
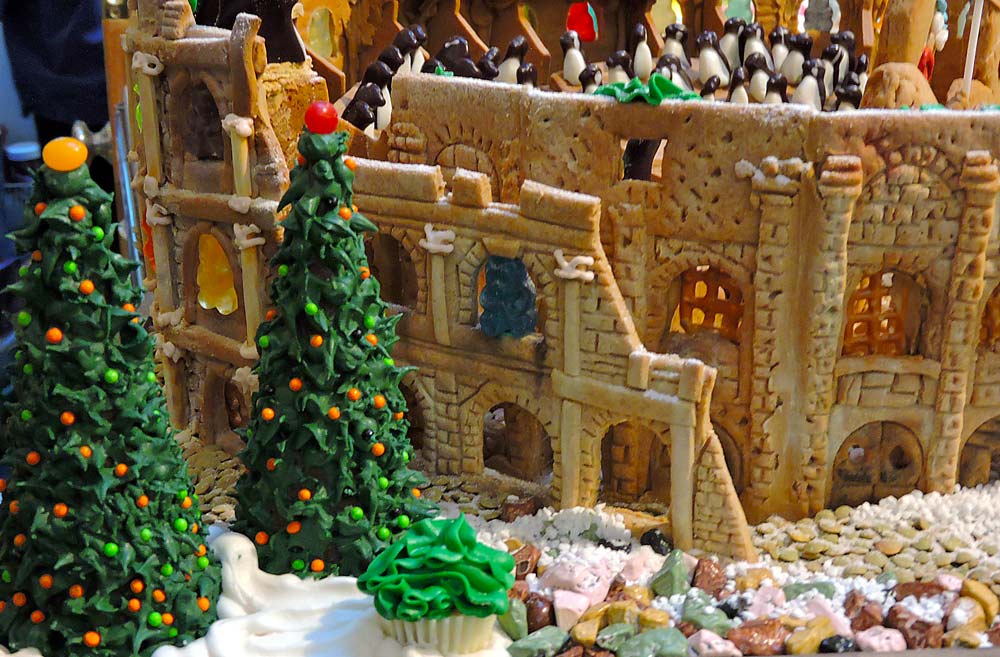 Exterior with piped Christmas trees over inverted ice cream cones, chocolate stones and lentils for the paths  We decided on using penguin gummies for the audience 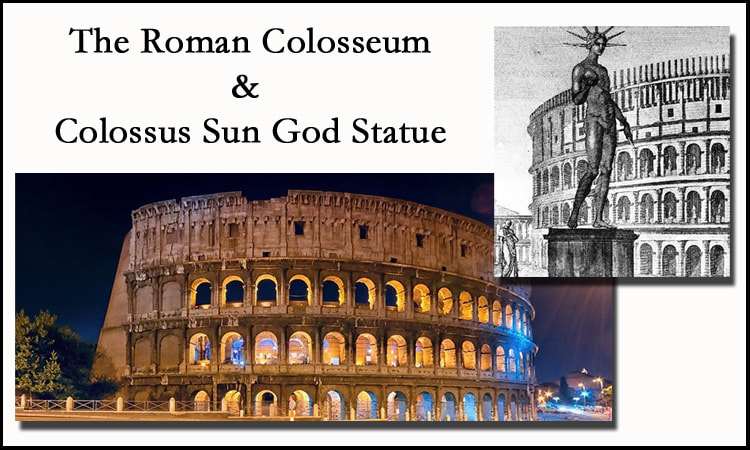  360 degrees of details captured from Google Earth and pasted together for reference in Photoshop
 As the Colosseum stands today |

Archives
May 2024
Categories
All
|