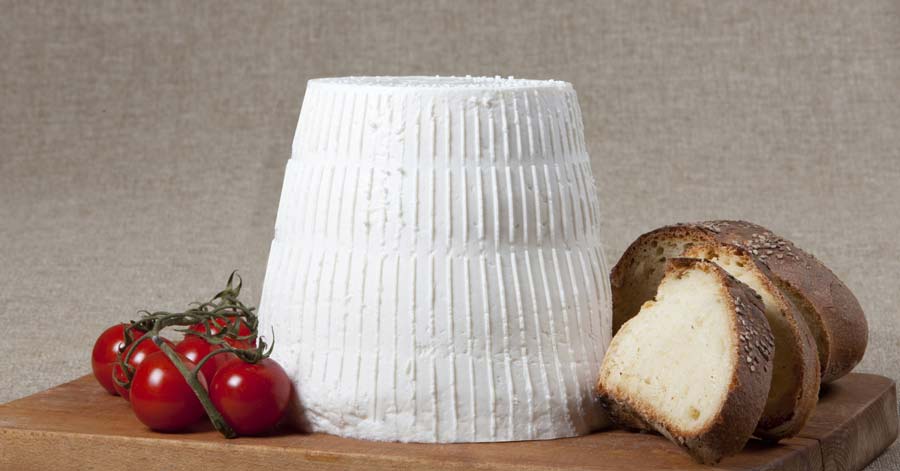
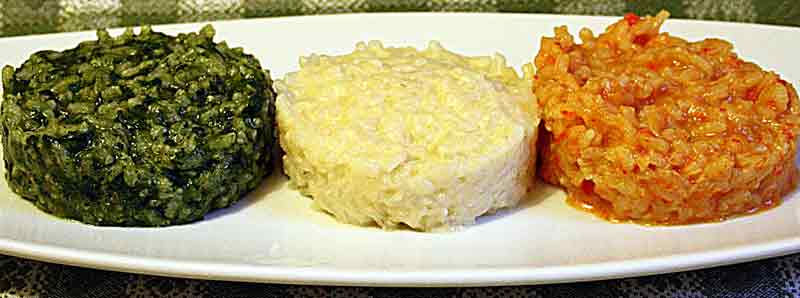
 Ricotta wasn't something I liked too much when I was a boy. Ok, I didn't like it at all. Too creamy, a bit sour to my taste buds and the texture was often a bit grainy. I'm still not a fan of eating it straight, or nel nudo... er... undressed. I don't even like white pizza with ricotta. That's Lisa's thing. But as my tastes have evolved and I've grown as a cook, I've learned to appreciate ricotta as an ingredient or an accompaniment for other foods. Fresh ricotta (especially when Lisa makes some) is great with a little honey drizzled over it and some fresh fruit--berries or figs. Even jam and ricotta is great on a Ritz cracker. Of course, as an ingredient for stuffed shells or lasagna it's indispensable. I even like when it's stuffed into huge olives. And I use it often to enrich sauces... besciamella, marinara, and even to make a creamy-cheesy pesto. Recently I used ricotta in a stuffed French toast breakfast. That really works! But, my all time favorite way to enjoy ricotta is when Lisa makes her Italian Cheesecake (almond flavored) around the holidays. I won't go so far as saying that I loved the powerfully stinky, burn your eyes out Ricotta Forte we tasted in Puglia, although Lucas seemed to go for it. Interesting that now that he's nearing puberty, his feet are starting to smell just like Ricotta Forte... (Lucas just read this and thinks I'm being mean.) 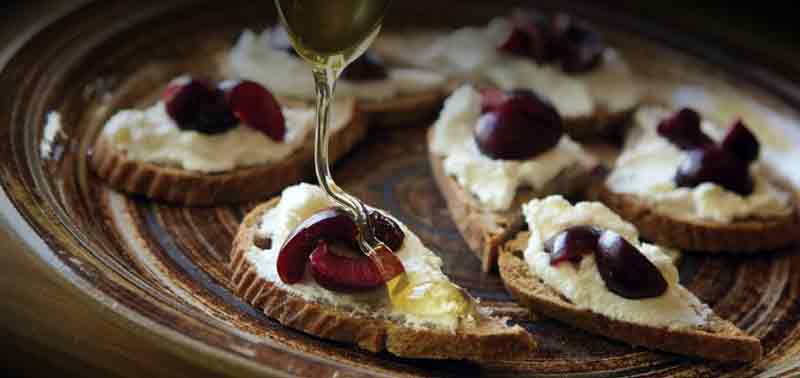 Crostini with ricotta, cherries and honey  Ricotta, pecans & honey Ricotta, pecans & honey Now I've heard rumors that ricotta isn't really a cheese at all, because it doesn't contain what most cheese do... casein. It is made from the whey leftover--usually after--another cheese has been made (like mozzarella). This is what "ricotta" means... literally, "twice cooked". Because ricotta doesn't contain casein, people can digest it a lot easier than other cheeses... with no side effects for people sensitive to such matters. (I'm staying mute on that subject). But in reality both casein and whey are each components of the proteins in milk, and believe it or not, there are people who might still be bothered in a big way by ingesting whey instead of casein. And for the lactose intolerant out there... yes, it does contain lactose! Steer clear. 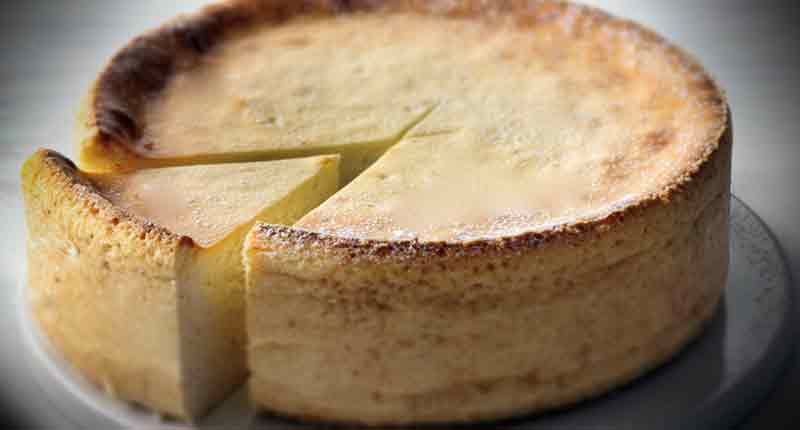 Ricotta cheesecake 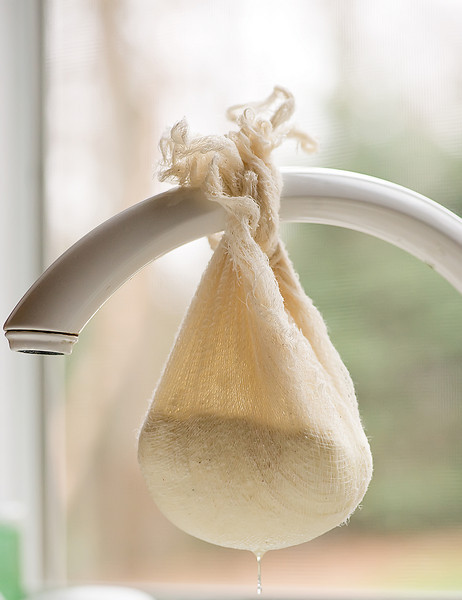 A simple way to drain fresh ricotta A simple way to drain fresh ricotta So, leaving the semantics aside... you can consider ricotta a cheese. (It's like the never-ending Sauce - Gravy debate about what a red marinara cooked all day with meat is called). Embrace the concept. It's not simply another "dairy product". It's a cheese. Oh, one other thing... A lot of people think of ricotta as a diet cheese, and although it is relatively low in fat, it still contains anywhere from 10-20% fat. So don't overdo it. (I actually don't like it when Lisa overdoes the ricotta in a lasagna--eat heart healthy!) If you want to be sure the ricotta you eat is lower in fat, buy only artisanal ricotta--or make it yourself at home. The store bought, packaged stuff is always going to be higher in fat.
As I mentioned before, ricotta means cooked twice. It is made from either sheep, cow, goat or water buffalo milk whey that's been left over after making another cheese. The "twice cooked" comes into the picture because the whey is heated almost to a boil either after fermenting to make it more acidic--or like Lisa does--by adding lemon juice for the acidity. This technique allows a second curd to develop from the whey that was leftover. To form a cheese, the curds are collected and shaped by hanging in a cheesecloth or by placing into special cheese baskets which allow the liquids to drain while leaving the curds behind. If you add a bit more salt and allow it to dry for much longer, you might even make ricotta salata, a salty, firm cheese similar to Greek feta. You know, now that I think about it, Lisa hasn't made any for about two months of more... nudge, nudge... get the hint, Sweetie? --Jerry Finzi If you enjoyed this post, please share it with your friends and all the cheesy people you know. Grazie!
0 Comments
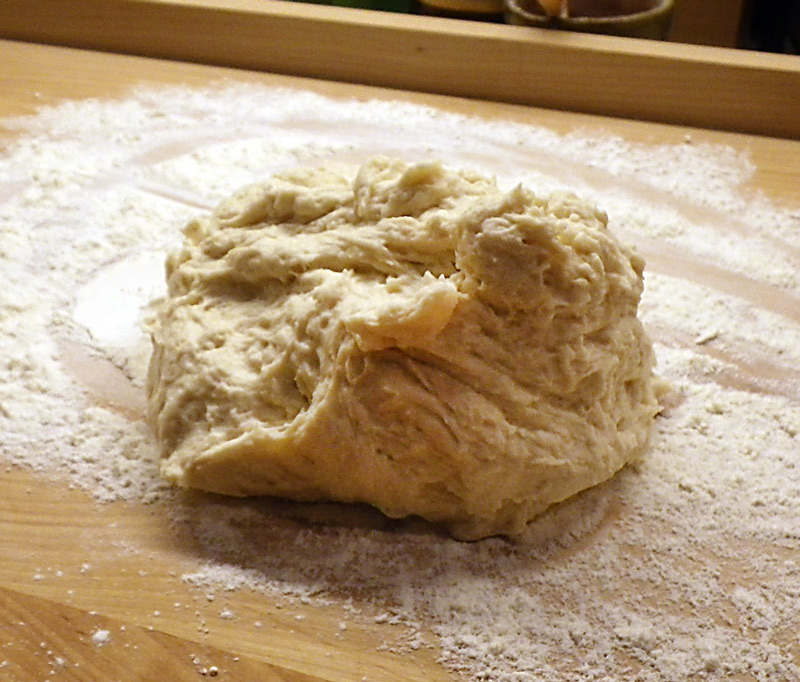
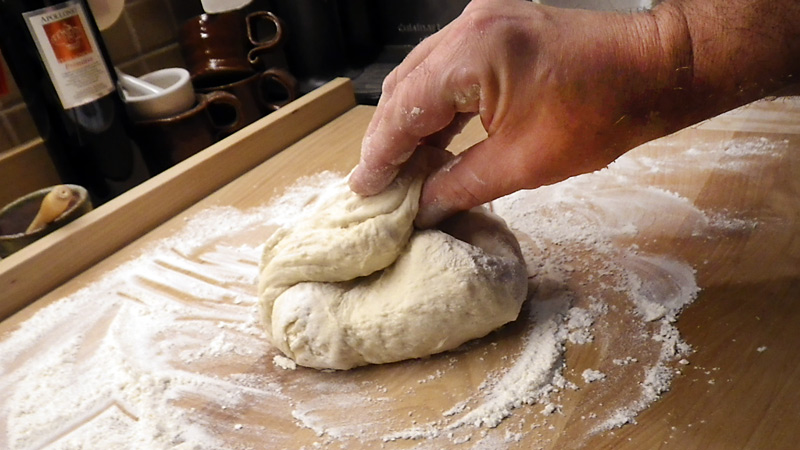
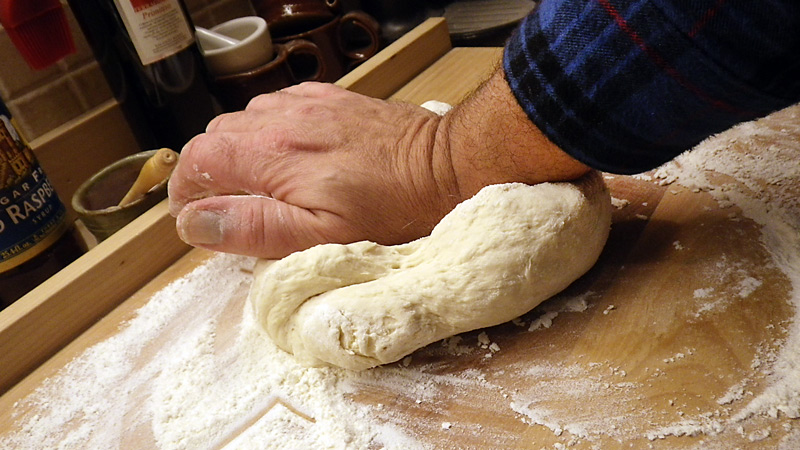
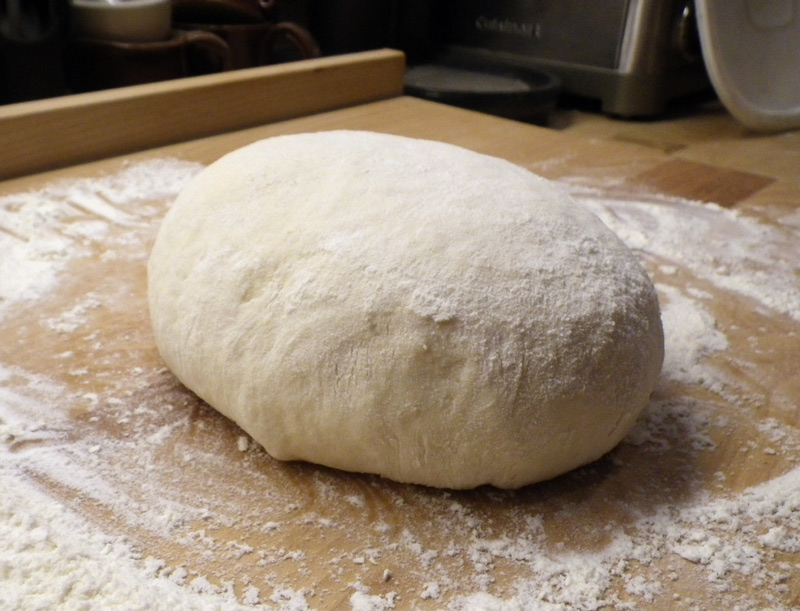
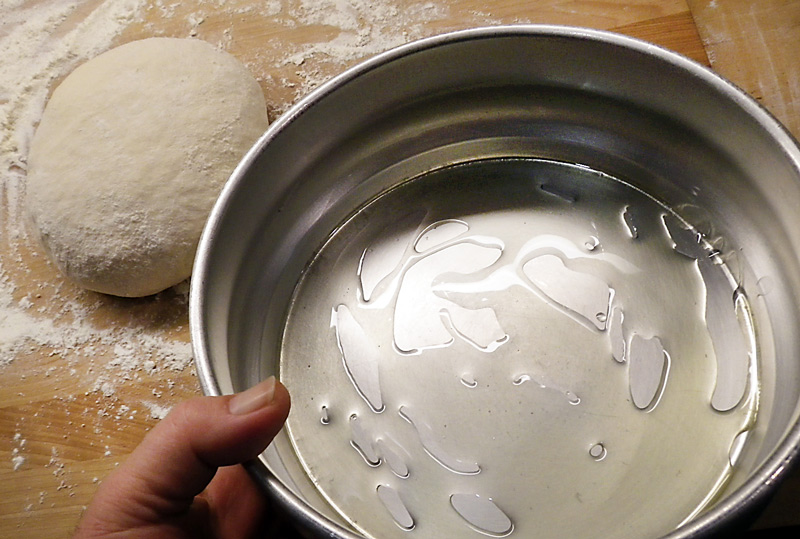
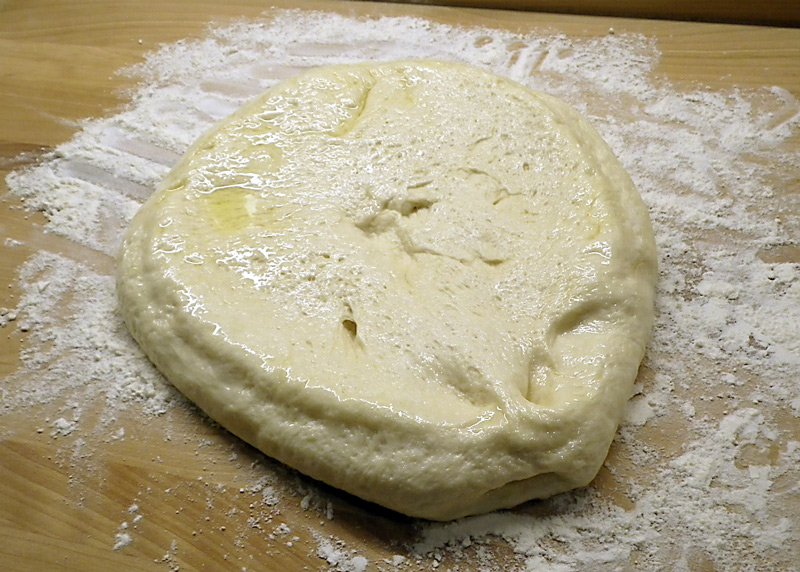
 When I starting making pizza about 15 years ago, I made a lot of terrible pies... doughy, pale-looking, tasteless, flat, oily, floppy, burnt--you name it. Lots of mistakes. But that's the part of life I love--learning from our mistakes and really fine-tuning a craft, talent or skill. You have to crawl before you walk or run. On guitar, one must pluck before you strum and then eventually really make some music. On my penny whistle, I squealed like a pig before I could play a tune that my wife wanted to sit and listen to. My love of carpentry started when I was 5 years old... with me holding the board while my father sawed it through. Now, I can built pretty much anything I set out to build. Learning to make truly great Pizzas requires the same attitude--learning from mistakes--and successes, as they add up. I would say that it took me about a year to learn how to make a really delizioso pizza--perhaps another couple of years until I could make pretty much any style of pizza... thin crust, thick foccacia, Chicago deep dish style, etc. You have to start somewhere, and with that simple fact, you need a simple dough that works. I am going to show you how to make my all-around, Basic Pizza Dough... What do I Need to Make Great Pizzas? First, a brief mention of tools (I go into more depth on gathering together a Pizza Tool Kit HERE). To make a good crust, you really need a rectangular pizza stone. Round stones are limited, but with a square shape (about 16" square) you can any different shape, whether of not they are placed directly on the stone or are baked in a pan. Although you can make pizzas in pans placed directly on an oven rack, using a stone affords shorter bake times and a crisper bottom crust. Even when using a pan, placing the metal on a stone speeds up the transfer of heat from the stone to the pan. On a rack, the air in the oven insulates most of the metal and slows down this transfer of heat from the rack to the pan. You should also pick up a pizza peel to prep your pizzas on and to remove pizzas from your oven. Although you might have seen a TV pizzaiolo on occasion loading up their dough rounds with toppings right on their floured, marble work surface, and then try to drag it onto a peel. Don't even try this. Your dough could stick, you could tear it and heavier toppings will go all over the place. So, shape your pizza on a wooden peel. I like using a metal one for removing pizzas from the oven, but a wooden one can also do double duty, if space is at a premium. When planning to bake pizzas made directly on the stone, I recommend using parchment paper on top of your peel. The order is: cover your wood peel with parchment, then shape the dough on top of the parchment, next, add the toppings. The parchment does two things: It helps slide your pizza onto the baking stone (even with heavily loaded pies); it helps keep your stone and oven clean. When I first started making pizzas, I used to use stone ground corn meal on the wooden peel. You can do this, but I've found that some always falls into the oven itself, gets burnt and makes a mess. Of course, you'll also need a pan or two. For serving, buy a flat, round 16" pizza serving pan. Do not use this type of pan to bake pizzas on, simply because they are usually silver and won't crisp a crust bottom that well. For baking, select a dark, non-stick rectangular pizza pan--a heavy one is better than a cheap thin pan. You will use this when making foccacia and "Sicilian", square slice pies. For regular pizzas, you will bake them directly on the stone. Finally, don't forget to buy a decent, large diameter pizza wheel (cutter). Ingredients for Thin Crust Dough Proofing the Yeast 1 - 1/4 cups warm water (about 115 degrees F) 1 packet instant or Rapid Rise yeast (or 1 tablespoon packaged/dry yeast) 1 tablespoon honey 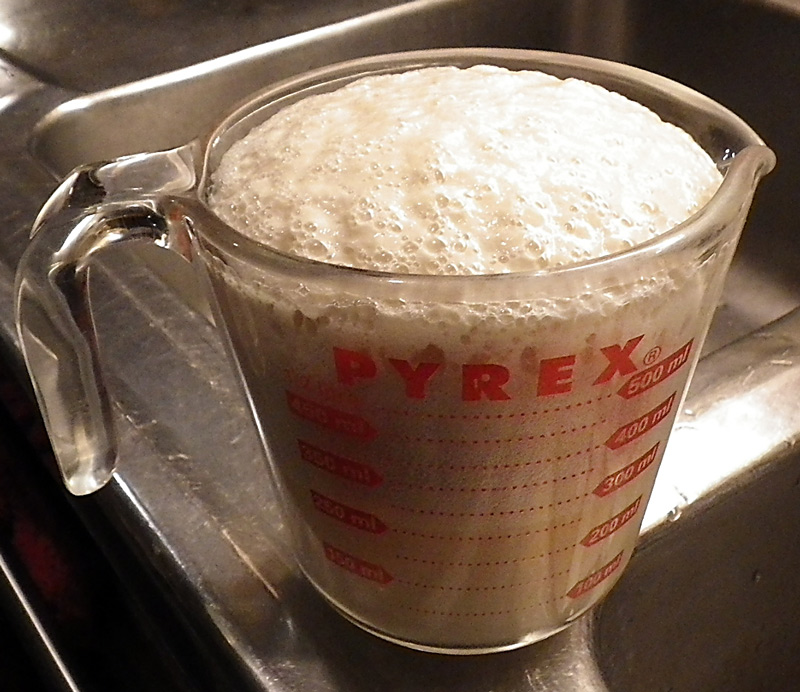 Mix the yeast and honey with the warm water in a 2 cup vessel (I use a measuring cup) and set aside to "proof" (foam up). To understand what's going on, the honey (or sugar) feeds the yeast and makes it create bubbles to lift the dough... pizza dough is a leavened crust (more akin to bread). A dough without yeast (or less yeast) makes more of an unleavened bread--like a cracker. In case you don't have a thermometer around, here's a method I've come up with to ensure the water is the right temperature... Turn your water on HOT and then try to hold the inside of your wrist in the stream of water coming from the faucet. At first it'll be way to hot to hold it for even a second. Start turning down the temp (add cold or turn the valve toward the cold side if it's a mixer valve) and try holding your wrist there again. When you can comfortably hold your wrist in the stream of hot water, it's hot enough without being hot enough to kill your yeast. I've tested this method with a thermometer and it usually lands me around 110-115 degrees F. Preheating the Oven and Pizza Stone Oil up a separate bowl (use olive oil) and set aside (this is to rise the dough in later). In the meantime, get your mixer ready. I use a standard mixer with a dough hook. Now is a good time to place your pizza stone in the oven on the center rack, and preheat your oven as hot as it can go... around 515 degrees F for American ovens. Remember, your stone needs to preheat along with your oven. I'd recommend letting it preheat for a minimum of one hour before putting a pizza in the oven. If you are doing a second, slow rise (see below) then wait a bit before preheating. For the dough 1-1/2 cups all-purpose flour (all-purpose is needed to create a more crisp crust) 1 - cup bread flour (bread flour makes pizza more bread-like, I recommend King Arthur's) 1 - tablespoon salt 1-tablespoon extra virgin olive oil Making the Dough Place the one cup of bread flour and the salt in the mixer bowl and mix a bit. Once your yeast looks foamy (no more than 10-15 minutes or so) pour it in with the flour and mix on a slow speed setting. Scrape down the bowl and beater once in a while. During this first mixing, add the olive oil. Once the dry flour mixes with the yeast into a slurry, add one (1) cup of the all-purpose flour. Mix and then scrape until the dryness is gone and then add another 1/4 cup of all-purpose flour until the dough starts to form a slightly sticky ball that will climb up the dough hook. If it looks too wet or sticks to the sides of the bowl, add another 1/4 cup of all-purpose flour. (The photo on the left needs more flour but is almost there. The center one has the right amount of flour--it's still a bit sticky. The third shows the dough as it looks on the bench before kneading.) 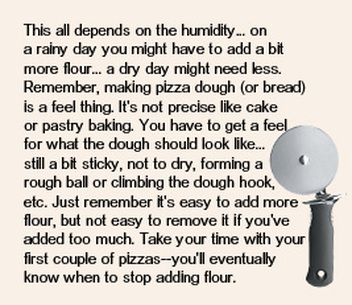 You want the dough to mix until it separates from the bowl--but it should still be a bit sticky. Go slow with adding more flour. A dough that's too dry will make a tough, leathery crust. You want it soft and a bit sticky. If the dough is sticking to the sides of the bowl a little, you can dust the sides of the dough ball with a little flour, then use a spatula to separate it from the sides before turning it out onto your work surface. Flour your work surface in an area about the size of the pizza you are making. I might mention why I use two types of flours in this recipe. If you were to use all bread flour, the pizza crust would be a bit softer--more bread like. It will be a bit more crusty for a thin crust pizza if you use 1 cup of all-purpose flour. If you prefer your thin crust even crustier, use all-purpose without any bread flour. I tend to use all bread flour when I do pan pizzas, Chicago style and focaccia for a more luscious bready texture. Kneading the Dough Turn the dough out onto a floured surface and knead by hand. Flour both your hands and flour the top of the dough on the board. Fold the dough over toward you, turn 1/4 turn and keep repeating until the dough looks smooth, soft and slowly bounces back when you stick it with your thumb. Some say you must knead the dough for 5 or even 10 minutes or more, but I think this produces too much stringy gluten--the glue in dough--and causes the dough to be tough. Besides, I'd rather be eating my pizza sooner rather than later. Tuck in or pinch together the bottom of your dough round and make it into a flat round shape, then put it in the oiled bowl to rise. Coat both sides--there should be oil on top of the dough round and the bottom of your rising bowl. Cover it with plastic wrap and let it rise at room temperature for 45 minutes. I usually help along the humidity a bit and lay a damp paper towel on top of the plastic wrap. You could even use a damp cotton chef's towel. I've done this for years now and call it my "Rainy Day Pizza Technique" because I noticed that pizzas made on rainy days are better--creating more air pockets in the dough. There are two ways to proceed now. One is the quick way--a single rise--the other is longer... a double rise. Typically, for Saturday night pizza, I'll do a short, single rise:
But if I'm trying to make a special artisan pizza recipe, a thick pan pizza or Chicago style pizza I'll do a double rise:
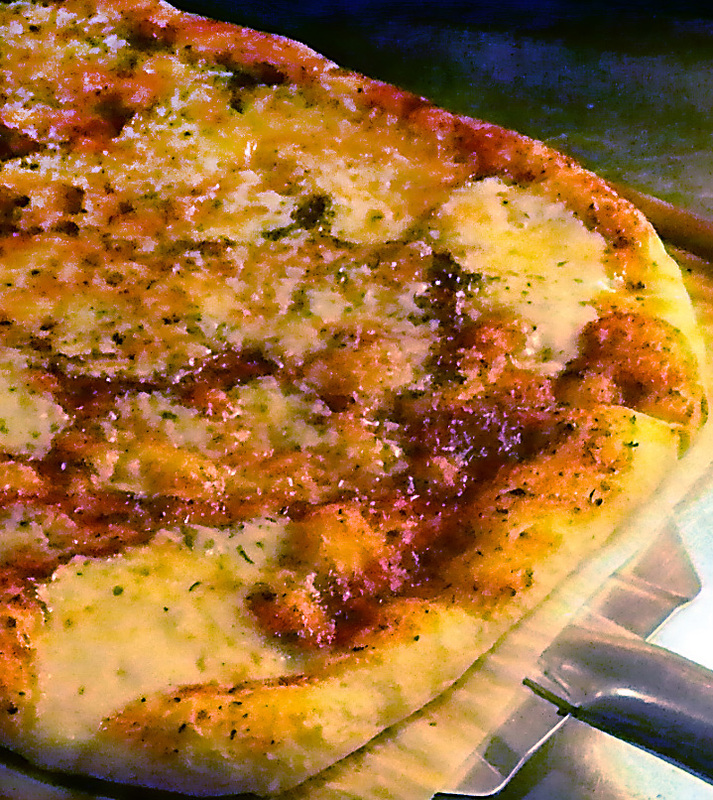
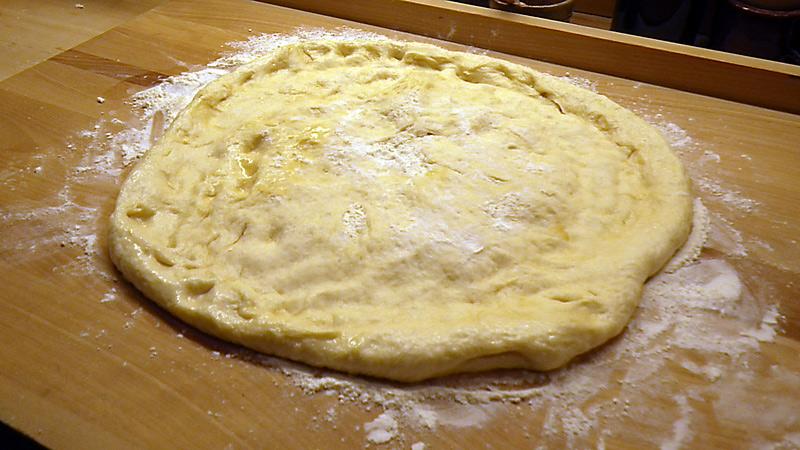
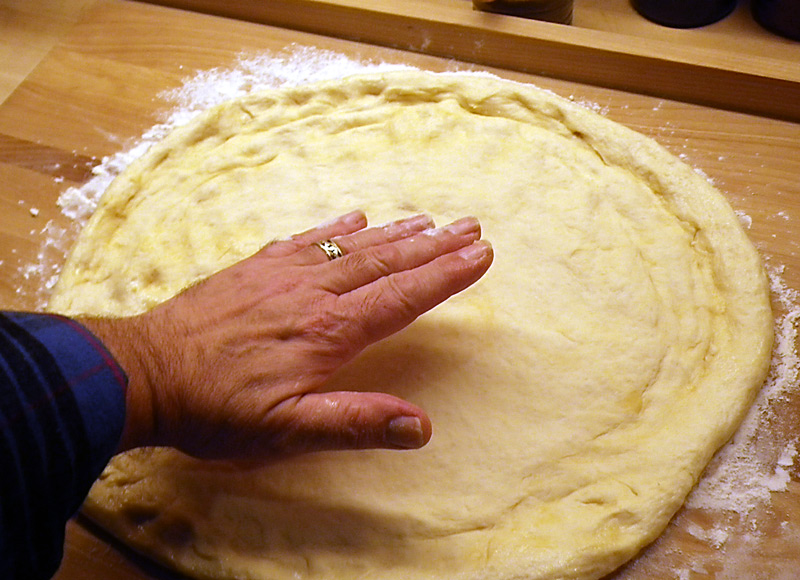
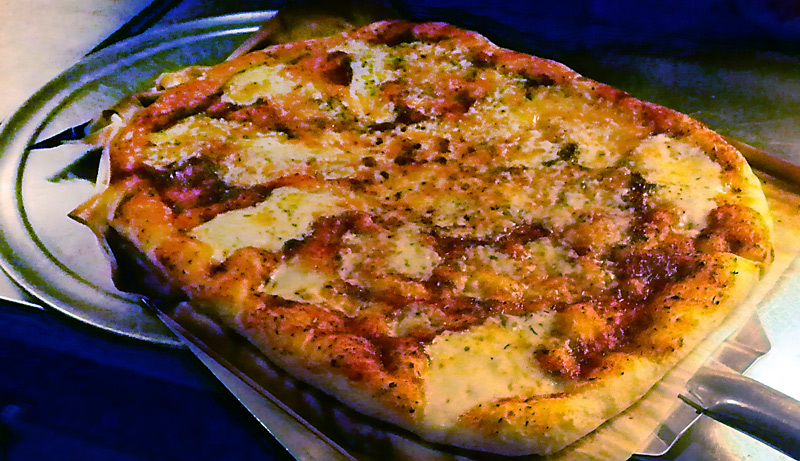
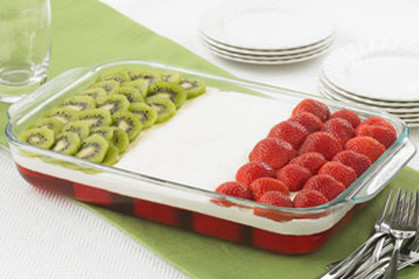
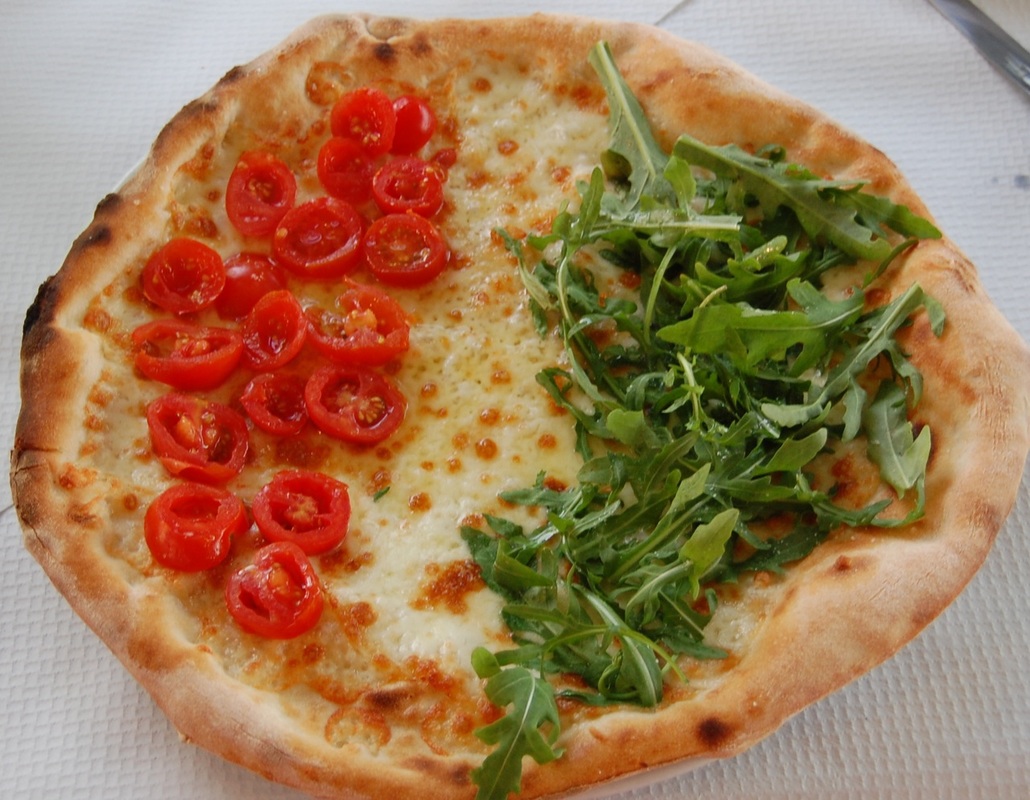
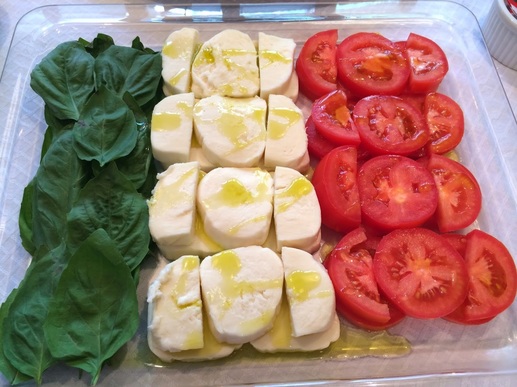
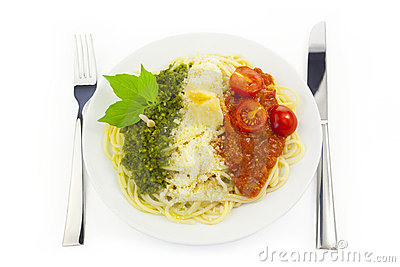
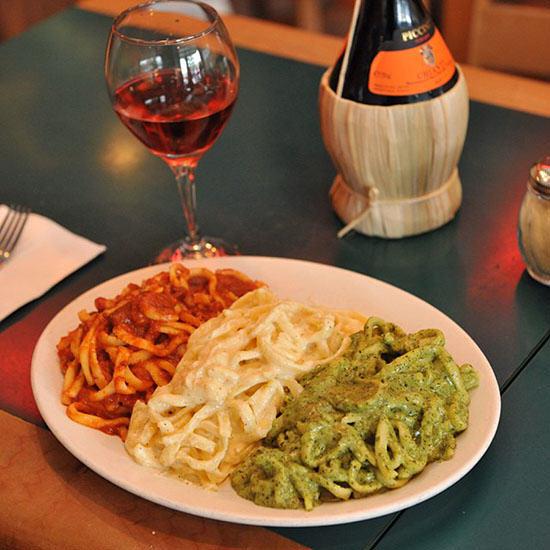
The longer the rise, the more complex flavor develops in the crust... something I think is unnecessary for a quick, thin crust pizza. If you want to try a truly artisan pizza, do the first at room temperature and the second rise in the refrigerator over night. The cold slows down the rise and lets more flavor develop. Forming and Topping your Pizza To use the dough, turn it out onto a floured surface and to shape your pizza. This recipe will make one large pizza, or you can cut it into smaller balls to make 2 individual pizzas. If you divide the dough, either do it before the rise (each one rising in separate bowls) or if you do it at the end, after cutting with a bench scraper, form the dough balls back into ball shapes. Let them rest a few minutes before shaping your pizzas. There are many ways to shape a pizza. If you want a really thin crust you can use a floured rolling pin--a simple log shaped one is best to ensure an even thickness. To make it easier for you, you can shape your pizza on a sheet of parchment paper and then when done, slide your peel under the paper for topping off. I tend to shape it on a floured surface, then transfer by hand to my peel which has a sheet of parchment covering it. Of course, don't forget your best tools--your hands. I mainly use my hands when shaping pizza. Since I'm really making a more delicate, artisanal style pizza dough, you really can't throw it like in a commercial pizzeria. First, make sure you have a decent amount of flour on the workbench. Now, toss more flour on top of the dough before you start. Basically, you want the dough to have enough flour under it to slide easily when working it. You also want flour on both the top and your hands so your hands don't stick to it. Make sure you flour your hands or things could get messy. 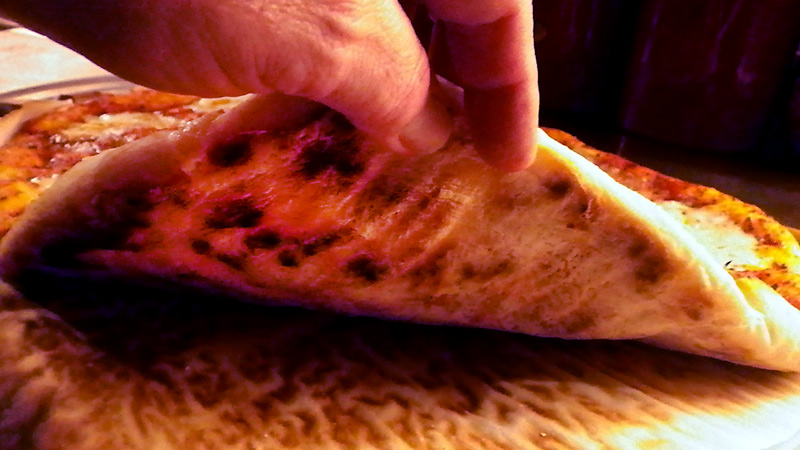 This crust used only bread flour and wasn't as crusty as the recipe above. Basically, I tend to leave a slight mound in the middle, then press with the sides of my hands to form a thicker crust edge (I like a thick crust on the perimeter of a pizza). Pat the middle with your flat hand, or use your finger tips (all of them) to push down the high spots of the dough until you make the diameter the size you need. As you press, push outward to where you need more width. If you make a hole, tear a little dough off the side and patch it. Next,--if you aren't using the parchment paper underneath--gently lift one side of the dough round and lift it on top of your forearm. Then with the other hand, help to lift and slide it onto your pizza peel on top of the waiting parchment. Pull the edges of the dough to fill your peel or into a circle, whichever you prefer. Rustic shapes are fine too. By the way, instead of using parchment, you can also sprinkle a good amount of coarse corm meal on the peel and put the raw shaped pizza on top of that. The corn meal acts like little ball bearings making it easy to slide your pizza onto the stone. I've switched to using parchment simply because it's a bit neater... some corn meal winds up at the bottom of the oven and tends to burn. Toppings I never would recommend topping off the dough while it's still on the work counter. I've even seen TV chefs do this and then have some trouble when trying to slide a metal peel underneath. A wooden one won't work at all--it's too thick! Just have all your toppings ready beforehand, place your peel with the raw shaped pizza next to them, and top-away! I'll post my recipe for home made pizza sauce, but in the meantime you can use any jar sauce, as long as it's not too thick. Pizza sauces tend to be on the watery side. As for cheese, while everyone loves mozzarella (we use part-skim to save on the fat, with the added benefit that it's less stringy) try others... sharp provolone, fontina, smoked mozzarella, fresh mozzarella, asiago or one we discovered in Italy, cacciacavalo. You can cut it into thin slices with a knife or grate it with the 1/4 inch holes on a typical cheese grater. As for the rest, live it up and experiment. If you want a simple Pizza Margherita, all you need is sauce, and some mozzarella. Perhaps a drizzle of extra virgin olive oil and sprinkle of oregano (we grow our own in summer) or basil. We love olives (buy pitted and just squish them in your fingers and drop them on), smoked or Virginia ham, prosciutto, leftover bacon from Sunday breakfast, paper thin (cut on my mandoline) slices of dry sausage, caramelized onions, fresh heirloom tomatoes, smoked turkey, home made meatballs... whatever suits your taste. After Thanksgiving we use leftovers for a Thanksgiving Day Pizza--turkey, stuffing, cheesy mashed potatoes, fresh cranberries and for the sauce, turkey gravy. Lisa likes a white pizza--easy to do (without red sauce), smeared with ricotta cheese (she makes it fresh lately) and drizzled with olive oil finished with grated Romano and oregano. A Note Here: Don't let your topped off pizza sit too long on the peel. Get it in the oven ASAP or it could stick to your parchment or workbench, or the wet ingredients might soak too far into the dough. After you've topped it off, slide it into your oven onto the stone. A quick thrust forward onto the stone and then pull back slowly on your peel--this should land the pizza perfectly. If your oven is around 510-515 degrees a pizza should cook between 3 and 5 minutes. Use a metal spatula to check under your crust to make sure it's darkened. After the timer goes off, use the peel to slide under the parchment and pizza, pull it out, and use a pizza wheel to cut your slices. Or if you have made thin crust individual pizzas, try eating it Napoletano style... fold it in half or quarters and eat it like a sandwich. The world is your pizza, when you just stop and think about it... --Jerry Finzi, aka Pizza Babbo P.S. If you like this post, please SHARE it on social media and how about taking out SURVEY? Grazie!  We've been making pizza quite a while now in our house.  Everything you see I owe to pasta. – Sophia Loren
 You think this looks really great on you.
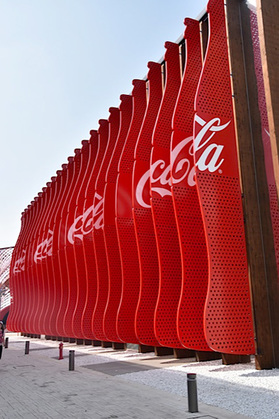
A judge from Guinness World Records has certified a 400-foot-long baguette baked at the Milan Expo 2015 World's Fair as the longest in the world. Some bakers worked nearly seven hours on Sunday to bake the French bread. (Oct. 18) Watch the video... --from BridgePugliaUSA.it In 80 shots, Madeleine Gehrig's camera “tells” the story of the art works, the scenes, the details and the people one can come across at EXPO in Milan... CLICK HERE to see all of her wonderful photos. (She caputured the beauty of the Milan Expo's art, architecture, jewelry and much more. I highly recommend taking a look at her photos. --J. Finzi) 
 This is no longer a football...  But this is... Una Pallone da Calcio 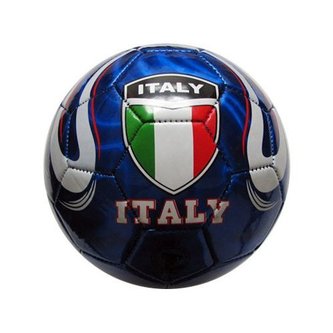 A report from BridgePugliaUSA, a fantastic website newsletter that showcases Apulian livestyle, its artistic and cultural heritage, food, crafts, wine and gastronomy. 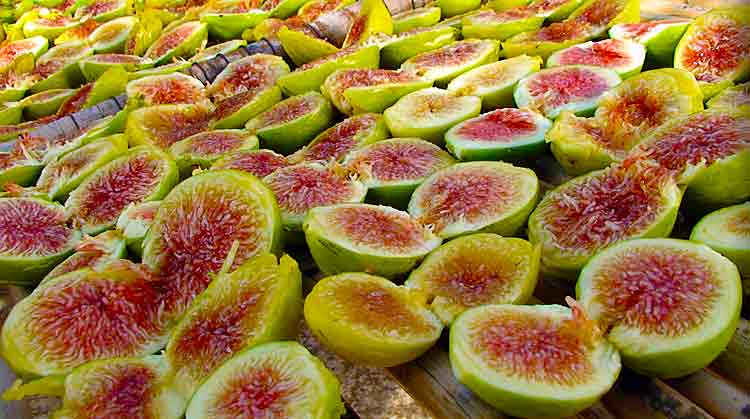 Drying figs in the Slalento Figs have always represented one of the most important crops on the Apulian agricultural scene; of all the woody species that have sustained the regional agricultural economy, it could be said that they rank third in importance below the olive tree and the vine. Theirs is certainly a longstanding presence; the immigration of oriental peoples, before the Roman domination, which took place in these lands, and the commercial relationships with the places of origin of those peoples, may have enabled the importation of plants, and amongst these, also of diverse varieties of figs. As Ferdinando Vallese affirms: “Even when they hadn’t transported plants, the dried figs were certainly one of easiest and the most popular long-life foods in the voyages undertaken by the ancient peoples that populated the Mediterranean basin”. ... (click HERE to read the entire article)
 The setting: a small and friendly supermarket in a old sleepy town in Italy
The characters: Serena and the staff at supermarket Il giovane cassiere, all’entrata del supermercato: “Buongiorno!” The young cashier, at the supermarket entrance: “Good morning!” Serena: “Buongiorno!” Poi, parlando tra sé e sé: “Allora, vediamo la lista della spesa: pere, uva, funghi…” Serena: “Good morning!” Then, talking to herself: “Right, let’s have a look at the shopping list: pears, grapes, mushrooms…”..... Click for More... 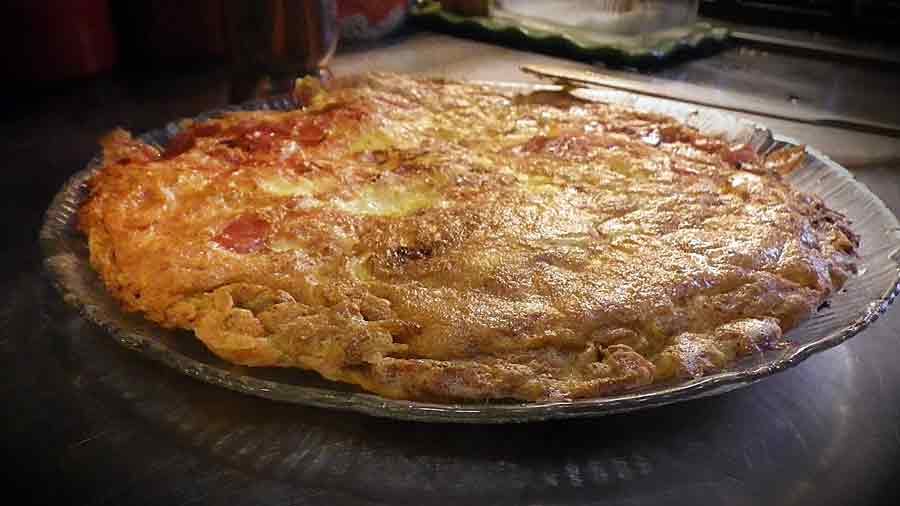 My Dad worked hard when I was a kid. He was a fruit and deli man his whole life. He started with his brother and his "three legged horse" and cart (as he called his lame horse) selling fruit and vegetables on the docks of Hoboken, New Jersey--mostly to the sailors coming off the ships from all over the world. I inherited his multi-national coin collection made up of coins he collected from those days. He worked overtime--a lot. He also worked holiday mornings (Thanksgiving, Easter.... even sometimes Christmas). For the most part, these were his deli jobs. He had one job for several years that had him on the night shift--as a fruit-veggie man. I'd remember him coming home to have some "dinner" in the morning right before I left school. He had little time left in the day for anything... But still he squeezed time in for me--to go fishing and crabbing on the Hudson, to show me how to plant in the garden, to go row boating in a local park, or to cook. Yes, Dad cooked--and he was a far better cook than my Mom (there, I said it) for the Holiday meals especially. He made the best roast beef, fist-sized meatballs, ,amazing roasted "Virginia" ham for Christmas, and a huge turkey for Thanksgiving. He was an expert at carving meats--after all, he was a Deli Man. But it was his simpler meals that I remember most.... the comfort food. One of these was his "Potatoes and Eggs". Simple, quick, tasty and belly filling. I'll be honest, I never knew that what Dad was making was called a frittata until I was a grown man. There's an Italian idiom used when someone has screwed something up badly... “hai fatto una frittata". It literally means "you've made an omelet", but it refers to how a frittata can quickly become a mess. I consider it a tribute to the casualness of this dish. You'll rarely find a frittata on a restaurant's menu in Italy simply because it's a dish made by people in their homes. You'll rarely make a frittata perfectly and the same each time. Some come out wonderfully intact and can be sliced like a cake, while others will need to be scooped up out of the pan and piled rustic style on the plate. No matter, it's still delicious comfort food. In our house, we have "Potatoes and Eggs" every so often, mostly for a lazy Saturday lunch, although it can be an excellent colazione (breakfast). What I love about it is how fast you can throw it all together (especially if you use canned New Potatoes and don't have to boil fresh potatoes)... and how I can change it up a bit each time, depending on what leftovers I have handy. Here's a basic recipe, sticking closely to how my Dad would make it... 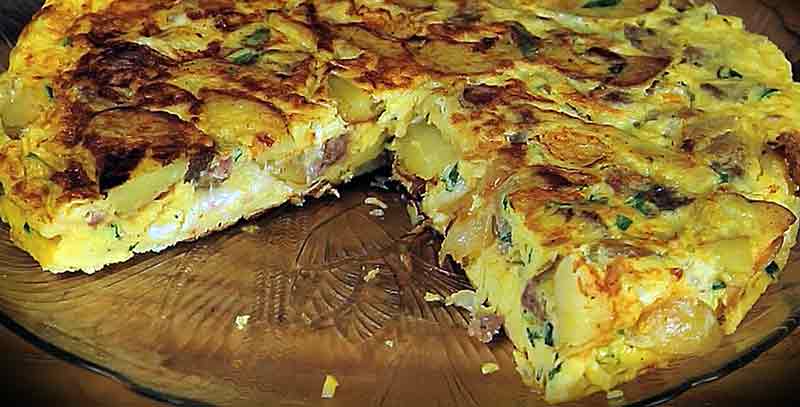 Ingredients (9-10" frittata for 2-3 people... OK, maybe for 4 if you eat like birds. You need a 9-10" non stick fry pan.) The Basic Recipe: 4 eggs 1 can of "New Potatoes" (Del Monte has good quality potatoes, diced, sliced or whole) 2 tablespoons of butter (for frying) 2 tablespoons of light olive oil (for frying) 1 small onion, finely diced 2 tablespoons Parmesan cheese, grated (and more for topping off the frittata) salt and pepper to taste Optional Ingredients: small bell pepper, diced or julienned caramelized onions (you would need to prep these beforehand) diced ham, smoked bacon, prosciutto, pancetta or Guanciale, (fried beforehand) cherry tomatoes (halved) or sliced wedges of Campari style tomatoes roughly grated fontina, mozzarella or caciocavallo cheese black pitted olives Preheat your oven to 425 F.
You can serve a slice (or wedge) of your Potatoes and Eggs with sliced, toasted ciabatta or with full blown garlic bread. We've made a dinner out of this by making a tomato and chopped black olive bruschetta to serve along with the frittata. It's also nice when paired with a small bowl of soup. We tend to have it by itself with a dollop of a simple marinara sauce (OK... or the way my Dad would serve it--with Ketchup). Top it off with marinara and more grated Parmesan cheese. If you like, add a small glass of Chianti or even a bottle of beer. It's comfort food. It's fast food for the Italian kitchen. It's just damned good. Mangia bene! --Jerry Finzi Copyright 2015, Jerry Finzi - All Rights Reserved
 Marcus Aurelius (121-180 AD) “Time is like a river made up of the events which happen, and a violent stream; for as soon as a thing has been seen, it is carried away, and another comes in its place, and this will be carried away too.” And here's a video by the Alan Parsons Project that goes along with this sentiment... Godere! --Jerry Finzi 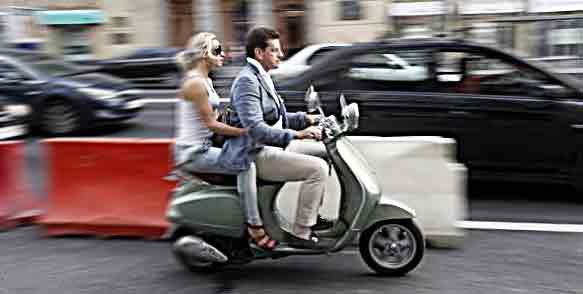 You see this as a perfectly acceptable form of transportation.
 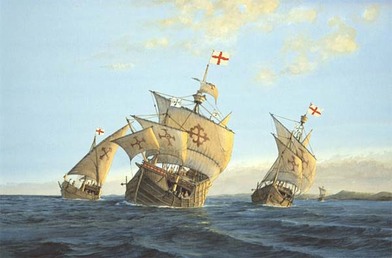 When we decided to travel to Italy, we knew it was there. Columbus had no idea that the Americas existed, but he knew--or at least, thought--that the Orient that Marco Polo had previously explored was there. He was looking for a shortcut to replace the long arduous journey through the Silk Trade Route to the Orient. It's been 523 years since he "sailed the ocean blue, in fourteen hundred and ninety-two" as we learned in school. Most people today think that people in the 15th century thought the Earth was flat, but in fact from the time of Aristotle it was well understood that our planet was a sphere. The ancient Greek mathematician Ptolemy proved that the Earth was a sphere and within a few hundred years of his death, other mathematicians and ancient astronomers even calculated the size of the Earth's circumference to near precision. Columbus and his advisers were confused by the various methods of measurement used in the ancient calculations and got the size wrong... leading to his belief that the Orient was closer than it really was--in a westward direction across the sea. He had no idea that there was a couple of continents in between Europe and China. Cristoforo was not born on born October 31, 1451... no one really knows the exact place or date of his birth. One respected historian puts his birth somewhere between August and October, 1451 in Genoa. Some other theories put the range of his birth year from 1436 to 1455! With such extremes, Columbus could have started out on his Voyage to the New World as young as 37 or as old as 56. In a time when most people died early from disease, Columbus living into his seventies is unlikely. This is one reason why most historians consider 1551 to be his birth date. Where he was born is also debated. Genoa is considered to be where he was born, but exactly what town? His father, Domenico was a wool weaver who worked in Genoa and Savona. As many people in modern day Italy, he had a couple of of ways to make a living... his second was that of a cheese monger, with young Cristoforo working as his apprentice. His mother Susanna Fontanarossa also gave birth to other sons... Bartolomeo, Giovanni Pellegrino, and Giacomo, and a daughter, Bianchinetta. Bartolomeo worked in a cartography workshop in Lisbon--along with Cristoforo--for at least part of his life. Columbus as a young boy and man was in awe of the sea. He read everything he could about the sea and being a mariner. He eventually learned to sail himself on small vessels in and around Europe. He became fairly talented, especially at navigating and map-making at 25 he and his brother worked as cartographers in Lisbon, Portugal. In 1480s he sailed and explored Africa and learned many things that would help him on his later explorations. For instance, he learned how various large seeds and plants would was up on the shores of Spain and Africa--species that were unknown to botanists. They had to be coming from somewhere, he thought. In the 1480s he presented his ideas to King John of Portugal. Just after this, Bartolomeu Dias returned to Portugal with after his successful rounding of the southern tip of Africa which proved there was a new eastern sea route to the Orient. King John was no longer interested in Columbus. He rejected his proposal. Next was a presentation to King Ferdinand and Queen Isabella or Spain. At the time he offered his plan, the Spanish Inquisition was in full swing... he had better not offend anyone, or else. They didn't accept right away, but then realized that if Columbus' plan worked, they would have a chance to get ahead of their successful upstart neighbor, Portugal. He negotiated for grand titles along with 10% of the profits of the venture (which the Spanish King and Queen reneged on after his voyage, leading to years of law suits against the Crown). Columbus's Voyages were very arduous and his first excursion with the Nina, the Pinta and the Santa Maria had its own troubles. He left Spain on August 3, 1492 and sailed west. He convinced his crew that enormous wealth awaited them, but as they passed the Canary Islands all they found was a dead calm--no wind. His crew started to second think his plan. But by September 3rd the winds started to push eastward on a calm sea. Unknowingly, he had just discovered the Southern Trade Winds that would carry westward bound ships for hundreds of years into the future. The passage dragged on and the crew became restless and thought of mutiny. Columbus kept two sets of ship logs--one to appease the crew with daily reports of traveling greater distances than they had actually gone. The second log recorded the true, slower measurements. By October 10th the crew was about to explode... but luckily (for Cristoforo) land was sighted the very next day. He didn't get rich--at least not right away. He didn't find the Orient. He didn't find gold and pearls. But he did stumble onto a New World. He's not a perfect man by any means. He also enslaved thousands of the native people, bringing back hundreds to Spain (with 200 dying on the return trip), and introduced European diseases to the indigenous people his army of men came in contact with. The native population of Greater Antilles and Bahamas dropped from one million to around 500 people within 50 years of contact with Europeans. He disobeyed the Queen about her desire not to take slaves and was thrown into chains--for a while. In the end, he made four Voyages. Their immediate success can be debated, but the contribution toward bridging the New World with the Old cannot be questioned. On 20 May 1506, around the age of 54, Columbus died in Valladolid, Spain. He never set foot in Italy again, but is still thought of as one of Italy's most successful sons. An interesting side note is that none of the portraits we know of Columbus are done from life. All are painted after 1519, years after his death. Still, there are statues, stamps and money with his likeness on them... and even an asteroid that bears his name.  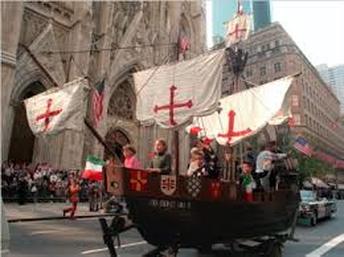 Then there are the places bearing his name: District of Columbia, Columbia University and the Columbia River. There are Columbuses in Ohio, Maryland, Missouri, South Carolina, Indiana, Georgia, Nebraska, Texas, Montana, Mississippi and Wisconsin. Of course there is the country in South America, too. And of course there are the parades in his Honor, one of the largest being held in New York City each year.
And that brings us to Columbus Day. The first state to officially observe Columbus Day was Colorado in 1906. Angelo Noce, an Italian immigrant who was the founder of Colorado's first Italian newspaper, La Stella. Noce, and fellow Italian-American, Siro Mangini both worked with Colorado's first Hispanic state Sen. Casimiro Barela, to sponsor a bill proposing a Columbus Day holiday. Mangini owned a tavern named Christopher Columbus Hall, thinking that he was the only Italian Americans would not throw rocks at. Within five years of Colorado's creating the holiday, 14 other states were also celebrating Columbus Day. It took until 1934 for Columbus Day to become a federal holiday during Franklin Roosevelt's administration. The Knights of Columbus was the driving force in the creation of the holiday. In 1970 Congress declared the holiday would be on the second Monday of October. Although it's a national holiday with banks, post offices and Wall Street closing, it's still not a holiday in some states. As a kid I always wondered why "our" Italian holiday didn't mean a day off for us. Still, if we don't celebrate the man himself, we should all celebrate the bridging of Europe and the New World. If it wasn't for the years of discovery, we all wouldn't be here... --Jerry Finzi If you enjoyed this post, please share it with your friends. Grazie.  From Così Italiano
October 10, 2015 By Eligio Bucciarelli La frittata is the Italian version of an omelet, and the word “frittata” derives from the Italian verb “friggere” meaning “to fry.” As with any omelet, eggs are the main ingredient to which various other ingredients such as meats, vegetables and cheeses are added. There are two main differences between a classic Italian frittata and a classic French omelet. First, a frittata is flat with the ingredients integrated with the eggs, whereas an omelet is folded semi-circular or rolled with the ingredients in the middle. Second, an omelet is always served hot; whereas a frittata can be enjoyed hot, at room temperature or cold. (CLICK for more...) |
Categories
All
Archive
June 2024
|


 RSS Feed