|
I just realized that I let our blog's anniversary pass without so much of a mention. Sorry. Actually, our very first blog post was on July 31, 2014... way back when we started planning our Grand Voyage to Italy. Our first post was Bringing Dad with us to Italy: A Traveling Homage. For a first post, it's wasn't too bad. Hey, anything that mentions my Dad, Saverio, can never be bad anyway. Our actual Voyage began on October 1st, 2014... just over a year ago. Writing this post has kept all the memories alive, and helped keep La Bella Italia alive in our daily lives. I hope Grand Voyage Italy has also helped you plan a trip to Italy, enjoy one of our recipes, learn some history, or just have a few laughs... all the while, keeping Italy alive in your own day to day life. I do want to thank the nearly 17,000 visitors we've had on our pages. You've read a combined total of almost 55,000 posts! Mille grazie a tutti. You humble us. Leave a comment and let us know how we've been doing this past year... Lucas, Lisa and Jerry Finzi
0 Comments
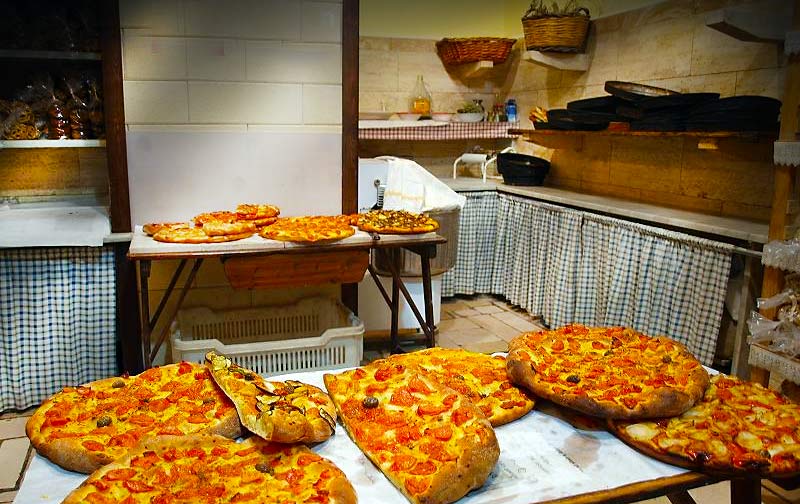
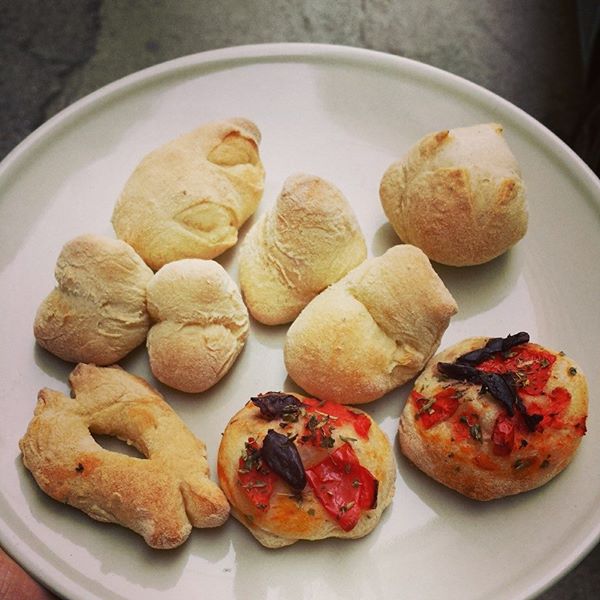
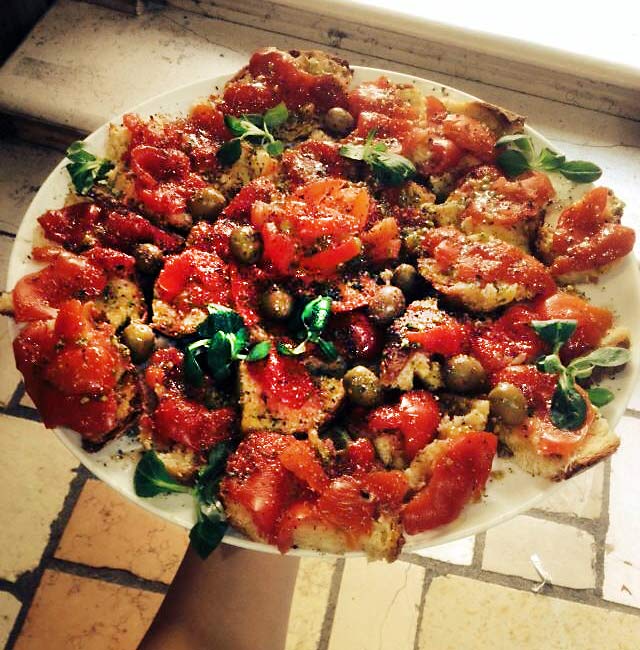
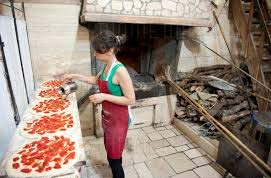
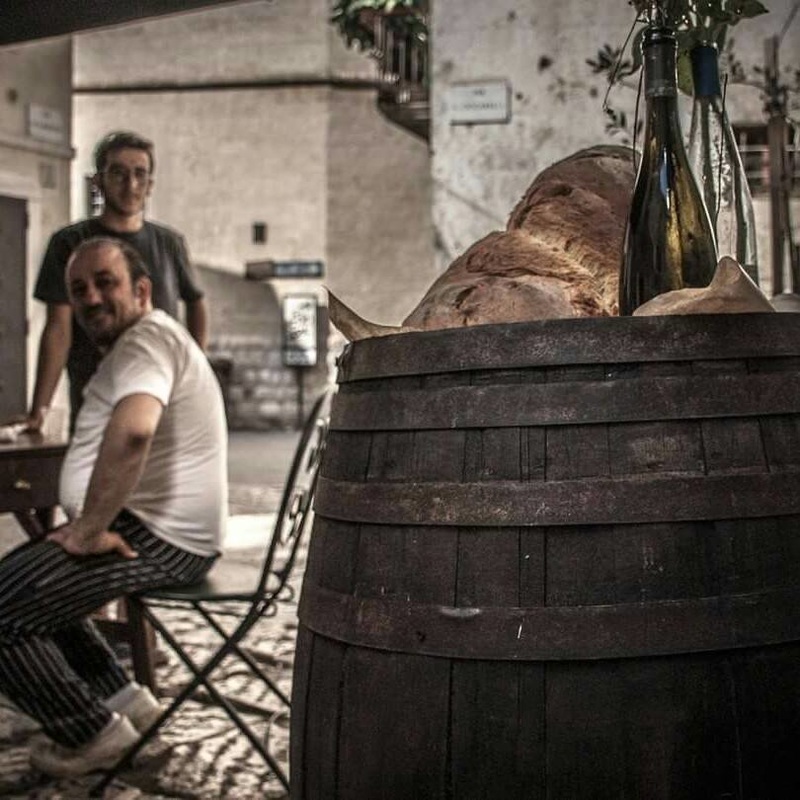
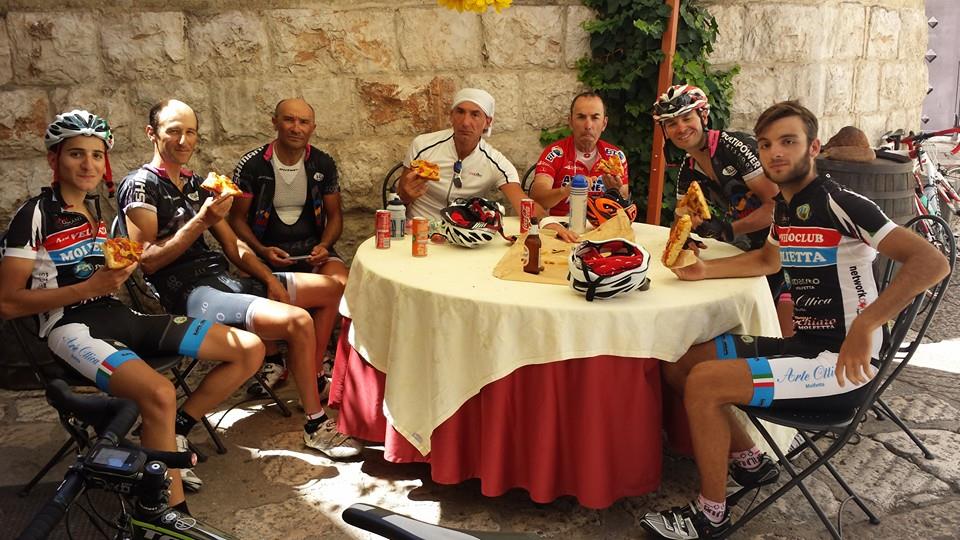
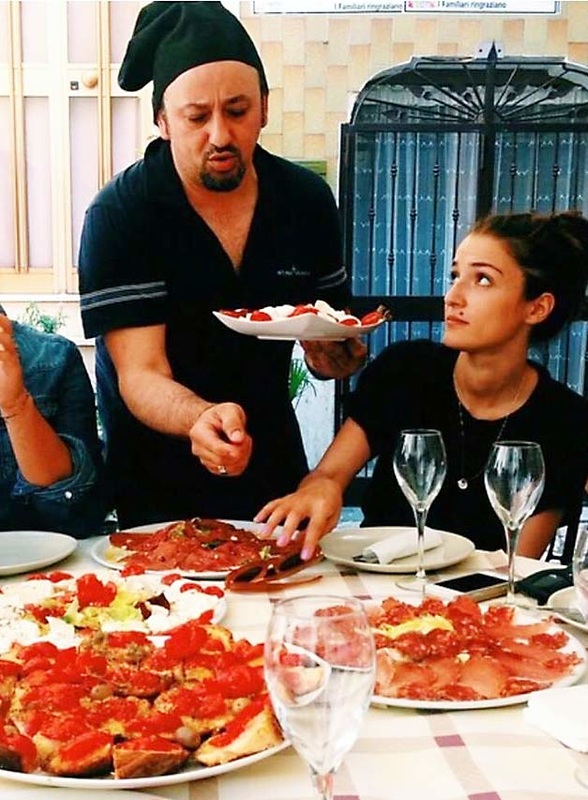
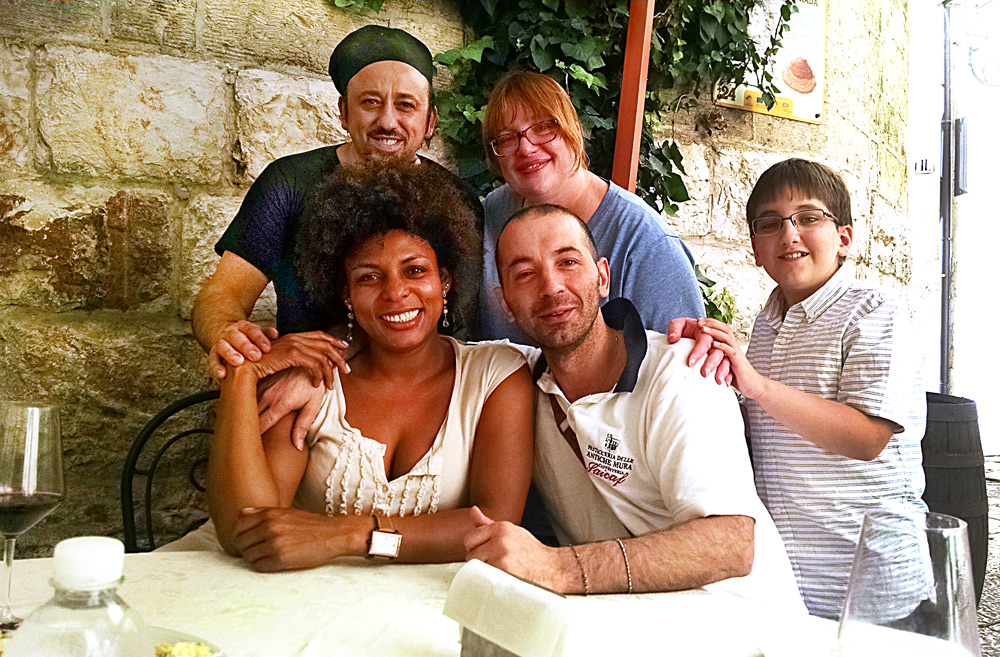
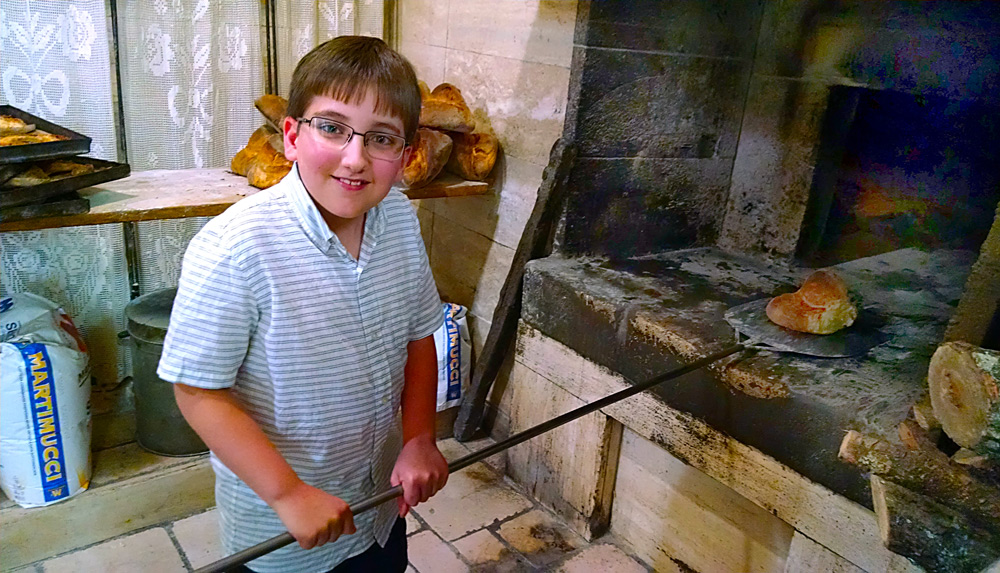
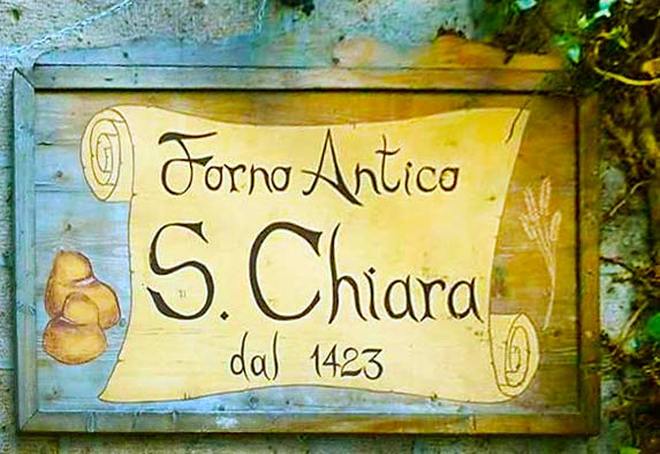 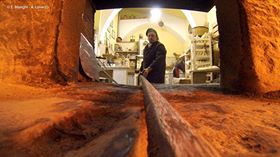 A bread's-eye view of Vito at the Forno A bread's-eye view of Vito at the Forno You will find Antico Forno Santa Chiara in the southern region of Puglia behind the walls of Altamura, where their world famous Altamura bread is made. In fact, Altamura bread can only be made in Altamura... it has D.O.P. designation and is under strict standards to be able to use the name "Altamura" bread. Vito Macella, is the owner, baker and a bit of pirate and showman. He loves to show off his historic forno (oven) that dates from 1423. His is one of of the first public ovens in Altamura, used for cooking meats, biscuits, pretzels and other Pugliese baked specialties, and of course, the famous Altamura Bread. A short walk inside the walls of the historic center and you'll come to the Forno. You can park your car on the Corso Vittorio Emanuale II just outside of the old arched porto where Via Madonna dei Martiri begins. Take a stroll three intersections until Via Corte D'Appello and then you'll see tiny Via Luca Martucci on your left. It's really like a very small piazza with the Forno Antico at the back left corner. You'll probably see a large round table outside with an umbrella over it. There might be people sitting, chatting and eating. Sit with them and join in. When Vito comes out to greet you, tell him you would like una degustazione (a tasting) of whatever he feels like putting in front of you. Depending on what he baked that day, and what other local ingredients he had to create with, he might bring you a plate of antipasto, focaccia, squares of pizza, olives, tomatoes, tiny bocconcin (mozzarella balls), sliced caciocavallo cheese, prosciutto, lardo, or carpaccio--paper thin slices of raw veal marinated in red wine. Oh, of course, he'll always have some of his Altamura Bread for you to taste. We consider unexpected lunch we had at the Forno as one of the best we ate in all of Italy.  In this unassuming little piazza, you'll find the door in the back corner for the Forno Inside the doors of the Forno you can see Vito at work at his rustic oven. The stacks of wood are what he uses--early each morning--to fire up this massive cavern. It takes lots of hard work and many hours to get the mass of stone inside the oven up to temperature. The bread of Altamura is made according to traditional methods and with high quality, local ingredients, the two most important (as Vito told me) being the water and the local Durham flour. Altamura bread was the the first product in Europe to bear the D.O.P. logo in the category "Bakery and baked goods". No wonder--it's such a special bread. The loaves are quite large with a shape like a floppy chef's hat or a sort of fat beret. It is airy and full of bubbles inside with a dark brown crust nearly 1/4 inch thick. Unlike Tuscan bread, they use salt in Altamura Bread, so there's loads of flavor. One more thing: The bread can stay fresh for weeks... some say for a month! A loaf we bought Vito's bakery lasted up for several days all the way back to Rome. 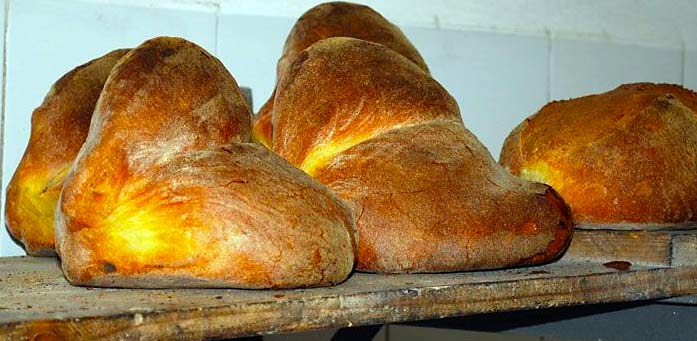 But again, there's more than just the bread to experience here. Vito offers the biggest dose of Southern Italian hospitality that anyone can find. He is charming, roguish, funny and inviting. You'll meet his kids and sit with strangers talking many languages, but somehow you will all be friends in the end. By all means, buy some bread and other treats here, but just soak in the atmosphere, the personalities and the wine.
Don't pass by Altamura. You won't be disappointed. --Jerry Finzi If you enjoyed this post, please, please, please, tell all your friends about us. Grazie. 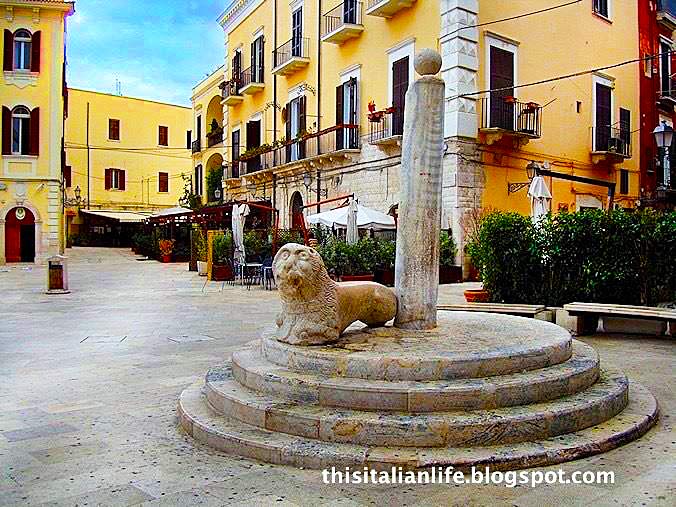 BARI, Italy - This is Bari’s Column of Justice (Colonna della Giustizia). It is next to the city’s Palace of Justice in Piazza Mercantile. The white marble column, which was put up in 1546, is topped with a ball and has a stone lion crouching at the base. On his chest are the words “Guardian of Justice.” The column was used to punish loan sharks, slackers who didn’t pay their bills and other non-violent offenders. The condemned had to sit on the lion with their bare backsides up in the air and their hands tied to the column. They were left there for a day or two while those they had offended, along with the townsfolk, circled around them and called them names.
--Phyllis Macchioni, This Italian Life  ...You've just decided to trade in your pickup truck for a Fiat 500.
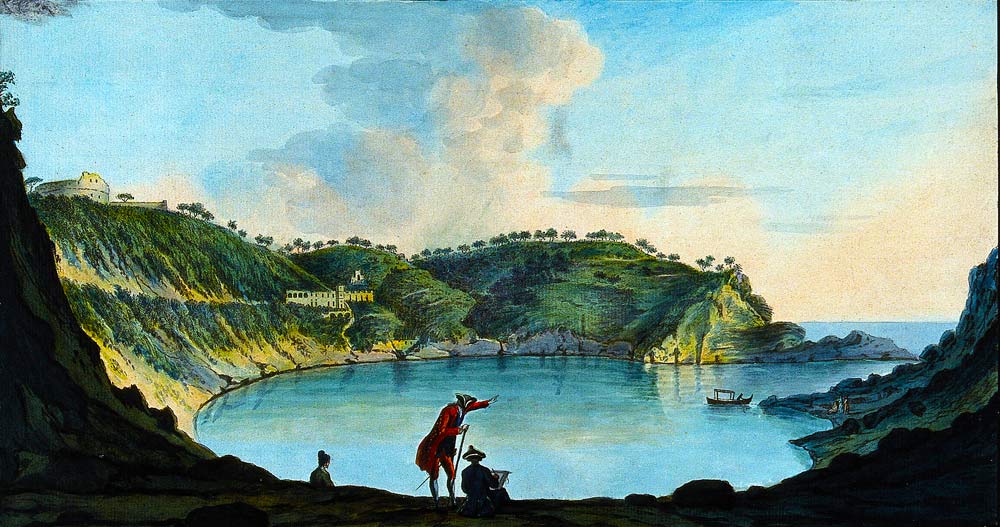  In the time of the Romans, politician and military leader Lucius Licinius Lucullus built a villa on the collapsed and flooded island volcano of Nisida. Another general, Marcus Iunius Brutus (of et tu Brute? fame) also built a villa there for holidays. You might say this was the Cape David of the day where the military leaders went to vacation, to rest, recharge and ponder their next battle while they enjoyed the comfort and pleasures of this island in the sea. Brutus's wife Porcia, committed suicide sometime after learning of Brutus' plan to assassinate Julius Caesar. Some historians think Brutus and Cassius hatched their plan here on Nisida. Some of the archaeological remains on Nisida are supposedly of Brutus' villa. Since then, there have been monasteries, a castle and even a prison on the island. Artists and noblemen would flock to it and even Cervantes was inspired by its mystery and charm. Today there is a rehabilitation center on the island for young boys at risk where they learn trades such as carpentry, ceramics, glass-making and other skills. The NATO Maritime Command also has it's headquarters on the island. 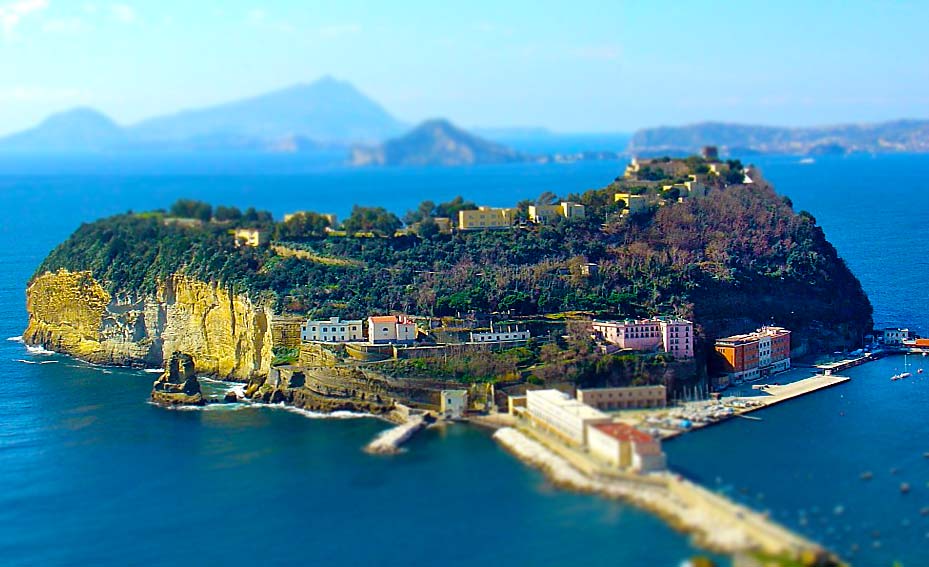 Nisida is a volcanic island near Cape Posillipo southeast of Naples. The crescent shaped island is connected to the mainland by a stone bridge. Being a volcano, there is a flooded crater forming the bay of Porto Paone on the southwest side--a small cove, really. It's small--a bit more than a half mile across and juts out of the Tyrrhenian Sea to a height of 350 feet. You can park and walk to the island on the stone bridge or go by boat--renting one at the nearby marina. There is also a large public beach on the mainland facing Nisida and a few restaurants. As with many parts of Italy, some of the area is covered in graffiti and looks worse for wear, but then again, this is Naples. If you walk to the island, you can hike in the non-restricted areas and take in the views of Naples and the surrounding bay and islands. The pebbled beach is surrounded by clean crystal clear water. You can relax in a private shady spot in the woods that cover the island nearly down to the beach. If you sail, you can rent small sailboats and cruise the waters around the island, but if you go by boat, be sure to check out the arch and the grottoes cut into the far side of the island. And, for a little side trip to this Naples side trip... Check out the views on the mainland from Parco Virgiliano, and urban park overlooking the bay and Nisida from it's perch 500 feet on top of another volcanic bluff. The views are staggering. --Jerry Finzi If you enjoyed this post, tell your friends about us. Grazie! 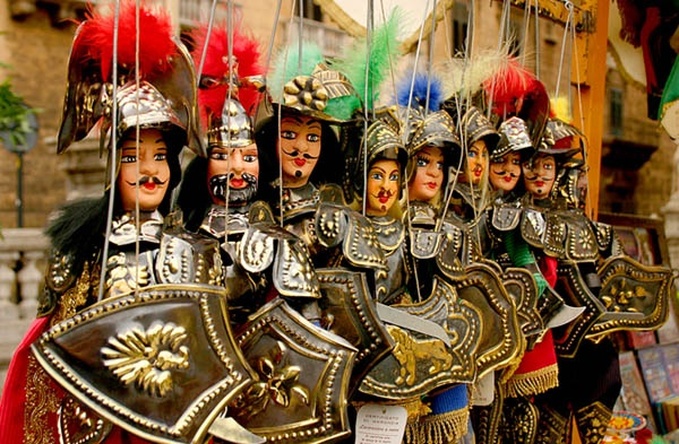 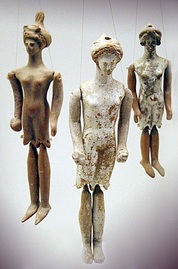 Ancient Greek terracotta marionettes Ancient Greek terracotta marionettes Firstly, a marionetta is a puppet that is manipulated into motion by the use of strings, rods or wires. Marionettes have been found as early as 2000 BC in Egypt, and archaeologists have found terracotta dolls with articulated joints in the graves of children. Aristotle and Plato both wrote about puppetry hundreds of years before the birth of Christ. Some experts claim that the Iliad and the Odyssey would have been performed using marionettes, especially to teach children about the Gods and the battles of good over evil. Italy, being part of the Greek culture before becoming the Roman Empire, was really the birthplace of the marionette. Marionette performances were not just for children, however. They were morality plays for the mostly illiterate masses. Political themed satires would also be portrayed in marionette performances--throwing insults or lewd behavior by marionettes was easier to take from a doll than if delivered by a human performer. Perhaps people made decisions on political matters by watching marionette shows, the same way peoples' political views can be shaped by watching the Daily Show today. In Greece and Rome, clay and ivory dolls dated from 500 BC had articulated arms and legs, with an iron rod extending from the top of their heads. The rod was used to manipulate the doll from above, the same method used in classical Sicilian puppetry. In Sicily, romantic poems were performed in traditional puppet theaters with hand-made marionettes of wood, an art form called L'Opera dei Pupi (Opera of the puppets). Both puppetry and L'Opera dei Pupi and the Sicilian tradition of Cantastori (singers of tales) are rooted in the troubadour tradition in Sicily during the reign of Frederick II, Holy Roman Emperor, in the first half of the 13th century. Still today, you can see this form of puppetry in the puppet theaters of Palermo. The marionettes, which take the form of knights in armor, sword and shield, told their stories and spread throughout Sicily. The shows depicted their amazing feats in small theaters or in the piazza of towns. There were tales of war, rebellion, boasting chivalry. The knights defended their religion, a beloved woman or their lords. They always fought on the side of Right. 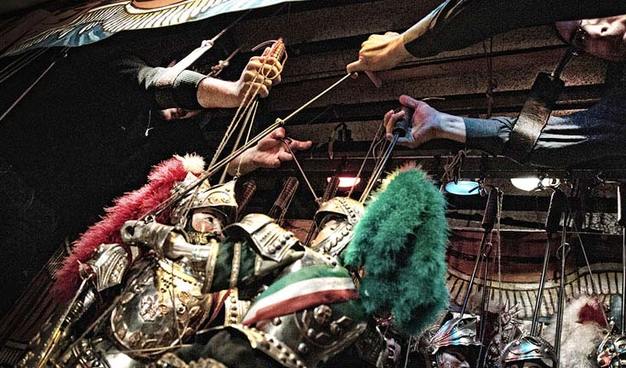 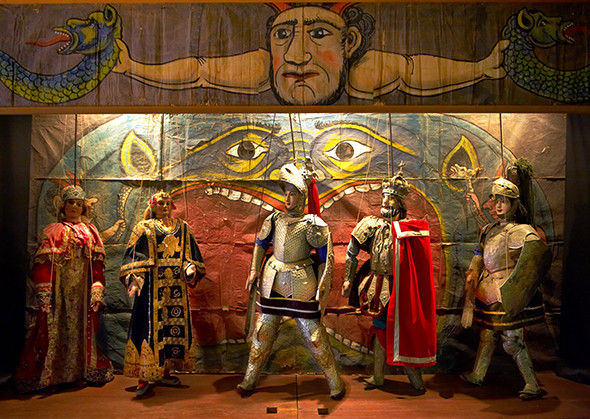 The puppets themselves are made of a variety of materials and can be surprisingly heavy--from 25 to 75 pounds! Wood was primarily used for the heads, torso and limbs. Metal is used for the joints between legs and torso. Long, thin rods support the puppet and to move the right arm (holding the sword) while the left holds the shield. The armor is beautifully ornate copper or tin with ornamental designs distinguishing the different characters. Sicilian puppets are operated from above close to the backdrop of the stage. During battle scenes, both puppets and puppeteers often need to run the entire 20 foot length of the stage. Puppeteers obviously need to be in great physical shape to perform these shows. And historically, puppeteers were not only responsible for the performances, voices and acting, but also built the puppets and props and painted backdrops used in the shows. In the 17th century, not long after they had become wildly popular in Italy, marionette performances spread throughout Europe and to England, where Italian puppeteers would exhibit their performances. Marionette were elevated into high art in Czechoslovakia and Germany, where still today they perform full blown operas. And in Sicily, you can still see the "rod" type of marionette show performed. Taking in a marionette show is is a definite must-do for a visit to Sicily. Here are a couple of links... 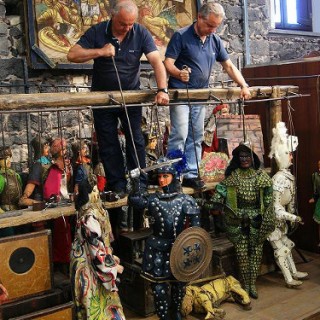 Piccolo Teatro Dei Pupi in Siracusa, Sicily Teatro dei Pupi Fratelli Napoli --Jerry Finzi If you enjoyed this post, please share it all over the World Wide Web and other planets too. Grazie. 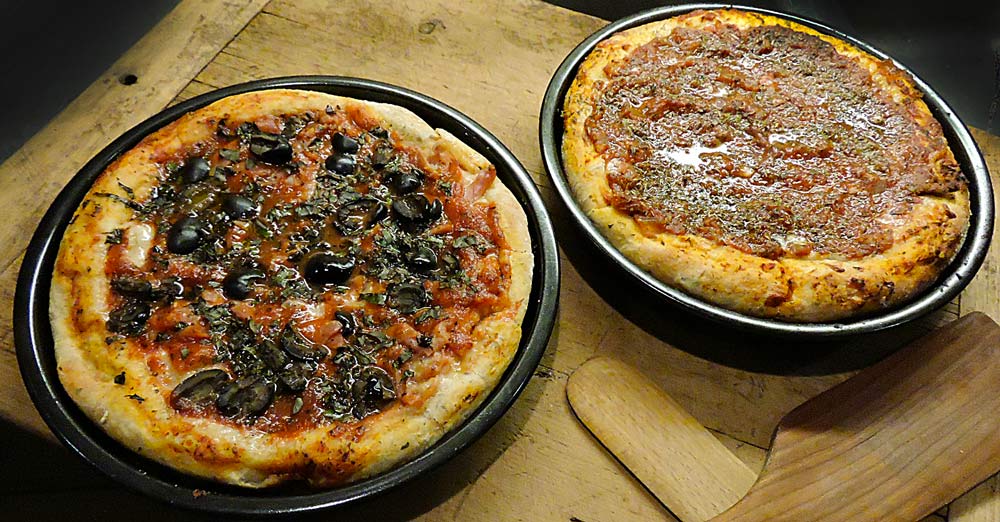 Fresh out of my oven...  Click for a store about Goldberg's Pizza Click for a store about Goldberg's Pizza The first time I ever ate a deep dish pizza, I didn't realize I was eating a "Chicago style" pizza. In Manhattan in the seventies, there was a pizzeria with an unexpected name... Goldberg's Pizzeria. The late, great Larry Goldberg actually had three locations in Manhattan. One was down on 20th and Third Avenue, near my studio. Sure, Larry offered his famous--or infamous--"Goldilox" pizza featuring lox, but most of their offerings were very Italian. Some say that Larry bribed an employee at Uno's Pizzeria in Chicago (Larry's hometown) for their recipe, but I've since eaten Uno's pizza and it's nothing like I remember Goldberg's was. I used to go to Goldberg's often to enjoy deep dish pizzas delivered to your high back booth table--lots of privacy for dates when I'd order their heart shaped pizza to make an impression. Larry's pizza's were thick, sweet and cheesy. While the crust was thick and steamy inside, the bottom and edge of the crust were nicely browned and there was always tons of fillings on top. He had a secret ingredient that he took to his grave (rye flour or corn flour in the crust?) Their meatball topping was amazing. The SMOG pizza had Sausage, Mushrooms, Onions and Garlic (s-m-o-g)--get it? The other thing that made Goldberg's so special was their sauce. It was sweet with a hint of spice. Perfetto! Or should I say, Mazoltov! Fast forward to the age of foodie channels on the boob tube. After I started seeing lots of food shows profiling Chicago deep dish pizzas I knew I had to try making my own. The curious thing about what I learned is, typically, the fillings are put on in an upside-down manner. The meat would go on first, then the cheese, and the the sauce on top. The pans are also crucial to making a successful Chicago style pizza. You need a 9-10" round pan that is black in color and about 2 inches high. Th black color is to ensure that the bottom of the crust is browned nicely at about the same time the toppings are ready. Here's my recipe for two 9 inch Windy City special pies: Ingredients Dough 2 cups King Arthur's Bread Flour 1 cup King Arthur's Whole Wheat Flour 1 tablespoon salt 1 tablespoon sugar 2 tablespoons extra virgin olive oil Yeast mixture 1 tablespoon dry active yeast 1-3/4 cups water (at 115 F) 1 tablespoon sugar for "proofing" the yeast Toppings: 1 cup of my Nostra Cucina Pizza Sauce Recipe 2 teaspoons dried basil 2 teaspoons dried oregano Extra virgin olive oil (for drizzling on top) cheese of your choice (fontina, provolone, mozzarella, etc.) for meat, try home made sliced meatballs, thin sliced prosciutto, smoked ham or diced Canadian bacon. 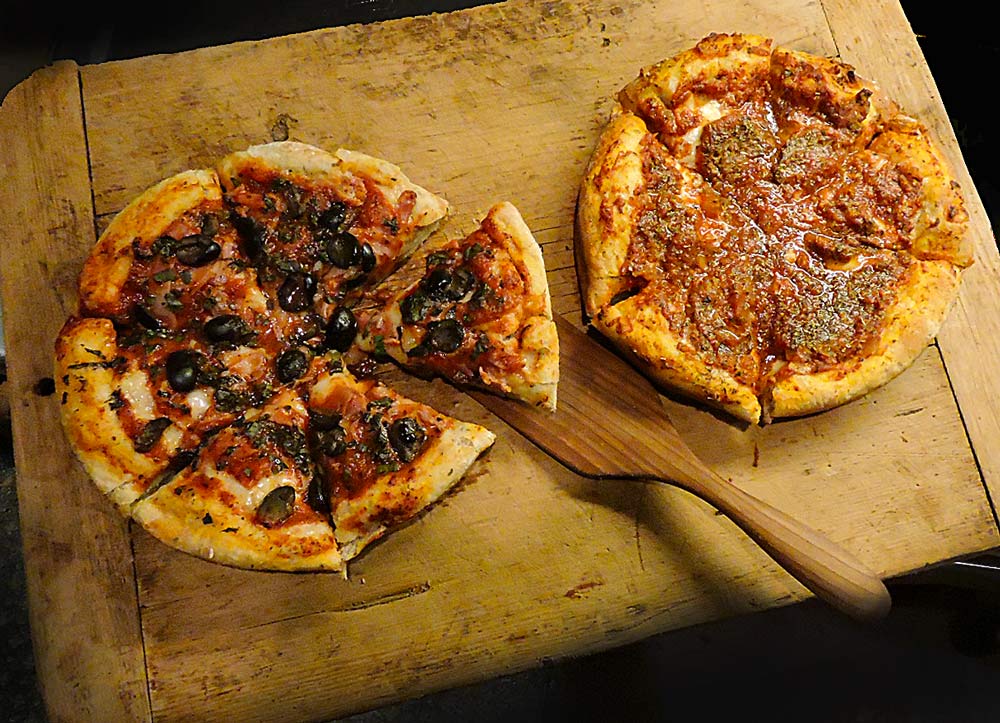 The one on the left is provolone, olives and proscuitto - The one on the right is fontina/mozzarella with meatballs You'll need two black, deep dish pizza pans (or cake pans) about 2 inches deep, like this one on Amazon.
After removing from the oven, let these pizzas rest for at least 5 minutes before trying to cut and serve. They tend to be very wet in the middle, depending on the amount and thickness of the toppings. To slice, I really recommend using a thin spatula or knife to help loosen the pizza from the pan, then place the pizzas on a cutting boat where you can cut pieces using a large chef's knife or a large mezzaluna (THIS is the one I use). Serve with a nice Primativo wine from Puglia. Buon Appetito! --Jerry Finzi If you enjoyed this recipe, please share it, post it to your favorite recipe site, but please tell them where the recipe came from. Ciao! Copyright 2015, Jerry Finzi - All rights reserved. 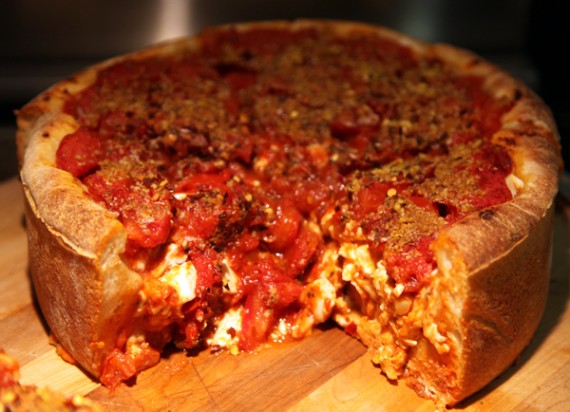 CHICAGO — This city takes its pizza seriously. And there's so much more to it than deep-dish. Here's a guide that will have you on your way to talking seriously about pizza in Chicago.... (Click to read more)
If you enjoyed this post, please share it on your favorite social media. Grazie. 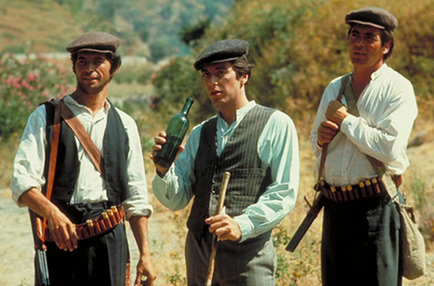 ...You find yourself fast-forwarding while watching Godfather II and only stop to watch the scenes filmed in Italy.
 The Trompia Valley is one of three main valleys in the province of Brescia in the Lombardy region with the Mella River winding through the territory for more than 20 miles. The presence of a large amount of raw materials, such as iron, made mining such a large part of this region's industry and success ever since Roman times... in fact, the Val Trompia was a center for weapons production throughout history.
The valley lies at the foot of the Brescia Alps and extends from the first mountain peaks to the north, to the lands of the Po Valley to the south. The valley can be explored along 70 miles of roads and hiking trails. The Valtrompia is a land rich in traditions, hunting, myths, legends and folk tales. There are also many sagre, fairs and festivals which take place throughout the year showcasing the most typical dishes of the local cuisine. It's well worth a visit for Voyagers wishing to discover the beauty and culture of the Italian Alps. --Jerry Finzi If you enjoyed this post,please share it... grazie! 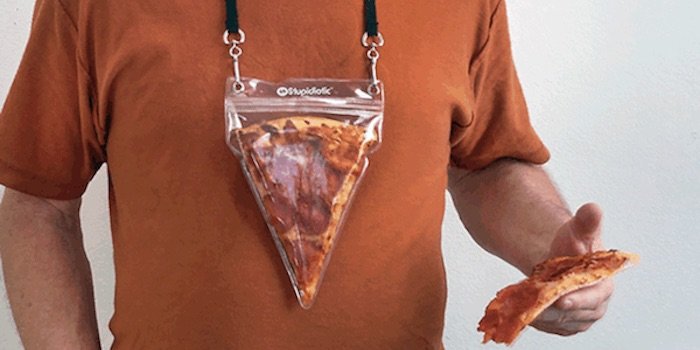 Ok... So maybe you think this idea is stupid and idiotic. Oh, wait a sec. That's right. That's (nearly) the name of the website that sells the Pizza Pouch--Stupidiotic.com. Here's the description:
"Just wearing this Pizza Pouch will instantly make you more popular and attractive. It’s a bold (and delicious) fashion statement. Portable pizza. The best invention since delivery." I can't tell you how many times I've been out running errands and I've noticed that I went way past lunchtime. If I had one of these I would look really cool, plus I could have just reached down and .... Ok. I can't do it. This IS a stupid idea. Idiotic, even. Still, it makes for a good laugh. Gotta go now. It's Saturday night and I'm in the middle of making deep dish Chicago style pizzas... Yea, that's right. Fresh made pizza. The way it should always be. Pizza should be eaten, not worn. (Unless you're like Lisa who always seems to wear a bit of hers, especially when she's wearing a white blouse... ) --Jerry Finzi If you enjoyed this post, have a slice with me and then SHARE it on your favorite social media site. Ciao!  ... You wake up in the morning and the first thing you smell isn't coffee brewing, but the smell of last night's marinara and meatballs still wafting through the house.
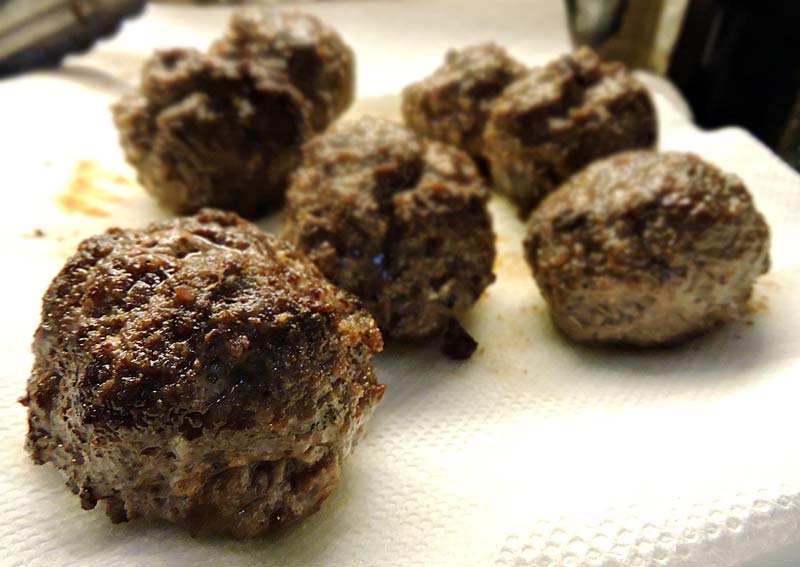
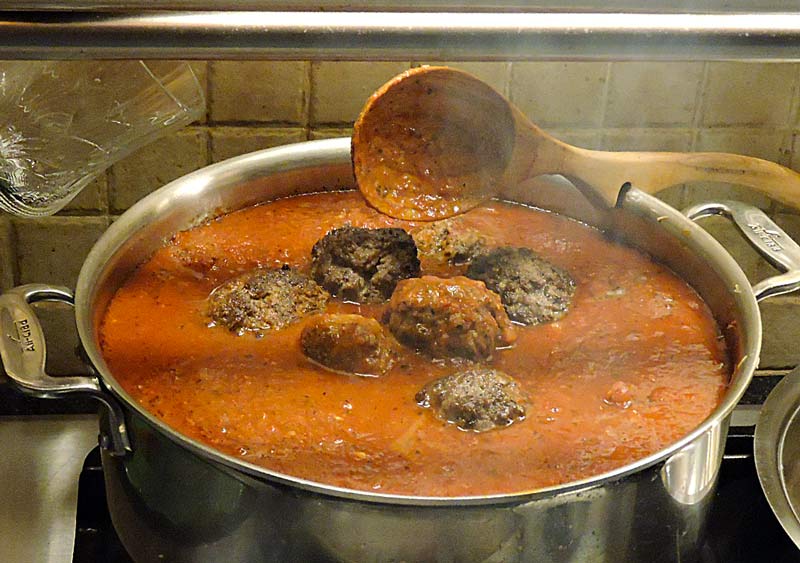
When it's hot in the summer we tend not to do the real heavy meals... especially not meatballs. But there's a brisk wind today, leaves are falling,the temperature's dropped into the fifties and people are putting pumpkins on their porches. It's time! So, I asked Lucas if he would help me and he did a bang-up job of measuring, sizing and shaping the polpette. We did them about 2-1/2" in diameter. (If I did my Dad's recipe for giant 4" meatballs, I'd need more time to bake them in the oven after browning). Here's our recipe... 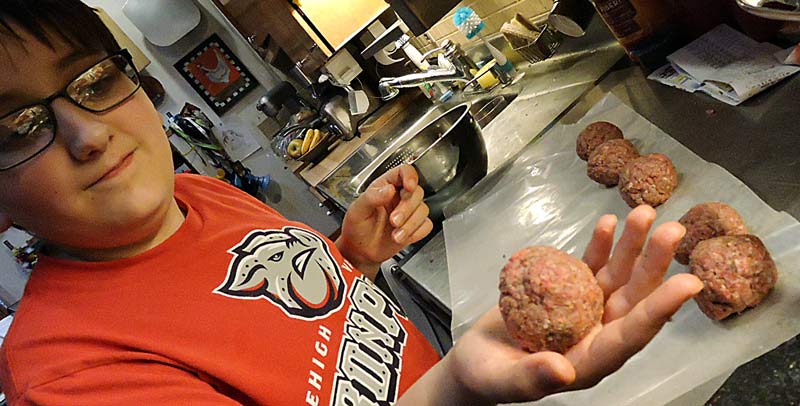 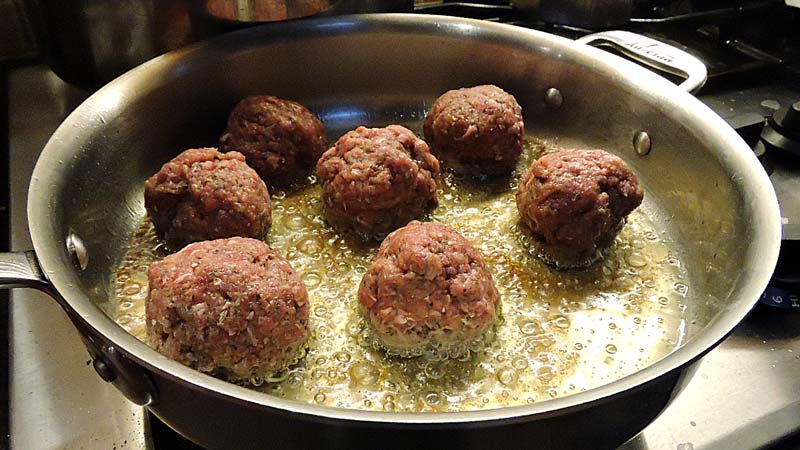 Ingredients 2-1/5 pounds of ground beef (80% chuck is my preference) 1-1/2 cups bread crumbs (if you have stale bread around, make your own) 2 large eggs 1/4 cup cold water 1 tablespoon salt 1 teaspoon freshly ground black pepper 1/2 teaspoon dried, ground sage 1 teaspoon garlic powder 2 tablespoons dried basil 1 tablespoon dried oregano 1/2 teaspoon red pepper flakes (ground in a spice grinder)
I do recommend adding them to a large pot of marinara (or "gravy", if you're also adding other meats). They will flavor the sauce and add a real meaty flavor... that's what chef's call umami (a meatly, savory taste), and what myMommy just called good.
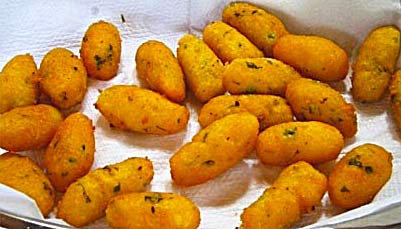
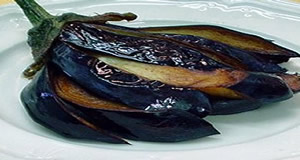
Enjoy! --Jerry Finzi If you enjoyed this recipe, leave a comment and tell me how it turned out. Oh yea... SHARE it. Ciao!  In Palermo, panellari are everywhere. Often no more than a window opening to a small kitchen with a few tables outside, these street food vendors offer simple fare: panelle... cici (chickpea) fritters made with chickpea flour, salt and water. A panino (sandwich) with panelle can be eaten for breakfast or lunch by businessmen, construction workers, students and children alike. Panelle have become so popular that you can find them pretty much anywhere in Italy. Other offerings at penellari include potato croquettes called crocché, made with mashed potatoes, fresh eggs, pepper, mint leaves and caciocavallo cheese. Then there's rascature, an example of the Sicilian idea of never letting anything going to waste. Basically, they are fritters made from the remains of the day--chickpea dough gone too dry to make regular panelle. Finally, you might find quaglie melanzane (sliced, fried eggplant)... "quaglie" means quail in Italian, a name given to the resemblance of this treat to a nesting quail because of it's interesting manner of preparation and presentation: A smallish eggplant is sliced into long strips, then deep fried, but it's stem is left as a handle.
Panelle (Chickpea Fritters) Recipe 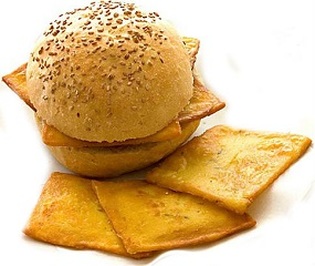 Ingredients
Line two 15-by-10-by-1-inch jelly roll pans with plastic wrap. Pour the water into a saucepan, then slowly whisk in the chickpea flour, a little at a time, to prevent lumps from forming. Whisk in the 2 tsp. salt and the pepper. Place over medium-low heat and bring to a simmer, stirring constantly. Reduce the heat to low and cook, stirring, until the mixture is very thick, about 5 minutes. Pour the batter into the prepared pans, dividing evenly. Using a rubber spatula dipped in water, quickly spread the batter to a thickness of about 1/4 inch. Let cool completely to set the mixture. (The recipe can be prepared up to this point, covered and refrigerated for up to 1 day before continuing.) Using a knife, cut the cooled sheets of batter into 3-by-2-inch strips, then peel the strips off the plastic wrap. In a large, deep fry pan over medium heat, pour in oil to a depth of 1/2 inch. Heat until the oil sizzles when a small piece of a strip is dropped into it. Carefully lower a few of the strips into the hot oil; do not crowd the pan. Fry, turning once, until golden brown and slightly puffed, 3 to 4 minutes. Using a slotted spoon, transfer the fritters to paper towels to drain. Keep warm while you fry the remaining pieces. Arrange the fritters on a warmed platter, season with salt and serve immediately. Serves 8 to 10. Adapted from Williams-Sonoma Savoring Series, Savoring Italy, by Michele Scicolone (Time-Life Books, 1999). Try Panelle in a sesame seed roll with some ricotta and honey, or as a finger food with a marinara dipping sauce. They are also great with a sprinkling of cheese and chopped parsley or mint. To be really authentic, serve them wrapped in plain paper along with with a granita, that icy Sicilian drink made of sugar and flavored water. Buon viaggio! --Jerry Finzi If you enjoyed this post, please leave a comment and don't forget to SHARE with your friends. Ciao! |
Categories
All
Archive
January 2021
|


 RSS Feed