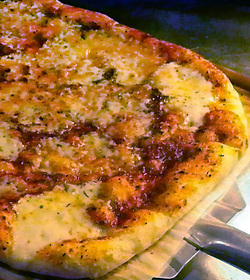
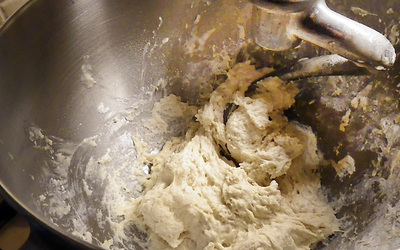
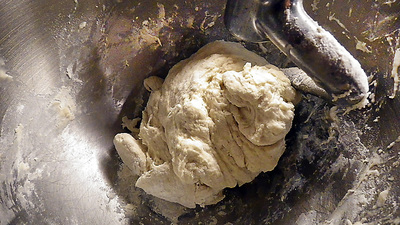
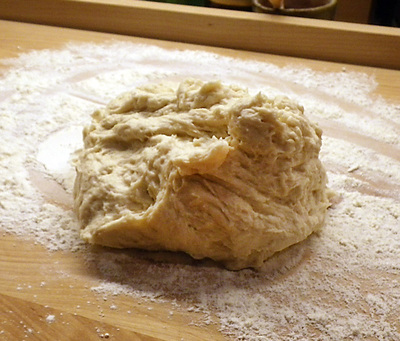
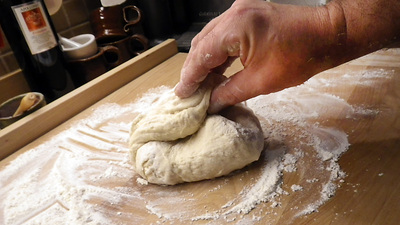
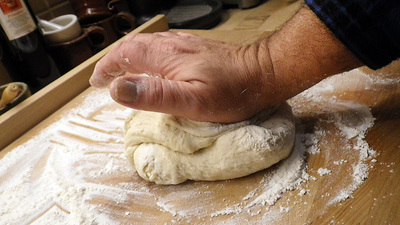
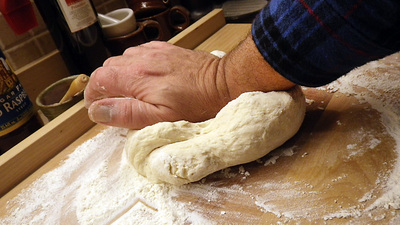
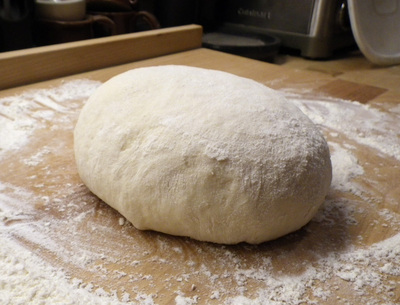
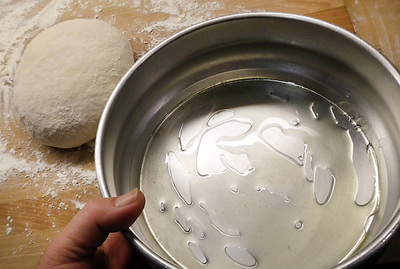
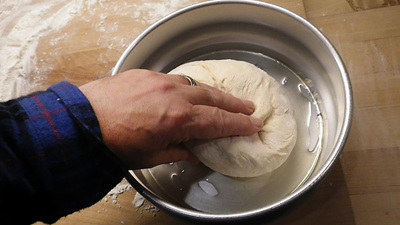
 When I starting making pizza about 15 years ago, I made a lot of terrible pies... doughy, pale-looking, tasteless, flat, oily, floppy, burnt--you name it. Lots of mistakes. But that's the part of life I love--learning from our mistakes and really fine-tuning a craft, talent or skill. You have to crawl before you walk or run. On guitar, one must pluck before you strum and then eventually really make some music. On my penny whistle, I squealed like a pig before I could play a tune that my wife wanted to sit and listen to. My love of carpentry started when I was 5 years old... with me holding the board while my father sawed it through. Now, I can built pretty much anything I set out to build. Learning to make truly great Pizzas requires the same attitude--learning from mistakes--and successes, as they add up. I would say that it took me about a year to learn how to make a really delizioso pizza--perhaps another couple of years until I could make pretty much any style of pizza... thin crust, thick foccacia, Chicago deep dish style, etc. You have to start somewhere, and with that simple fact, you need a simple dough that works. I am going to show you how to make my all-around, Basic Pizza Dough... What do I Need to Make Great Pizzas? First, a brief mention of tools (I go into more depth on gathering together a Pizza Tool Kit HERE). To make a good crust, you really need a rectangular pizza stone. Round stones are limited, but with a square shape (about 16" square) you can any different shape, whether of not they are placed directly on the stone or are baked in a pan. Although you can make pizzas in pans placed directly on an oven rack, using a stone affords shorter bake times and a crisper bottom crust. Even when using a pan, placing the metal on a stone speeds up the transfer of heat from the stone to the pan. On a rack, the air in the oven insulates most of the metal and slows down this transfer of heat from the rack to the pan. You should also pick up a pizza peel to prep your pizzas on and to remove pizzas from your oven. Although you might have seen a TV pizzaiolo on occasion loading up their dough rounds with toppings right on their floured, marble work surface, and then try to drag it onto a peel. Don't even try this. Your dough could stick, you could tear it and heavier toppings will go all over the place. So, shape your pizza on a wooden peel. I like using a metal one for removing pizzas from the oven, but a wooden one can also do double duty, if space is at a premium. When planning to bake pizzas made directly on the stone, I recommend using parchment paper on top of your peel. The order is: cover your wood peel with parchment, then shape the dough on top of the parchment, next, add the toppings. The parchment does two things: It helps slide your pizza onto the baking stone (even with heavily loaded pies); it helps keep your stone and oven clean. When I first started making pizzas, I used to use stone ground corn meal on the wooden peel. You can do this, but I've found that some always falls into the oven itself, gets burnt and makes a mess. Of course, you'll also need a pan or two. For serving, buy a flat, round 16" pizza serving pan. Do not use this type of pan to bake pizzas on, simply because they are usually silver and won't crisp a crust bottom that well. For baking, select a dark, non-stick rectangular pizza pan--a heavy one is better than a cheap thin pan. You will use this when making foccacia and "Sicilian", square slice pies. For regular pizzas, you will bake them directly on the stone. Finally, don't forget to buy a decent, large diameter pizza wheel (cutter). Ingredients for Thin Crust Dough Proofing the Yeast 1 - 1/4 cups warm water (about 115 degrees F) 1 packet instant or Rapid Rise yeast (or 1 tablespoon packaged/dry yeast) 1 tablespoon honey 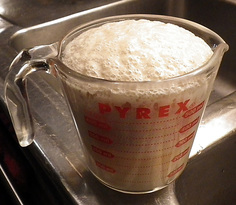 Mix the yeast and honey with the warm water in a 2 cup vessel (I use a measuring cup) and set aside to "proof" (foam up). To understand what's going on, the honey (or sugar) feeds the yeast and makes it create bubbles to lift the dough... pizza dough is a leavened crust (more akin to bread). A dough without yeast (or less yeast) makes more of an unleavened bread--like a cracker. In case you don't have a thermometer around, here's a method I've come up with to ensure the water is the right temperature... Turn your water on HOT and then try to hold the inside of your wrist in the stream of water coming from the faucet. At first it'll be way to hot to hold it for even a second. Start turning down the temp (add cold or turn the valve toward the cold side if it's a mixer valve) and try holding your wrist there again. When you can comfortably hold your wrist in the stream of hot water, it's hot enough without being hot enough to kill your yeast. I've tested this method with a thermometer and it usually lands me around 110-115 degrees F. Preheating the Oven and Pizza Stone Oil up a separate bowl (use olive oil) and set aside (this is to rise the dough in later). In the meantime, get your mixer ready. I use a standard mixer with a dough hook. Now is a good time to place your pizza stone in the oven on the center rack, and preheat your oven as hot as it can go... around 515 degrees F for American ovens. Remember, your stone needs to preheat along with your oven. I'd recommend letting it preheat for a minimum of one hour before putting a pizza in the oven. If you are doing a second, slow rise (see below) then wait a bit before preheating. For the dough 1-1/2 cups all-purpose flour (all-purpose is needed to create a more crisp crust) 1 - cup bread flour (bread flour makes pizza more bread-like, I recommend King Arthur's) 1 - tablespoon salt 1-tablespoon extra virgin olive oil Making the Dough Place the one cup of bread flour and the salt in the mixer bowl and mix a bit. Once your yeast looks foamy (no more than 10-15 minutes or so) pour it in with the flour and mix on a slow speed setting. Scrape down the bowl and beater once in a while. During this first mixing, add the olive oil. Once the dry flour mixes with the yeast into a slurry, add one (1) cup of the all-purpose flour. Mix and then scrape until the dryness is gone and then add another 1/4 cup of all-purpose flour until the dough starts to form a slightly sticky ball that will climb up the dough hook. If it looks too wet or sticks to the sides of the bowl, add another 1/4 cup of all-purpose flour. (The photo on the left needs more flour but is almost there. The center one has the right amount of flour--it's still a bit sticky. The third shows the dough as it looks on the bench before kneading.)  You want the dough to mix until it separates from the bowl--but it should still be a bit sticky. Go slow with adding more flour. A dough that's too dry will make a tough, leathery crust. You want it soft and a bit sticky. If the dough is sticking to the sides of the bowl a little, you can dust the sides of the dough ball with a little flour, then use a spatula to separate it from the sides before turning it out onto your work surface. Flour your work surface in an area about the size of the pizza you are making. I might mention why I use two types of flours in this recipe. If you were to use all bread flour, the pizza crust would be a bit softer--more bread like. It will be a bit more crusty for a thin crust pizza if you use 1 cup of all-purpose flour. If you prefer your thin crust even crustier, use all-purpose without any bread flour. I tend to use all bread flour when I do pan pizzas, Chicago style and focaccia for a more luscious bready texture. Kneading the Dough Turn the dough out onto a floured surface and knead by hand. Flour both your hands and flour the top of the dough on the board. Fold the dough over toward you, turn 1/4 turn and keep repeating until the dough looks smooth, soft and slowly bounces back when you stick it with your thumb. Some say you must knead the dough for 5 or even 10 minutes or more, but I think this produces too much stringy gluten--the glue in dough--and causes the dough to be tough. Besides, I'd rather be eating my pizza sooner rather than later. Tuck in or pinch together the bottom of your dough round and make it into a flat round shape, then put it in the oiled bowl to rise. Coat both sides--there should be oil on top of the dough round and the bottom of your rising bowl. Cover it with plastic wrap and let it rise at room temperature for 45 minutes. I usually help along the humidity a bit and lay a damp paper towel on top of the plastic wrap. You could even use a damp cotton chef's towel. I've done this for years now and call it my "Rainy Day Pizza Technique" because I noticed that pizzas made on rainy days are better--creating more air pockets in the dough. There are two ways to proceed now. One is the quick way--a single rise--the other is longer... a double rise. Typically, for Saturday night pizza, I'll do a short, single rise:
But if I'm trying to make a special artisan pizza recipe, a thick pan pizza or Chicago style pizza I'll do a double rise:
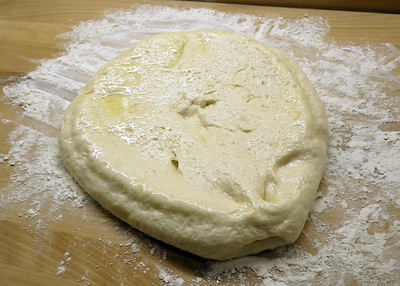
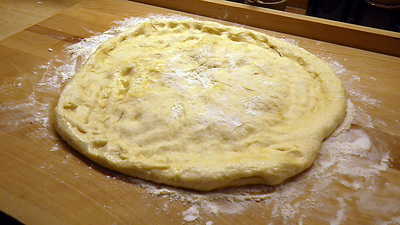
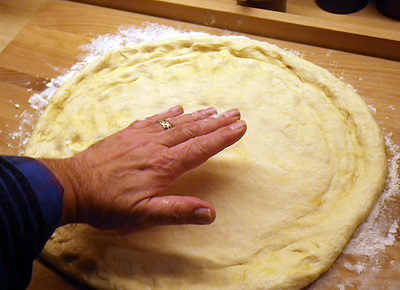
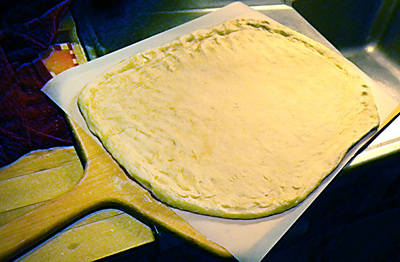
The longer the rise, the more complex flavor develops in the crust... something I think is unnecessary for a quick, thin crust pizza. If you want to try a truly artisan pizza, do the first at room temperature and the second rise in the refrigerator over night. The cold slows down the rise and lets more flavor develop. Forming and Topping your Pizza To use the dough, turn it out onto a floured surface and to shape your pizza. This recipe will make one large pizza, or you can cut it into smaller balls to make 2 individual pizzas. If you divide the dough, either do it before the rise (each one rising in separate bowls) or if you do it at the end, after cutting with a bench scraper, form the dough balls back into ball shapes. Let them rest a few minutes before shaping your pizzas. There are many ways to shape a pizza. If you want a really thin crust you can use a floured rolling pin--a simple log shaped one is best to ensure an even thickness. To make it easier for you, you can shape your pizza on a sheet of parchment paper and then when done, slide your peel under the paper for topping off. I tend to shape it on a floured surface, then transfer by hand to my peel which has a sheet of parchment covering it. Of course, don't forget your best tools--your hands. I mainly use my hands when shaping pizza. Since I'm really making a more delicate, artisanal style pizza dough, you really can't throw it like in a commercial pizzeria. First, make sure you have a decent amount of flour on the workbench. Now, toss more flour on top of the dough before you start. Basically, you want the dough to have enough flour under it to slide easily when working it. You also want flour on both the top and your hands so your hands don't stick to it. Make sure you flour your hands or things could get messy. Basically, I tend to leave a slight mound in the middle, then press with the sides of my hands to form a thicker crust edge (I like a thick crust on the perimeter of a pizza). Pat the middle with your flat hand, or use your finger tips (all of them) to push down the high spots of the dough until you make the diameter the size you need. As you press, push outward to where you need more width. If you make a hole, tear a little dough off the side and patch it. Next,--if you aren't using the parchment paper underneath--gently lift one side of the dough round and lift it on top of your forearm. Then with the other hand, help to lift and slide it onto your pizza peel on top of the waiting parchment. Pull the edges of the dough to fill your peel or into a circle, whichever you prefer. Rustic shapes are fine too.
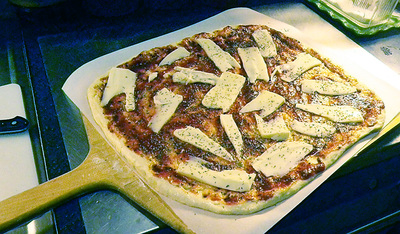
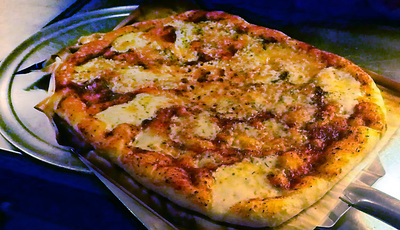
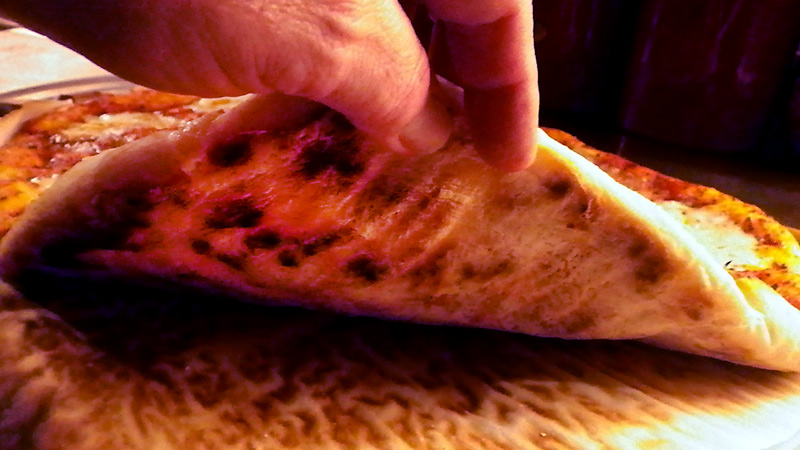
By the way, instead of using parchment, you can also sprinkle a good amount of coarse corm meal on the peel and put the raw shaped pizza on top of that. The corn meal acts like little ball bearings making it easy to slide your pizza onto the stone. I've switched to using parchment simply because it's a bit neater... some corn meal winds up at the bottom of the oven and tends to burn. Toppings I never would recommend topping off the dough while it's still on the work counter. I've even seen TV chefs do this and then have some trouble when trying to slide a metal peel underneath. A wooden one won't work at all--it's too thick! Just have all your toppings ready beforehand, place your peel with the raw shaped pizza next to them, and top-away! I'll post my recipe for home made pizza sauce, but in the meantime you can use any jar sauce, as long as it's not too thick. Pizza sauces tend to be on the watery side. As for cheese, while everyone loves mozzarella (we use part-skim to save on the fat, with the added benefit that it's less stringy) try others... sharp provolone, fontina, smoked mozzarella, fresh mozzarella, asiago or one we discovered in Italy, cacciacavalo. You can cut it into thin slices with a knife or grate it with the 1/4 inch holes on a typical cheese grater. As for the rest, live it up and experiment. If you want a simple Pizza Margherita, all you need is sauce, and some mozzarella. Perhaps a drizzle of extra virgin olive oil and sprinkle of oregano (we grow our own in summer) or basil. We love olives (buy pitted and just squish them in your fingers and drop them on), smoked or Virginia ham, prosciutto, leftover bacon from Sunday breakfast, paper thin (cut on my mandoline) slices of dry sausage, caramelized onions, fresh heirloom tomatoes, smoked turkey, home made meatballs... whatever suits your taste. After Thanksgiving we use leftovers for a Thanksgiving Day Pizza--turkey, stuffing, cheesy mashed potatoes, fresh cranberries and for the sauce, turkey gravy. Lisa likes a white pizza--easy to do (without red sauce), smeared with ricotta cheese (she makes it fresh lately) and drizzled with olive oil finished with grated Romano and oregano. A Note Here: Don't let your topped off pizza sit too long on the peel. Get it in the oven ASAP or it could stick to your parchment or workbench, or the wet ingredients might soak too far into the dough. After you've topped it off, slide it into your oven onto the stone. A quick thrust forward onto the stone and then pull back slowly on your peel--this should land the pizza perfectly. If your oven is around 510-515 degrees a pizza should cook between 3 and 5 minutes. Use a metal spatula to check under your crust to make sure it's darkened. After the timer goes off, use the peel to slide under the parchment and pizza, pull it out, and use a pizza wheel to cut your slices. Or if you have made thin crust individual pizzas, try eating it Napoletano style... fold it in half or quarters and eat it like a sandwich. The world is your pizza, when you just stop and think about it... --Jerry Finzi, aka Pizza Babbo P.S. If you like this post, please SHARE it on social media and how about taking out SURVEY? Grazie!
2 Comments
|
Categories
All
Archive
June 2024
|


 RSS Feed
