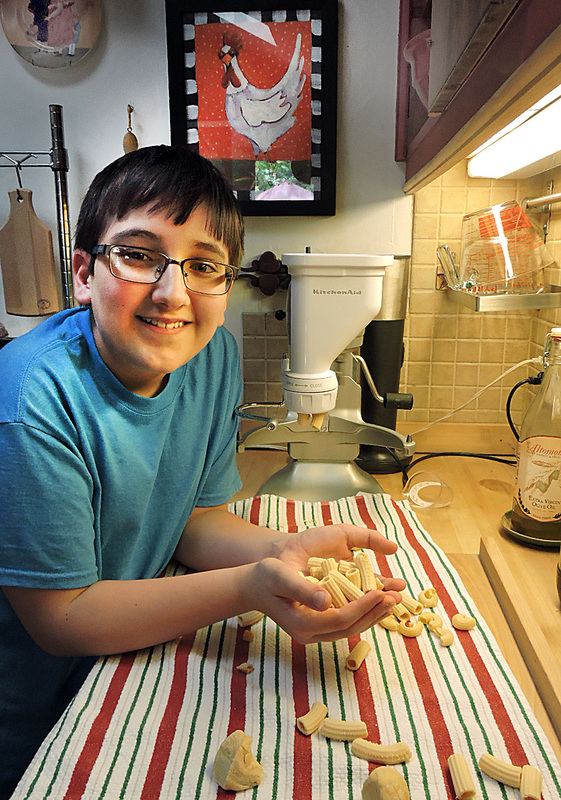
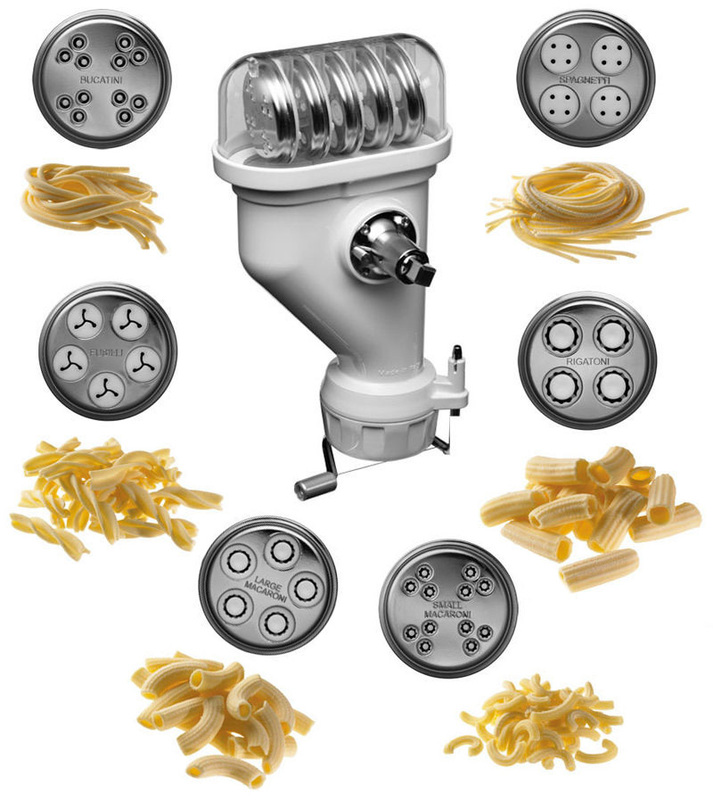
  We've made fresh pasta before. My son, Lucas and I are usually the pasta-making team. We've made it totally by hand with the flour-well method and rolling pin and we also make it with out pasta roller attachment for our KitchenAid stand mixer. For lucas and I, it's a bonding experience... we make it together and get great satisfaction knowing that WE did it, ourselves. There's nothing like eating tender, fresh pasta that you've just made. When it came time to decide on my wife, Lisa's birthday present this spring, we thought we'd get her into the fresh pasta-making action, too. The KitchenAid Pasta Extruder attachment was a natural for our kitchen and for creating a new Extruded Pasta Team--Lucas and Lisa. Like all KitchenAid products, this unit seems like it's built by NASA engineers. I'm always pleasantly surprised at the engineering that goes into their equipment. No cheap plastic parts here... this thing will last for decades. And even though the die shape inserts themselves (surrounded my metal plates) are made of a plastic, they seem to be made of an industrial strength nylon. For $134, I wouldn't expect commercial grade bronze dies, anyway. The thing that really impressed me was the pressure that this thing has to endure when extrusion is actually happening... Being the first time out, Lisa set out to use the "Basic Egg Noodle Pasta" recipe in the KitchenAid manual: Ingredients 4 large eggs 3-1/2 cups sifted all purpose flour 1 tablespoon water 1 teaspoon salt Directions
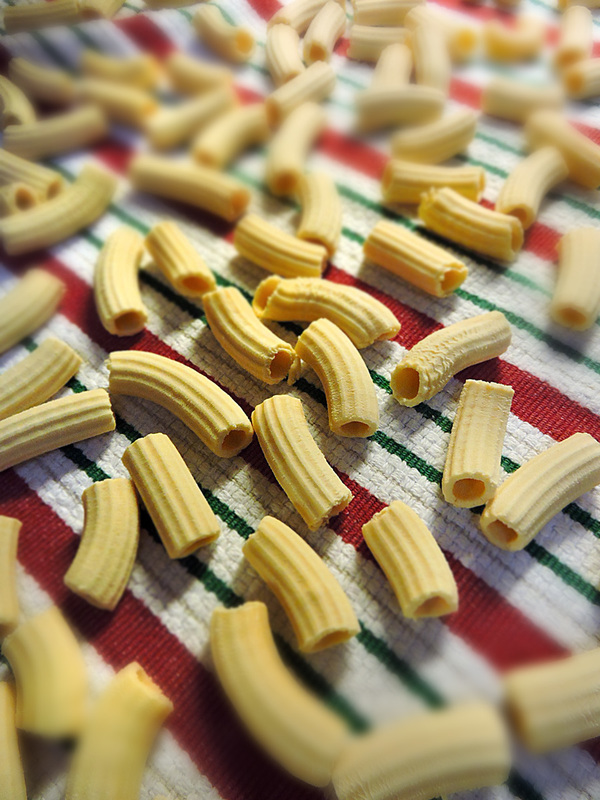 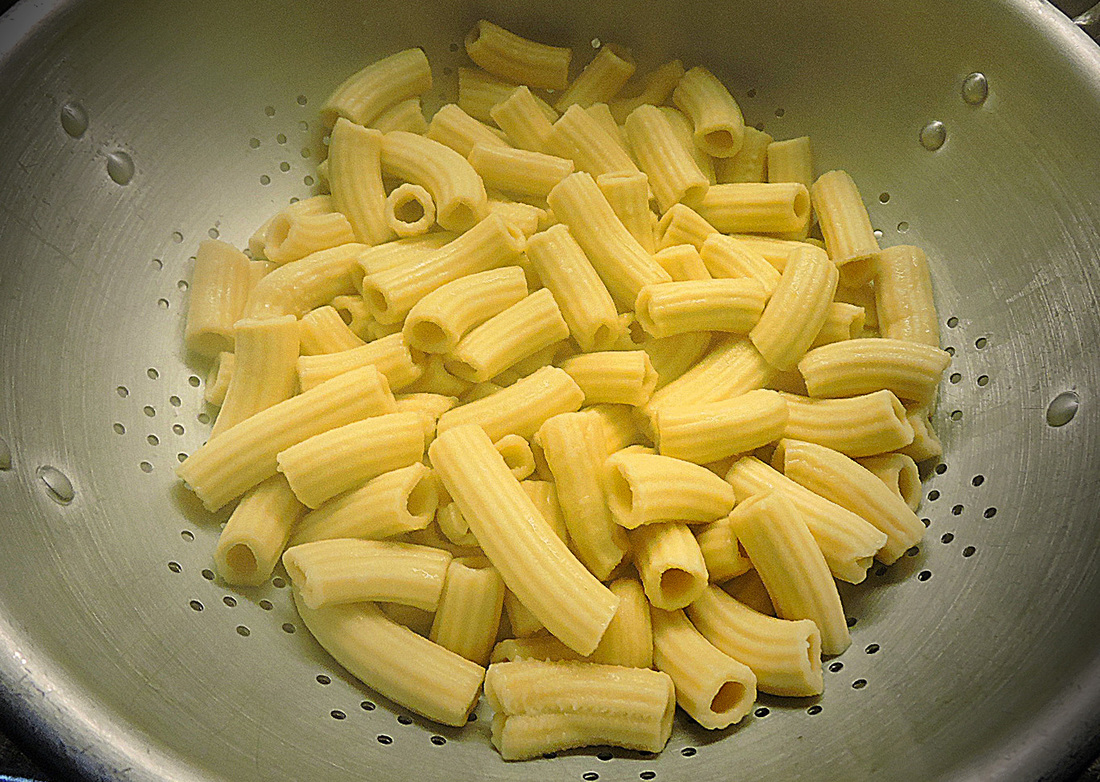 Ok... here's my own observations on this whole process; I stepped back and let this be a Lucas and Mom project, but then Lisa called me in when she noticed the dough was very tough and nearly impossible to knead into a "smooth, pliable" dough ball. Now as I said, Lucas and I have made fresh pasta before... but extruding is a bit different. In general, the dough has to be a stiffer mix to hold up to extrusion. If it's too soft it will make a sticky mess when put through the extruder. My first reaction to the dough when I saw it was to toss it and start from scratch with a new recipe. It was really tough. I rolled it up in plastic wrap and put it aside and went online to find a typical recipe for extruding pasta. By the time I came back, Lisa said she took another look and her dough was a bit softer. In fact, it had relaxed a bit, so I kneaded it a bit--a real muscle job--and Lisa started to cut the walnut sized balls. Putting the shape disk on was easy. The machine fired up and Lisa dropped a a bunch of balls into the hopper to top it off. Slowly, pasta began to extrude... very slowly at first. Our mixer didn't bog down, even with the heavy dough. Then it stopped. Apparently, you need to feed one or two balls of dough at a time and the auger at the bottom of the extruder presses the dough against the shape disc. Lisa put too much into the auger and there was a gap. We pulled out the dough, then started adding balls no more than two at a time. Past was being made... a pretty acceptable rigatoni shape! Then Lucas took over the cutting... waiting until the rigatoni was about 1-1/2" long, then slicing them off quickly with the piano wire guillotine underneath the disc. He then laid them out to dry on a clean, cotton kitchen towel. They dried for about 2 hours before cooking, draining and saucing. Lucas loved his job and made over a pound of rigatoni for that night's dinner. Great job, Little Chef! (His nickname in the kitchen ever since we fell in love with the film, Ratatouille. 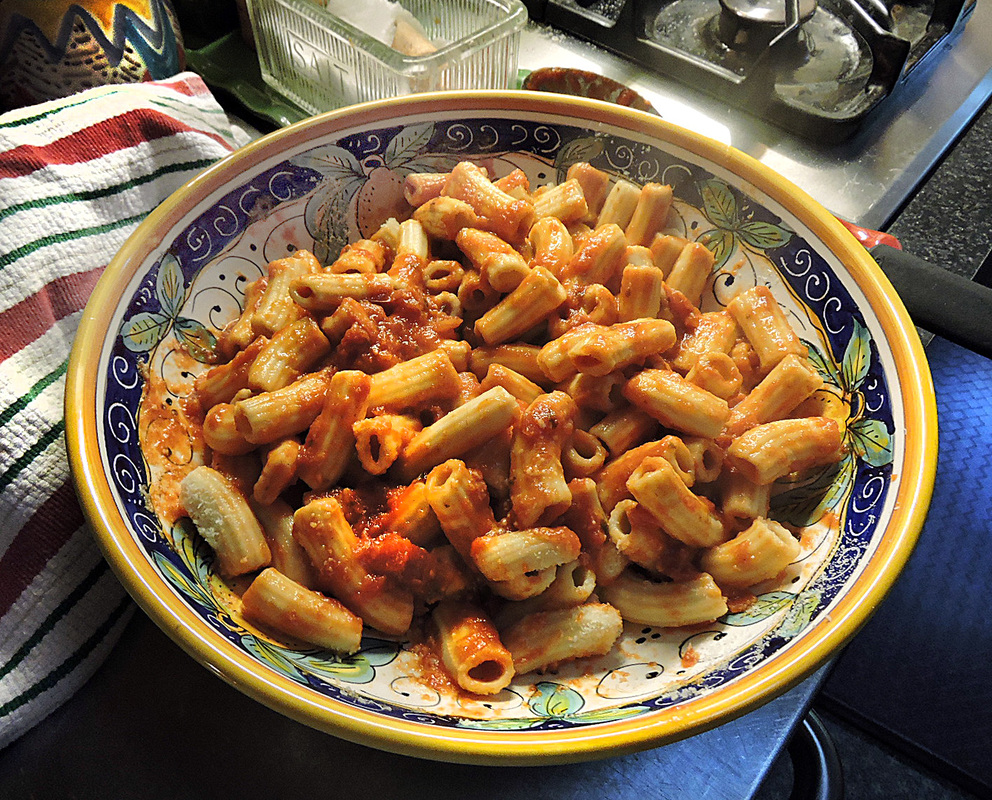 Lucas' and Lisa's Rigatoni, ready to be served Lessons Learned
The next time we use the extruder, we'll adjust the recipe. The dough can't be as supple as when making fresh pasta with a pasta roller attachment, but it can be less dense than what we made with the KitchenAid recipe. I told Lisa that she should also use semolina pasta flour instead of all-purpose. I think this was part of the problem. Even a mix of all-purpose and semolina would work better. And my tip to Lisa was this: Don't rely on a written recipe alone when judging any dough. You have to use your eyes and feel the dough as it's being made. Whether the humidity is high or not giverns whether to hold back liquids or add more. I would make this dough with less eggs too. Many recipes for extruded pasta that is going to be dried do not contain any eggs at all (danger of contamination)--just water. As for the pasta they made, we all agreed it was a bit bland and a tad... well, doughy. As I'd expect from all-purpose flour. Perhaps it could have used more salt in the dough. The semolina would make it taste a bit more nutty, too. So, we'll report the next time Lucas and Lisa make extruded pasta and let you know how it went. Ciao and buon appetito! --Jerry Finzi You can also follow Grand Voyage Italy on: Google+ StumbleUpon Tumblr Copyright 2016 - Jerry Finzi - All Rights Reserved
5 Comments
Lynn Torretti
1/6/2019 01:13:57 pm
Going to try 9/28/2019 08:26:50 am
I need to buy two of the machine.
Micaela Poole
5/30/2023 10:25:36 pm
What would you have your revised recipe be for the dough when it will be extruded?
Jerry F.
6/4/2023 06:12:54 pm
Try this... Your comment will be posted after it is approved.
Leave a Reply. |
Categories
All
Archive
June 2024
|

 RSS Feed