GRAND VOYAGE ITALY
  • Piazza
    • Older Posts
  • Travel
    • Our Family's Voyage
  • Cucina
  • Culture
  • History
  • Style
  • Photos
  • Videos
    • Music Videos
  • About
    • Survey
    • Links
  • Shop 🛒
  • Piazza
    • Older Posts
  • Travel
    • Our Family's Voyage
  • Cucina
  • Culture
  • History
  • Style
  • Photos
  • Videos
    • Music Videos
  • About
    • Survey
    • Links
  • Shop 🛒
We're All About Italy

Cucina

A Simple, but Luscious Treat: Pandoro Christmas Tree with Custard

12/30/2018

Comments

 
The Italian Christmas season continues past our American idea of the holiday... all the way to January 6th. To really live the Italian Lifestyle, especially during the Christmas season, this means doing what Italians do... extending the celebrations in many traditional ways.

One amazingly simply Italian tradition is to make a Pandoro Christmas Tree or Albero di Natale di Pandoro. And the great thing about this dessert is you don't even have to bake one yourself.
Picture
Our Pandoro Tree ready for serving, thrown together in less than an hour
PictureAn naked Pandoro awaiting its regal clothes
During the Christmas Holidays--even in the States--panettone and pandoro are both in plentiful supply, even in large supermarket chains. In fact, I bought several imported pandoro and panettone (they store and freeze well) two days after Christmas for under $5 each!

Pandoro literally means golden bread, and lends itself to making a tree shape because of its fluted sides. To make a tree shape, simply cut 3/4 - 1" thick slices, ensuring that each slice is cut as flat as possible to prevent your "tree" from leaning when re-assembling later. A very sharp chef's knife is better than a serrated bread knife which would create too many crumbs.

You will be filling each layer and re-assembling by alternating the position of each layer to position its points in between the points of the layers below them. Keep track of the orientation of the layers and re-assemble to keep your "tree" from leaning--flipping them upside and to the side after cutting each helps keep them in order.

To make ours, I brushed each layer with a coating of heated and softened seedless red raspberry jam, then willed each layer with some vanilla custard, the same recipe I use when I make pasticiotti. You can also fill them with zabaglione, butter cream, or a store-bought vanilla, or other flavored pudding mix.

I held back a bit of the custard and placed it into a piping bag with a fluted tip, then piped rosettes around the tiers of the assembled panettone tree, placing a blackberry on each. You can use fresh blueberries, strawberries, raspberries or pitted cherries. Top the cake with more piped custard and berries, or place a star-shaped Christmas cookie standing up.  Powdered sugar adds a dusting of "snow" to make it look really festive.

Traditionally, you make tall sliced wedges for each serving and lay them on their side in a dessert plate.

Vanilla Custard Recipe

While French style egg custards can be difficult to master, this is a very easy custard due to the fact that the cornstarch is the thickening agent. This recipe can be used for many pastry treats that utilize a custard as a bed for berries.


Ingredients
3 tablespoons cornstarch
1/2 cup sugar
1 - 1/2 cup whole milk or Half & Half
2 egg yolks
1 tablespoon butter
1 teaspoon butter

Directions
In a medium saucepan, whisk together the cornstarch and sugar.
Whisk in the milk and egg yolks.
Place the saucepan on medium heat, stirring with either whisk or spatula until the custard starts to thicken.
Add the vanilla extract and butter and stir until creamy, thick and smooth.
Transfer to a bowl to cool, covering the surface with plastic wrap to prevent a skin from forming.

Spread melted seedless on each layer of your pandoro and then spread on a layer of custard. Do this for each payer as you re-assemble your "tree". Pipe rosettes as described above and place your berries. Dust with powdered sugar.

Buon Natale!

--Jerry Finzi


Comments

Pane Carasau, the Crispy Flat Bread from Sardinia

9/11/2018

Comments

 
Picture
Picture
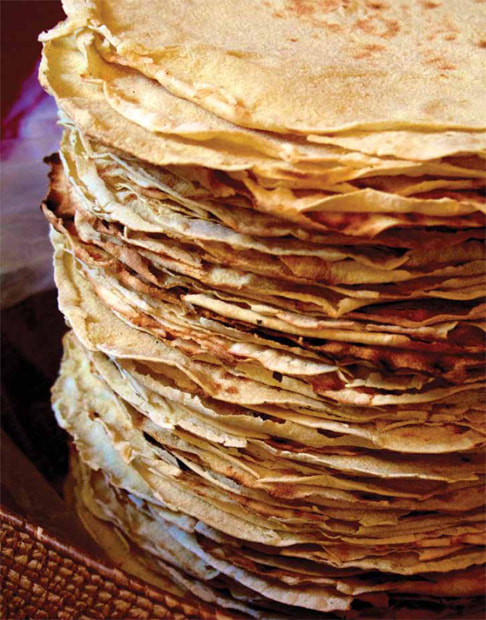
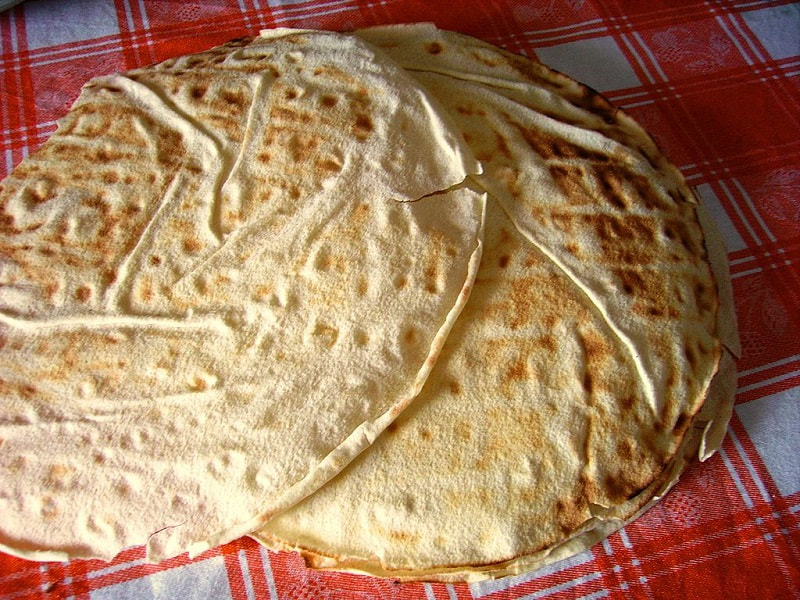
Ancient Sardinians had a saying: Chie hat pane, mai no morit (who has bread, will never die). This is true for most of the world. Pane Carasau is one of the ancient breads they were talking about. You can imagine the ancients making this bread because of its long storage capabilities and portability. 

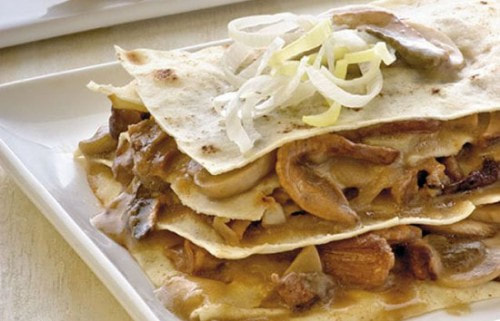
It is a a very thin flat bread--some might call a cracker--that was traditionally made for shepherds by the housewives to carry with them for long months on high pastures with their flocks. They can be eaten with sausage and cheese, or dipped in milk to re-hydrate for colazione and drizzled with honey or jam. Pane Frattau is a soup made with shards of Pane Carasau, meat, eggs, cheese and tomato. Modern Sardinian chefs are also using pane carasau in their recipes, for instance, carasau lasagna.

The tedious method by which is is made creates a thin, crispy bread that will last literally for months, even if it happens to crack into shards along their travels. There are some who refer to this flatbread as carte della musica (music sheets) because of its thinness.
 
The dough itself is fairly simple: durum wheat, yeast, water and salt. It's rolled into extremely thin rounds and baked in a wood oven until the bread puffs up like a balloon, then quickly (with dexterity, not to get steam-burned) cut into two halves, making it even thinner. They are then toasted again in the oven and dried completely. Nowadays, in Italy you might even come across packaged Pane Carasau in supermarkets.

Picture
Ingredients
  • 1 1/2 Cups Unbleached All-Purpose Flour
  • 1 1/2 Cups Semolina Flour (Durham)
  • 1 teaspoon, Active Dry Yeast
  • 1 1/2 Cups Warm Water (Approximate, depending on humidity)
  • 1 teaspoon sugar
  • 1 teaspoon sea salt
The best results are achieved in a wood pizza oven, but you can use a baking steel (this holds heat better than a baking stone). Place the steel on the bottom rack (with all others removed) in an oven, the preheat to its maximum temperature (typically 550 F). If you want to use a baking stone, the cook time will be slightly shorter. You might also benefit by having a thin, metal pizza peel to remove your  pane carasau from the oven.
Directions
  1. Place the baking steel into your oven and preheat to maximum temperature.
  2. In a 2 cup measuring cup or small bowl, dissolve the yeast, sugar and all the water,  then proof for about 15 minutes.
  3. In a stand mixer, at first combine the all-purpose flour with salt.
  4. Mixing on low speed, add the yeast mixture to the flour.
  5. Mixing at a low speed, add 1/4 cup at a time of the bread flour until the dough climbs the dough hook, then knead briefly into a smooth ball on a lightly floured surface.
  6. Place into an oiled bowl and cover with a damp, cotton kitchen towel until doubled.
  7. Knead the dough for a second time on a lightly flowered surface for 2-3 minutes, them place back into the bowl for one more hour.
  8. Place the dough ball onto a lightly floured surface and cut into four equal pieces.
  9. Roll each into a long cylinder about 2'3" thick, then cutting each into small segments, each one about the side of a small dinner roll.
  10. With cupped hands, roll each segment into a ball shape.
  11. Using a straight rolling pin, roll out each round as thin as possible, about the size of a dinner plate.
  12. Since each one is baked separately, it's best to get help from other members of your family:  One person is responsible for rolling out the flat rounds; The baker will be responsible for placing them into the oven onto the steel (or stone), keeping a watch on them as they bake, turning them over when puffed up, and removing them; A third person is needed to cut them in half with a very sharp paring knife and stack them before toasting in the oven a second time (which can be done after all have been cut and stacked.)
  13. The time it takes to bake your pane carasau depends on your oven. Obviously, in a 900 degree+ wood pizza oven, they will cook in less than a minute. In a 550 F oven with a baking steel, this might take 2-3 minutes. Using a baking stone, it might take a bit longer. This is the type of baking you need to keep a constant eye on, flipping over the ballooning breads briefly before removing them for cutting. I recommend studying how this is done in the video below. 

  14. Remove, brush lightly with olive oil, sprinkle with fresh chopped rosemary and salt and return to the oven for a few minutes.
  15. Let sit until cool enough to handle, then break into large pieces.
  16. Serve warm.
Comments

Summer Treats: Brioche Gelato Burger!

8/1/2018

Comments

 
Picture
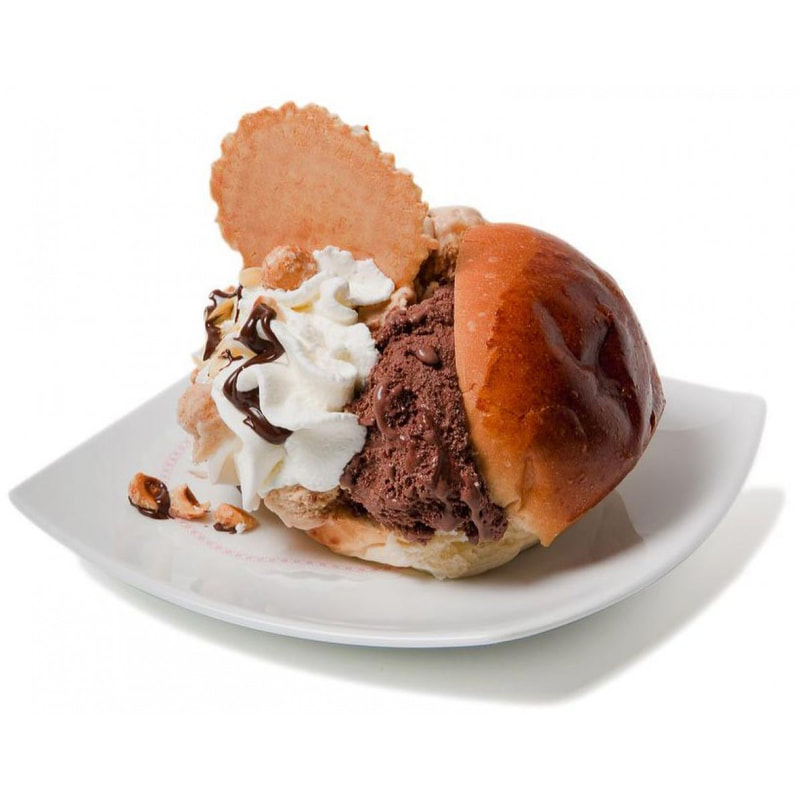
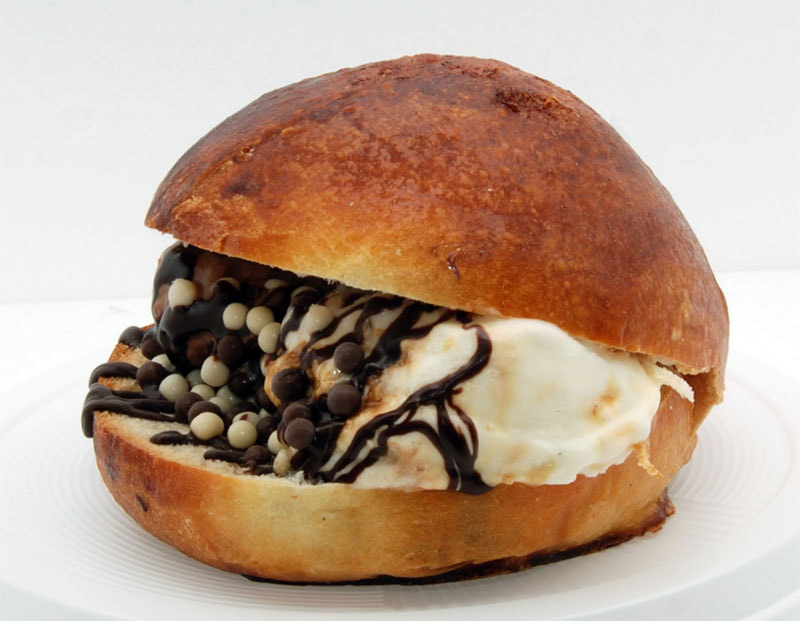
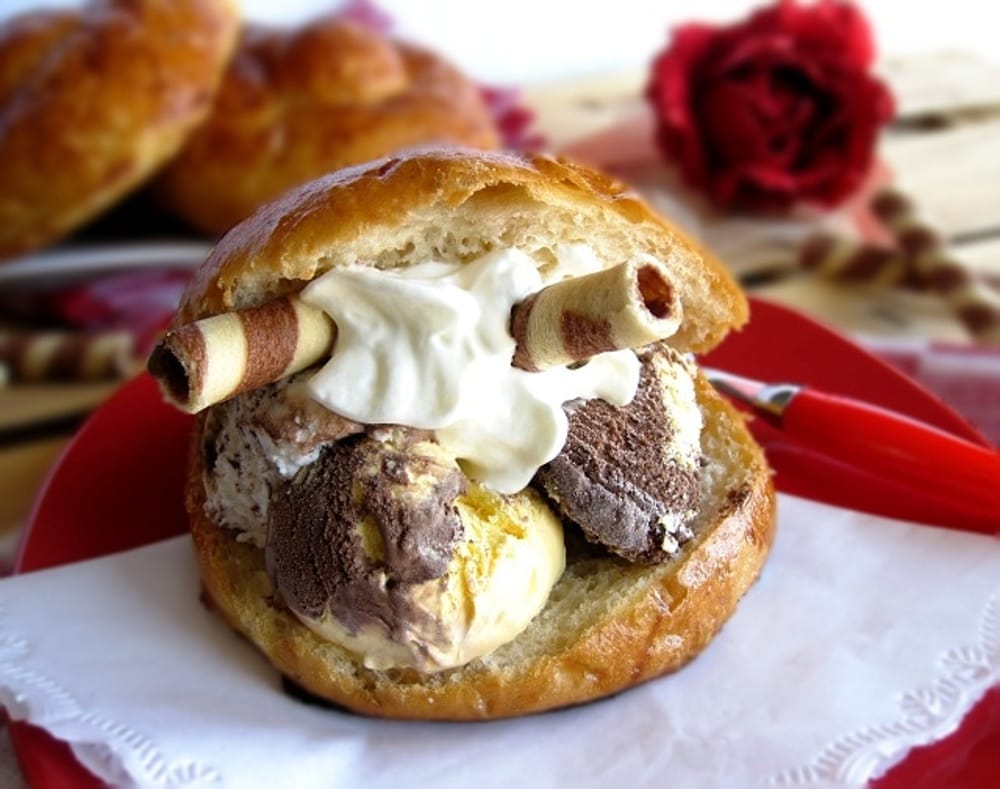
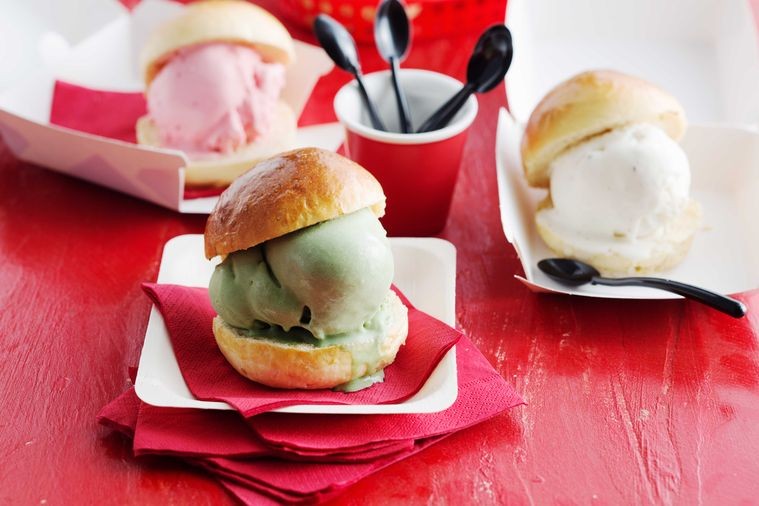
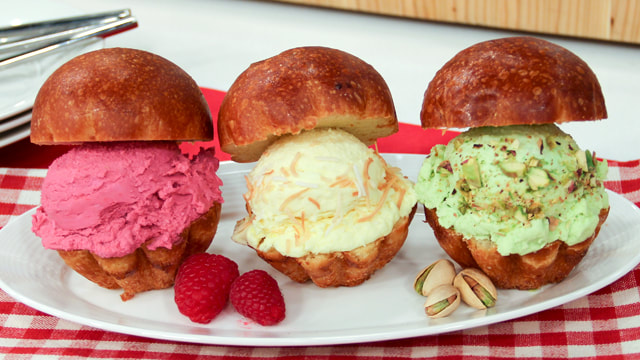
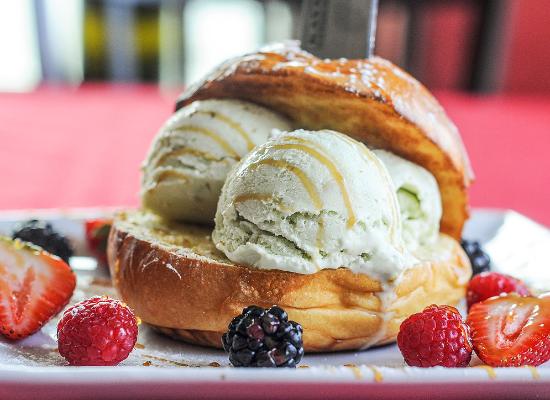
Summer is in full swing, and with Italy currently in the midst of a full blown heatwave, here is an idea from southern Italy that will help you beat the heat...
Brioche Gelato Burgers!

More and more popular in Sicily, Puglia and Calabria, the trend is catching on. In the last several years, the sweet, glossy brioche bun has gained popularity in the States, used as the go-to bun for burgers and sliders. But the sweet, soft crumb of the classic brioche also pairs well with gelato (OK, and ice cream, too). Grilling the sliced brioche helps raise the flavor a notch. Toppings or spreads can include, crushed pistachios or sliced almonds, Nutella,  Pirouettes crackers, almond biscotti crumbs, whipped cream or zabaglione, or a smear of almond paste. How about a trio of gelato sliders? To add crunch, tuck a pizzelle inside!

Stay cool!

--GVI
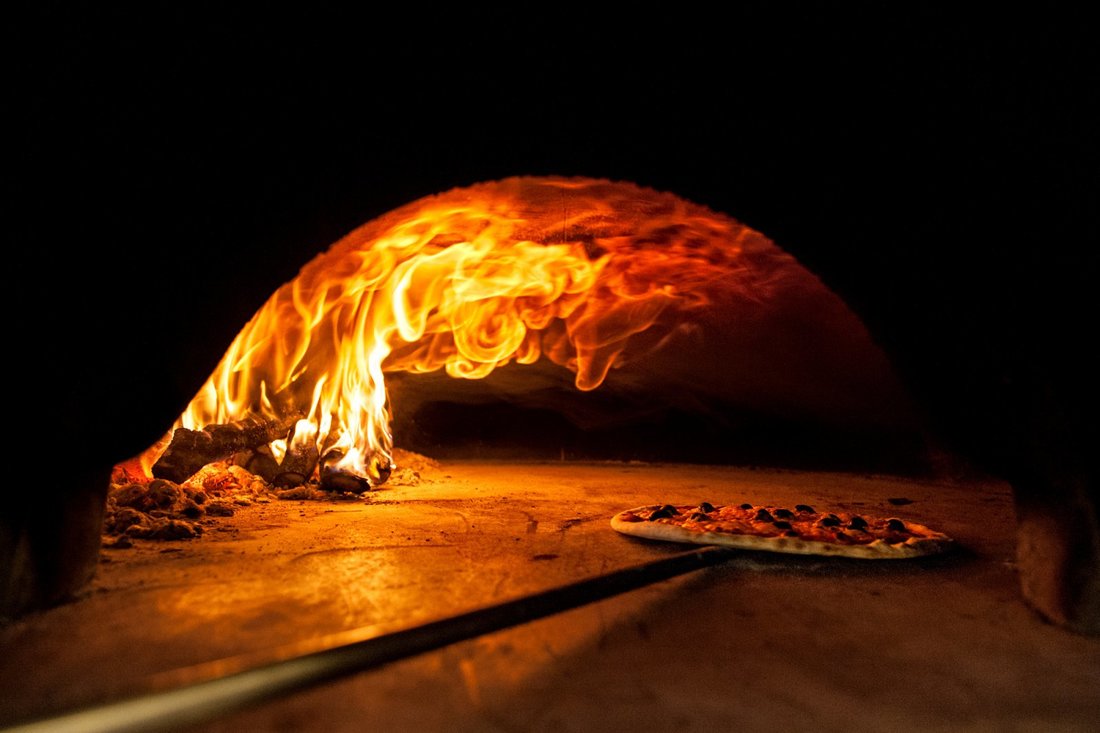
Picture
Picture
Picture
Picture
Picture
Comments

Modern  Pompeii Baker Recreates Ancient Roman Breads

4/16/2018

Comments

 
Comments

A Brief History of Wood Fired Ovens

4/16/2018

Comments

 
Picture
PictureOne of many ovens at Pompeii
Excerpt from an article by Kristan Melia on Culinary Backstreets/Naples

There is evidence that wood-fired ovens similar to the ones used in Naples today were employed by the Ancient Greeks, and some assume that Greek mariners brought this technology with them to the city. Thanks to Vesuvius’ explosive eruption in 79 AD, we can turn to Pompeii for gustatory evidence. Archeologists have unearthed 33 domed clay ovens, complete with chimneys, on the grounds of Pompeii. We know that bread was an important part of the Pompeian diet. The very volcano that would eventually lead to Pompeii’s demise actually contributed to her rise as an early producer of baked goods.

The Greek geographer, philosopher and historian Strabo observed that the area around Pompeii and Naples as a result of the soil’s volcanic fecundity, was “the most blessed of all plains, and round about it lie fruitful hills.” It turns out the slopes of Vesuvius were ideal for the growth of cereal grains, and that bread was to become a symbol of Pompeii. An engraving on the entrance to the walled town reads matter-of-factly, “Traveler, you enjoy bread at Pompeii.”

The process of grinding the grain to make the bread was arduous. However, the volcanic black lava rock of the region was ideal for shaping tools to grind the local cereals. The practice of crushing, grinding and pounding wheat through a mill was known as pistor and by 160 BC, as Cato documents, the tradesmen responsible for this grinding were known as pistore. When coupled with the ingenious design of the beehive clay oven with chimney, this gave rise to the baking of deceivingly simple, pliable, leavened breads called pinse, so named for the grinding and pounding required to produce them. The pinse would travel through the Roman Empire; years later, we would know its cousins as pissaladiere in Provence, pita in the Middle East and pizza in Naples.
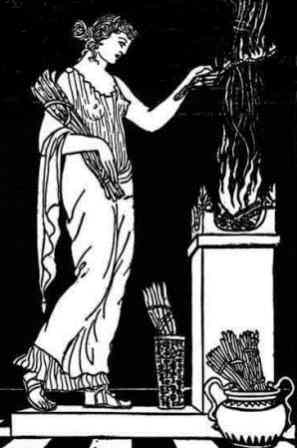
PictureVesta
In the early days of bread baking in Pompeii, pistore worshiped the god Fornax, the ancient personification of the oven. It is from Fornax that we also derive the word forno (oven), as in forno a legna (wood oven). Every year on February 17, Pompeii’s guild of oven tenders celebrated Fornacalia, lighting and feeding fires in much the same way modern Neapolitans light fires in commemoration of Saint Anthony the Abbot’s day. Years later, Pompeii’s bakers would switch their pious devotions to the goddess Vesta, protector of the hearth – perhaps a testament to the reverence they harbored for the fire that fueled their precious ovens.

For all the early success Vesuvius afforded Pompeii’s vibrant grain economy, the volcano would eventually become the town’s undoing. But the traditions of the pistore live on today in the ancient vicolos and back alleys that thread through Naples’ historic center.

CLICK HERE TO READ MORE...

Picture
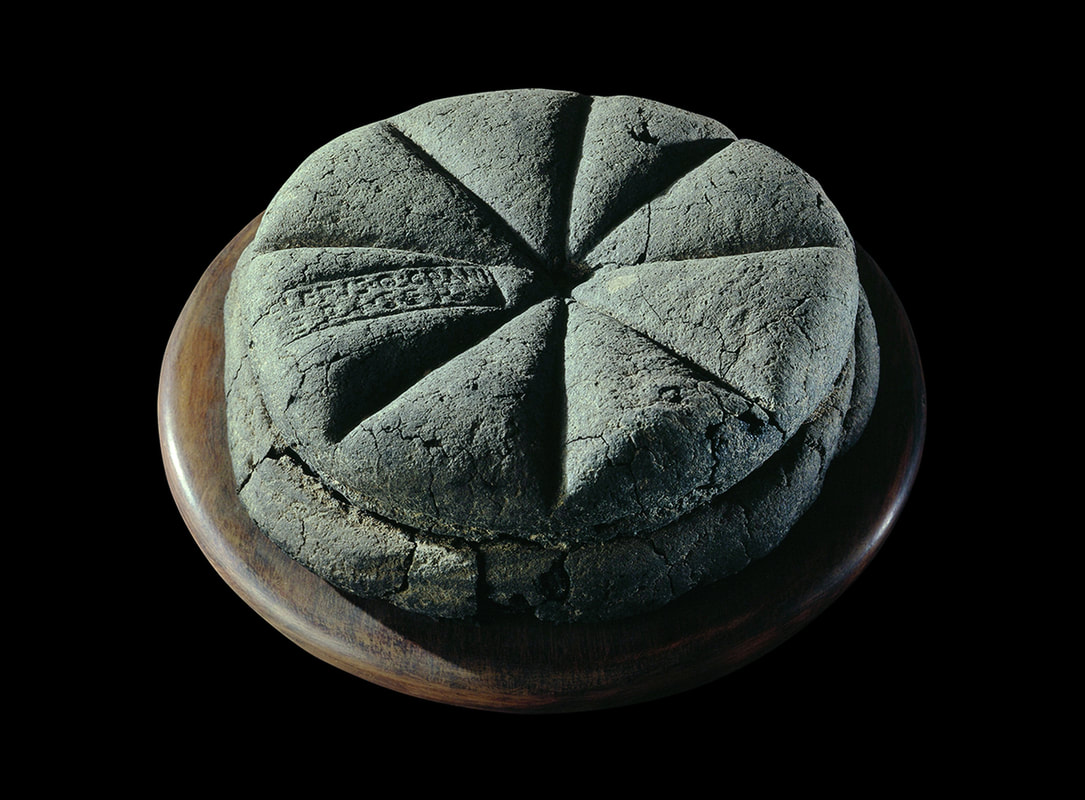
A carbonized loaf of bread with the stamp 'Property of Celer, Slave of Q. Granius Verus', Herculaneum (near Pompeii), 79 AD
Comments

Pane Coccoi: The Amazing Sardinian Art of Decorated Breads

3/30/2018

Comments

 
Picture
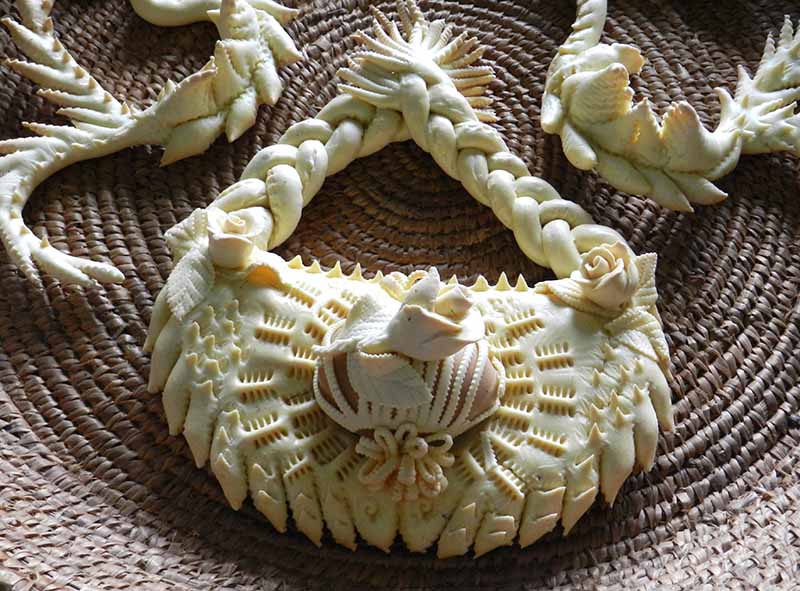
Chie hat pane mai non morit.--Sardinia Proverb
One who has bread never dies.

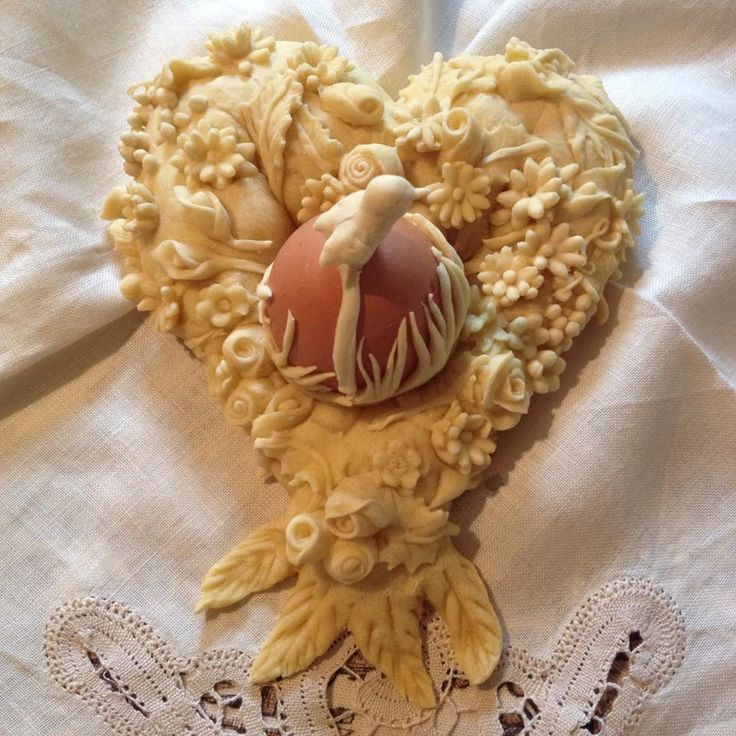
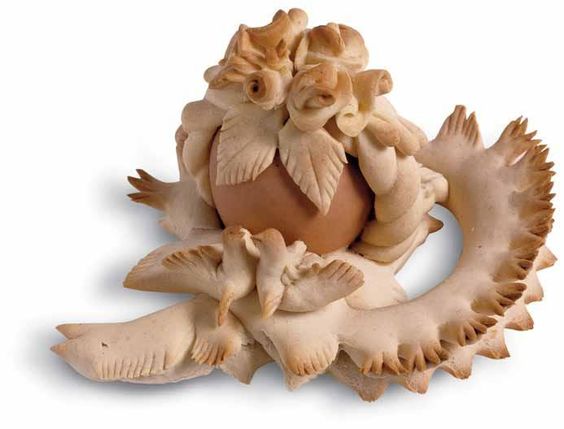
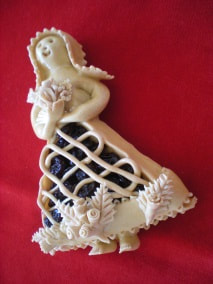
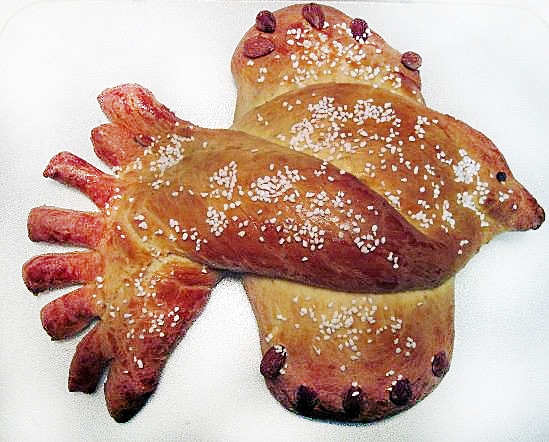
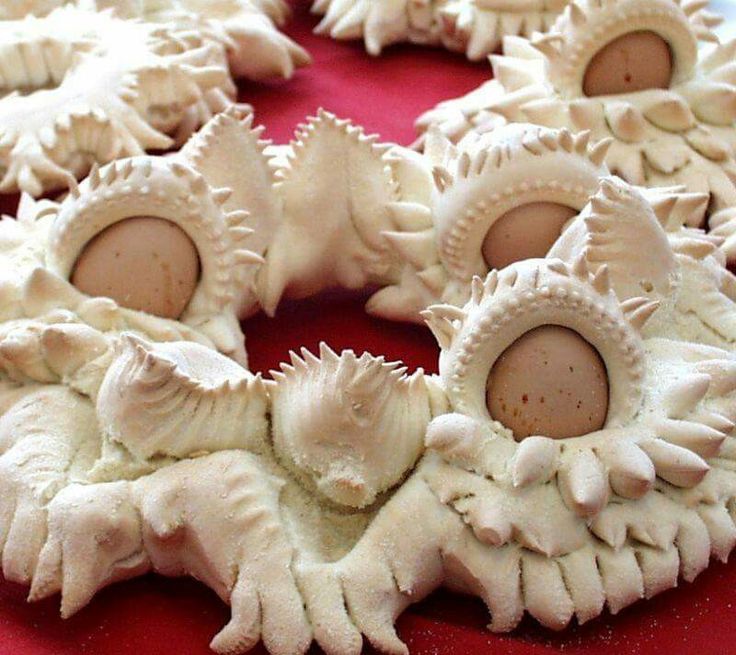
In Sardinian bakeries there is a time honored tradition of elaborate and intricate decoration of celebration breads for weddings and also for Pasqua (Easter), called
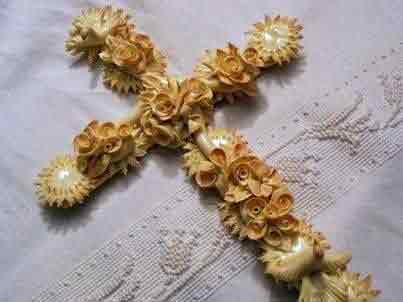
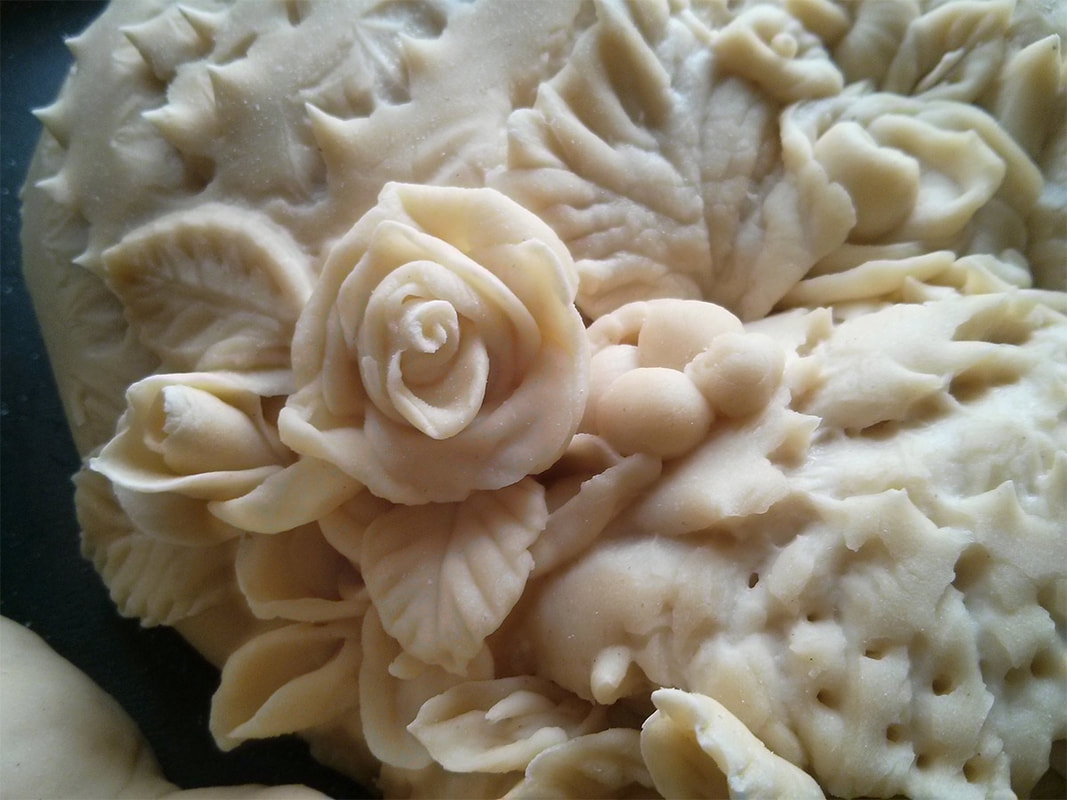
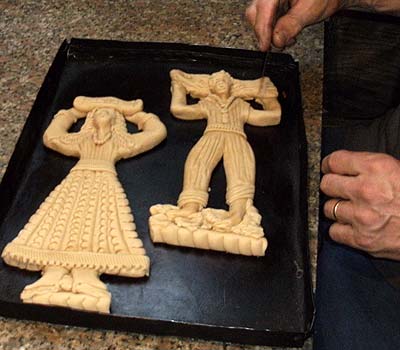
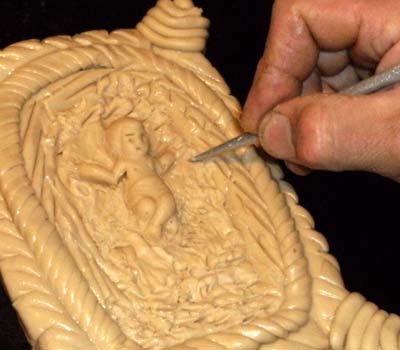
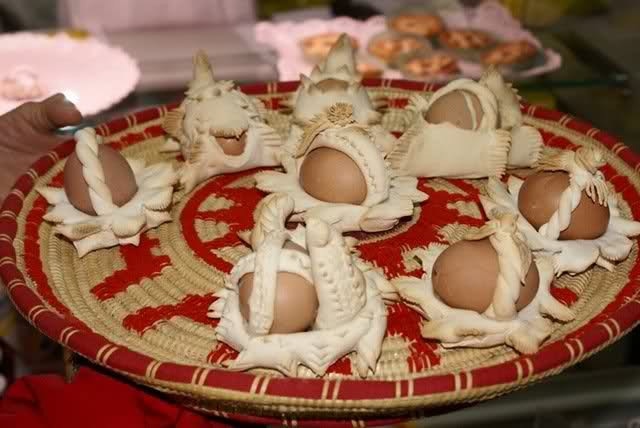
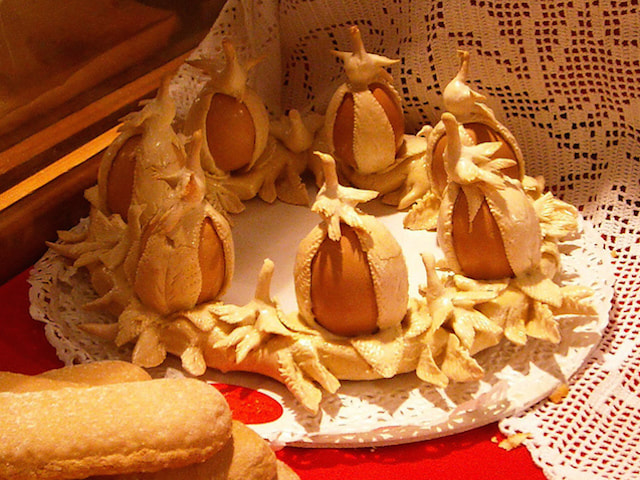
Pane Pasquelina, or in local dialect known as Su Coccoi or Pane Coccoi.

The designs recall ancient symbols from the many cultural influences in Sardinia.  The shapes include the crown, wreathes, the chick, a girl, doves, fish, small baskets, fruits and flowers. Especially for Easter, whole eggs are incorporated into each design, sometimes hidden but often exposed within the design theme. These breads are considered symbols of fertility and good luck. When you look at the intricacies of these artisinal breads, it's surprising to think the only tools used are a small knife and scissors.
Picture
Picture
Picture
Picture
Picture
Picture
Picture
Picture
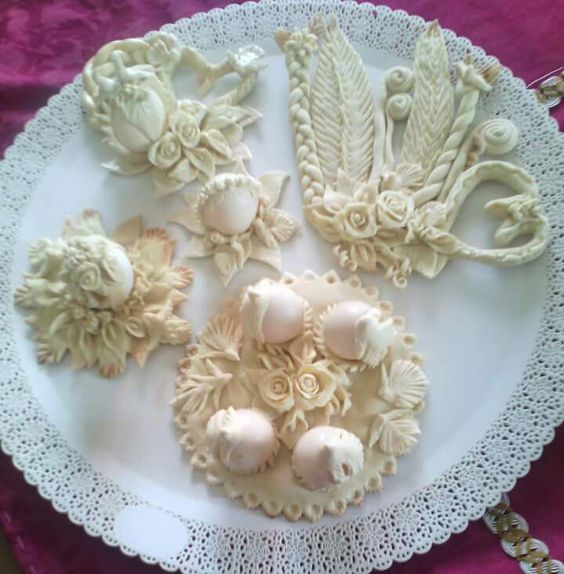
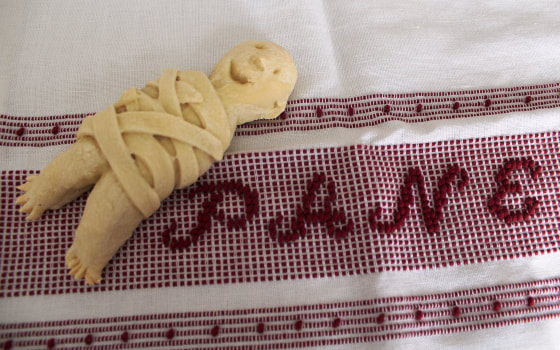
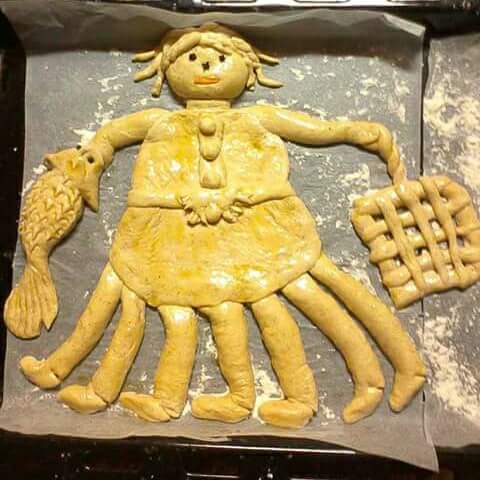
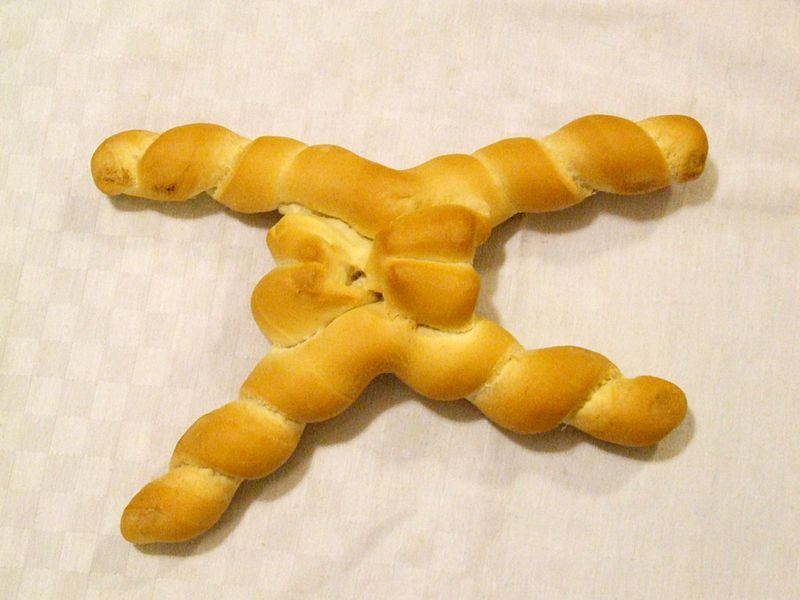
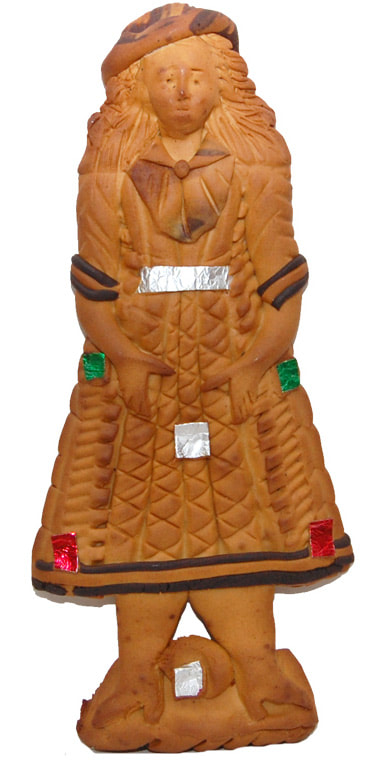
Two interesting shapes are called Sa Pippia and Lazzaro. Sa Pippia is a doll-shaped bread with seven legs, one for each day of the Holy Week. This bread was used as an Easter Advent Calendar, one leg given to a child each day leading up to Easter Sunday. Lazzaro represents the body of Lazarus wrapped in a shroud, a symbol of resurrection.
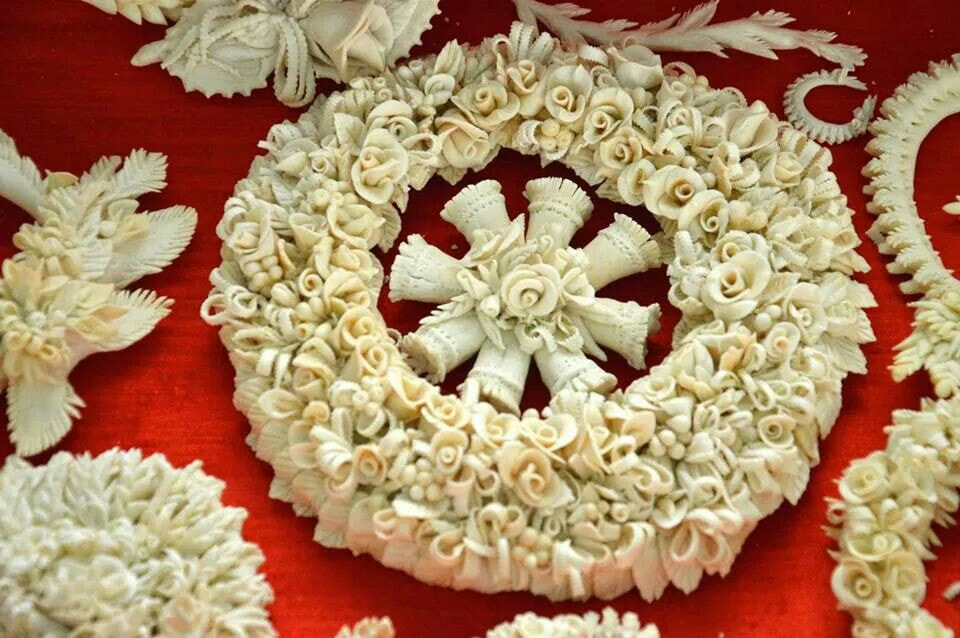
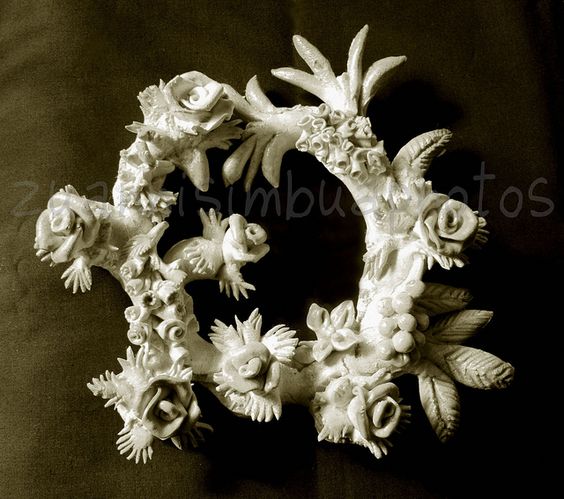
Picture
Lazzaro
Picture
Sa Pippia
Picture
Sa Pippia
Picture
Picture
Wedding wreath
Picture
Watch as the Nonni teach the younger women how to create Pane Coccoi
and then bake them in a community oven.


If you'd like to try making these special breads, here is an authentic Sardinian recipe that I translated and converted...
Recipe
  • 4 cups Semolina Flour (Pasta Flour) - holding back 1 cup flour to adding as needed
  • 1 - 3/4 cups warm water
  • 1 tablespoon yeast  
  • 1 teaspoon salt
You'll need a pizza stone to bake these breads.
  1. Place the yeast into a small bowl with the water. Let it proof for 3-5 minutes
  2. Put about 1 cup of the flour to start in a stand mixer, adding the salt, then turned on low, mix the dry ingredients. 
  3. Add the yeast/water mix and mix well, slowly adding 1/2 cup of flour at a time until a dough ball begins to form. (The 1 cup of four can be added if needed, but keep in mind, you can always add, but you can't take it out if your dough gets too tough.)
  4. As soon as the dough begins to take shape, start kneading the dough on low speed for 10-15 minutes. You need to obtain a homogeneous, elastic and consistent dough. It should not be stick, but you don't want it too dense, either. The dough should start to have a smooth surface and be elastic.
  5. You can pull off a piece to test it: work it with your palms pushing away on your work table, until you you almost feel a crackle under your hands--air bubbles will burst. At this point, the dough is ready. Work the rest of your dough in the same way as your test piece.

Shaping the Dough
  • Using scissors or a pasta cutter, cut and then roll out elongated cylinders. Keep the extra dough under plastic wrap as you work.
  • Shape as you like using the scissors or a small paring knife.
  • Place the freshly prepared breads on lightly floured kitchen cloths, cover them and let them rise for at least two hours.
  • After the rise, handling them gently, you can use your knife or scissors to make further decorative cuts.

Baking
Preheat your oven to 450 F degrees with the pizza stone on the middle rack. Place a sheet pan on the bottom or lowest rack of your oven at this point.

I suggest using a pizza peel to transfer your breads into the oven and directly onto the pizza stone. If you don't have one, you can use an up-turned sheet pan lined with parchment paper (the paper will slide onto the stone with the dough). Alternately, sprinkle the back of the sheet pan with course cornmeal, then place your shaped breads on top. The cornmeal acts like ball bearings to slide your breads onto the stone.

I don't recommend baking your breads on pans simply because the pans would be cold when placed into the oven. If you do want to use pans instead of a pizza stone, use sturdy, heavy dark pans. They will heat up faster.

Just before placing your breads into your oven, pour about 1/4 cup of water into the hot sheet pan on the lower rack to create steam. Immediately shut the oven door.

Quickly transferring your formed breads into the oven, bake for the first 10 minutes at 450 degrees, then lower the temperature to 350 F degrees and continue cooking for another 20-25 minutes.
You might want to quickly spray some water onto the oven's side walls halfway through the baking.
Check the browning of the bread and adjust according to your oven. These breads should be a very light tan with a fine textured crumb interior.

Remove from the oven and place on cooling racks to dry and cool completely.


There is another version that adds eggs, so you can experiment in adding eggs while you compensate by adding more flour. You can still eyeball the smoothness and elasticity of the dough when mixing. Remember, making dough for breads and pizza is a feel thing, varying depending on the humidity of the day. 


Have a great celebration! Buona Pasqua!

--Jerry Finzi

You might also be interested in...

Our Pane di Pasqua Recipe
Vintage Italian Easter Cards
Decorated Italian Easter Eggs
How Italians Celebrate Easter
Celebrating Easter in Italy
SHARE ON YOUR SOCIAL MEDIA SITE
Comments

The Art of Shaped Calabrese Mostaccioli

2/22/2018

Comments

 
Picture
Picture
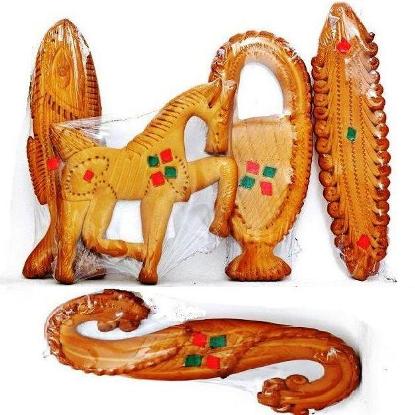
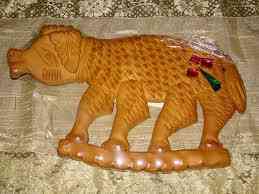
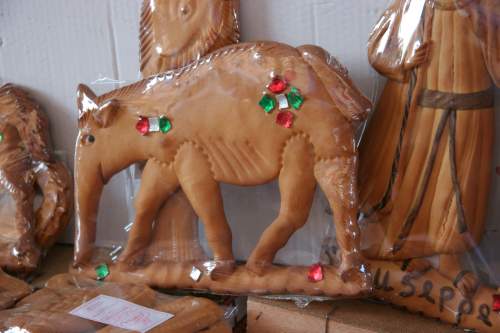
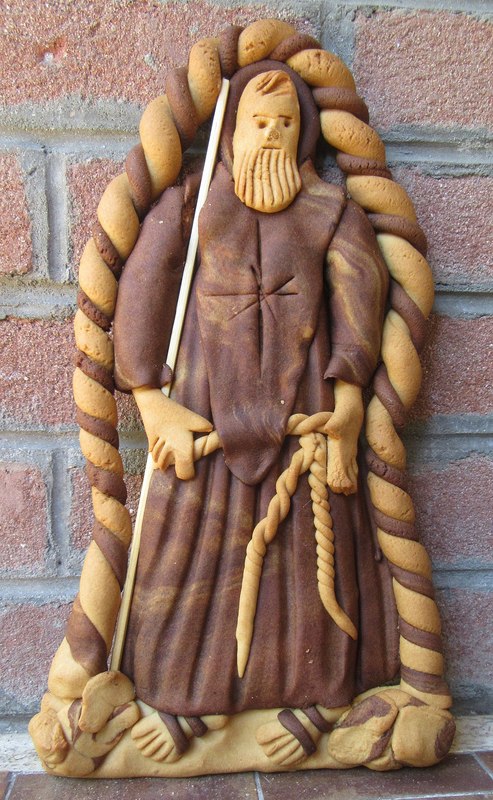
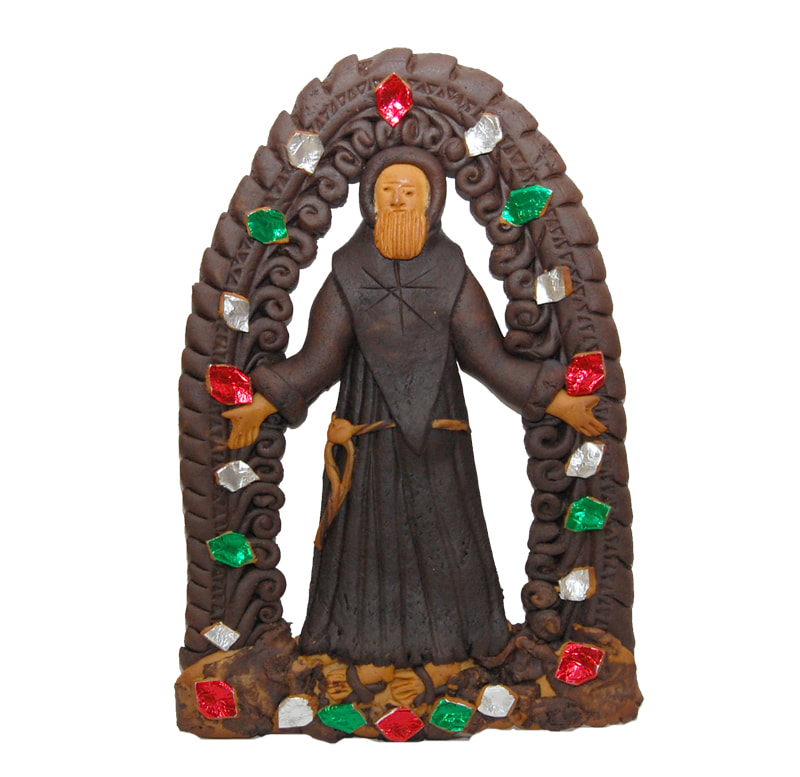
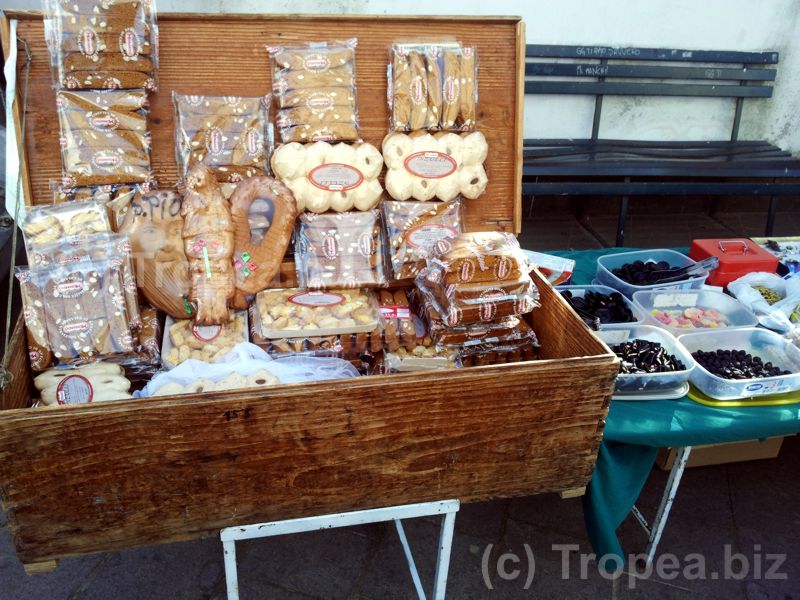
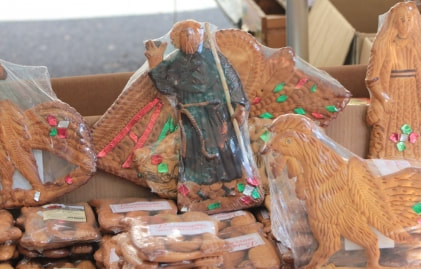
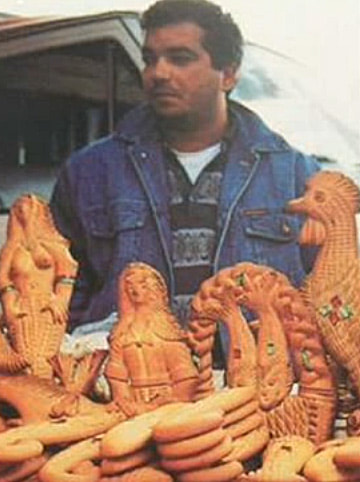
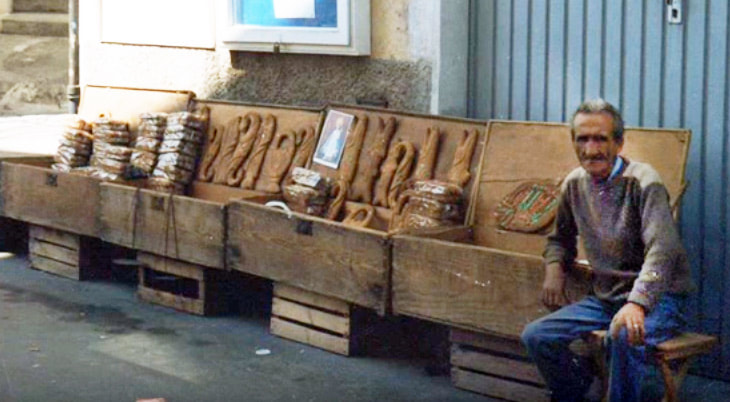
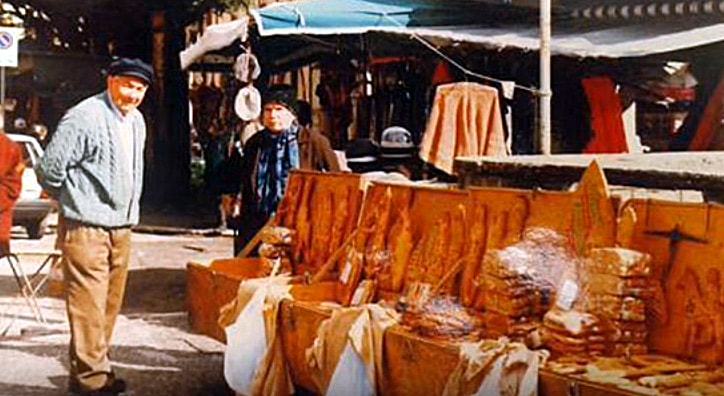
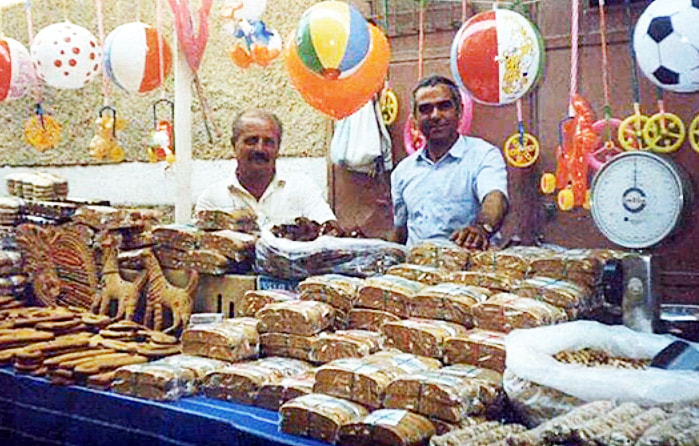
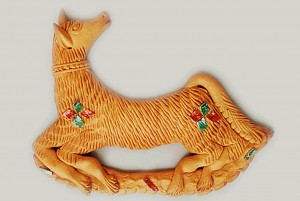
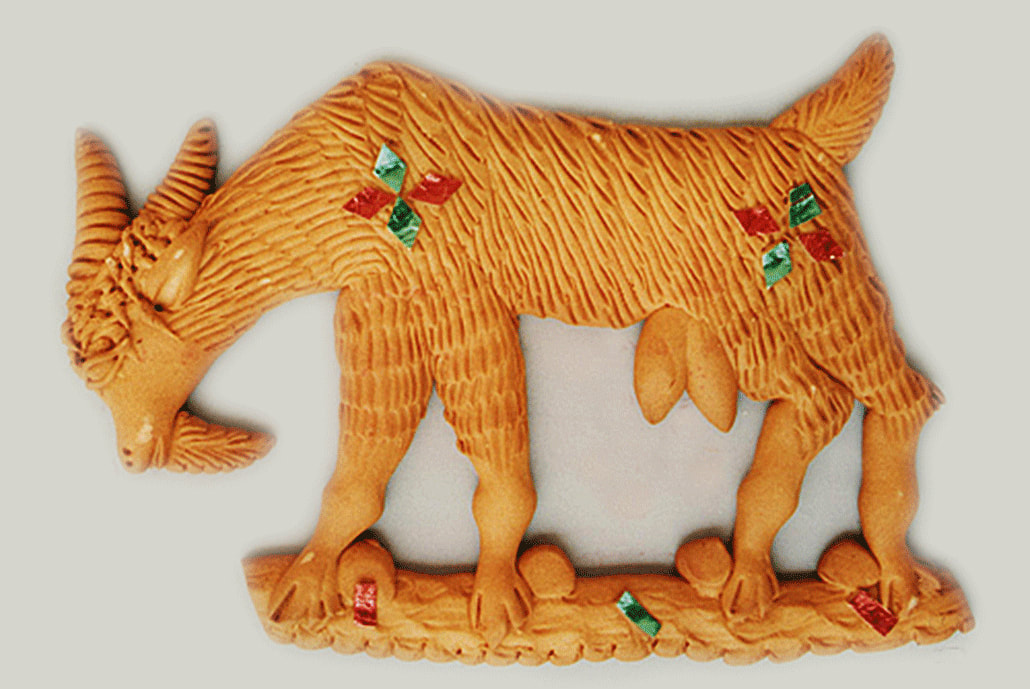
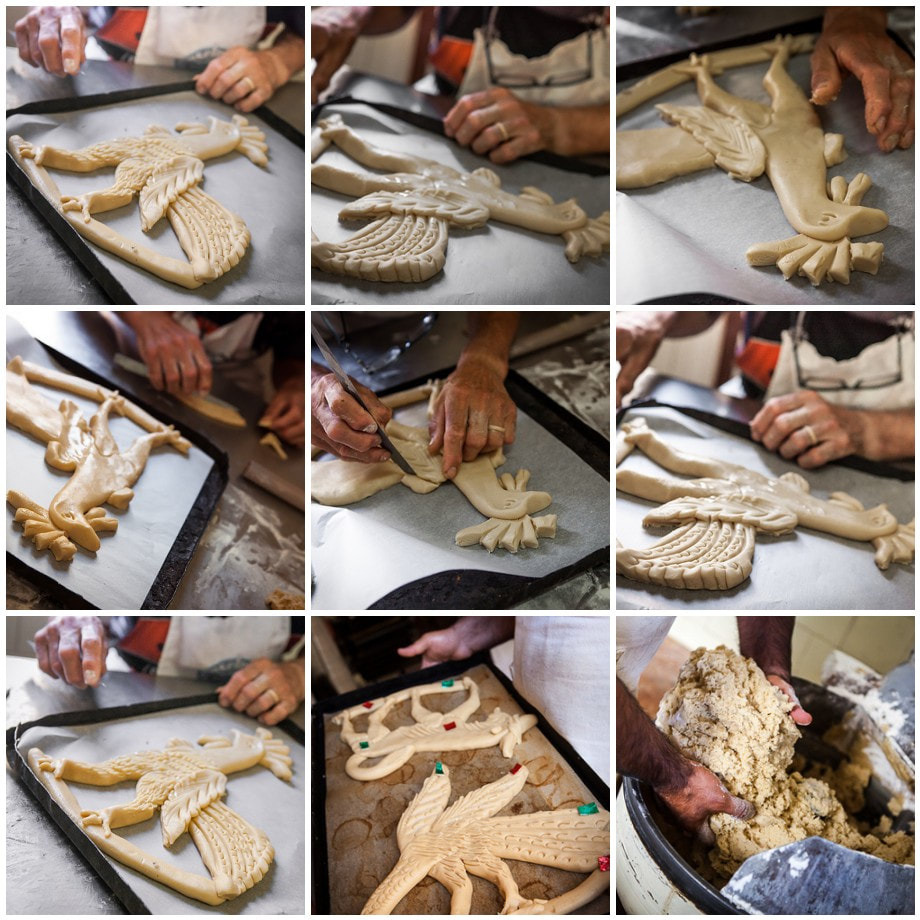
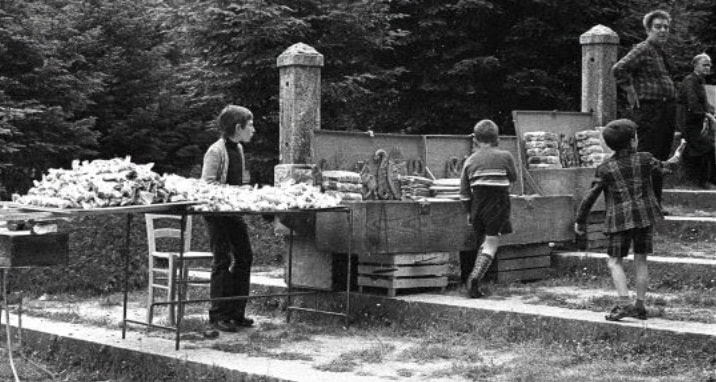
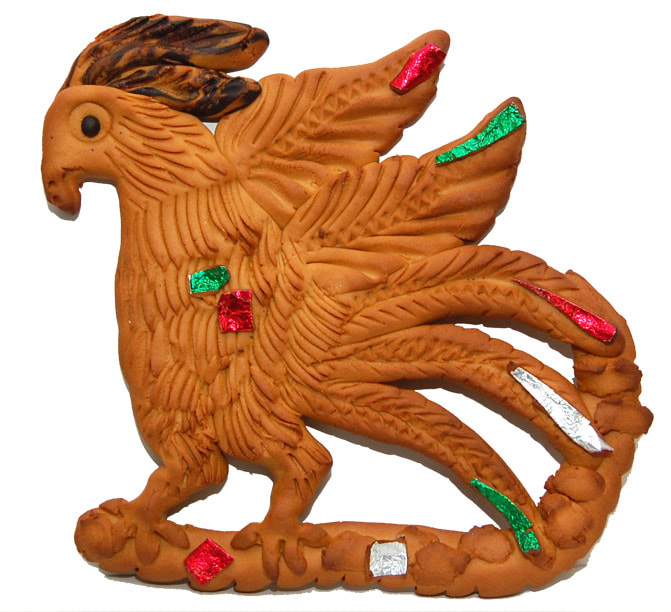
The ancient town of of Soriano Calabro sits between the hills of Calabria and is known for the hard, spiced and shaped biscuits known as Mostaccioli (also, Mastazzola, Mustazzoli). They are traditionally made using grape must, a byproduct from wine-making process. These ornately decorated and shaped treats are popular for festivals, weddings, Christmas and Easter. The more traditional shapes include a parma (the palm), u panaru (the basket), a grasta (the heart), u pisci spada (the swordfish), and a sirena (the siren). Aside from the myriad of shapes, they are decorated with colored foil and some might even have been created using different colors of dough. These are not molded but cut and assembled by hand.

Picture
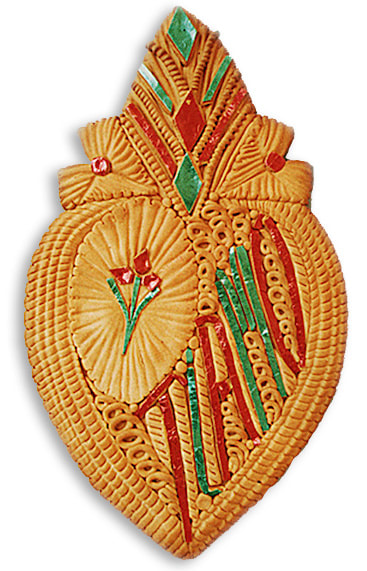
You can still see Mastazzolari (vendors) selling plastic wrapped Mostaccioli from their wooden trunks at sagre in the region, with parents buying ones shaped like a horse or bird for their children, or the devoted purchasing one shaped like a saint, angel, fish or basket as an offering on a saint's day. A heart shaped one might be given on a wedding, engagement or on San Valentino's day.

Picture
Click on the photo above to watch a video of Maestro Calabrese bakers making shaped Mostaccioli (alt', Mustacciuoli) celebration cookies by hand


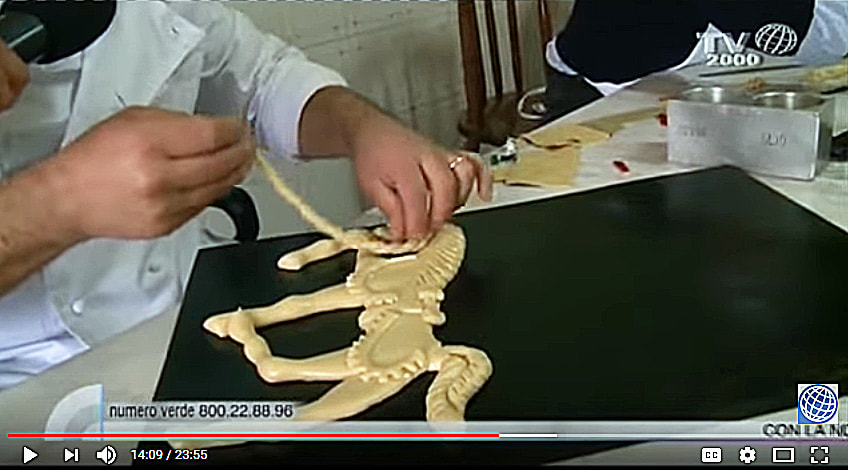
Or, if you prefer, you can watch the video right here... Click below.
Picture
Picture
Picture
Picture
Picture
Picture
Picture
Picture
Picture
Picture
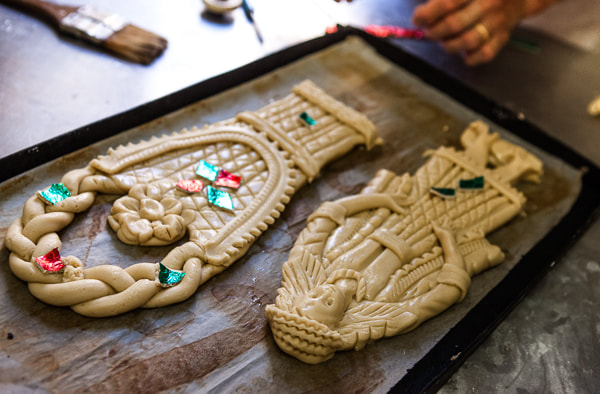
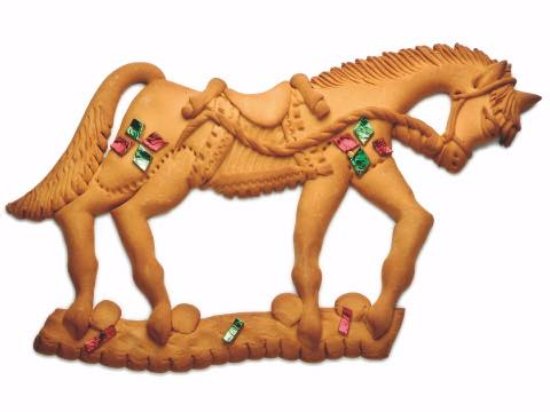
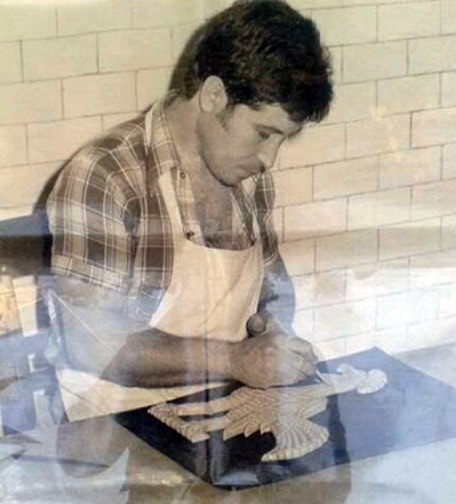
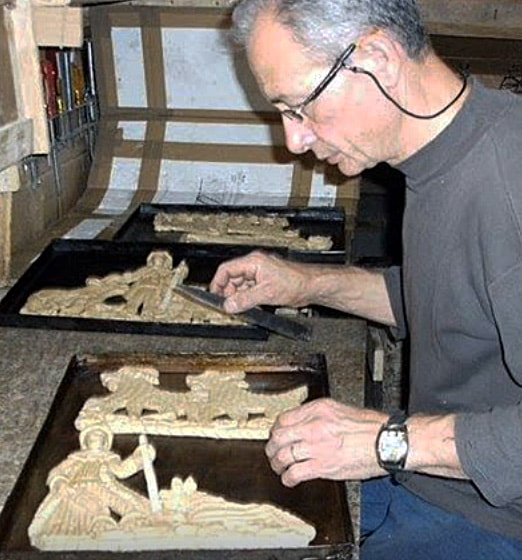
Creating Mostaccioli
Picture
Picture
Picture
Picture
Picture
Picture
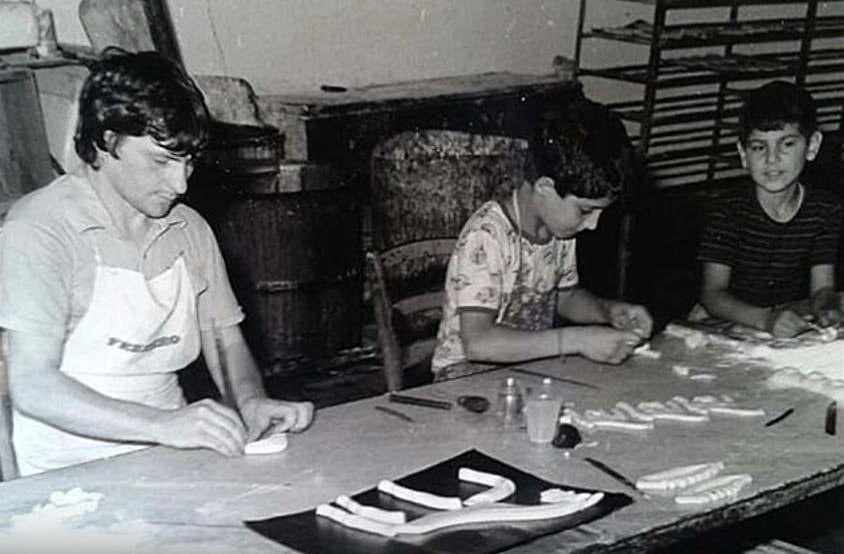
Mastazzolari and How They Sell Their Wares
Picture
Picture
Picture
Picture
Picture
Picture
Picture
Picture
Picture
Comments

Canederli: An Italian Matzo Ball?

12/15/2017

Comments

 
Picture
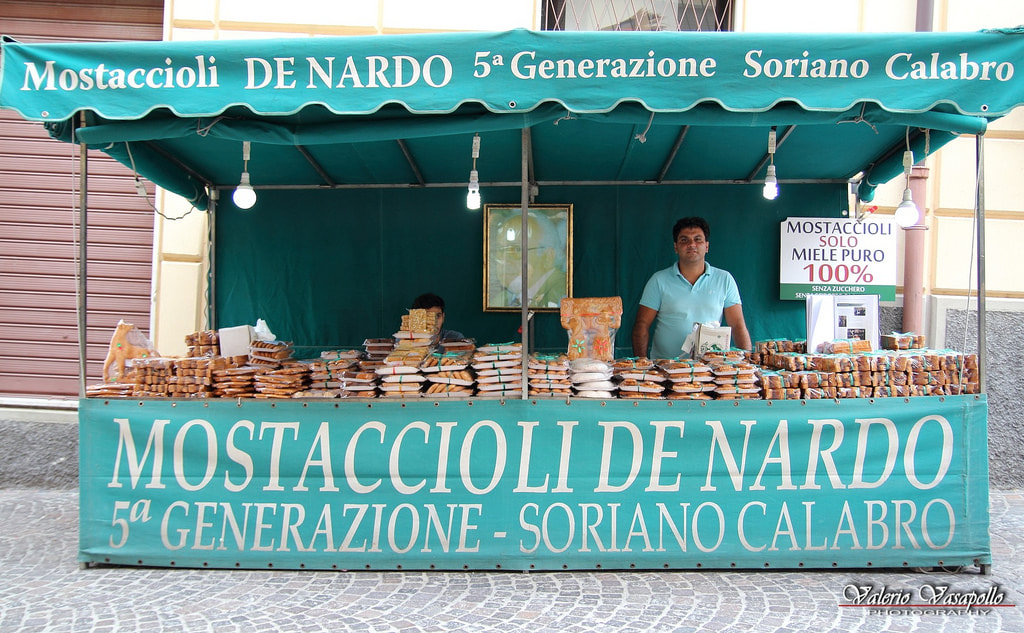
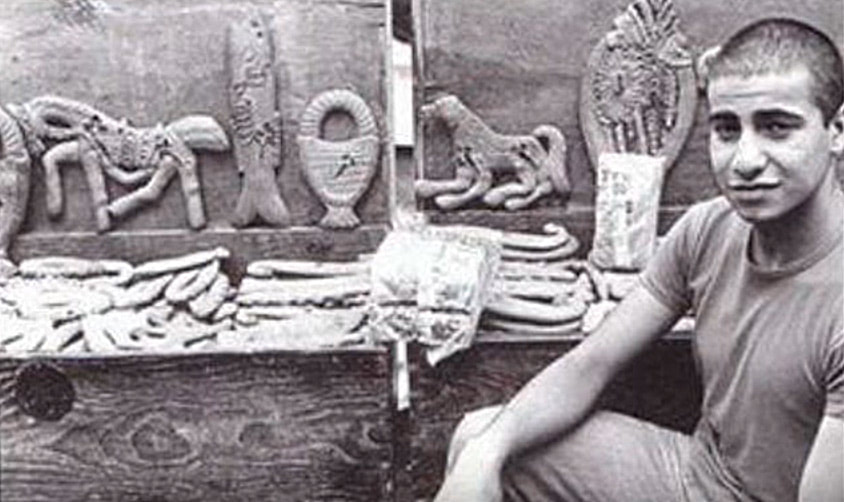
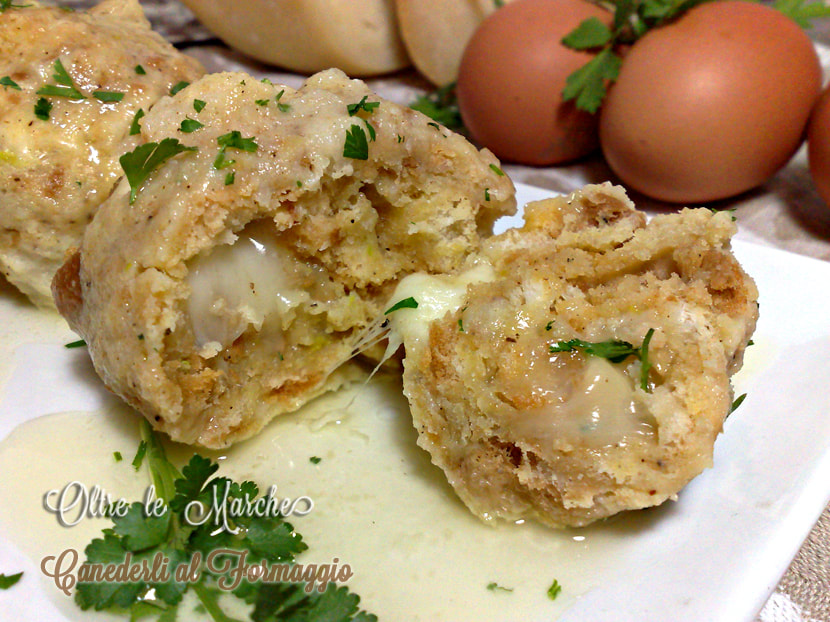
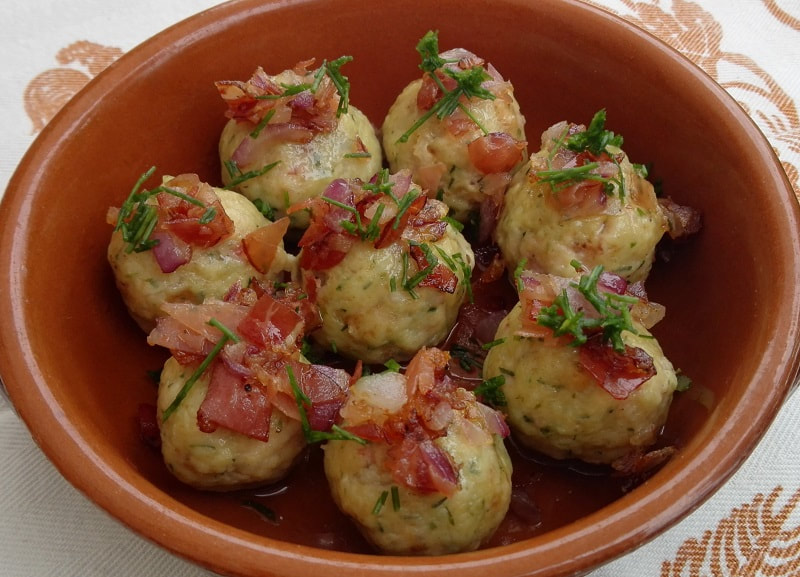
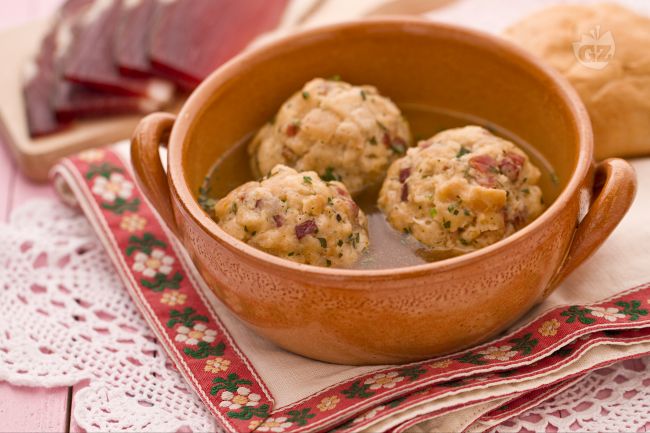
Well... Almost.  Canederli are bread dumplings found in the north-east of Italy (Trentino-Alto Adige, Friuli, and part of the Veneto), typically served in beef broth, dry or with a sauce. They are made using stale bread, milk, onions, parsley, eggs and a little flour. Often they are stuffed with speck (a smoked prosciutto), cheese, mushrooms or pancetta. You can also serve them as a side with sausages.
Picture
Stuffed with cheese
Picture
Topped with speck
Canederli with Speck
Ingredients
1/2 pound of stale bread
2 eggs, beaten
6 ounces diced Speck
1 medium onion, diced
6 cups milk
fresh parsley
4 tablespoons butter, softened
1 tablespoon flour
pinch nutmeg
Pinch salt

Instructions
  • Put the pieces of stale bread in a large bowl and soften them with some milk.  When completely soft, wring out excess milk. 
  • Add the diced speck and then some salt, the butter, parsley and the onion. 
  • Season with some nutmeg and salt.
  • Mix with two eggs and stir thoroughly adding some flour if necessary.  Cover and leave to rest for 20 minutes in the refrigerator.
  • Forms 2" balls from the mixture and boil them in salted hot water for 15 minutes or until they float to the top.
  • Serve hot in a bowl with broth, tomato sauce. Top with grated Parmigiano Reggiano or Asiago. 
Picture
Comments

Our Pane di Pasqua (Easter Bread) Recipe

4/10/2017

Comments

 
Picture
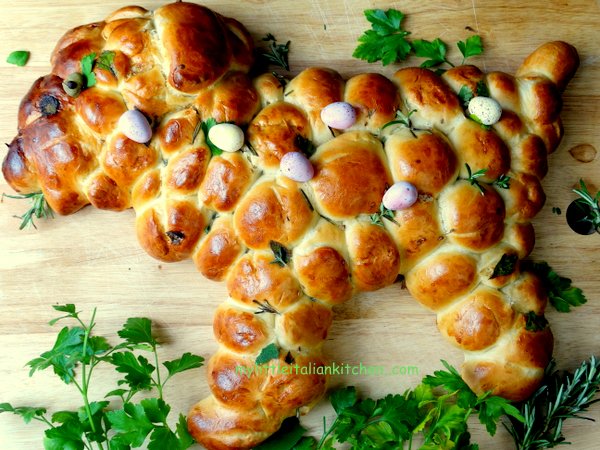
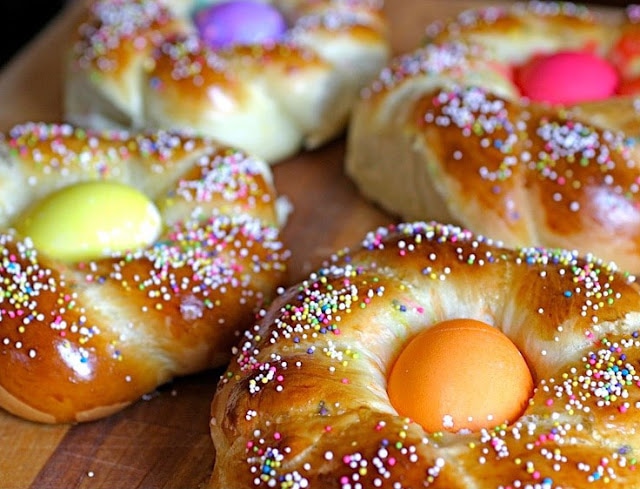
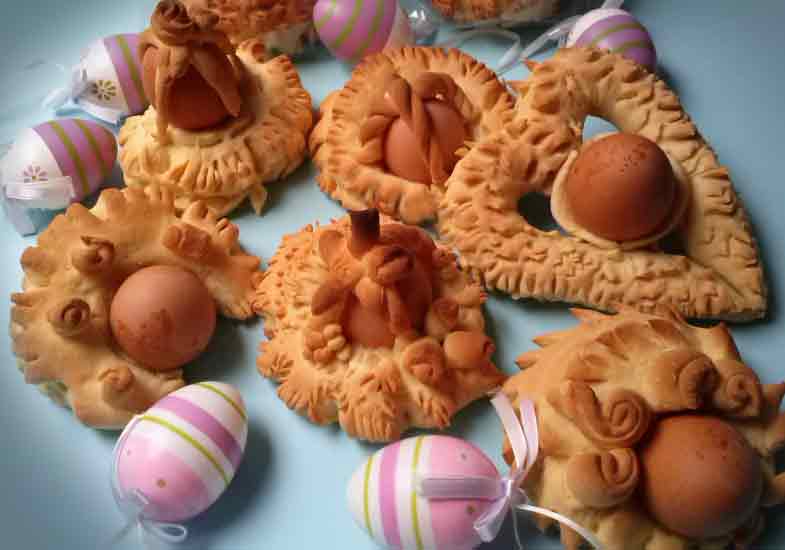
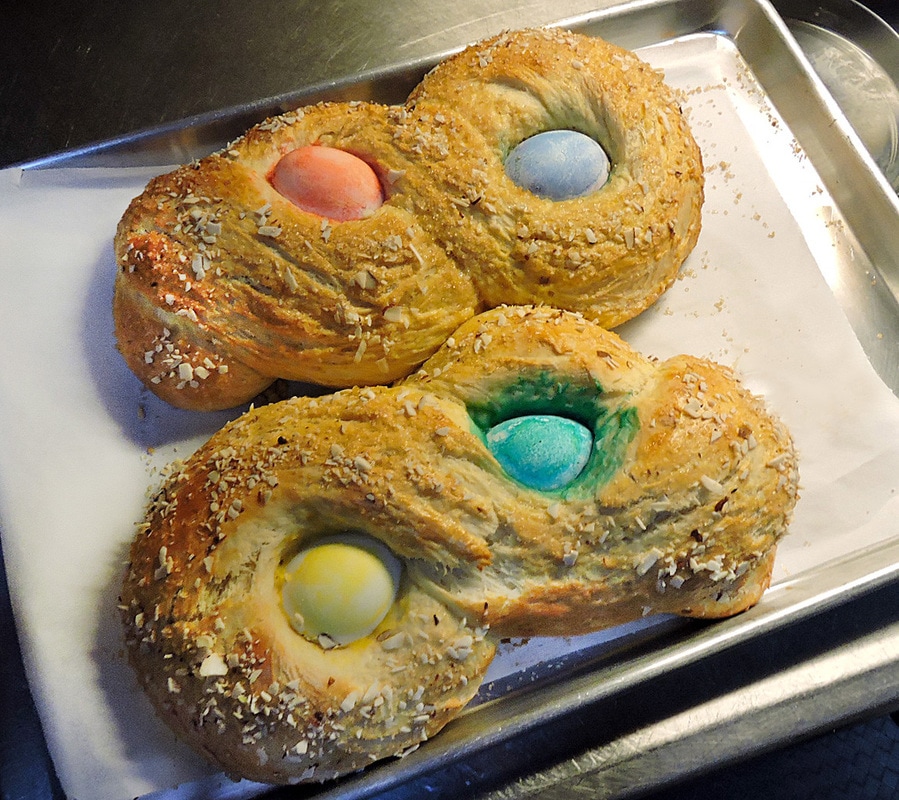
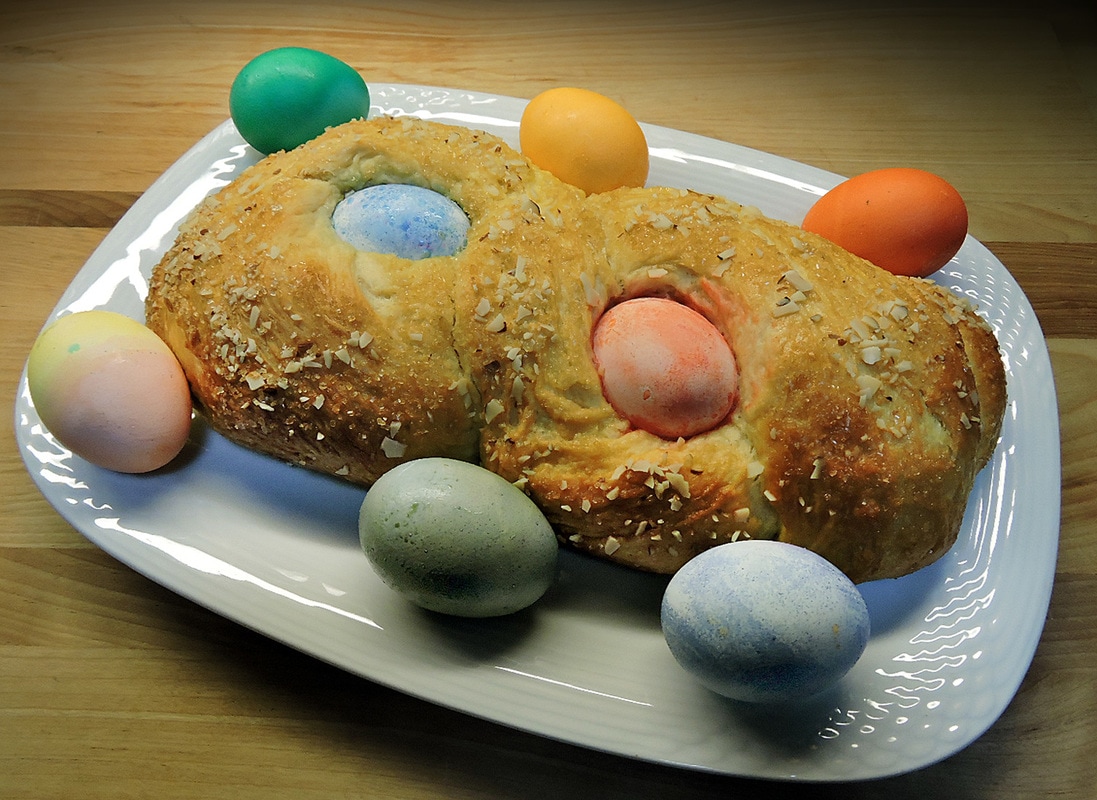
There's nothing like making a Pane di Pasqua for Easter. This is a traditional holiday egg bread that usually contains hard boiled eggs--baked right into the bread. It can be eaten as a snack with honey or jam, served with a meal or given as gifts when visiting family.
Variations of Easter celebration breads are made throughout Italy. To celebrate Easter in Sicily, they make "baby-doll" breads for girls, and breads shaped like ducks, lambs and horses for boys. In most areas of Italy, there are Easter breads and mostly are sweet and contain whole, brightly dyed eggs which are braided into the bread, with the eggs cooking during the baking.

In Lombardy there is the Colomba Pasquale (literally "Easter dove"), which has become popular throughout Italy. In Sardinia, the celebration breads get even more intricate, with scissor work on the dough adding amazing details in Easter egg baskets. The eggs can be brightly colored or natural. In the Greek tradition, the same sort of bread is made with eggs dyed red by using onion skins. The eggs represent birth, or rather, at Easter the re-birth.
Picture
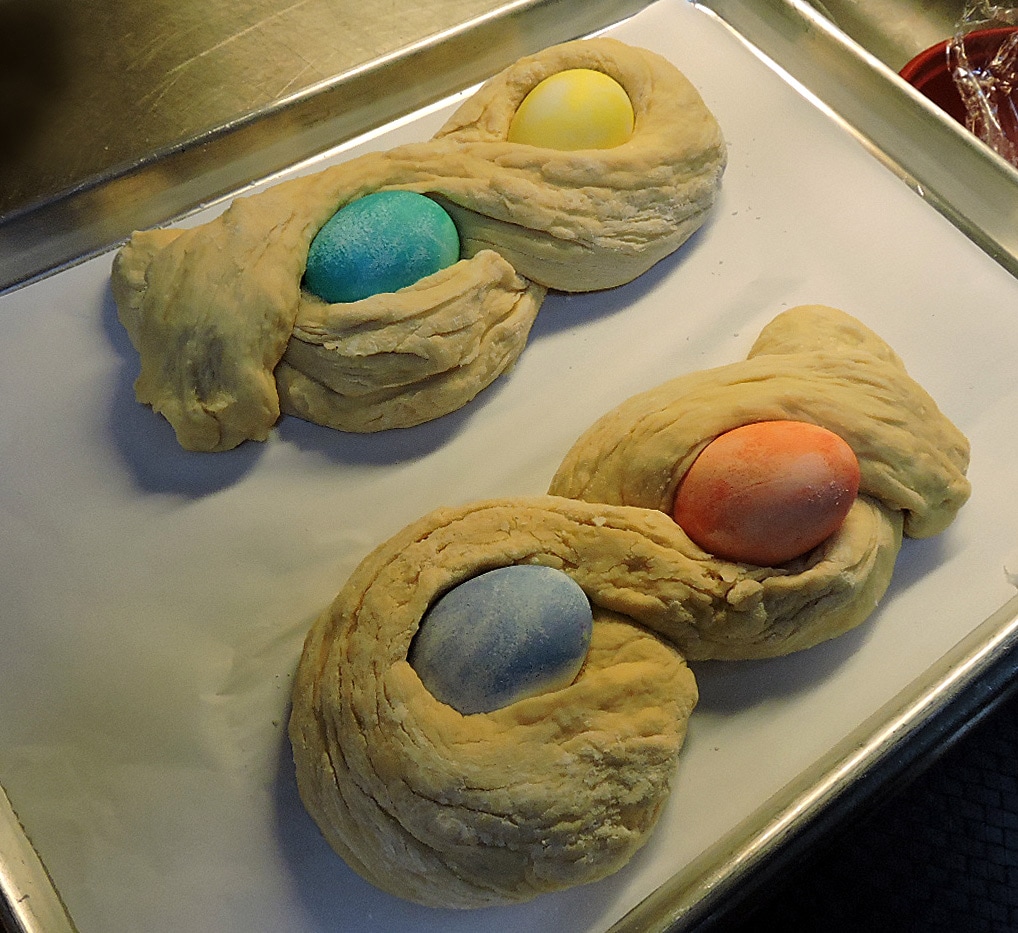
This recipe can make one round bread or two smaller straight braided breads, or 6 individual breads.

Boiling and Dying the eggs:

For perfect eggs:
  1. Place 4-6 eggs into a saucepan and pour in cold water to cover. Slowly, bring the water to a boil. When the water just the boil, turn off heat, cover pan with a lid, and let stand for 12 minutes.
  2. Place the pan under a faucet and run cold water over the eggs--slowly replacing all the hot water with cold. Let the eggs sit in the cold water until cool, 20 minutes. Peel eggs under running water.

You can dye 4-6 eggs, only after hard-boiling them. In the past, I've tried to use raw eggs placed directly in the dough, but they often are a bit under-cooked--not soft boiled, but a bit under. If you want to make real looking like partridge eggs, dye them a pale blue and then use a tooth brush with brown dye to put blotches and spots all over each egg.

Proofing the Yeast:
1 tablespoon instant or active dry yeast.
1/3 cup milk (at 115 F)
1 tablespoon sugar
  • Proof the yeast first by placing the warm milk, sugar and yeast into a 2 cup measuring cup or small bowl and mixing well. Wait 5 to 10 minutes until you see bubbly foam rising about 1 inch or more above the liquid.

For the dough:
2 1/2 - 3 cups all-purpose flour (depends on humidity... don't put in all the flour if it doesn't need it, but if it's a rainy day or you're using jumbo eggs, you might need 4 cups).
1/2 cup warm milk (115 F)
1/4 cup orange juice (room temperature)

1/2 cup sugar
1 teaspoon salt
8 tablespoons butter (softened & cut into small pieces)
3 eggs well beaten  (You can substitute Egg Beaters if you like).
1 teaspoon vanilla (or almond flavoring for a more Italian flavor)

For egg wash and topping:
2 eggs beaten (egg wash for brushing)
2 tablespoons sliced almonds
2 tablespoons turbinado sugar
colored sprinkles (optional)


Directions
  • Warm the milk in a small saucepan until 115 F.
  • In a large bowl of your electric mixer (using a dough hook), combine 1 cup of flour, sugar, teaspoon of salt.
  • Add the pieces of butter, little by little as you mix on low speed to disperse the butter.  Scrape down the bowl as needed.
  • Next, add the yeast mixture, the 1/2 cup warm milk, orange juice and vanilla into your mixing bowl and mix on low speed into a slurry.
  • Add the three beaten eggs and 1/2 cup flour; keep mixing on low speed...
  • Add the remaining flour, 1/2 cup at a time, scraping the sides of the bowl as needed.
  • Continue to add flour until a soft, sticky mix starts to form and clear the sides of the mixer. It should be soft, a bit sticky but be able to hold together in a mound when taken out of the bowl.
  • Turn out the dough to a lightly floured surface and knead for a minute or two until smooth, adding a dusting of flour if it gets too sticky, then shape into a ball. 
  • Place the dough ball into a large bowl coated with extra virgin olive oil to rise. Cover with plastic wrap and let rise at room temperature until doubled in volume, about 1 hour.
Picture
Forming the Bread
  • After your dough has risen, preheat your oven to 350 F, preferably with a large pizza stone on the center rack.
  • I suggest lining a large baking tray with parchment paper rather than a greased sheet to place your formed bread on for baking. You may also form it on a pizza peel on a parchment sheet, which can slide onto a pizza stone for baking.  
  • Gently punch down your dough, turn it out onto a floured work surface and roll out into a long rope, about 20-24 inches long. Put the two ends together and twist into a rope braid. An easy way to do this is to hold up your rope from the middle, then spin one rope around the other. 
  • Lay the rope braid onto your parchment paper and baking sheet (or parchment/pizza peel). Pull the ends around to form a ring, then pinch and fold under to seal. Place the dyed eggs (careful, remember, they are raw) in between the ropes at evenly spaced positions along the ring. An easy way to make it even is position one egg on one side, then another on the opposite side. Then divide the space between each egg in half and put another egg there, and so forth. Make sure the eggs are tucked well into the ropes with about 1/3 of their tops showing through.
  • Next, cover and let rise until doubled in size before baking. 
  • Before placing the bread into the oven, brush egg wash over the dough.  If you want, you can put colored sprinkles or turbinado sugar (Sugar in the Raw) over the top (they will stick to the egg wash). I used the turbinado sugar and sliced almonds on top of the egg wash. Some people like to do a drizzle of a sugar glaze (after the bread is baked and cooled). I'll leave this up to you. (You can make a simple sugar glaze with 1 cup powdered sugar, 1/2 teaspoon vanilla or other flavoring, and 1-2  tablespoons of milk.)
  • Bake the risen and decorated bread for 30 - 45 minutes until golden brown. You can use a cake tester to make sure the center is cooked. Stick a tester wire or piece of straw from a broom into the bread... it should pull out cleanly. Transfer the bread to wire racks to cool completely. Keep in the fridge until serving.

    A variation on this bread would be to add a mix of regular and golden raisins that have been soaked in water (or an orange liquor) to the dough before forming the ropes. About 1-1/2 cups would work well. You might also incorporate the zest from 2 large lemons and replace the orange juice with either lemon juice or Limoncello to give it a southern Italian flavor.

    Do the Italian thing and bring your finished bread to Easter Mass and have the priest bless it for you.... You and your family will have good blessings all year!

    Another thing to do for the kids... Put a coin or two in the bread dough. The person finding the coin will have buona fortuna all year!

Here are some other variations on Pane di Pasqua...
--Jerry Finzi
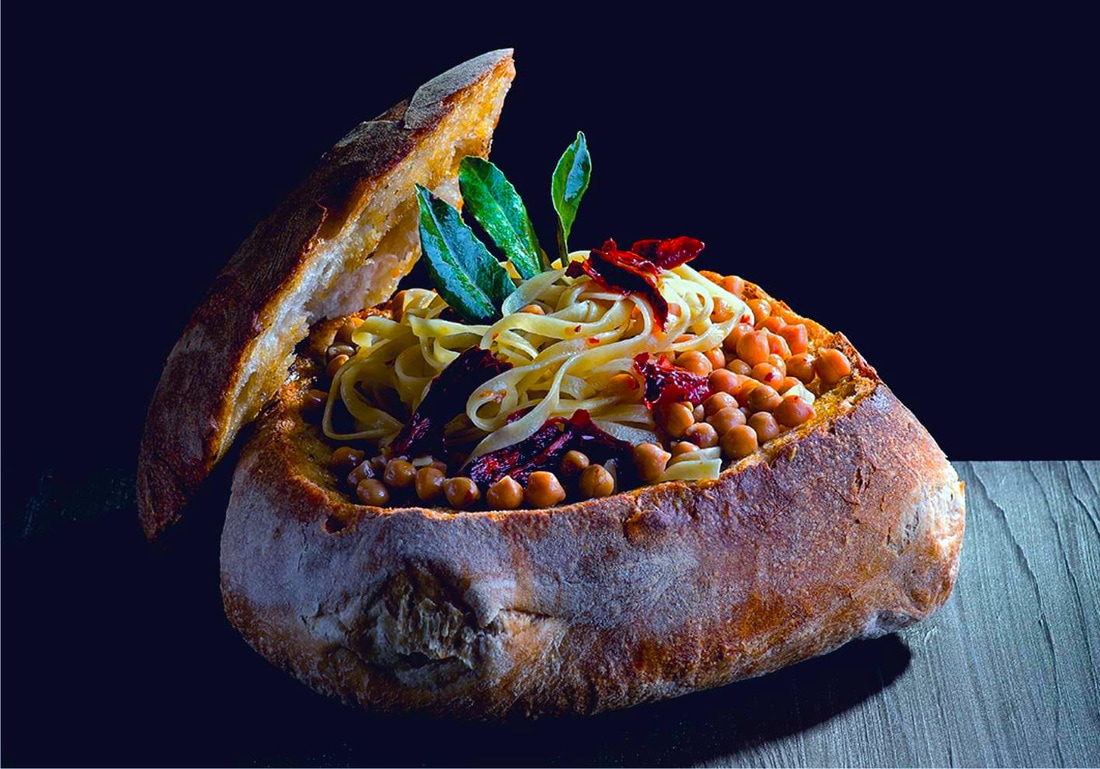
You might also be interested in...

Breads and Tarts for Easter
Our Pane di Pasqua Recipe
Vintage Italian Easter Cards
Decorated Italian Easter Eggs
How Italians Celebrate Easter
Celebrating Easter in Italy
Comments

Video Recipe: Tortino di Pane

3/1/2017

Comments

 
Comments
<<Previous
Forward>>
    Picture

    Archives

    March 2025
    July 2024
    May 2024
    April 2024
    July 2023
    March 2023
    January 2023
    August 2022
    July 2022
    May 2021
    December 2020
    October 2020
    August 2020
    July 2020
    May 2020
    April 2020
    March 2020
    February 2020
    December 2019
    November 2019
    August 2019
    April 2019
    March 2019
    February 2019
    December 2018
    November 2018
    September 2018
    August 2018
    July 2018
    June 2018
    May 2018
    April 2018
    March 2018
    February 2018
    January 2018
    December 2017
    November 2017
    October 2017
    September 2017
    August 2017
    July 2017
    June 2017
    May 2017
    April 2017
    March 2017
    February 2017
    January 2017
    March 2016
    October 2014
    September 2014

    Categories

    All
    Antipasti
    Baking
    Beverages
    Caffè
    Carne
    Colazione
    Dolce
    Education
    Formaggio
    Hacks & Tips
    Healthy Diet
    History
    Holiday Recipes
    Humor
    Kids Recipes
    Kiitchen Style
    Olive Oil & Balsamic
    Pane
    Panini
    Pasta
    Pastry
    Pesce
    Pizza
    Pranzo
    Primo
    Restaurants
    Riso
    Sauces
    Shopping In Italy
    The Italian Gardener
    Tomatoes
    Tools For La Cucina
    Vedura
    Vino
    Zuppe

Copyright 2014 - 2024 by GrandVoyageItaly.com
Picture
  • Piazza
    • Older Posts
  • Travel
    • Our Family's Voyage
  • Cucina
  • Culture
  • History
  • Style
  • Photos
  • Videos
    • Music Videos
  • About
    • Survey
    • Links
  • Shop 🛒